繼上上週Vue Router基本篇之後
這週要來提到一些我個人在實務上常用到的功能
首先先談談動態Router
我們常常會需要在導頁時 傳入一些參數資訊
例如:
工具:
/tools/wrench
/tools/hammer
/tools/scissors
要進入的頁面:
/page/1
/page/2
/page/3/5
導頁時 我們就可以利用動態Router的方式去抓到參數
以工具來說, router設定上可以改成這樣:
/tools/:tool
接著頁面中就可以利用$route.params.tool來抓到傳入的tool值
完整範例:
const routes = [
  {
    path: '/tools/:tool',
    name: 'Tools',
    component: Tools
  },
  ...
]
<div>身為一個工程師,有個 {{ $route.params.tool }} 在身邊是很合邏輯的</div>

當然要多個參數也是沒問題
/tools/:job/:tool/:number
<div>
    身為一個 {{ $route.params.job }}
    有 {{ $route.params.number }} 個 {{ $route.params.tool }} 在身邊是很合邏輯的
</div>
不過這種方式傳參數會有個問題, 就是少填一個參數頁面就會無法正常呈現, 這點需要注意
順便講一下, 如果要用原始的問號傳參數的方式
例如 /tools?tool=hammer
頁面上可以使用$route.query.tool來取得值
<div>雷神鎖耳拿著他的大 {{ $route.query.tool }} </div>
這個參數就可填可不填
兩種方式搭配使用也是可以的
/tools/:job/:tool?number=1
第二個常用的就是 巢狀路由
例如Google帳戶設定頁面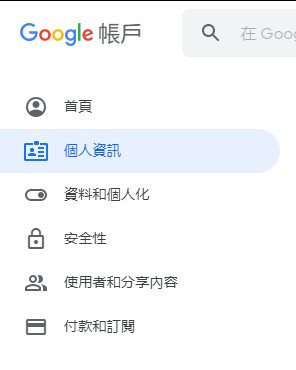
當在首頁或是個人資訊, 這兩個所呈現的元件一定不會是一樣的
那到底在哪個頁面需要用到什麼元件
就可以用巢狀路由來控制
而巢狀路由寫法, 只需要在原本的router設定內加一個children陣列, 陣列內放的物件跟原本的route一樣, 像這樣:
const routes = [
  ...,
  {
    path: '/account/',
    name: 'Account',
    component: Account,
    children: [
      //這裡放route物件
      {
        path: 'index', //記得前面不需要斜線
        name: '首頁',
        component: AccountIndex,
      },
      {
        path: 'userinfo', //記得前面不需要斜線
        name: '個人資訊',
        component: AccountUserInfo,
      },
      ...
    ]
  }
]
接著Account元件上要記得加上*< router-view />*, 子頁才會呈現喔~
<template>
  <div>
    <h1>This is an Account page</h1>
    <router-view />
  </div>
</template>
要做子頁中的子頁一樣也是沒問題的
const routes = [
  ...,
  {
    path: '/account/',
    name: 'Account',
    component: Account,
    children: [
      {
        path: 'index', //記得前面不需要斜線
        name: '首頁',
        component: AccountIndex,
        children: [
          {
            path: 'subpage1',
            name: '子子頁1',
            component: AccountIndexSubpage1,
          },
        ]
      },
      {
        path: 'userinfo',
        name: '個人資訊',
        component: AccountUserInfo,
      },
      ...
    ]
  }
]
這個我個人覺得超實用而且設定超簡單的方法
使用情境是使用者常常會自作聰明在url上亂打, 但系統沒有判斷這個所以還是讓他通過了, 然後就幫他導頁到奇怪的地方, 這時候客訴電話就來了~~(凸)~~
為了防止這種情況發生
我們可以在routes設定最後面加上這段
{
  path: '*',
  redirect: '/',
}
path: '*' 意思是 任何路由
redirect: '/' 意思是 導頁到/
合起來就是 - 任何路由都導頁到/
也就是說不管使用者亂打什麼, 最後都會被導頁到首頁, 也就不會有客訴電話了
要注意的是, 這段一定要放在最後面
假如放在前面, 他就會先被判斷到, 這樣就算我們打上已經存在的路由也會被導頁到首頁去
完整routes程式碼:
const routes = [
  ...,
  {
    path: '/about',
    name: 'About',
    component: About,
  },
  ...,
  {
    path: '*',
    redirect: '/',
  },
]
以上就是個人在實務上超常使用到的功能vue-router到這結束~
 餅乾
餅乾
