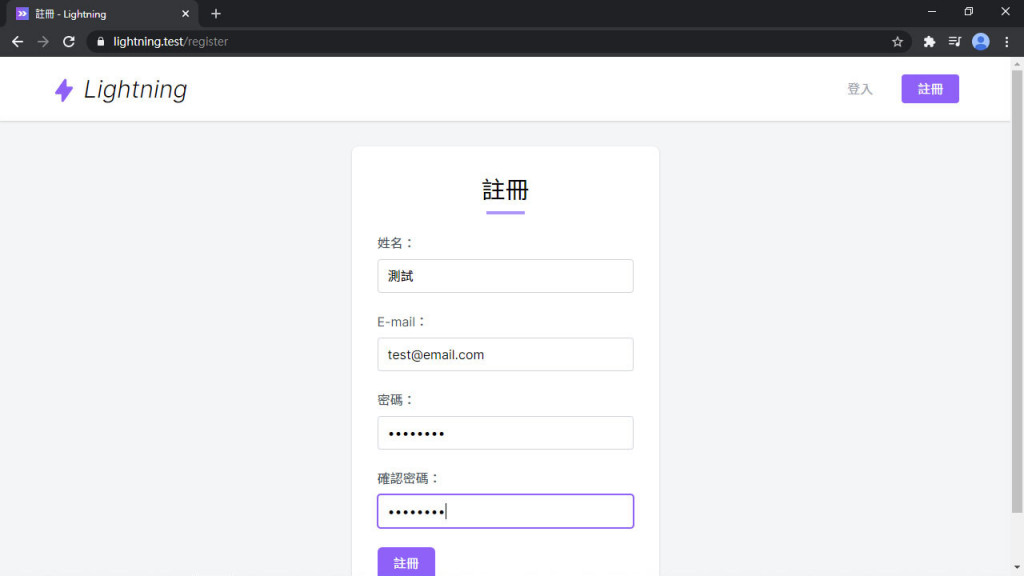
註冊基本上和登入差不多,我們要做的註冊頁面裡也只需要增加一點欄位。
跟登入一樣,到 RegisterController 中替換掉註冊頁面:
app/Http/Controllers/Auth/RegisterController.php
use Inertia\Inertia;

public function showRegistrationForm()
{
    return Inertia::render('Auth/Register');
}
如果你有不同的登入、註冊需求,都是可以透過修改
LoginController、RegisterController來完成,參考它們用的 Trait 了解 Laravel 背後如何實作功能。
還有用 Login.vue 修改過的 Register.vue:
resources/js/Pages/Auth/Register.vue
<template>
  <div class="py-6 md:py-8">
    <form @submit.prevent="submit" class="card max-w-sm p-6 md:p-8 mx-auto">
      <h1 class="text-3xl text-center">註冊</h1>
      <div class="w-12 mt-1 mx-auto border-b-4 border-purple-400"></div>

      <div class="grid gap-6 mt-6">
        <text-input v-model="form.name" :error="$page.errors.name" label="姓名" autocomplete="name" ref="nameInput" />
        <text-input v-model="form.email" :error="$page.errors.email" label="E-mail" autocomplete="email" />
        <text-input v-model="form.password" :error="$page.errors.password" type="password" label="密碼" />
        <text-input v-model="form.password_confirmation" type="password" label="確認密碼" />
        <div>
          <loading-button :loading="loading" class="btn btn-purple">註冊</loading-button>
        </div>
      </div>
    </form>
  </div>
</template>

<script>
import AppLayout from '@/Layouts/AppLayout'
import TextInput from '@/Components/TextInput'
import LoadingButton from '@/Components/LoadingButton'

export default {
  layout: AppLayout,
  metaInfo: {
    title: '註冊'
  },
  components: {
    TextInput,
    LoadingButton
  },
  data() {
    return {
      form: {
        name: '',
        email: '',
        password: '',
        password_confirmation: ''
      },
      loading: false
    }
  },
  methods: {
    submit() {
      this.$inertia.post('/register', this.form, {
        onStart: () => this.loading = true,
        onFinish: () => this.loading = false
      })
    }
  },
  mounted() {
    this.$refs.nameInput.focus()
  }
}
</script>
Inertia.js v0.3 已棄用 Promise 調用方式
現在全系列已更新為 Inertia.js v0.3,增加了 Event system (事件系統),Promise 調用的方式已棄用,若尚未更新至 v0.3 請更新版本:
yarn add @inertiajs/inertia@^0.3 @inertiajs/inertia-vue@^0.2.4並參考 Day 09 Lightning 用戶登入 的「載入進度條」篇安裝進度條套件。
但如果你還是想要使用舊方法或者不想升級,請參考以下用法:
submit() {
  this.loading = true
  this.$inertia.post('/register', this.form).then(() => this.loading = false)
}
然後來測試看看註冊一個新帳號:

前面已經先做好了相關工作,後端邏輯 & 路由由 Laravel UI 提供、頂部導覽列的「註冊」按鈕也有、需要的組件都跟登入頁面一樣,註冊才可以這麼簡單。下回要實作編輯個人資料 & 刪除帳號,跟註冊不同是,還有個人簡介跟用戶頭像,排版也會做點調整。
Lightning 範例程式碼:https://github.com/ycs77/lightning
