我們在上一篇提到在Flutter整個Render Pipeline中,光是Layout這個步驟就值得獨立一篇出來討論,因此今天我們就繼續來深入研究整個Layout的機制,並試著在範例中應用它吧。
首先讓我們回憶一下整個Layout機制的核心規則:
Parent向下傳遞constraints,child向上傳遞size,由Parent決定child position
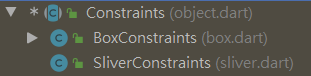
我們平常使用的絕大多數Widget,背後都是以RenderBox作為RenderObject,它們傳遞下去的Constraints便是BoxConstraints,也就是由min/max width/height組成的四個數字:
  const BoxConstraints({
    this.minWidth = 0.0,
    this.maxWidth = double.infinity,
    this.minHeight = 0.0,
    this.maxHeight = double.infinity,
  })
我們後續的討論也都會以RenderBox的constraints作為範例,但如果你真的很想知道SliverConstraints長什麼樣子,我們也是可以稍微瞄一眼:
  const SliverConstraints({
    @required this.axisDirection,
    @required this.growthDirection,
    @required this.userScrollDirection,
    @required this.scrollOffset,
    @required this.precedingScrollExtent,
    @required this.overlap,
    @required this.remainingPaintExtent,
    @required this.crossAxisExtent,
    @required this.crossAxisDirection,
    @required this.viewportMainAxisExtent,
    @required this.remainingCacheExtent,
    @required this.cacheOrigin,
  })
整個SliverConstraints包含這麼多參數,全部都是required,全部都是為了決定child的size。光看就覺得很複雜,所以我們就暫時跳過吧。
接下來,讓我們再來熟悉一下整個Layout的流程細節:
在4.和7.中,所謂自身的size preference基本上只有三種:
雖然是跟Android有點雷同的概念,但再次強調在Flutter中這些只是child preference,若和parent constraints發生衝突時,最終還是以constraints為準。沒有任何一個widget可以你要它多大就多大的,一定都會受到parent的影響。
另外根據5.我們也可以看到另一個重點,widget無法決定,也不會知道自己的position,
最後,整個流程是個one-pass depth-first traversal,每個節點都只會被走訪一次,就可以完成整個Layout。這也就是為什麼即使我們的Widget Tree有再深再複雜的巢狀結構,Flutter依然能飛快的計算出整個Layout,不像某個因為可能會在parent-child間來回走訪很多次,而要求使用者盡量讓Layout扁平化的系統...
其實從上一篇到現在,我們都還沒有在實際的widget tree上,套用整個Layout流程實際走訪一遍。相信你一定覺得這一切有點難以想像,一定很想趕快用實際的案例,來檢驗自己的理解正不正確吧?不用擔心!不必多言!感謝國外的神人幫我們準備了超精美的30個Layout範例,搭配說明做成一個鬼神般的Layout Demo App,還放在DartPad上讓我們可以直接線上瀏覽,真是太神啦!另外該神人的原始Medium文章也被Flutter團隊直接徵用,變成了官方說明文件之一。如果你覺得這些對你有幫助,請務必去原始Medium文章給作者拍個手。
雖然我可能也沒辦法解釋的比原作者更好了,但為了照顧中文的讀者,還是讓我從中挑出一些我覺得比較重要的範例來解說吧。
在開始之前要注意的是,雖然範例APP是把Example Widget放進一串Widget Tree裡,但請當作它是被直接放在runApp裡,效果是一樣的。
Container(width: 100, height: 100, color: red);

先來暖個身。這裡因為最外層的Screen給Container的Constraints是必須和螢幕尺寸一模一樣,因此Container自己設定的size被忽略,直接佔滿了整個螢幕。
如果你有看之前關於渲染樹的文章,就會知道這裡的Screen其實是RenderObjectToWidgetAdapter,而它背後的RenderObject則是一個特殊的RenderView。我們來看看RenderView是怎麼performLayout的:
  // In RenderView
  @override
  void performLayout() {
    assert(_rootTransform != null);
    _size = configuration.size; // screen size
    assert(_size.isFinite);

    if (child != null)
      child.layout(BoxConstraints.tight(_size));
  }
這裡的configuration.size就是screen size,BoxConstraints.tight就是minWidth=maxWidth, minHeight=maxHeight這樣的限制,也就是child沒有任何空間,必須是parent指定的size。
實際看到程式碼之後,是不是感覺Layout過程稍微沒那麼Magic了?不過我們主要目的還是在於徹底理解並熟悉整個Layout演算法,之後我們就不再深入source code了。
Center(
      child: Container(width: 100, height: 100, color: red),
    );

Center一樣被RenderView要求和Screen一樣大,但Center並沒有給Container一個size的下限,只有上限不能超過自己,這種我們稱為loose constraints。Container因此可以決定自己的size是(100,100)。
Center(
      child: Container(color: red),
    )

這次Container沒有被設定size,因此根據自己的preference,決定自己在沒有child的時候要match parent。
Center(
      child: Container(
        color: red,
        child: Container(color: green, width: 30, height: 30),
      ),
    );

這次red Container根據preference決定自己在有child時要wrap_content,因此紅色的部份就消失了。
UnconstrainedBox(
      child: Container(color: red, width: 4000, height: 50),
    );

就像之前的Center一樣,UnconstrainedBox本身的size和螢幕一樣,但是它給的Constraints是Unbounded,也就是讓child可以無限大...於是就產生了我們最熟悉也最害怕的overflow警告。也就是說,當一個Widget給了它自己給不起的Constraints時,就有可能出現overflow。
FittedBox(
      child: Text("Some Example Text."),
    );

FittedBox是一個很好用的Widget,它不會給child任何constraints,但它會在child決定自己的size之後,連同child一起放大到自己收到的max width。以這個例子來說,就是螢幕寬度。
Center(
      child: FittedBox(
        child: Text(
            "This is some very very very large text that is too big to fit a regular screen in a single line."),
      ),
    );

類似的案例,但這次是Text過長,FittedBox同樣可以把它縮小到自己收到的max width。
Row(
      children: [
        Container(
            color: red,
            child: Text("This is a very long text that won't fit the line.", style: big)),
        Container(color: green, child: Text("Goodbye!", style: big)),
      ],
    );

另一個更常見的Overflow的例子,這次你能猜到為什麼嗎?沒錯,因為Row給的width constraints也是Unbounded,而Container決定要wrap content,而Text又超過螢幕寬度,就產生了Overflow。
Scaffold(
      body: Container(
        color: blue,
        child: Column(
          children: [
            Text('Hello!'),
            Text('Goodbye!'),
          ],
        ),
      ),
    );

這也是一個常常有人遇到的小問題。我們的layout很常是一個Scaffold裡放一個Column,中間用Container加個背景,卻會發現Column的width preference是wrap content而非我們所想的match parent。解決方案就在下一個範例中,我們可以用SizedBox.expand來使它的child match parent。
這次我們繼續深入討論了Flutter Render Pipeline中,Layout的詳細流程和規則,我們看到整個Layout是個one-pass depth-first traversal,由parent不斷將constraints往下傳遞,而child根據它決定自己的size之後不斷向上傳遞,並由parent決定child的position。我們也走訪了一些簡單的範例,看到這些規則是怎麼被實際應用的。雖然Flutter提供的無數widget可能各有不同的constraints和preference,只要熟悉了這些規則,當我們設計的UI不如我們所預期的排版時,就很容易透過追查發生問題的widget的layout規則,來進行除錯和修正了。


 iThome鐵人賽