大家好,今天要來跟大家一起操作 Language Understanding (LUIS),話不多說,我們直接開始吧!
0.1 準備好一個 Azure Account
0.2 建立好 Python 環境
0.3 打開 terminal (Powershell or CMD),輸入以下指令
pip install requests
1.1 前往 Azure Portal,並搜尋 LUIS
1.2 自己完成以下的設定
Create options:
Authoring
Authoring location:
West US
2.1 前往 LUIS 官網
2.2 確認已經登入 Azure Account
2.3 建立一個新的 LUIS APP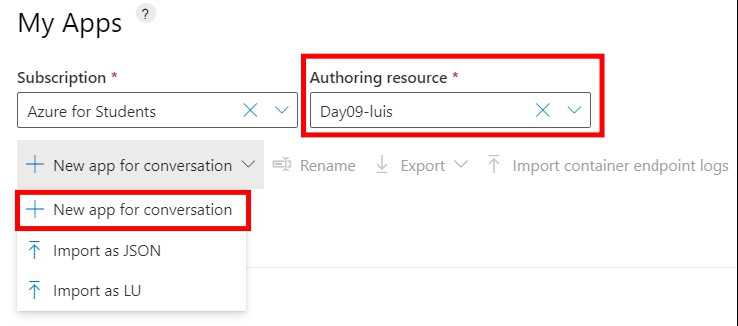
2.4 設定名稱及語言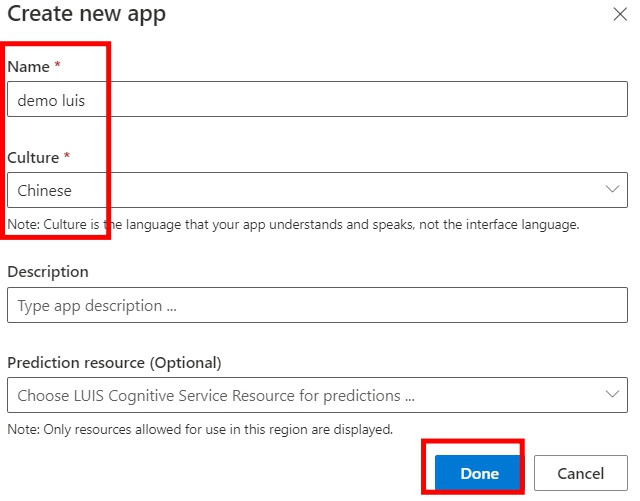
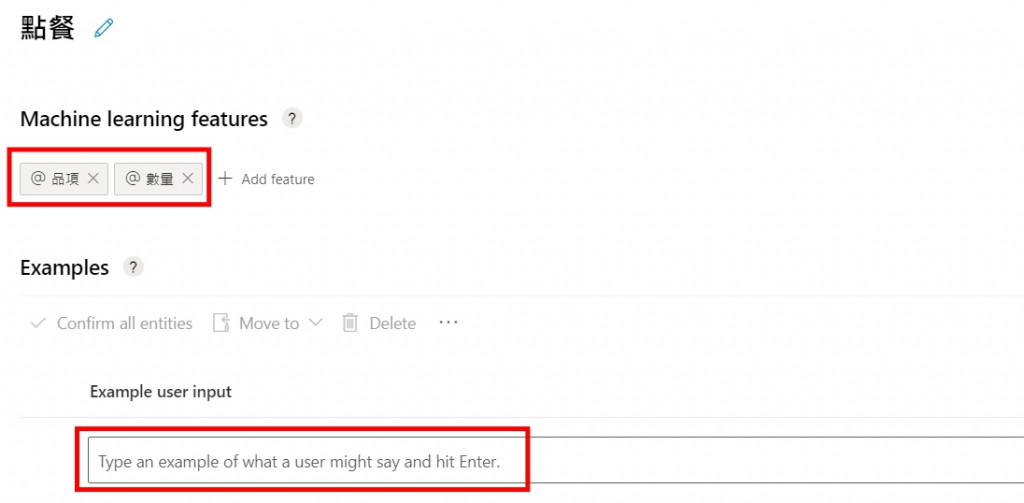
2.5 建立兩個 Entity
品項
數量
2.6 建立一個 Intent
點餐
2.7 新增訓練句子
我想要外帶2杯咖啡
我想外帶一份燒餅
老闆,3杯豆漿謝謝
兩份蛋餅內用
我要2片吐司和一杯米漿
2.8 新增完成後,手動標註 Entity 的位置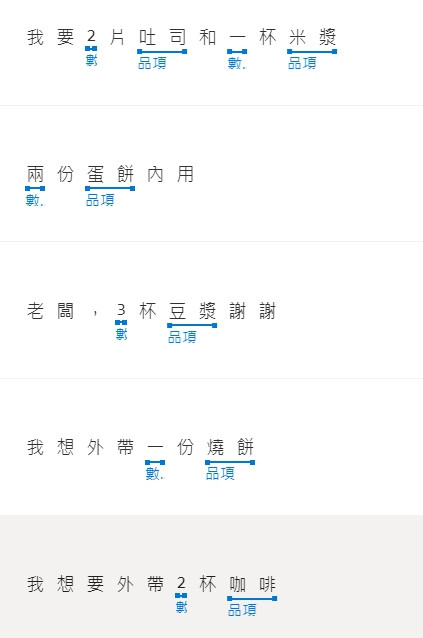
2.9 訓練 LUIS APP 模型
2.10 Publish 這個 demo LUIS APP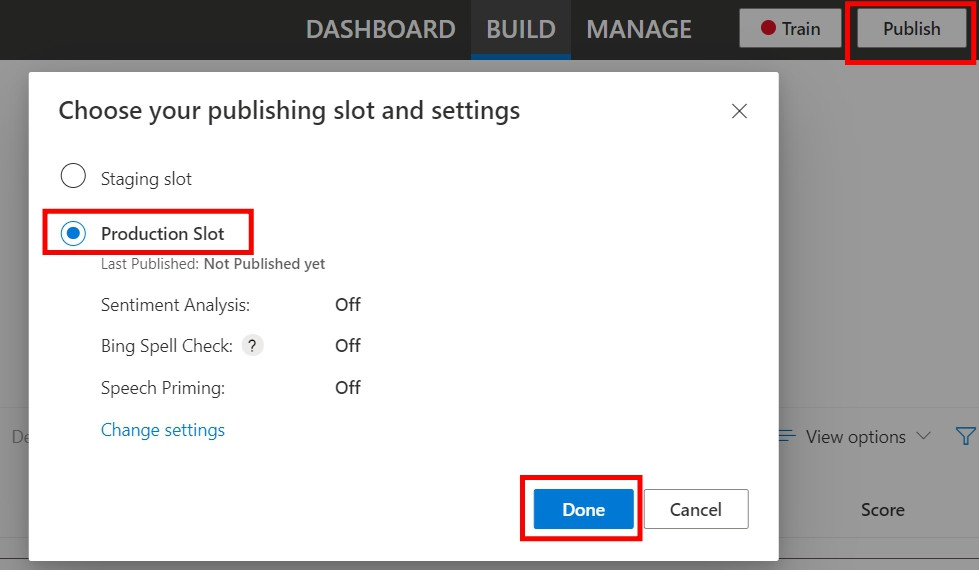
2.11 複製 LUIS App ID
2.12 複製 Key + Endpoint URL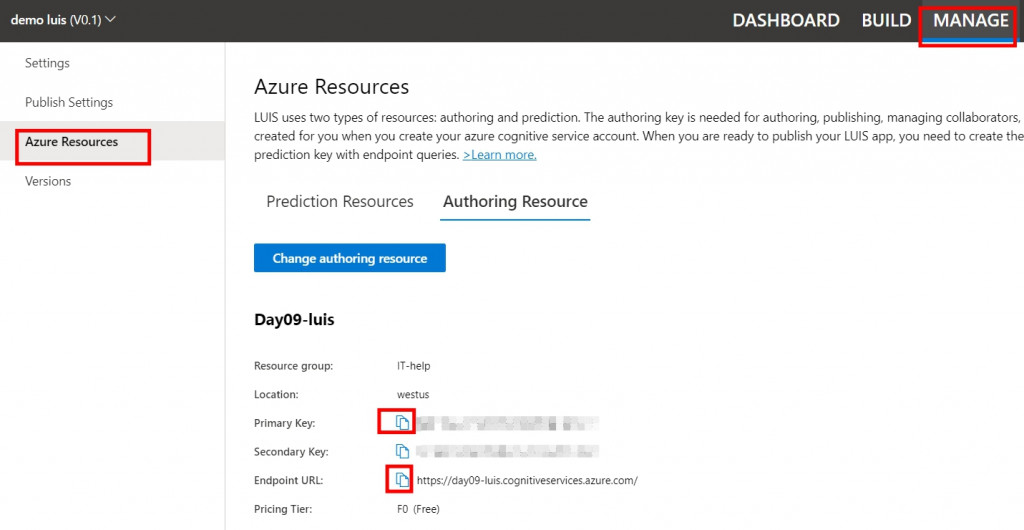
3.1 打開 Visual Studio Code (VS Code)
3.2 新增一個 Python 程式檔,命名為test-luis.py,並將以下程式碼複製貼上
import requests
import json

subscription_key = '<key>'     ## 貼上你的key

def predict_sentence_test(prediction_url, body):
    headers = {
        # Request headers
        'Content-Type': 'application/json',
        'Ocp-Apim-Subscription-Key': subscription_key ,
    }
    url = prediction_url
    response = requests.request("POST", url, data = body, headers=headers)
    response_text = json.loads(response.text)

    # print(response_text)                                                           #print出所有json的資料
    print("Intent:{}".format(response_text["topScoringIntent"]['intent']))           #單獨print出這個句子的intent
    for i in range(len(response_text["entities"])) :
        print("Entity:{}".format(response_text["entities"][i]["entity"]))            #將所有讀到的entity列印出來

#測試 從訓練好的luis app問取得一句話的intent及entity等資料
prediction_url = '<endpoint url>/luis/v2.0/apps/<appid>'   # 貼上的你的endpoint url + luis app id
prediction_sentence = "我想要外帶2杯咖啡"
prediction_sentence_json = json.dumps(prediction_sentence)
predict_sentence_test(prediction_url, prediction_sentence_json)
3.3 打開terminal,確認位置為程式檔案的位置後,輸入以下指令
python test-luis.py
以上是我今天想要分享的內容![]()
