本系列文章已出版實體書籍:
「你的地圖會說話?WebGIS 與 JavaScript 的情感交織」(博碩文化)
WebGIS啟蒙首選✖五家地圖API✖近百個程式範例✖實用簡易口訣✖學習難度分級✖補充ES6小知識
本篇文章請搭配
[4-1] 線、面資料圖徵 - 以行政區定位及導航為例
今天要來寫很頭痛的程式,準備好了嗎?跟著我~深呼吸~吸氣~吐氣~吸氣~吐氣~
還記得昨天我們寫的線資料圖徵及面資料圖徵嗎?
        var ShowLine = (pointList = [], map, style) => {
            let lineString = new H.geo.LineString();  // 重複的程式碼
            pointList.forEach(item => {
                lineString.pushPoint({ lat: item.y, lng: item.x });
            });
            map.addObject(new H.map.Polyline(
                lineString, { style: style }
            ));
            map.getViewModel().setLookAtData({
                bounds: lineString.getBoundingBox()
            });
        };
        var ShowPolygon = (pointList = [], map, style) => {
            let lineString = new H.geo.LineString();  // 重複的程式碼
            pointList.forEach(item => {
                lineString.pushPoint({ lat: item.y, lng: item.x });
            });
            map.addObject(new H.map.Polygon(
                lineString, { style: style }
            ));
        };
↑ Here Maps API的線圖層function,以及面圖層function。雖然我們把資料、地圖物件、樣式都變成參數分離出來了,可是我們建立出來的面,不會只把它秀在地圖上,我們可能還會給它新增滑鼠事件,讓它跟地圖或是其它地圖上的點、線、面做互動,因此我們不能是一次性的function呼叫完就沒了,而要把它建成一個物件。然而,需要生產物件,就需要生成物件的模具,類別就是物件的模具。
還記得[1-2] 地圖的工廠 - 以 簡單工廠模式 Simple Factory Design Pattern 產出地圖這篇使用工廠模式產生地圖嗎?這次我們要用類似的方式全面性改寫!
首先,因為神隱少女梗圖的風潮,我們建立一個神隱少女物件(SpiritedAway)。
var SpiritedAway = {}; // 神隱少女物件
ps. 其實神隱少女就是異世界創造地圖的工廠(factory pattern),只是今天我們不用new的方式建立工廠,我們讓它唯一,因為神隱少女是我們童年的唯一 (笑
↓ 接者因為等等要建立地圖,我們為神隱少女建立一個大家共用的Map方法
        SpiritedAway.Map = function (option) {
            var map;
            var mapFunc;
            option = option || {};
            mapFunc = window[option.mapType + 'Map'];  // 類別

            if (!(mapFunc instanceof Function)) {
                console.error(`${mapFunc} is not constructor.`);
                return;
            }

            map = new mapFunc(option);
            map.mapType = option.mapType;
            map.x = option.x;
            map.y = option.y;
            map.zoom = option.zoom;
            map.id = option.id;
            return map;
        }
這裡有幾個重點
這裡可以把Map當成一個介面,什麼是介面呢?也就是接下來要實作地圖的一個規範。 有了介面後,現在用Here Maps API來實作地圖吧。
        var HMap = function (option) {
            this.apikey = option.apikey;
        }

        HMap.prototype.Init = function () {
            this.platform = new H.service.Platform({
                'apikey': this.apikey
            });
            this.defaultLayers = this.platform.createDefaultLayers();
            this.mapObject = new H.Map(
                document.getElementById(this.id),
                this.defaultLayers.vector.normal.map,
                {
                    zoom: this.zoom,
                    center: { lat: this.y, lng: this.x },
                });
            this.behavior = new H.mapevents.Behavior(
                new H.mapevents.MapEvents(this.mapObject));
            this.ui = H.ui.UI.createDefault(this.mapObject, this.defaultLayers);
        }
HMap類別
<div id="hmap"></div>
↑ 地圖的div
        var map = new SpiritedAway.Map({
            mapType: 'H',
            x: 121,
            y: 23.5,
            zoom: 7,
            id: 'hmap',
            apikey: apikey
        });
        map.Init();
↑ 呼叫
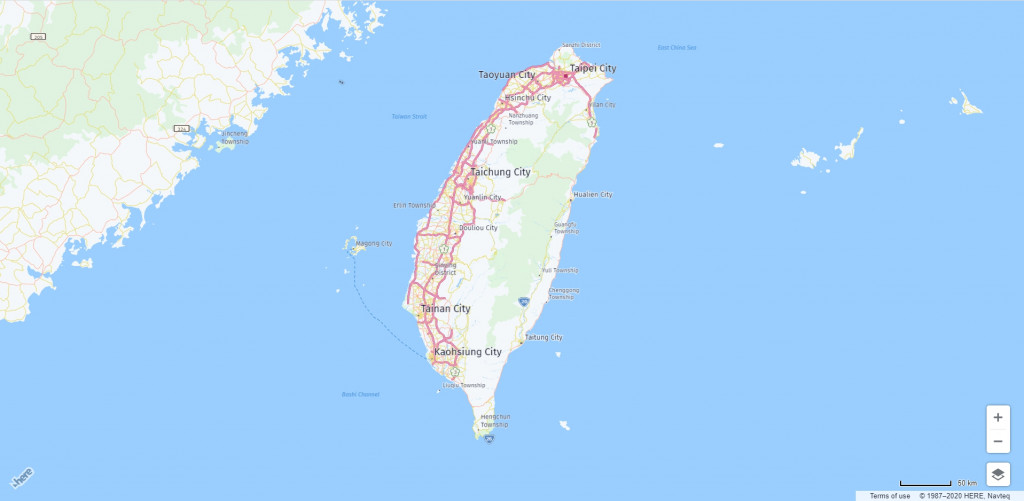
↑ 成功建立地圖。
        SpiritedAway.LineString = function () { return; }
        var HLineString = function () { return; }
↑ 把LineString當成抽象類別使用,因此直接return
        HLineString.prototype.GetLineString = function () {
            this.lineString = new H.geo.LineString();
            this.pointList.forEach(item => {
                this.lineString.pushPoint({ lat: item.y, lng: item.x });
            });
        }
↑ 建立原型方法GetLineString,可以new H.geo.LineString();
以及把pointList重組,等等要繼承這個prototype來共用方法
        SpiritedAway.Polygon = function (map, pointList) {
            var polygon;
            var polygonFunc = window[map.mapType + 'Polygon'];

            if (!(polygonFunc instanceof Function)) {
                console.error(`${polygonFunc} is not constructor.`);
                return;
            }

            polygon = new polygonFunc(map, pointList);
            polygon.map = map;
            polygon.pointList = pointList;
            polygon.Init();

            return polygon;
        }
這裡有幾個重點
        var HPolygon = function (map, pointList) {}  // 類別
        HPolygon.prototype = Object.create(HLineString.prototype);  // 繼承
        HPolygon.prototype.constructor = HPolygon;  // 建構子修正
原型鏈(prototype chain)會由自己逐漸向上尋找,在物件本身找不到就會找物件的原型,再往上找到繼承的原型,直到找到需要的方法,如果到最上層Object的原型依舊找不到,就會回傳undefined。
        HPolygon.prototype.Init = function(){
            this.GetLineString();  // 會找到HLineString的原型方法GetLineString();
        }
↑ 由於HPolygon本身沒有GetLineString方法,就會找它的原型,它的原型指向HLineString,因此找到HLineString的原型方法。
        HPolygon.prototype.ShowPolygon = function (style) {
            style = style || {};

            this.map.mapObject.addObject(new H.map.Polygon(
                this.lineString, { style: style }
            ));
            this.map.mapObject.getViewModel().setLookAtData({
                bounds: this.lineString.getBoundingBox()
            });
        }
↑ 接者在HPolygon的原型上新增ShowPolygon方法,因為每次顯示面圖徵的樣式可能都不太一樣,因此style在這裡才給。
        var polygon = new SpiritedAway.Polygon(map, pointList);  // 新增面資料圖徵
        polygon.ShowPolygon({  // 顯示
            fillColor: '#99CEFF',
            strokeColor: '#E5A596',
            lineWidth: 3
        });
↑ 呼叫
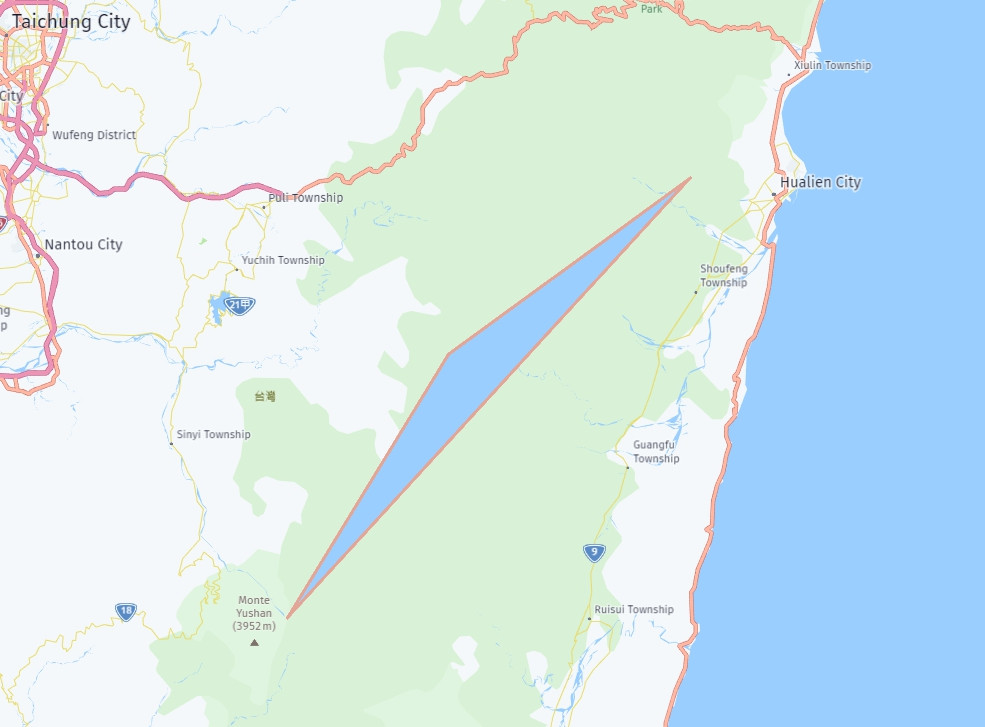
↑ 成功以物件的方式建立面圖徵
線資料圖徵的方式與面大同小異。
        SpiritedAway.Line = function (map, pointList) {
            var line;
            var lineFunc = window[map.mapType + 'Line'];

            if (!(lineFunc instanceof Function)) {
                console.error(`${lineFunc} is not constructor.`);
                return;
            }

            line = new lineFunc(map, pointList);
            line.map = map;
            line.pointList = pointList;
            line.Init();

            return line;
        }
↑ 建立Line共用的介面
        var HLine = function (map, pointList) {
            if (!(this instanceof HLine)) {
                return new HLine(map, pointList);
            }
        }

        HLine.prototype = Object.create(HLineString.prototype);
        HLine.prototype.constructor = HLine;
讓HLine繼承HLineString。這裡再教大家一個小技巧,如果建構子並沒有以new的方式呼叫,而是直接呼叫HLine本身,我們可以判斷this instanceof HLine,如果為false,回傳new HLine(map, pointList),幫開發人員重新new一個物件,是一種巧妙的防呆方式。
        HLine.prototype.Init = function () {
            this.GetLineString();  // 會找到HLineString的原型方法GetLineString();
        }

        HLine.prototype.ShowLine = function (style) {
            style = style || {};

            this.map.mapObject.addObject(new H.map.Polyline(
                this.lineString, { style: this.style }
            ));
            this.map.mapObject.getViewModel().setLookAtData({
                bounds: this.lineString.getBoundingBox()
            });
        }
HLine的原型方法Init,會找到HLineString的原型方法GetLineString();
HLine的原型方法ShowLine,用來顯示線圖徵。
        var line = new SpiritedAway.Line(map, pointList);
        line.ShowLine({ lineWidth: 8, strokeColor: '#E488AE' });
↑ 呼叫

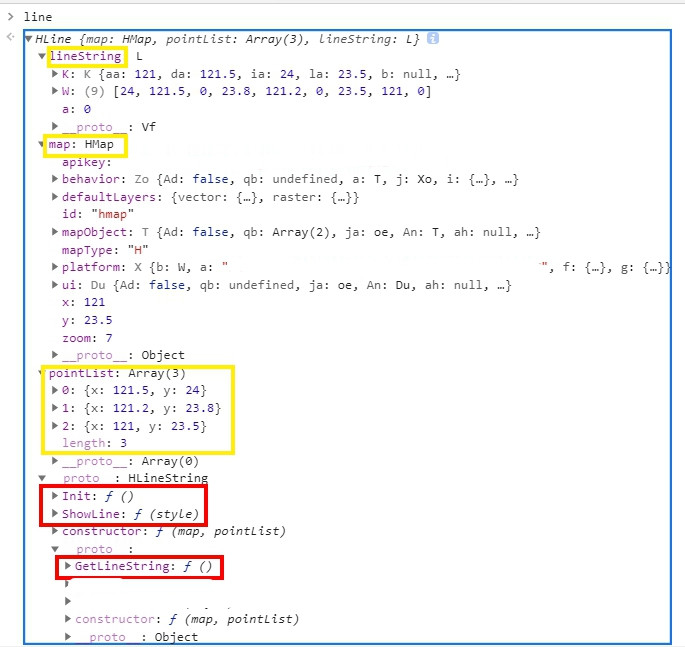
↑ 讓我們從chrome F12開發者工具中來看看,line物件的原型鏈結構,可以從中找到存放的屬性,並且從__proto__找到原型中的Init方法跟ShowLine方法,以及繼承的GetLineString方法。
今天先講到這裡吧!原型鏈裡面其實還有很多小細節可以講,例如怎麼跨過原型的方法找到更上層的方法?諸如此類。只是相信再講下去大家頭會很痛!我也寫的頭很痛![]()
明天即將邁入第10篇了,將會有一個番外篇,跳脫出JavaScript的範疇!
哼!林北明天不寫JS了啦~![]()
