一樣先簡單介紹幾個今天會用到的 Widget內容,之後會在我們的範例專案上使用:
可以定義我們App整體的風格,像是統一配色、文字樣式等等,主要分成區域和全域
MaterialApp控件裡定義,會影響整個app的顏色、字型樣式等風格,如果沒有設定Theme,Flutter將會使用預設的樣式Theme,可以自行定義通過ThemeData去保存共享app的主題及樣式等資料,裡面有規定哪些樣式是可以給我們自行定義的
import 'package:flutter/material.dart';
void main() => runApp(MyApp());
class MyApp extends StatelessWidget {
  @override
  Widget build(BuildContext context) {
    return MaterialApp(
      title: 'Flutter Demo',
      theme: ThemeData( //定義全域主題
          brightness: Brightness.light, //選擇亮度主題,有白色/黑色兩種可選
          primaryColor: Colors.blue, //選擇基準色值
          accentColor: Colors.lightBlue[100]), //選擇強調色值
      home: ThemeExample(),
    );
  }
}
class ThemeExample extends StatelessWidget {
  @override
  Widget build(BuildContext context) {
    return Scaffold(
      appBar: AppBar(
        title: Text("ThemeExample"),
      ),
      body: Container(
        color: Theme.of(context).primaryColor, //背景顏色引用primaryColor
        margin: EdgeInsets.all(50.0),
        padding: EdgeInsets.all(10.0),
        child: Text(
          "MaterialApp Theme Color",
          style: TextStyle(
              fontSize: 24, color: Theme.of(context).accentColor), //引用accentColor
          textAlign: TextAlign.center,
        ),
      ),
    );
  }
}
TextField:就是一個輸入框,我們簡單介紹一下其主要屬性的作用
false,則輸入框會被禁用,禁用狀態不接收輸入內容和事件,同時顯示禁用狀態樣式null,則無行數限制Form:它可以對輸入框進行分組,然後進行一些統一操作,它的子控件必須是FormField類型,為了方便使用,Flutter提供了一個TextFormField組件,它繼承FormField,並把TextField控件封裝進來,所以除了FormField定義的屬性之外(),它還包括了TextField定義的屬性 (FormField是一個表單控制項,此控制項包含表單的狀態,方便更新UI,通常情況下,我們不會直接使用FormField,而是使用TextFormField)
FormState:FormState為Form的State類,可以通過Form.of()或GlobalKey獲得,我們可以通過它來對Form的子控件進行統一操作
FormState.validate():為驗證表單資訊的合法性,調用此方法後,會調用Form所有子FormField的validator回調,如果有一個校驗失敗,則返回false,所有校驗失敗的validator都會返回錯誤提示
(validator驗證函數,輸入的值不匹配的時候返回的字元串顯示在TextField的errorText屬性位置)
Form 的
autovalidate參數為是否自動驗證,設置為true時,TextField發生變化就會調用validator,設置false時,FormFieldState.validate調用時才會回調validator
FormState.save():為保存表單資訊,調用此方法後,會調用Form所有子FormField的save方法
FormState.reset():調用此方法後,會將所有子FormField的內容清空
引用套件,Dart Pub上有許多人提供的方便套件供我們使用,使用方始也很簡單,在pubspec.yaml 的dependencies處添加你所需套件再pub get 即可
我們這邊想要使用 material design icon 套件,讓我們可以使用很多常用的 icon,想要找icon 的話也可以從這裡尋找
Login頁 構想:由上而下 AppBar,標題,描述文字,email 輸入框,密碼輸入框,(Remember me 和 忘記密碼),登入按鈕,使用(google、fb、twitter) 登入按鈕,註冊連結
首先我們新增一些共用資料:
lib下的constants.dart:
import 'package:flutter/material.dart';
import 'package:travel_note/size_config.dart';

const kPrimaryColor = Color(0xFF3E4067);
const kPrimaryLightColor = Color(0xFF3E5067);
const kTextColor = Color(0xFF757575);
const kAnimationDuration = Duration(milliseconds: 200);

// Form Error
Pattern pattern =
    r'^(([^<>()[\]\\.,;:\s@\"]+(\.[^<>()[\]\\.,;:\s@\"]+)*)|(\".+\"))@((\[[0-9]{1,3}\.[0-9]{1,3}\.[0-9]{1,3}\.[0-9]{1,3}\])|(([a-zA-Z\-0-9]+\.)+[a-zA-Z]{2,}))$';
final RegExp emailValidatorRegExp = new RegExp(pattern); //email 格式

const String kEmailNullError = "Please Enter your email";
const String kInvalidEmailError = "Please Enter Valid Email";
const String kPasswordNullError = "Please Enter your password";
const String kShortPasswordError = "Password is too short";
const String kMatchPasswordError = "Passwords don't match";
const String kNameNullError = "Please Enter your name";
const String kPhoneNumberNullError = "Please Enter your phone number";
const String kAddressNullError = "Please Enter your address";
AppBar:
設定全域的主題,在 lib 資料夾下建立theme.dart,用來放我們之後要用到的Theme
theme.dart:
import 'package:flutter/material.dart';

import 'constants.dart';

ThemeData theme() {
  return ThemeData(
    scaffoldBackgroundColor: Colors.white,
    appBarTheme: appBarTheme(),
    textTheme: textTheme(),
    inputDecorationTheme: inputDecorationTheme(),
    visualDensity: VisualDensity.adaptivePlatformDensity,
  );
}

//文字框的主題樣式
InputDecorationTheme inputDecorationTheme() {
  OutlineInputBorder outlineInputBorder = OutlineInputBorder(
    borderRadius: BorderRadius.circular(28),
    borderSide: BorderSide(color: kTextColor),
    gapPadding: 10,
  );
  return InputDecorationTheme(
    contentPadding: EdgeInsets.symmetric(horizontal: 42, vertical: 20),
    enabledBorder: outlineInputBorder,
    focusedBorder: outlineInputBorder,
    border: outlineInputBorder,
  );
}

TextTheme textTheme() {
  return TextTheme(
    bodyText1: TextStyle(color: kTextColor),
    bodyText2: TextStyle(color: kTextColor),
  );
}

AppBarTheme appBarTheme() {
  return AppBarTheme(
    color: Colors.white,
    elevation: 0,
    iconTheme: IconThemeData(color: Colors.black),
    textTheme: TextTheme(
      headline6: TextStyle(color: Color(0XFF8B8B8B), fontSize: 18),
    ),
  );
}
在 main.dart設定MaterialApp 主題:
import 'package:flutter/material.dart';
import 'package:travel_note/routes.dart';
import 'package:travel_note/screens/splash/splash_screen.dart';
import 'package:travel_note/theme.dart';

void main() {
  runApp(MyApp());
}

class MyApp extends StatelessWidget {
  @override
  Widget build(BuildContext context) {
    return MaterialApp(
      //拿掉畫面右上角的debug
      debugShowCheckedModeBanner: false,
      title: 'Flutter Demo',
      theme: theme(),
      /*
      當底下的頁面有很多的時候,需要在 MaterialApp 中定義Routes 並且
      同時設定 initialRoute,這樣進入 App 的時候,就會先進入 initRoutes,
      再利用 Navigator 切換不同的頁面(Route)
      initialRoute 是啓動APP的初始頁面,也就是用戶看到的第一個頁面
      */
      initialRoute: SplashScreen.routeName,
      routes: routes,
    );
  }
}
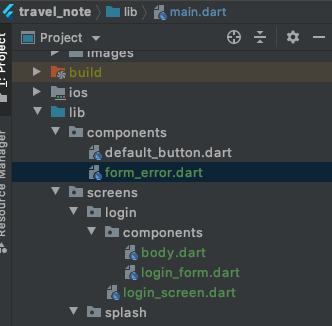
在 lib 資料夾的screens資料夾下建立login資料夾,當作我們放Login 畫面的地方,建一個login_screen.dart用來設計我們的login 畫面,再在login資料夾下建立components資料夾,當作我們放login 畫面裡元件的地方,我們建一個body.dart來處理我們login 畫面的body、login_form.dart來處理我們login 的表單
在 lib 資料夾下的components資料夾,我們建一個form_error.dart來設計共用的表單有誤時的錯誤提示widget
form_error.dart:
import 'package:flutter/material.dart';
import 'package:material_design_icons_flutter/material_design_icons_flutter.dart';

import '../size_config.dart';

class FormError extends StatelessWidget {
  const FormError({
    Key key,
    @required this.errors,
  }) : super(key: key);

  final List<String> errors;

  @override
  Widget build(BuildContext context) {
    return Column(
      children: List.generate(
          errors.length, (index) => formErrorText(error: errors[index])),
    );
  }

  Padding formErrorText({String error}) {
    return Padding(
      padding: EdgeInsets.symmetric(vertical: getProportionateScreenWidth(5)),
      child: Row(
        children: [
          Icon(
            MdiIcons.fromString("alert-circle-outline"),
            size: 18.0,
            color: Colors.red,
          ),
          SizedBox(
            width: getProportionateScreenWidth(10),
          ),
          Text(error),
        ],
      ),
    );
  }
}
login_form.dart:
import 'package:flutter/material.dart';
import 'package:material_design_icons_flutter/material_design_icons_flutter.dart';
import 'package:travel_note/components/default_button.dart';
import 'package:travel_note/components/form_error.dart';

import '../../../constants.dart';
import '../../../size_config.dart';

class LoginForm extends StatefulWidget {
  @override
  _LoginFormState createState() => _LoginFormState();
}

class _LoginFormState extends State<LoginForm> {
  final _formKey = GlobalKey<FormState>();
  String email;
  String password;
  bool remember = false;
  final List<String> errors = []; // 要傳給 FormError 的錯誤清單,來顯示錯誤訊息

  void addError({String error}) {
    if (!errors.contains(error))
      setState(() {
        errors.add(error);
      });
  }

  void removeError({String error}) {
    if (errors.contains(error))
      setState(() {
        errors.remove(error);
      });
  }

  @override
  Widget build(BuildContext context) {
    return Form(
      key: _formKey,
      child: Column(
        children: [
          buildEmailFormField(),
          VerticalSpacing(of: 30),
          buildPasswordFormField(),
          VerticalSpacing(of: 30),
          Row(
            children: [
              Checkbox(
                value: remember,
                activeColor: kPrimaryColor,
                onChanged: (value) {
                  setState(() {
                    remember = value;
                  });
                },
              ),
              Text("Remember me"),
              Spacer(), //佔滿剩餘空間
              GestureDetector(
                onTap: () {} //導入ForgotPasswordScreen
                ,
                child: Text(
                  "Forgot Password",
                  style: TextStyle(decoration: TextDecoration.underline),
                ),
              )
            ],
          ),
          FormError(errors: errors),
          SizedBox(height: getProportionateScreenHeight(20)),
          DefaultButton(
            text: "Continue",
            press: () {
              if (_formKey.currentState.validate()) {
                _formKey.currentState.save();
                // if all are valid then go to success screen
                // Navigator.pushNamed(context, LoginSuccessScreen.routeName);
              }
            },
          ),
        ],
      ),
    );
  }

  TextFormField buildPasswordFormField() {
    return TextFormField(
      obscureText: true,
      onSaved: (newValue) => password = newValue,
      onChanged: (value) {
        //若更新後的密碼,已解決錯誤,即清掉該錯誤訊息,送出時還會檢查最後密碼是否符合我們的條件
        if (value.isNotEmpty) {
          removeError(error: kPasswordNullError);
        }
        if (value.length >= 8) {
          removeError(error: kShortPasswordError);
        }
      },
      validator: (value) {
        if (value.isEmpty) {
          addError(error: kPasswordNullError);
          return "";
        } else if (value.length < 8) {
          addError(error: kShortPasswordError);
          return "";
        }
        return null;
      },
      decoration: InputDecoration(
        labelText: "Password",
        hintText: "Enter your password",
        floatingLabelBehavior: FloatingLabelBehavior.always,
        suffixIcon: Icon(
          MdiIcons.fromString("lock-outline"),
        ),
      ),
    );
  }

  TextFormField buildEmailFormField() {
    return TextFormField(
      keyboardType: TextInputType.emailAddress,
      onSaved: (newValue) => email = newValue,
      onChanged: (value) {
        //若更新後的email,已解決錯誤,即清掉該錯誤訊息,送出時還會檢查最後email是否符合我們的條件
        if (value.isNotEmpty) {
          removeError(error: kEmailNullError);
        }
        if (emailValidatorRegExp.hasMatch(value)) {
          removeError(error: kInvalidEmailError);
        }
      },
      validator: (value) {
        if (value.isEmpty) {
          addError(error: kEmailNullError);
          removeError(error: kInvalidEmailError);
          return "";
        } else if (!emailValidatorRegExp.hasMatch(value)) { // 是否符合 email 格式
          addError(error: kInvalidEmailError);
          return "";
        }
        return null;
      },
      decoration: InputDecoration(
          labelText: "Email",
          hintText: "Enter your email",
          floatingLabelBehavior: FloatingLabelBehavior.always,
          suffixIcon: Icon(
            MdiIcons.fromString("email-outline"),
          )),
    );
  }
}
body.dart:
import 'package:flutter/material.dart';
import 'package:material_design_icons_flutter/material_design_icons_flutter.dart';
import 'package:travel_note/components/no_account_text.dart';
import 'package:travel_note/size_config.dart';

import '../../../constants.dart';
import 'login_form.dart';

class Body extends StatelessWidget {
  @override
  Widget build(BuildContext context) {
    return SingleChildScrollView(
      child: Padding(
        padding:
            EdgeInsets.symmetric(horizontal: getProportionateScreenWidth(25)),
        child: Column(
          children: [
            Text(
              "Welcome to Travel Note",
              style: TextStyle(
                color: Colors.black,
                fontSize: getProportionateScreenWidth(24),
                fontWeight: FontWeight.bold,
              ),
            ),
            VerticalSpacing(of: 16),
            Text(
                'Log in with your email and password \nor continue with social media',
                textAlign: TextAlign.left,
                style: TextStyle(
                  color: kTextColor,
                  height: 1.5,
                  fontSize: getProportionateScreenWidth(16),
                )),
            VerticalSpacing(of: 25),
            LoginForm(),
            VerticalSpacing(of: 25),
            Row(
              mainAxisAlignment: MainAxisAlignment.center,
              children: [
                IconButton(
                    icon: Icon(MdiIcons.fromString("google")),
                    iconSize: 24,
                    onPressed: () {}),
                IconButton(
                    icon: Icon(MdiIcons.fromString("facebook")),
                    iconSize: 24,
                    onPressed: () {}),
                IconButton(
                    icon: Icon(MdiIcons.fromString("twitter")),
                    iconSize: 24,
                    onPressed: () {}),
              ],
            ),
            VerticalSpacing(of: 25),
            Row(
              mainAxisAlignment: MainAxisAlignment.center,
              children: [
                Text(
                  "Don’t have an account? ",
                  style:
                  TextStyle(fontSize: getProportionateScreenWidth(16)),
                ),
                GestureDetector(
                  onTap: () {}, //導入SignUpScreen
                  child: Text(
                    "Sign Up",
                    style: TextStyle(
                        fontSize: getProportionateScreenWidth(16),
                        decoration: TextDecoration.underline,
                        color: kPrimaryColor),
                  ),
                ),
              ],
            ),
            VerticalSpacing(of: 25),
          ],
        ),
      ),
    );
  }
}
login_screen.dart:
import 'package:flutter/material.dart';
import 'package:travel_note/screens/login/components/body.dart';

class LoginScreen extends StatelessWidget {
  static String routeName = "/login";
  @override
  Widget build(BuildContext context) {
    return Scaffold(
      appBar: AppBar(
        title: Text('Login'),
      ),
      body: Body(),
    );
  }
}
之後要把我們login 串上
routes.dart:
import 'package:flutter/material.dart';
import 'package:travel_note/screens/login/login_screen.dart';
import 'package:travel_note/screens/splash/splash_screen.dart';

final Map<String, WidgetBuilder> routes = {
  SplashScreen.routeName: (context) => SplashScreen(),
  LoginScreen.routeName: (context) => LoginScreen(), //新增 login route
};
在splash 的body.dart的下方按鈕補上我們login的連結:
import 'package:flutter/material.dart';
import 'package:travel_note/components/default_button.dart';
import 'package:travel_note/screens/login/login_screen.dart';
import 'package:travel_note/screens/splash/components/splash_content.dart';

import '../../../constants.dart';
import '../../../size_config.dart';

class Body extends StatefulWidget {
  @override
  _BodyState createState() => _BodyState();
}

class _BodyState extends State<Body> {
  int currentPage = 0;
  List<Map<String, String>> splashData = [
    {
      "text": "Welcome to Travel Note,\nLet’s plan a travel!",
      "image": "assets/images/splash_1.jpg"
    },
    {
      "text": "We show the easy way to plan travel,\nsearch tour attractions.",
      "image": "assets/images/splash_2.jpg"
    },
    {
      "text": "Just start traveling with us!\nEnjoy and record your life!",
      "image": "assets/images/splash_3.jpg"
    },
  ];

  @override
  Widget build(BuildContext context) {
    return SafeArea(
      child: SizedBox(
        width: double.infinity,
        child: Column(
          children: <Widget>[
            Expanded(
              child: PageView.builder(
                onPageChanged: (value) {
                  setState(() {
                    currentPage = value;
                  });
                },
                itemCount: splashData.length,
                itemBuilder: (context, index) => SplashContent(
                  image: splashData[index]["image"],
                  text: splashData[index]['text'],
                ),
              ),
            ),
            Padding(
              padding: EdgeInsets.all(
                getProportionateScreenWidth(25),
              ),
              child: Column(
                mainAxisAlignment: MainAxisAlignment.end,
                children: <Widget>[
                  Row(
                    mainAxisAlignment: MainAxisAlignment.center,
                    children: List.generate(
                      splashData.length,
                      (index) => buildDot(index: index),
                    ),
                  ),
                  VerticalSpacing(of: 40),
                  DefaultButton(
                    text: getButtonText(),
                    press: () {
                      Navigator.pushNamed(context, LoginScreen.routeName);
                    },
                  ),
                ],
              ),
            ),
          ],
        ),
      ),
    );
  }

  AnimatedContainer buildDot({int index}) {
    return AnimatedContainer(
      duration: kAnimationDuration,
      margin: EdgeInsets.only(right: 5),
      height: 6,
      width: currentPage == index ? 20 : 6,
      decoration: BoxDecoration(
        color: currentPage == index ? kPrimaryColor : Color(0xFFD8D8D8),
        borderRadius: BorderRadius.circular(3),
      ),
    );
  }

  String getButtonText() {
    if (currentPage == splashData.length - 1) {
      return "Continue";
    } else {
      return "Skip";
    }
  }
}
這樣就完成了登入頁,我們接下來還需要補上 忘記密碼頁、註冊頁,我們會發現設計模式都差不多,繼續動手做,一起熟悉它吧


 iThome鐵人賽