在正式寫註冊跟登入頁面之前,
我們會先寫一個主板頁面(layout),
很多網站都會有前台跟後台,
前台是給使用者看的,
後台是給管理員看的,
前台跟後台常常會使用不同的layout,
不過我們這30天著重在Laravel的部分,
為了方便起見就把前台跟後台寫在一起,
css稍微美化的部分也直接寫結果,
不特別多做說明.
我們建立一個layout檔案resources/views/layout/master.blade.php並加入以下內容
<!DOCTYPE html>
<html>
    <head>
        <meta charset="utf-8">
        <title>@yield('title')</title>
        <script src="/js/app.js"></script>
        <link href="https://maxcdn.bootstrapcdn.com/bootstrap/3.3.5/css/bootstrap.min.css" rel="stylesheet" type="text/css" />
        <script src="https://maxcdn.bootstrapcdn.com/bootstrap/3.3.5/js/bootstrap.min.js"></script>
        <link rel="stylesheet" href="/css/app.css?<?php echo date("mj", time())?>">
    </head>
    <boby>
        <div class="toolbar_section">
            <span class="toolbar_title">@yield('title')</span>
            <span class="toolbar_title2">小魚</span>

        </div>

        <div class="container">
            <div class="col-sm-1 form background_white">
                <ul class="nav nav-pills nav-stacked">
                    <!-- 首頁 -->
                    <li
                    @if($name == "home")
                        class="active"
                    @endif
                    >
                        <a href="/">首頁</a>
                    </li>
                    <!-- 註冊 -->
                    <li
                    @if($name == "sign_up")
                        class="active"
                    @endif
                    >
                        <a href="/user/auth/sign-up">註冊</a>
                    </li>
                    <!-- 登入 -->
                    <li
                    @if($name == "sign_in")
                        class="active"
                    @endif
                    >
                        <a href="/user/auth/sign-in">登入</a>
                    </li>
                    <!-- 登出 -->
                    <li>
                        <a href="/user/auth/sign-out">登出</a>
                    </li>
                </ul>
            </div>
            <div class="col-sm-11 background_white2">
                @yield('content')
            </div>
        </div>
    </body>
</html>
我們可以看到@yield('title')和@yield('content'),
這個title和content要在繼承master的模板裡面定義,
我們這30天的所有模板都會繼承這個模板,
我們新建一個檔案resources/views/home.blade.php並加入以下內容
<!-- 指定繼承 layout.master 母模板 -->
@extends('layout.master')

<!-- 傳送資料到母模板,並指定變數為title -->
@section('title', $title)

<!-- 傳送資料到母模板,並指定變數為content -->
@section('content')
首頁
@endsection
可知我們要繼承模板有兩種方式,
一種是直接一行解決 @section('title', $title)
另外一種是包在@section('content')和@endsection之間
這裡再附上resources/sass/app.scss檔案的內容
$mainTitleHeight: 56px;
$loginFormWidth: 360px;

$mainColor: #0097A7;
$textColor: #FFF;
//背景顏色
$BackWhiteColor: #FFFFFF;
$BackWhiteColor2: #FAFAFA;
$lightgrayColor: #A7A7A7;

$mainFont: 24px;
$mainFont2: 16px;
$toolBarFont: 16px;
$loginTitleFont: 32px;
$formMainFont: 20px;
$formTextBoxTextFont: 16px;
$formTextBoxBorderFont: 40px;

$mainLeftMargin: 24px;


//上面Bar的樣式
.toolbar_section{
    height: $mainTitleHeight;
    background: $mainColor;

    .toolbar_title{
        line-height: $mainTitleHeight;
        font-size: $mainFont;
        margin-left: $mainLeftMargin;
        color: $textColor;
    }

    .toolbar_title2{
        line-height: $mainTitleHeight;
        font-size: $mainFont2;
        margin-left: $mainLeftMargin;
        color: $textColor;
    }

    .toolbar_right{
        float: right;
        height: $mainTitleHeight;
        margin-right: 24px;
        font-size: $toolBarFont;
    }

    .toolbar_text{
        margin-left: 12px;
        color: $textColor;
        line-height: $mainTitleHeight;
    }
}

//登入表單
.login_form{
    width: $loginFormWidth;
    margin: autto;

    .login_title{
        margin-top: 15px;
        margin-bottom: 30px;
        font-size: $loginTitleFont;
        font-weight: 600;
        text-align: center;
    }

    .login_label{
        font-size: $formMainFont;
        font-weight: 600;
        margin-bottom: 12px;
    }

    .login_textbox{
        font-size: $formTextBoxTextFont;
        line-height: $formTextBoxBorderFont;
        margin-bottom: 20px;
        .form_textbox{
            padding-left: 12px;
        }
    }

    .btn_group{
        text-align: right;
        .btn_login{
            font-size: $formMainFont;
            height: 40px;
            width: 120px;
            color: $textColor;
            box-shadow: none;
            border-radius: 3px;
            border-width: 0;
            background: $mainColor;
        }
    }
}


.background_white {
    min-height: calc(100vh - #{$mainTitleHeight});
    background: $BackWhiteColor;
}

.background_white2 {
    min-height: calc(100vh - #{$mainTitleHeight});
    background: $BackWhiteColor2;
}


/****************改變Bootstrap樣式****************/


.container {
    width: 100vw;
    padding: 0;
    background: $BackWhiteColor2;
}

//排版
.form.col-sm-1 {
    padding: 0;
}

//選單
.nav-pills>li{

    &>a{
        border-radius: 0;
        color: $lightgrayColor;
        font-size: $formTextBoxTextFont;

        &:hover{
            background: #E9E9E9;
        }
    }

    &.active{
        border-right: solid 4px $mainColor;

        &>a, {
            color: $mainColor;
            background: transparent;

            &:hover{
                color: $mainColor;
                background: #E9E9E9;
            }
        }
    }

}
scss檔案編輯完記得執行npm run dev才能正常顯示,
我們還要修改原來的HomeController檔案,
不過為了讓所有的畫面都用同樣的Title,
我們建立一個App/Module/ShareData.php檔案放所有的共用資料,
Module資料夾是我放所有自定義資料的地方,
ShareData.php檔案內容如下
<?PHP
namespace App\Module;

class ShareData {
    const TITLE = '如何用Laravel寫一個簡單的部落格網站';

}
?>
記得前面的命名空間跟資料夾名稱路徑一樣,
然後修改HomeController如下
<?PHP
namespace App\Http\Controllers;

use App\Http\Controllers\Controller;
use App\Module\ShareData;

class HomeController extends Controller
{
    //首頁
    public function indexPage()
    {
        $name = 'home';
        $binding = [
            'title' => ShareData::TITLE,
            'name' => $name,
        ];
        return view('home', $binding);
    }
}
?>
要引用ShareData的資料需要加入這一行
use App\Module\ShareData;
我們用$binding將我們要傳到模板的變數寫在裡面,
'name' => $name,
我們就可以在blade模板檔案中用$name來使用這個變數的內容,
也可以傳陣列等等任何的物件到模板,
我們輸入首頁的網址可以看到簡單的畫面完成了,
http://localhost:8915/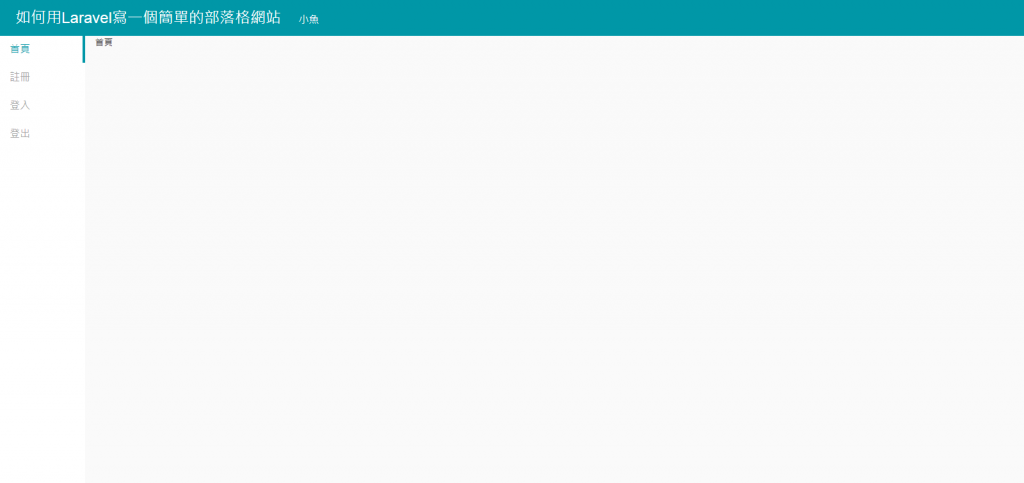


 iThome鐵人賽