昨天和前天教了大家查詢資料庫和資料的頁面呈現,
但目前為止還不會把資料新增到資料庫中,
於是今天的主要學習目標便是新增資料。
首先,我們利用view做一個能夠輸入資料的表單。
至view/class底下新增create.php檔案。
內容如下:
<h2><?php echo $title ?></h2>

<?php echo validation_errors(); ?>

<?php echo form_open('students/create') ?>

    <label for="student_name">Title</label>
    <input type="input" name="student_name" /><br />

    <label for="text">Text</label>
    <textarea name="text"></textarea><br />

    <input type="submit" name="submit" value="Create news item" />

</form>
form_open()是Codeigniter提供的form輔助功能,()中為輸入資料的傳送目的地validation_errors()則是當表單驗證錯誤時,用來顯示錯誤訊息,詳細可見。
接著至controller/student.php新增一個函式以檢查是否有表單被送出,以及送出的資料是否通過驗證規則。:
public function create()
        {
                $this->load->helper('form');
                $this->load->library('form_validation');

                $data['title'] = 'Create a new student';

                $this->form_validation->set_rules('student_name', 'Name', 'required');
                $this->form_validation->set_rules('text', 'text', 'required');

                if ($this->form_validation->run() === FALSE)
                {
                        $this->load->view('templates/header', $data);
                        $this->load->view('class/create');
                        $this->load->view('templates/footer');
                }
                else
                {
                        $this->student_model->set_students();
                        $this->load->view('class/success');
                }
        }
開頭前幾行用來載入 Form 輔助函式以及 Form Validation 程式庫。
接著是設定表單驗證的規則。set_rules()方法需要三個參數,輸入欄位的名稱,用來顯示在錯誤訊息中的名稱,以及規則(rule)。
在這個例子中使用的規則,required用來表示標題及內文都是必要的欄位。
然後在view/class底下新增success.php並寫入以下內容:
<h2>寫入成功</h2>
最後一件事就是寫一個方法來將資料存進資料庫。
回到student_model.php加入以下函式:
public function set_students()
		{
		    $this->load->helper('url');

		    $number = rand();

		    $data = array(
		        'name' => $this->input->post('student_name'),
		        'number' => $number,
		        'intro' => $this->input->post('text'),
		        'gender' => '1',
		    );

		    return $this->db->insert('class', $data);
		}
我們繼續處理待會要存入的資料,將其放進
$data陣列中。 陣列中的每個元素都對應到我們建立的資料庫中的欄位。
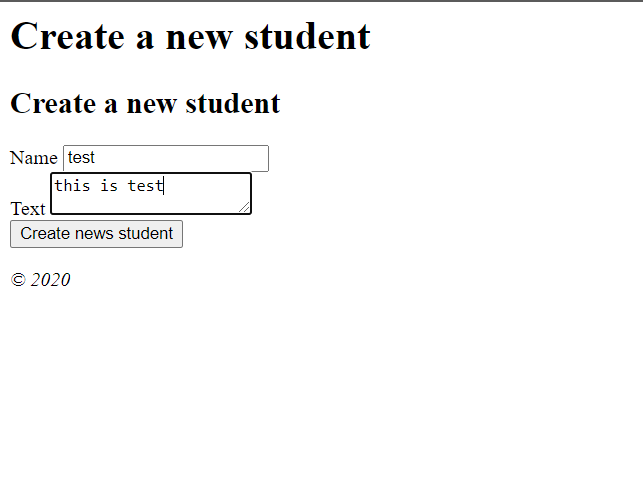
接著打開 http://localhost/ci/index.php/students/create
就能看到新增資料的頁面囉~