響應式表單 (Reactive Forms) 是透過定義表單模型來開發表單,這一篇將會完成待辦事項表單的開發。
為了要新增待辦事項,因此在 task.service.ts 檔案要加入 add() 方法,利用 json-server 提供的 post() 方法來新增待辦事項。
@Injectable({
  providedIn: 'root',
})
export class TaskRemoteService {
  private _url = 'http://localhost:3000/tasks';

  private _id: number;

  constructor(private httpClient: HttpClient) {}

  getData(subject?: string, state?: number): Observable<Task[]> {
    const condition = [];
    if (subject) {
      condition.push(`subject_like=${subject}`);
    }
    if (state !== undefined) {
      condition.push(`state=${state}`);
    }
    const url = this._url + (condition.length === 0 ? '' : `?${condition.join('&')}`);
    return this.httpClient.get<Task[]>(url).pipe(tap((tasks) => (this._id = Math.max(...tasks.map((task) => task.id)) + 1)));
  }

  add(task: Task): Observable<any> {
    task.id = this._id;
    this._id++;
    return this.httpClient.post(this._url, task);
  }
}
另外,也在 task.component.css 加入所需要的樣式。
div.tags-field {
  padding: 10px 20px 10px 0;
  margin: 5px 0;
}

div.tags-field div {
  display: flex;
  margin-top: 10px;
  padding-left: 80px;
}

div.tags-field div input {
  flex-grow: 1;
}

div.button {
  margin-top: 20px;
  text-align: center;
}
對於清單資料的表單需求,可以利用響應式表單 (Reactive Forms) 所提供的 FormArray 模型類別進行定義。因此,可以把 task-form.component.ts 中的待辦事項表單定義,新增標籤清單的資料模型。
export class TaskFormComponent implements OnInit {
  form: FormGroup;

  get tags(): FormArray {
    return this.form.get('tags') as FormArray;
  }

  constructor(private fb: FormBuilder) {}

  ngOnInit(): void {
    this.form = this.fb.group({
      subject: this.fb.control(undefined),
      state: this.fb.control(0),
      level: this.fb.control(undefined),
      tags: this.fb.array([]),
    });
  }
}
如上面程式,可以利用 FormBuilder 服務的 array() 方法,將標籤屬性建立成 FormArray 實體,其第一個參數即為初始值;若不使用 FormBuilder 服務,則會利用 tags: new FormArray([]) 語法建立。
另外,由於需要在頁面中使用所建立的 tags 表單模型屬性,因此會在 task-form.component.ts 中利用 getter 定義 tags 屬性。需注意的是,利用 FormGroup 的 get() 方法所回傳的是 AbstractControl 型別,此型別為 FormGroup、FormControl 與 FormArray 的基礎類別,為使用 FormArray 類別的屬性因而需要轉型。
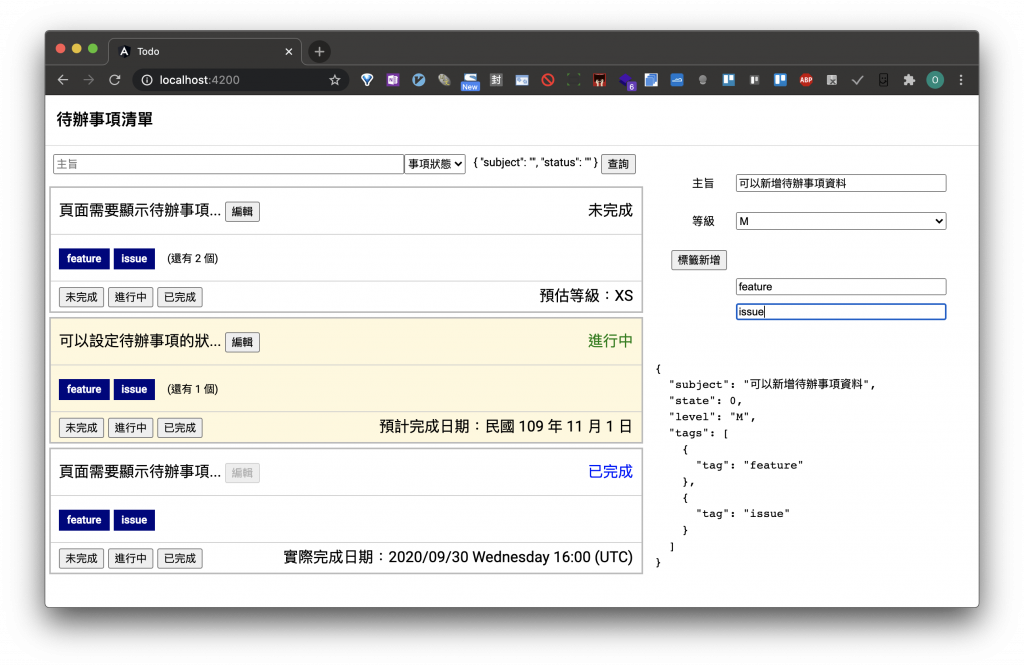
接著,在 task-form.component.html 中加入標籤新增的按鈕,利用此按鈕新增標籤個數;並利用 *ngFor 將 FormArray 中的 controls 屬性顯示在頁面上。
<form [formGroup]="form">
  <div class="tags-field">
    <button type="button" (click)="onAddTag()">標籤新增</button>
    <div formArrayName="tags" *ngFor="let control of tags.controls; let index = index">
      <ng-container [formGroupName]="index">
        <input type="text" formControlName="tag" />
      </ng-container>
    </div>
  </div>
</form>
export class TaskFormComponent implements OnInit {
  onAddTag(): void {
    const tag = this.fb.group({
      tag: this.fb.control(undefined),
    });
    this.tags.push(tag);
  }
}
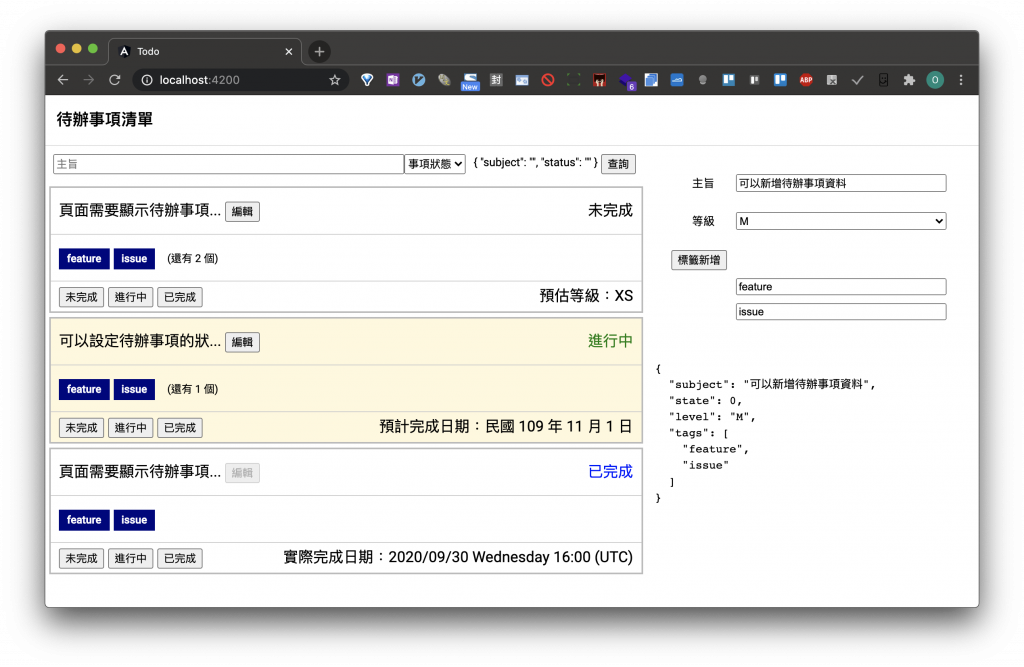
由於上面程式,將標籤定義為一表單群組 (FormGroup),因而在頁面上利用 *ngFor 的索引值作為表單群組名稱 (formGroupname)。不過,目前需求中的標籤資訊為單一字串,此時可以修改成利用 FormControl 指令,直接指定表單陣列 (FormArray) 內的控制項。
<form [formGroup]="form">
  <div class="tags-field">
    <button type="button" (click)="onAddTag()">標籤新增</button>
    <div formArrayName="tags" *ngFor="let control of tags.controls; let index = index">
	  <input type="text" [formControl]="control" />
    </div>
  </div>
</form>
export class TaskFormComponent implements OnInit {
  onAddTag(): void {
    const tag = this.fb.control(undefined),
    this.tags.push(tag);
  }
}
在 FormArray 類別中提供了 removeAt() 方法來刪除陣列資料項目,因此可以在 task-form.component.html 加入標籤刪除按鈕,並利用 removeAt() 方法實作。
<form [formGroup]="form">
  <div class="tags-field">
    <button type="button" (click)="onAddTag()">標籤新增</button>
    <div formArrayName="tags" *ngFor="let control of tags.controls; let index = index">
	  <input type="text" [formControl]="control" />
      <button type="button" (click)="onDeleteTag(index)">刪除</button>
    </div>
  </div>
</form>
export class TaskFormComponent implements OnInit {
  onDeleteTag(index: number): void {
    this.tags.removeAt(index);
  }
}
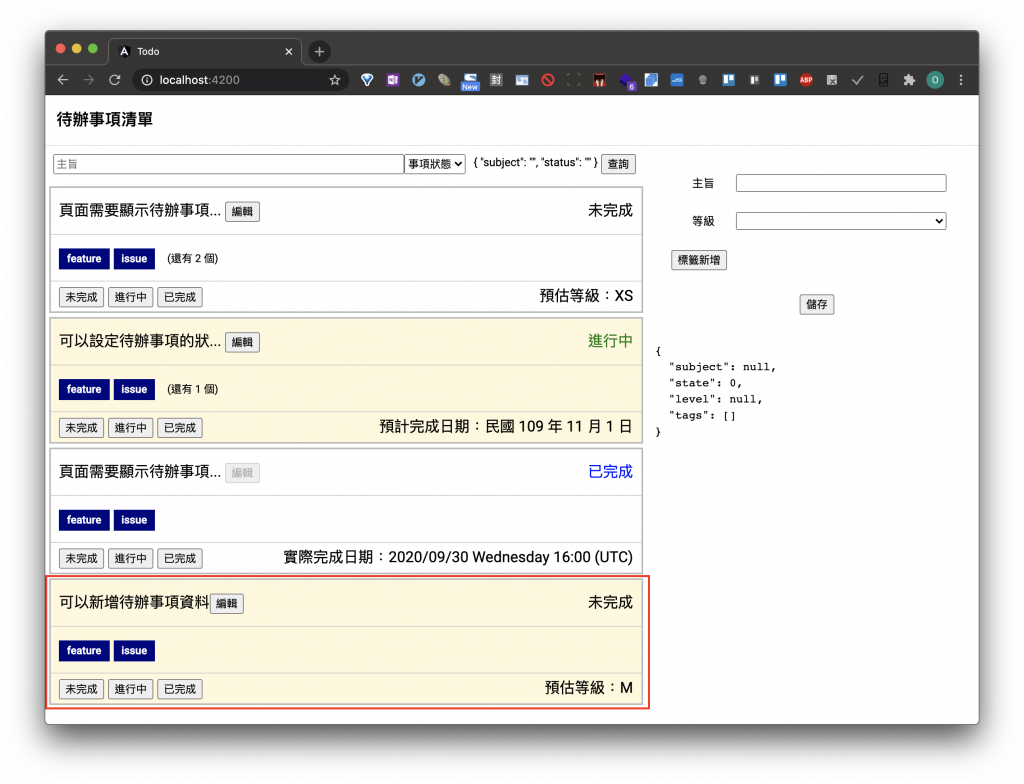
最後,在 task-form.component.html 中加入儲存功能,利用 TaskRemoteService 中的 add() 方法來將表單資料新增至 db.json 內。
  <div class="button">
    <button type="button" (click)="onSave()">儲存</button>
  </div>
  onSave(): void {
    this.taskService.add(this.form.value).subscribe(() => alter('儲存成功'));
  }
因
add()方法的回傳值為 Observable,所以需要訂閱才會被執行。
利用表單陣列 (FormArray) 可以實作陣列類型的資料,下一篇將利用響應式表單 (Reactive Forms) 開發的表單驗證,來針對待辦事項進行所需的驗證。