開一個
docker-compose.yml
填入
version: "3.5"

services:
 rabbitmq:
   image: rabbitmq:management
   hostname: "y_rabbitmq"
   ports:
     - "5672:5672"
     - "15672:15672"
   container_name: yc_rabbitmq
然後在那個資料夾打 docker-compose up --build
這樣就能起一個rabbitmq了
再來
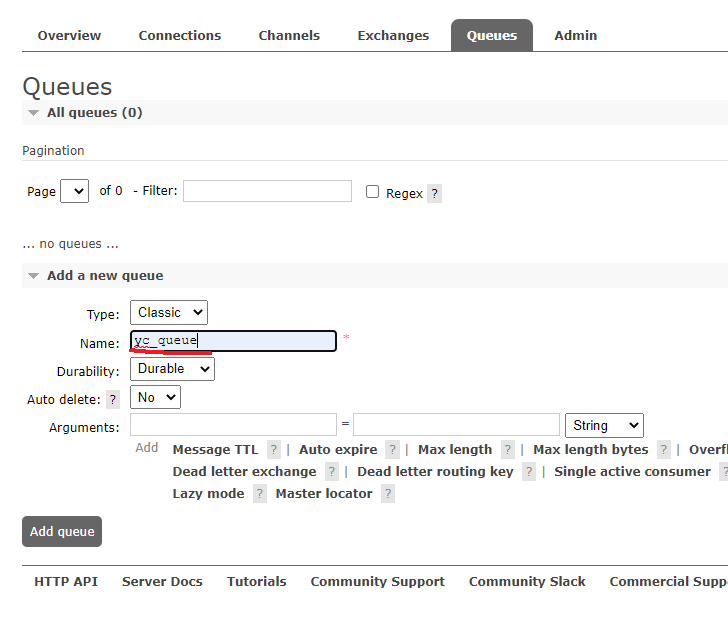
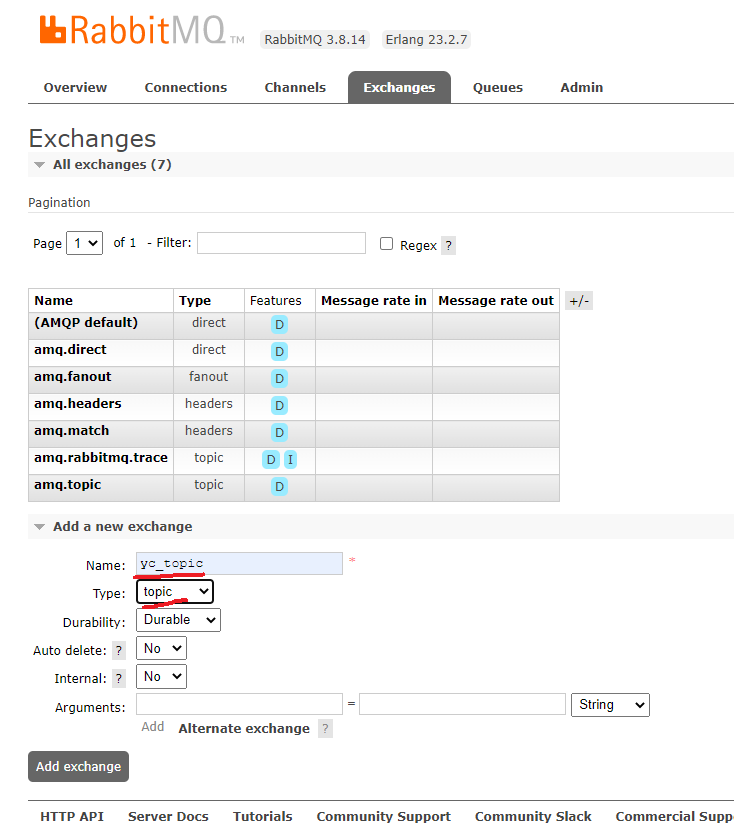
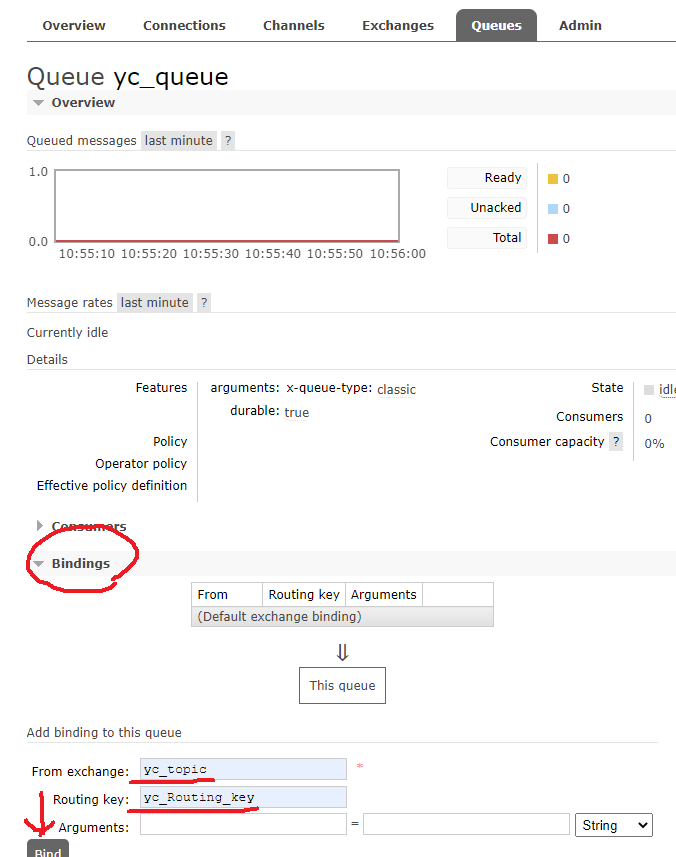
蓋一個rabbitMQ大概如下。
add queue
add exchange
add queue裡面的bind
即可
 !
!
 !
!

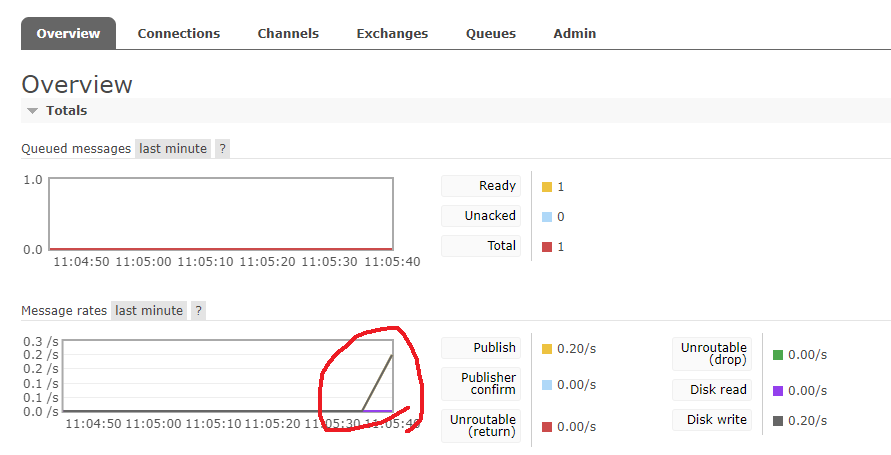
如果有打進去的話會是這樣(還沒打 等一下)
java的部分測試的話
pom檔+這段
       <!-- Spring AMQP for RabbitMQ -->
        <dependency>
            <groupId>org.springframework.amqp</groupId>
            <artifactId>spring-rabbit</artifactId>
        </dependency>
去application.yml +連線資訊 然後把exchange,exchange,queues 等剛剛填在rabbitMQ的資訊寫在這
spring :
  rabbitmq:
    virtual-host: /
    username: guest
    password: guest
    port: 5672
    host: 127.0.0.1
example:
  rabbitmq :
    exchange : yc_topic
    routing_key : yc_Routing_Key
    queues : yc_queues
public interface RabbitService
{

	void sendMessage(String yc);
}
@Slf4j
@Service
public class RabbitServiceImpl implements RabbitService
{

	@Autowired
	private RabbitServiceClient rabbitServiceClient;

	@Value("${example.rabbitmq.exchange}")
	private String exchange;

	@Value("${example.rabbitmq.routing_key}")
	private String routingKey;

	@Override
	public void sendMessage(String yc)
	{
		rabbitServiceClient.sendMessage(exchange, routingKey, yc);
	}

}
RabbitServiceClient
@Service
public interface RabbitServiceClient
{
	void sendMessage(String exchangeKey, String routingKey, Object message);
}
@Slf4j
@Component
public class RabbitServiceClientImpl implements RabbitServiceClient
{
	private static final MessagePostProcessor rabbitTemplatePostProcessor = new RabbitTemplatePostProcessor();

	@Autowired
	private RabbitTemplate rabbitTemplate;
	@Override
	public void sendMessage(String exchangeKey, String routingKey, Object message)
	{
		log.info("Sending one message to host: [{}], port: [{}].", rabbitTemplate.getConnectionFactory().getHost(),
				rabbitTemplate.getConnectionFactory().getPort());
		log.info("Sending Routing Key [{}]; exchange [{}]", routingKey, exchangeKey);
		log.info("message[{}]", message);
		rabbitTemplate.convertAndSend(exchangeKey, routingKey, message, rabbitTemplatePostProcessor);
	}
}
public class RabbitTemplatePostProcessor implements MessagePostProcessor
{
	@Override
	public Message postProcessMessage(Message message) throws AmqpException
	{
		message.getMessageProperties().setTimestamp(Date.from(Instant.now()));
		return message;
	}
}
@Slf4j
@Service
public class CreateWaybillListener
{
	@RabbitListener(queues = "example.rabbitmq.queues")
	public void createWaybill(@Payload String yc,
			@Header(value = AmqpHeaders.RECEIVED_ROUTING_KEY) String receivedRoutingKey)
	{
		log.info("Reschedule delivery timeslot from FRS: {}; yc: {}", receivedRoutingKey, yc);
	}
}
done.
打controller接sendMessage 就可以了.
