在前一天介紹了 Docker 容器操作的技巧,今天來透過 Lab 學習如何將專案建置成 Image ,並推送至 GCP 的 Container Registry。
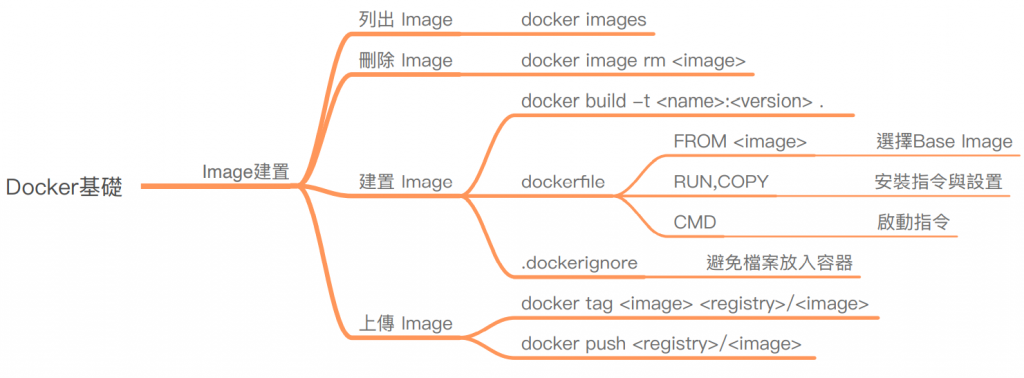
若想要在自己的環境下安裝 Docker,可以參考 Install Docker Engine 指南,本次 Lab 中,我們會使用在Day5 中介紹的 Cloud Shell,裡面已經安裝好 Docker 的環境,只要透過瀏覽器就能直接使用。
進入 Cloud Shell 網站
確認右上角編輯器與終端機皆已開啟

點擊終端機輸入指令
檢查docker版本,確認是否已安裝
docker -v
(輸出結果)
Docker version 20.10.8, build 3967b7d
還記得我們在 Day04 中使用 VM 來搭建出 Web Service。這次試著將服務用容器的方式來運行。而在製作容器所需的 Image 前,需要先確認程式能否正常執行,就來用 Cloud Shell 實際測試看看。
project 資料夾cd && mkdir project
package.json和app.js檔案cd project && touch package.json app.js
左上 Explorer -> Open Folder -> 選擇 project 資料夾 -> Open
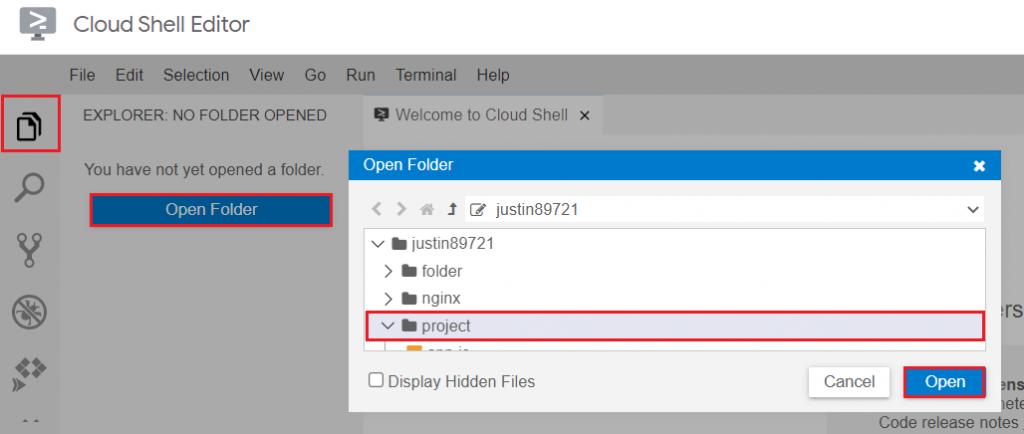
app.js檔案並貼上以下內容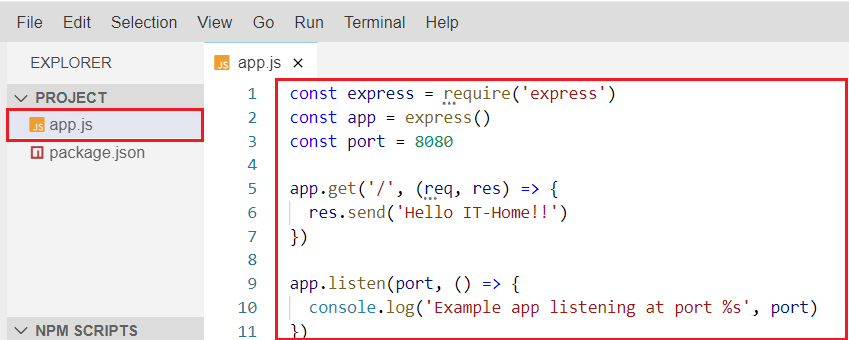
const express = require('express')
const app = express()
const port = 8080

app.get('/', (req, res) => {
  res.send('Hello My Container Project!!')
})

app.listen(port, () => {
  console.log('Example app listening at port %s', port)
})
這次專案預設是監聽 8080 Port
package.json檔案並貼上以下內容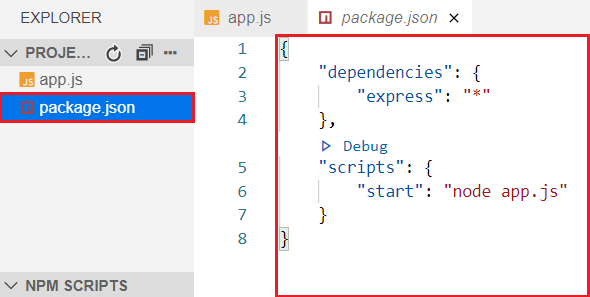
{
    "dependencies": {
        "express": "*"
    },
    "scripts": {
        "start": "node app.js"
    }
}
在 Cloud Shell 裡面已經安裝好了 NodeJS 以及 Npm,準備好程式碼後安裝完套件就能執行了。
npm install
npm start
(輸出結果)
> start
> node app.js

Example app listening at port 8080
網頁預覽->透過以下通訊預覽 : 8080

可以看到伺服器回傳訊息,代表 Web Service 建立成功。

Ctrl +c停止程式。服務準備好了,那到底要怎麼建置 Image 呢?就是透過撰寫Dockerfile,內容主要分為三個步驟。
首先會到 Docker Hub 找尋適合的Base Image,這裡我們選擇是 node。
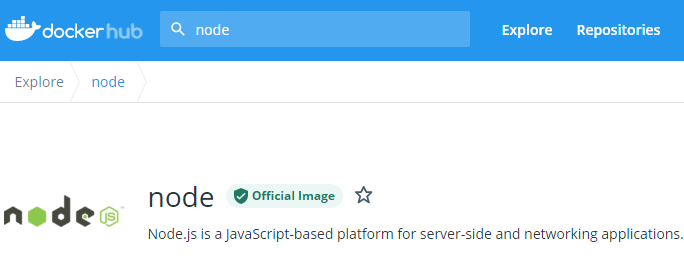
接著就可以建立 dockerfile 了。
dockerfile和dockerignore檔案touch dockerfile .dockerignore
dockerfile檔案並貼上以下內容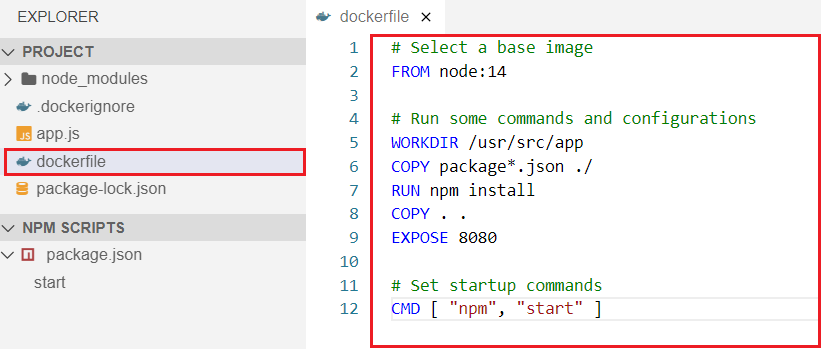
# Select a base image
FROM node:alpine

# Run some commands and configurations
WORKDIR /usr/src/app
COPY package*.json ./
RUN npm install
COPY . .
EXPOSE 8080

# Set startup commands
CMD [ "npm", "start" ]
FROM node:alpine
WORKDIR /usr/src/app
COPY package*.json ./
RUN npm install
COPY . .
EXPOSE 8080
CMD [ "npm", "start" ]
為避免將不必要的檔案也複製到容器裡,所以會設定.dockerignore來忽略。
.dockerignore檔案並貼上以下內容
.git
.env
*Dockerfile*
node_modules
npm-debug.log
寫好了Dockerfile就可以使用docker build 來建置 Image 了,為了區別每次 Build 的 Image ,所以會加上版本號。
docker build
docker build -t node-project:v1 .
(輸出結果)
Sending build context to Docker daemon   42.5kB
Step 1/7 : FROM node:alpine
alpine: Pulling from library/node
4e9f2cdf4387: Pull complete
631bfa39568f: Pull complete
9854121ede03: Pull complete
0d50f77f17a6: Pull complete
Digest: sha256:e250bb9fbb7b7dfa462aff25deffe986e448e0177838fee8b69103810f06932b
Status: Downloaded newer image for node:alpine
 ---> 195bb95229bd
Step 2/7 : WORKDIR /usr/src/app
 ---> Running in 38d3ec57d019
Removing intermediate container 38d3ec57d019
 ---> ac05354464d6
Step 3/7 : COPY package*.json ./
 ---> 3272711ed7ec
Step 4/7 : RUN npm install
 ---> Running in 0269829bf554

added 50 packages, and audited 51 packages in 2s

found 0 vulnerabilities
npm notice
npm notice New minor version of npm available! 7.21.0 -> 7.22.0
npm notice Changelog: <https://github.com/npm/cli/releases/tag/v7.22.0>
npm notice Run `npm install -g npm@7.22.0` to update!
npm notice
Removing intermediate container 0269829bf554
 ---> 13a4da6d5cea
Step 5/7 : COPY . .
 ---> 142abe6e3dab
Step 6/7 : EXPOSE 8080
 ---> Running in f9c1b1f5cf08
Removing intermediate container f9c1b1f5cf08
 ---> ade735d6413f
Step 7/7 : CMD [ "npm", "start" ]
 ---> Running in aee8f9a6fef8
Removing intermediate container aee8f9a6fef8
 ---> 313106b6e3c0
Successfully built 313106b6e3c0
Successfully tagged node-project:v1
docker build會根據你撰寫的dockerfile使用 Base Image 來啟動容器,再根據安裝指令和設置執行在容器內部,最後就將容器輸出成我們要的 Image。
docker images來查看docker images
(輸出結果)
REPOSITORY     TAG       IMAGE ID       CREATED          SIZE
node-project   v1        313106b6e3c0   54 seconds ago   116MB
node           alpine    195bb95229bd   6 days ago       112MB
docker run建立專案容器docker run -p 8080:8080 -d node-project:v1
docker ps
(輸出結果)
CONTAINER ID IMAGE           COMMAND                CREATED       STATUS       PORTS
8c721a09b013 node-project:v1 "docker-entrypoint.s…" 2 seconds ago Up 2 seconds 0.0.0.0:8080->8080/tcp
網頁預覽->透過以下通訊預覽 : 8080

可以看到伺服器回傳訊息,代表 Image 建置成功。

最後我們把建置好的 Image 上傳至 Container Registry 保存起來。
PROJECT_ID
gcloud projects list

<PROJECT_ID>改成 GCP 專案的 IDdocker tag node-project:v1 gcr.io/<PROJECT_ID>/node-project:v1
docker images來查看docker images
(輸出結果)
node-project                            v1     313106b6e3c 9 minutes ago 116MB
gcr.io/ninth-bonito-324214/node-project v1     313106b6e3c 9 minutes ago 116MB
node                                    alpine 195bb95229b 6 days ago    112MB
<PROJECT_ID>改成 GCP 專案的 IDdocker push gcr.io/<PROJECT_ID>/node-project:v1
進入 GCP 網站
點擊搜尋欄->輸入Container Registry->找到Container Registry

node-project
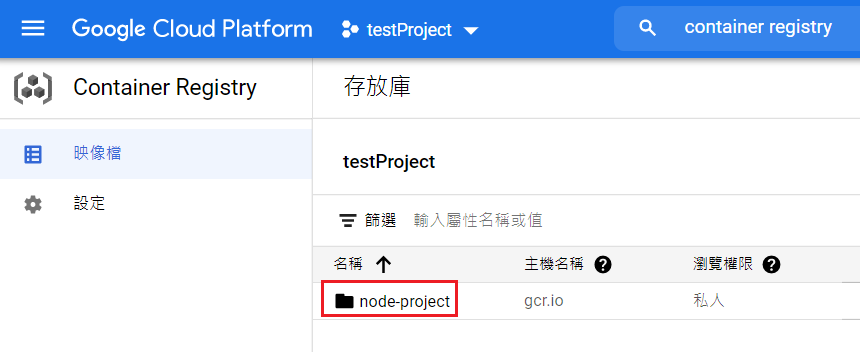
裡面就會出現剛剛 Build 的 Image 了。
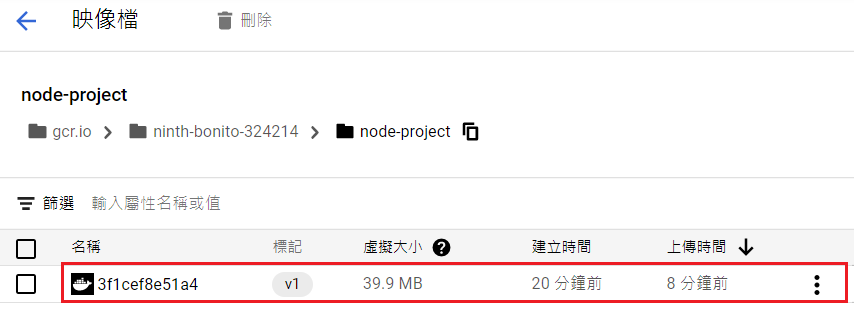

今天試著按表操課照文章練習,發現我的預設帳號沒有權限去做docker push.
後來到IAM與管理
加入以下Rule
roles/storage.objectViewer,
roles/storage.legacyBucketWriter,
roles/storage.admin
有正常可以推送了
分享有遇到相同問題的朋友
參考:https://cloud.google.com/container-registry/docs/access-control