昨天完成了log集中收攏的機,今天就來完成Observability的最後一塊拼圖tracing,tracing其實同樣是分為一個發送tracing資料的來源跟接收的server端,來源的做法有很多種,因為day 5的時候透過rancher的介面安裝好了istio+jaeger,今天就來配置管理這些tracing訊息的server。
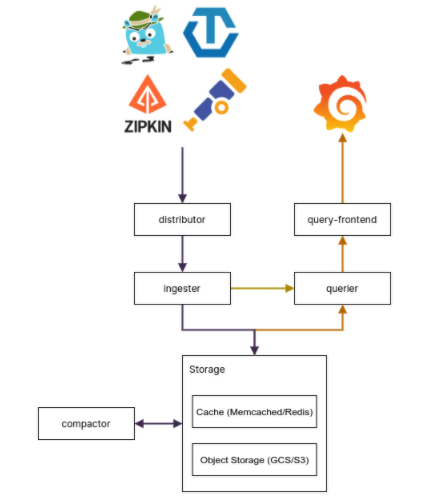
管理工具有好幾種可以選擇像是opentelemetry、tempo等等...,因為grafana特別推出這個關於tracing的管理,所以我採用這個架構,以下就是來自官網上的架構圖
應該不難發現,這個架構跟loki非常的相似,所以可以透過幾乎同樣的配置方式做出來tempo的架構唷,那就先來一個小demo嘗試看看tempo吧,首先利用前幾天的介紹,創造一個新的cluster出來,並運行下面的指令。
https://github.com/grafana/tempo/tree/main/example/helm
helm repo add grafana https://grafana.github.io/helm-charts
helm repo update
helm upgrade --set traces.jaeger.thriftHttp=true --install tempo grafana/tempo-distributed
helm upgrade -f microservices-grafana-values.yaml --install grafana grafana/grafana
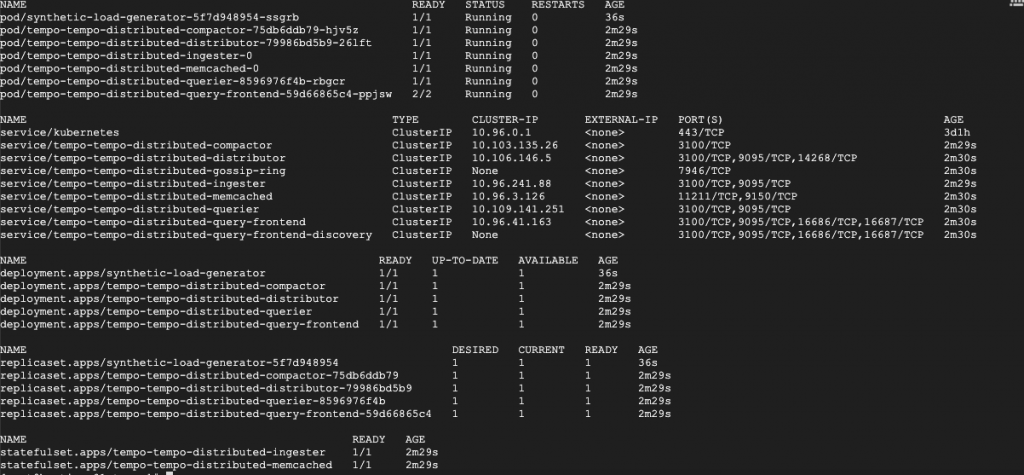
kubectl create -f microservices-extras.yaml

有沒有發現元件昨天的loki很相似,並且可以在comfigmap的設定中發現jaeger和storage的配置方法。
接著為了將使用rancher安裝的jaeger all-in-one連接到tempo,來簡單解釋一下jaeger的tracing機制,jaeger all-in-one的設計上會提供16686/TCP這個port做為觀看介面,收攏了tracing的資訊
但是這個不是給tempo使用的,在這邊如果不使用tempo的話可以直接在grafana加入來源jaeger:16868的datasource來看資訊,但是因為缺少資料儲存設計,所以並沒有那麼優秀。
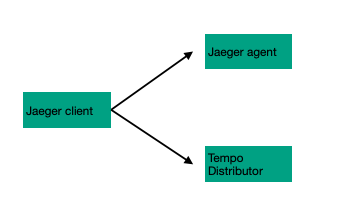
要改為給tempo使用的話,要些微的挑整一下deployment設定和tempo的service,要將deployment.apps/rancher-istio-tracing中加入env JAEGER_AGENT_HOST 調整為tempo的distributor元件,另外將service/tempo-tempo-distributed-distributor加入jaeger agent的default port 6381,這樣調整的概念會像是下面這樣,將原本丟到jaeger agent的線調整到tempo distributor。
接著調整storage的設定儲存到minio上(如下)
        backend: s3
        s3:
            bucket: tempo
            endppoint:minio_ip:port
            access_key: minioadmin
            secret_key: minioadmin
最後就是將tempo的tempo-tempo-distributed-query-frontend對外暴露出來,讓外部的grafana能夠設定為datasource,這樣在grafana上就可以將pod的metric、log、tracing都查詢的到囉。
