花了好幾天終於完成了所有的基礎設施,接著就可以開始部署服務以及使用了,對於k8s來說要部署服務需要的其實只要yaml就可以了,最簡單能夠讓外頭使用的服務會需要幾個yaml(deployment、service)基於istio還需要(virtualservice、gateway);而在我個人的認知上,佈署服務的層面分為兩個階段,第一階段是yaml管理,在這個階段會將服務所需要的資源做成相對應的yaml並且管理好,第二階段是operator,在這個階段透過kubernetes的API通知k8s有resources需要新增異動,對於服務的佈署,不太可能透過人為的方式用kubectl的指令或是api打給k8s,所以會仰賴cd流程去自動化的apply yaml的新增異動,那麼要如何自動的配置yaml就是今天的目標,
yaml的配置方法有很多種,新手入門的人可以簡單的用shell的方式,優點是利用變數的方式填空很容易統一掌控服務的yaml,缺點就是不容易擴充而且有新功能的時候很容易疊著加上去,進階一點的用法可以使用kustomize方式,優點是透過這樣的方式擴充容易,而且是基於k8s而生具有較完整的支援,缺點就是如果沒有管理好的情況,很可能讓懂得使用的開發人員做出超出控制的yaml。
先來一段基礎版
apiVersion: apps/v1
kind: Deployment
metadata:
  name: hello-kubernetes
spec:
  replicas: 3
  selector:
    matchLabels:
      app: hello-kubernetes
  template:
    metadata:
      labels:
        app: hello-kubernetes
    spec:
      containers:
      - name: hello-kubernetes
        image: paulbouwer/hello-kubernetes:1.10
        ports:
        - containerPort: 8080
---
apiVersion: v1
kind: Service
metadata:
  name: hello-kubernetes
spec:
  type: ClusterIP
  ports:
  - port: 80
    targetPort: 8080
  selector:
    app: hello-kubernetes
---
apiVersion: networking.istio.io/v1alpha3
kind: Gateway
metadata:
  name: hello-kubernetes
spec:
  selector:
    istio: ingressgateway
  servers:
    - port:
        number: 80
        name: http
        protocol: HTTP
      hosts:
        - hello-world.yuhlin.com.tw
---
apiVersion: networking.istio.io/v1alpha3
kind: VirtualService
metadata:
  name: hello-kubernetes
spec:
  hosts:
    - hello-world.yuhlin.com.tw
  gateways:
    - hello-kubernetes
  http:
    - route:
        - destination:
            port:
              number: 80
            host: hello-kubernetes
另外因為我的示例中並沒有使用lb轉送服務,所以我用nodeport的方式解釋會需要用到下述指令
export INGRESS_PORT=$(kubectl -n istio-system get service istio-ingressgateway -o jsonpath='{.spec.ports[?(@.name=="http2")].nodePort}')
export SECURE_INGRESS_PORT=$(kubectl -n istio-system get service istio-ingressgateway -o jsonpath='{.spec.ports[?(@.name=="https")].nodePort}')
export TCP_INGRESS_PORT=$(kubectl -n istio-system get service istio-ingressgateway -o jsonpath='{.spec.ports[?(@.name=="tcp")].nodePort}')
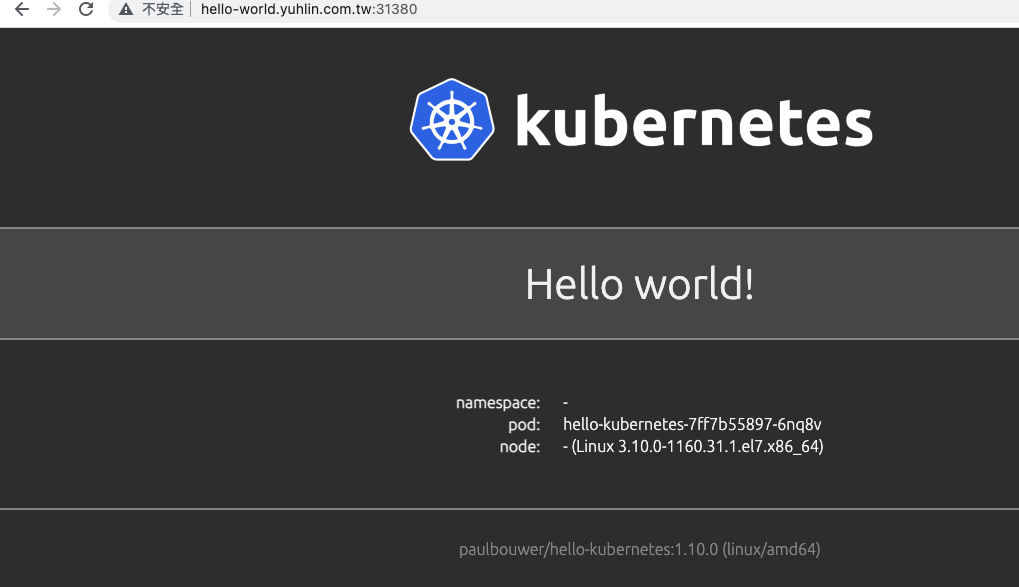
在簡易設定好上面的指令後,設定ip和hostname到/etc/hosts,那麼觀察一下瀏覽器,確實有成功的瀏覽到了呢,那麼前幾天做的prometheus、loki等等有需要對外expose的服務也都可以依這個方式對外,而不是kubectl port-forward囉
那麼就來進階的用kustomize玩耍yaml吧,應用kustomize會需要先有一個base目錄放置yaml的雛形
像是圖例中有基本的deployment、hpa、service
針對istio使用的vs、gw
對於openshift使用的route
kustomization.yaml中則是定義會運用到哪些base yaml。
準備好base後,就可以在另一個目錄撰寫kustomization.yaml說明服務需要依據base做哪些變動
namePrefix: hello-world
bases:
  - ../base
patches:
  - deployment.yaml
  - service.yaml
  - hpa.yaml
  - vs.yaml
  - gw.yaml

images:
- name: image-name
  newName: my-registry/yuhlin/hello-world
  newTag: 20210911v0
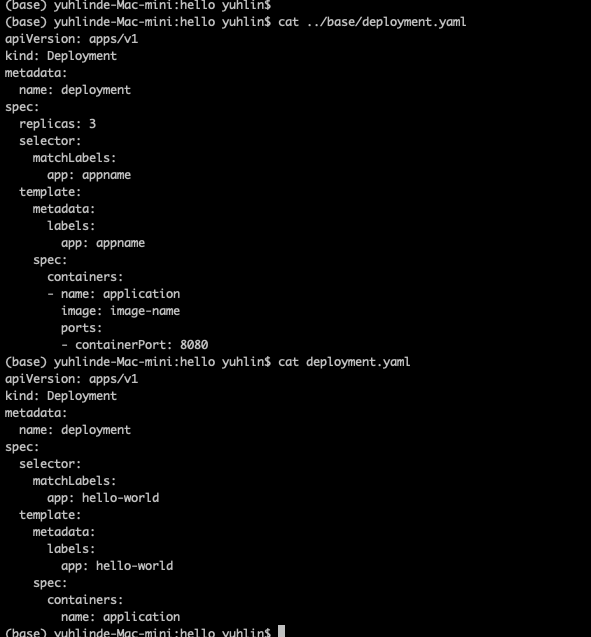
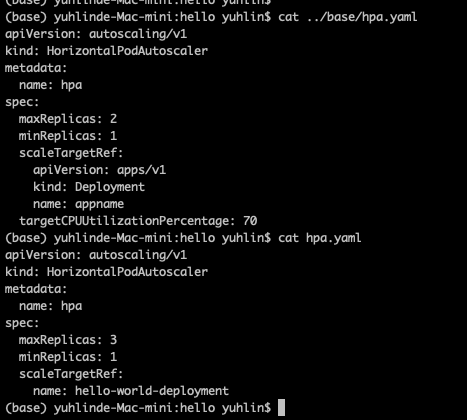
我以deployment和hpa為範例

其實這個做法看起來跟填空幾乎沒有兩樣,但是可以輕易的多加入更多參數(env、volume等等...),接著將其他yaml 想要加入的參數寫好,這樣我在這個目錄中的服務就可以再根據base和這個目錄下的patches去調整要變動的項目囉。
