
前一天我們將 Image Build 好並上傳到 GitLab 的 Registry 以便暫時儲存,當測試完成準備進入部屬,就要推送到生產環境的 Registry 。 在使用 Docker-in-Docker 的框架下,只需要把 Image 給 pull 下來 ,tag 修改一下就可以 push 了。
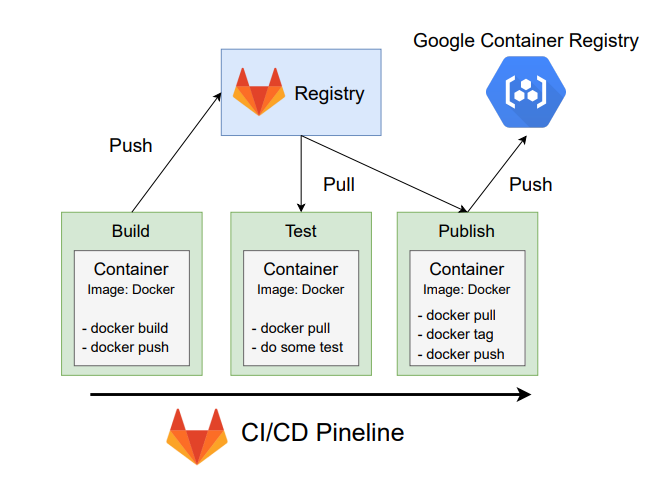
了解完上述概念, Publish 的 Job 寫法大致上會長這樣,唯一的問題就只剩要如何擁有 GCP 的權限了。
publish:
  stage: publish
  only:
    - master
  before_script:
    - # 登入到 GitLab 的 Container Registry
    - # 登入到 GCP 的 Container Registry
  script:
    - docker pull $CI_IMAGE
    - docker tag $CI_IMAGE $DEPLOY_IMAGE
    - docker push $DEPLOY_IMAGE
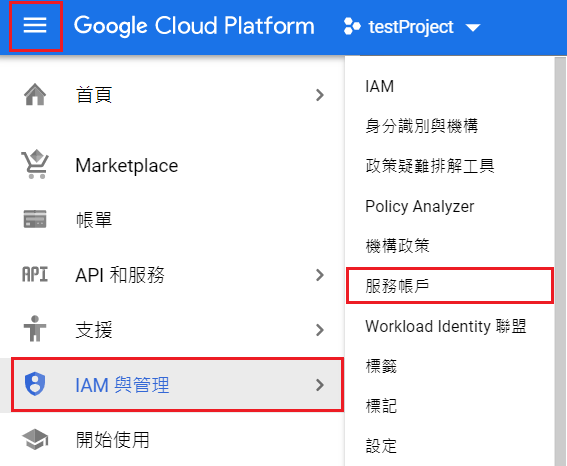
要讓 GitLab 有存取 GCP 的權限,可以建立 Identity and Access Management (IAM) 來讓我們管理對 GCP 服務資源的存取, 下面就來創建一個管理 GCP Storage 的 IAM 使用者。
進入 GCP 網站
點擊 console 左上角 -> IAM 與管理 -> 服務帳戶
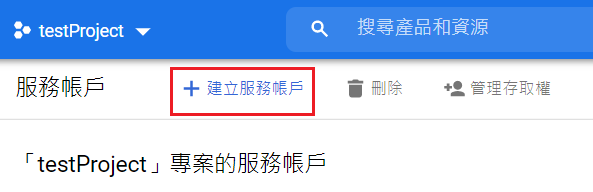
建立服務帳戶
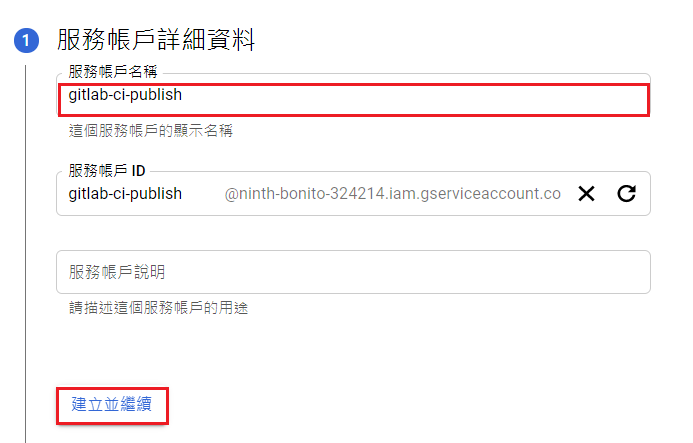
gitlab-ci-publish ,接著點選建立並繼續
請選擇角色,找到 Cloud Storage -> Storage 管理員 並選取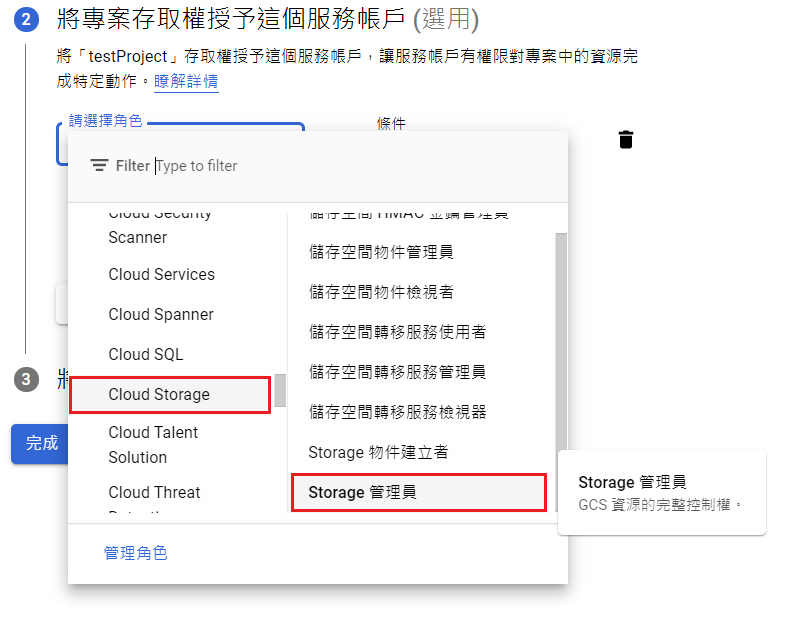
繼續,接著點選完成

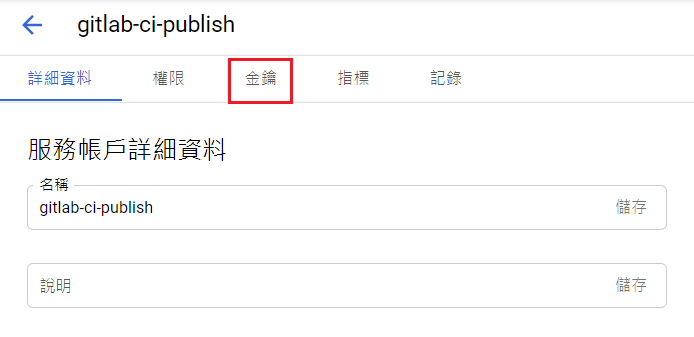
gitlab-ci-publish 的服務帳戶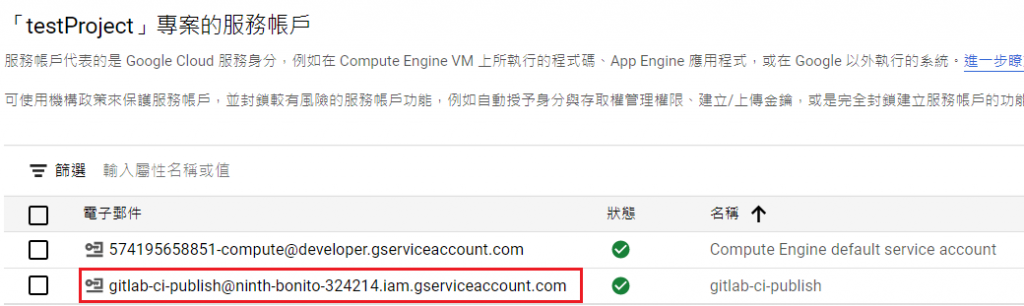
金鑰
新增金鑰 -> 建立新的金鑰
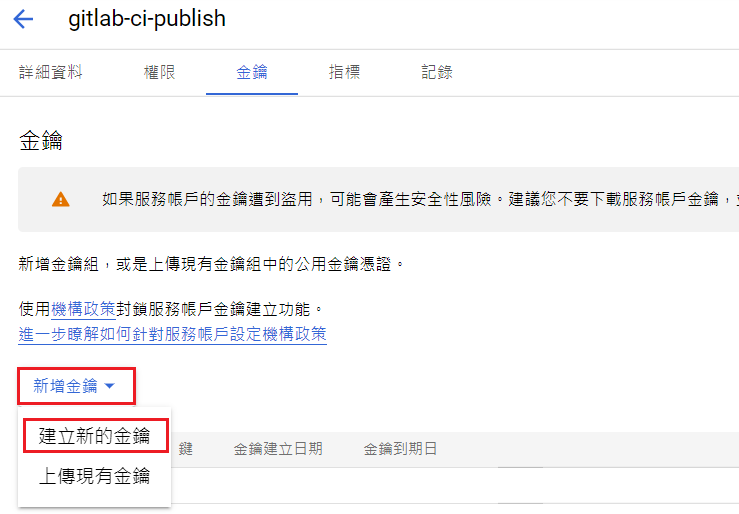
JSON,接著按下建立

金鑰就會下載到電腦裡,可用來存取雲端資源。
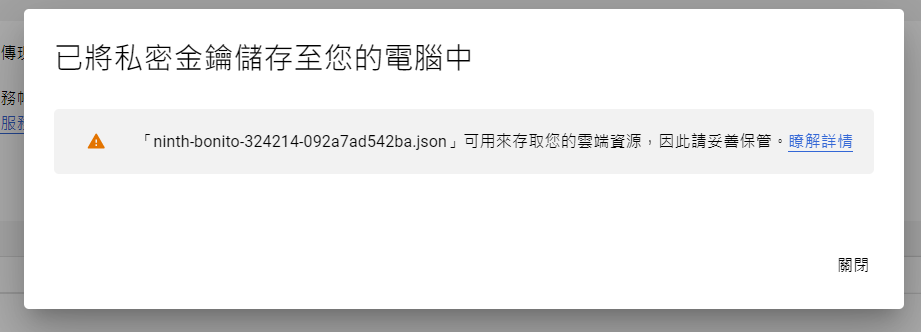
有了此金鑰等於擁有
gitlab-ci-publish服務帳戶的權限,不能隨意將金鑰外流。
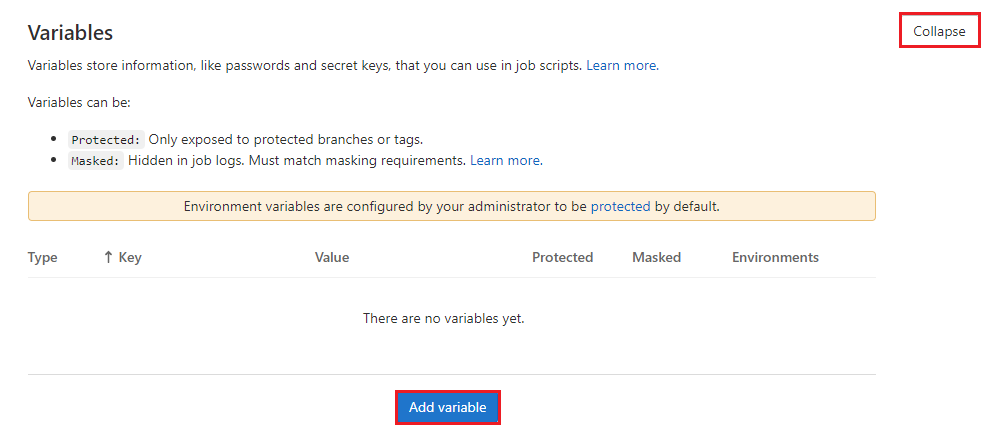
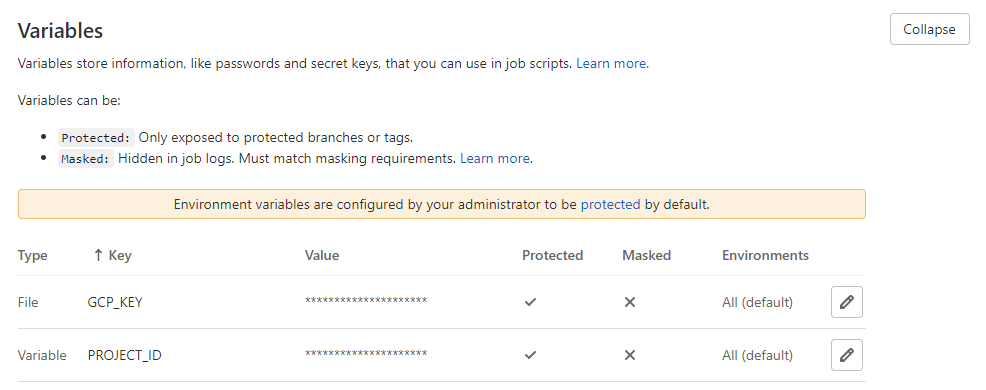
有了金鑰檔案之後,可以將其儲存到 GitLab 的環境變數,在執行 CI/CD Pipeline 時就能透過金鑰獲取 GCP 的權限,馬上來實際操作看看。
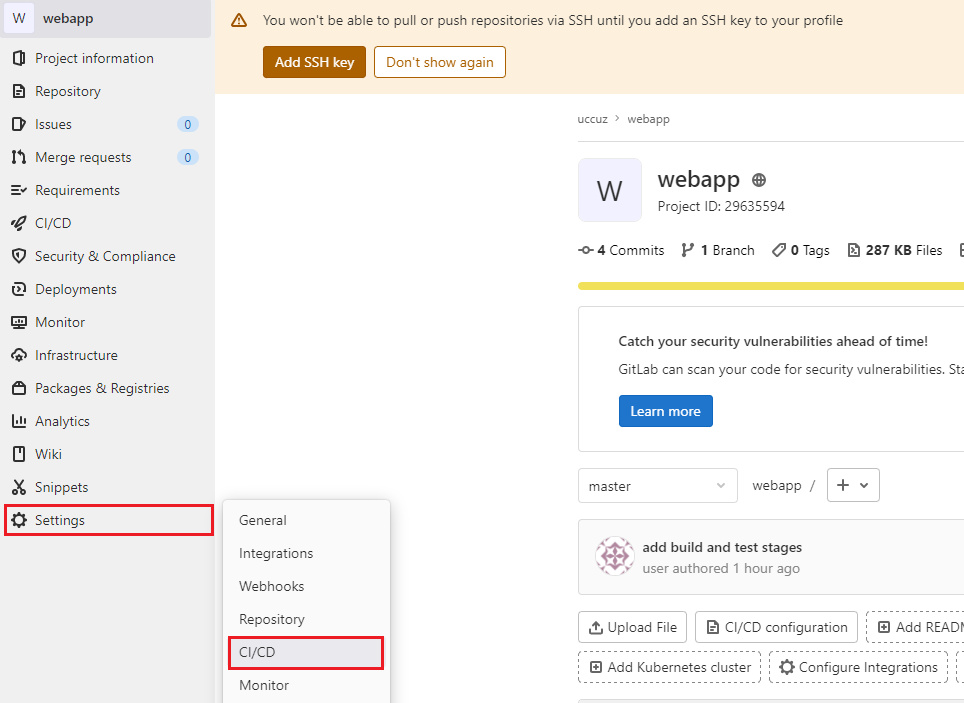
到 GitLab 網站,點擊之前建立的 web app 的 Repository
進入到 Repository 後,點擊 Settings -> CI/CD
Add variable
Add variable
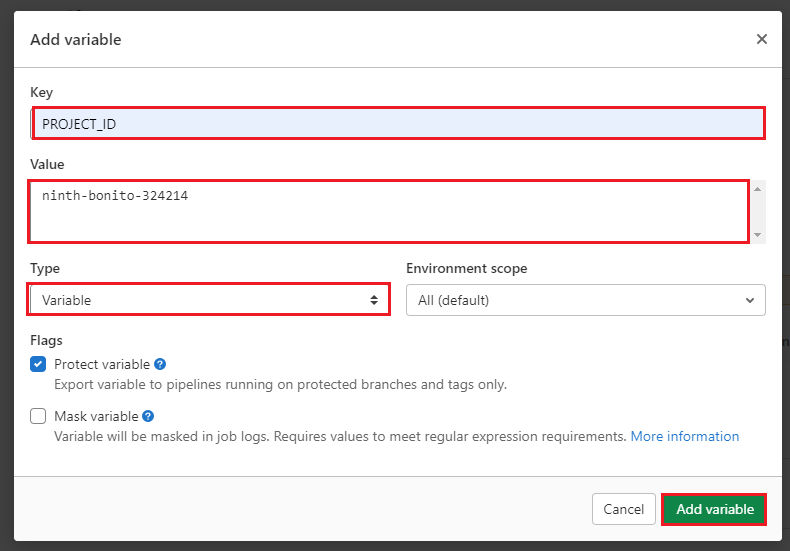
Add variable
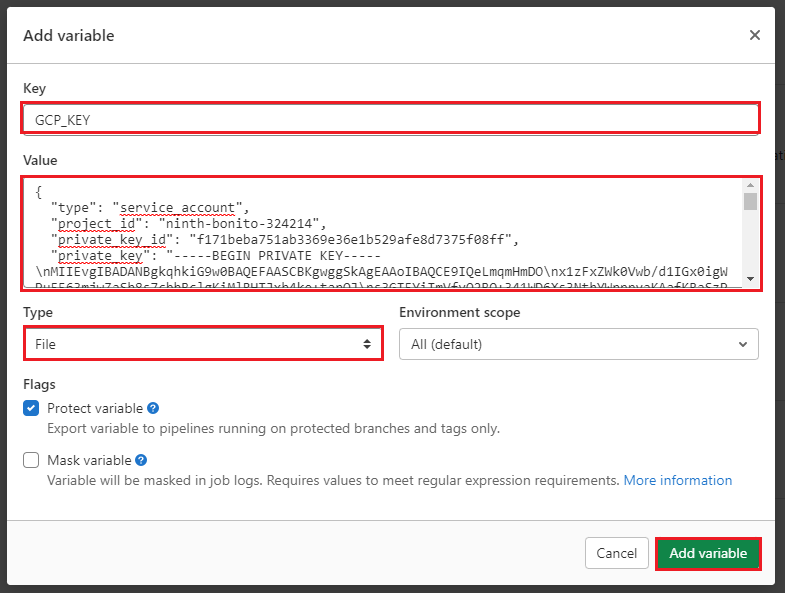
這樣 PROJECT_ID 以及 GCP_KEY 的環境變數就建置完成。
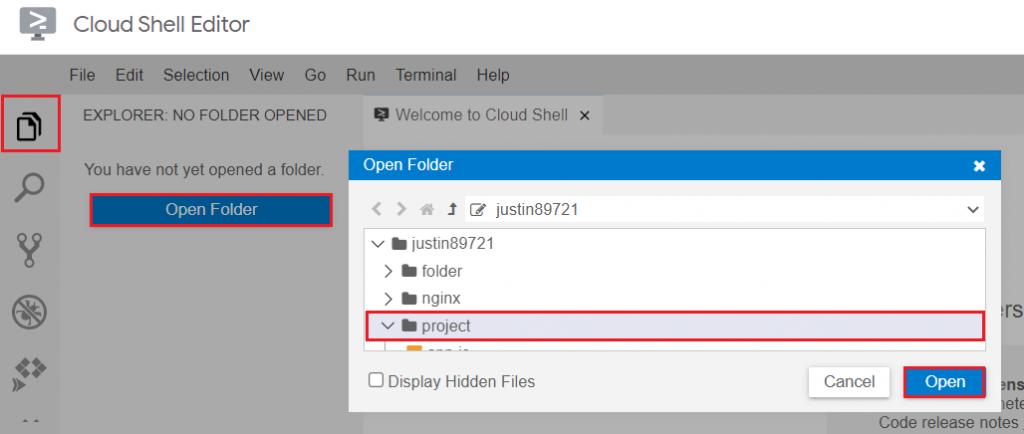
準備好金鑰,就可以建置 Publish Stage 了。
進入 Cloud Shell 網站
點擊左上 Explorer -> Open Folder -> 選擇 project 資料夾 -> Open
.gitlab-ci.yml 檔案並用以下內容取代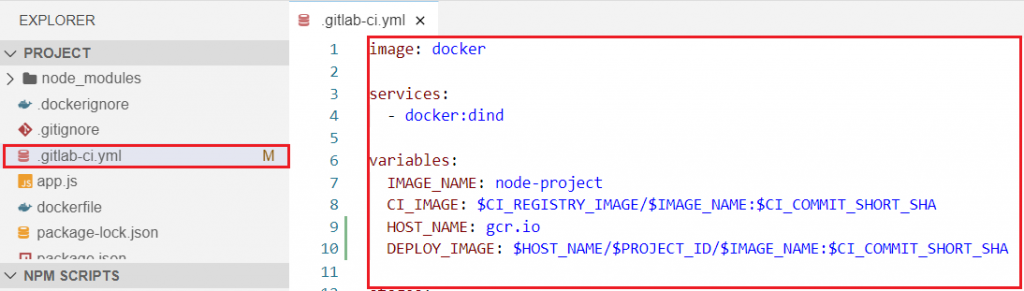
image: docker

services:
  - docker:dind

variables:
  IMAGE_NAME: node-project
  CI_IMAGE: $CI_REGISTRY_IMAGE/$IMAGE_NAME:$CI_COMMIT_SHORT_SHA
  HOST_NAME: gcr.io
  DEPLOY_IMAGE: $HOST_NAME/$PROJECT_ID/$IMAGE_NAME:$CI_COMMIT_SHORT_SHA

stages:
  - build
  - test
  - publish
  - stg-deploy
  - prod-deploy

build:
  stage: build
  only:
    - dev
    - master
  before_script:
    - docker login -u $CI_REGISTRY_USER -p $CI_REGISTRY_PASSWORD $CI_REGISTRY
  script:
    - docker build -t $CI_IMAGE .
    - docker push $CI_IMAGE

test:
  stage: test
  only:
    - dev
    - master
  before_script:
    - docker login -u $CI_REGISTRY_USER -p $CI_REGISTRY_PASSWORD $CI_REGISTRY
  script:
    - docker pull $CI_IMAGE
    - docker run $CI_IMAGE echo "run test script here"

publish:
  stage: publish
  only:
    - master
  before_script:
    - docker login -u $CI_REGISTRY_USER -p $CI_REGISTRY_PASSWORD $CI_REGISTRY
    - cat $GCP_KEY | docker login -u _json_key --password-stdin https://$HOST_NAME
  script:
    - docker pull $CI_IMAGE
    - docker tag $CI_IMAGE $DEPLOY_IMAGE
    - docker push $DEPLOY_IMAGE

stg-deploy:
  stage: stg-deploy
  only:
    - master
  script:
    - echo "Staging deploy job"

prod-deploy:
  stage: prod-deploy
  only:
    - master
  script:
    - echo "Production deploy job"
  when: manual
cd ~/project
git add .
git commit -m "add publish stage"
git push origin master
Enter
Username for 'https://gitlab.com':
Password for 'https://user@gitlab.com':
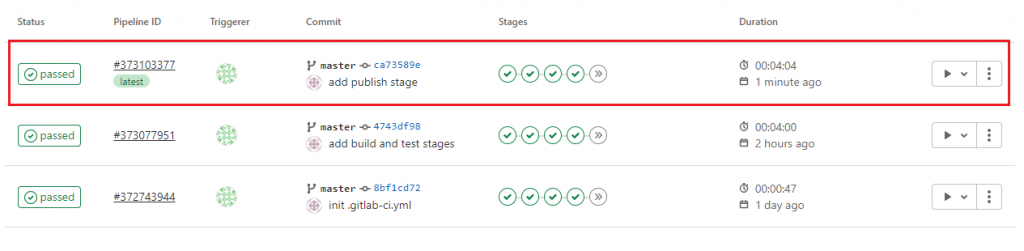
CI/CD -> Pipelines
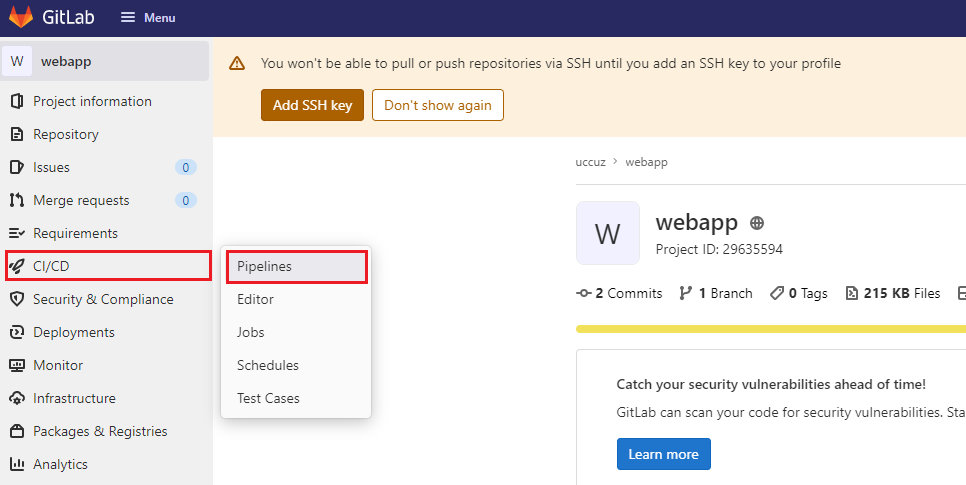
會看到新的 CI/CD Pipeline ,等待一段時間直到運行成功。
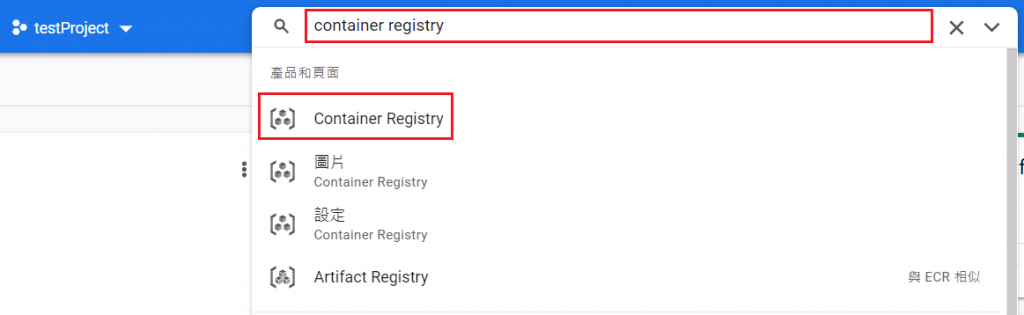
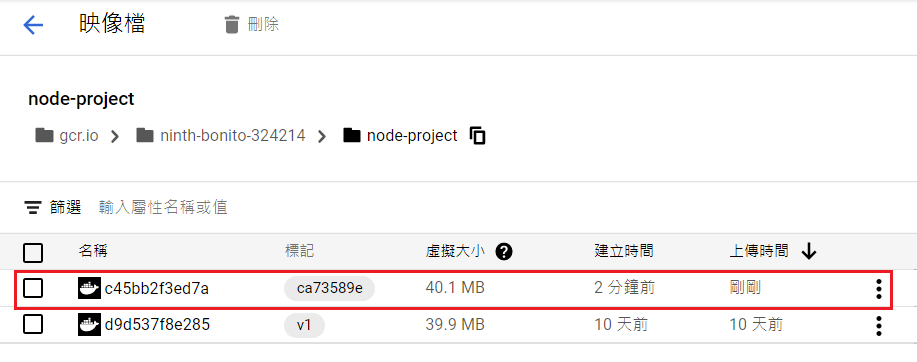
Container Registry,找到Container Registry
node-project
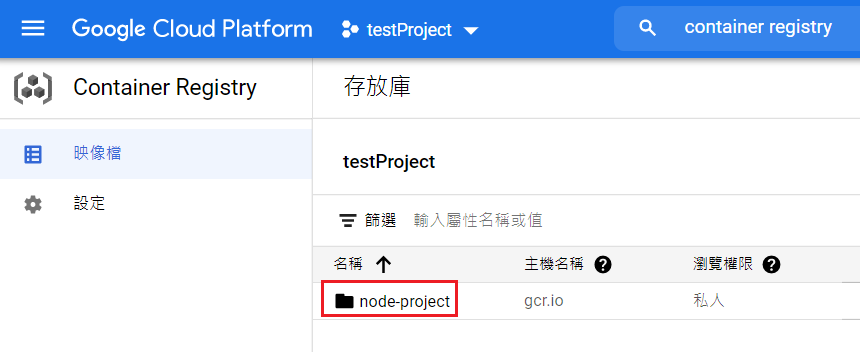
裡面出現 CI/CD Pipeline 建置的 Image ,代表 Publish Stage 執行成功。
今天學會如何將 Image 推送到 Google Container Registry ,若是要 Push 到 Docker Hub,方法也是差不多,只要建立 Docker Hub 的 Access Tokens,並將其放入到環境變數,就可以用同樣步驟上傳 Image。

 iThome鐵人賽