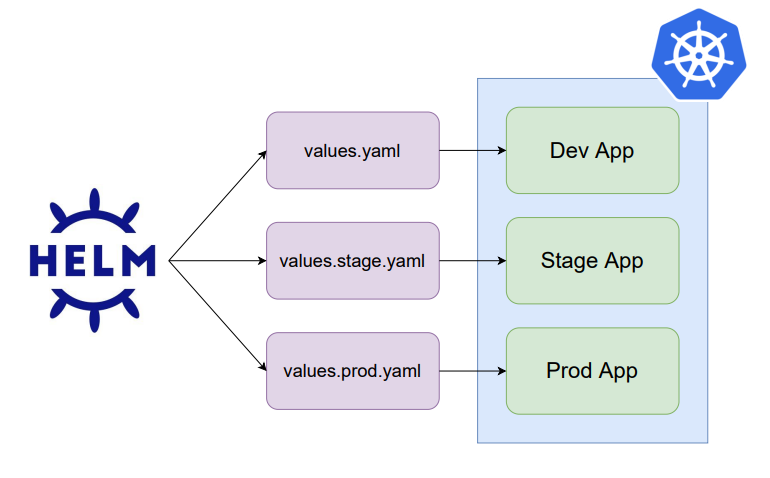
在 Day15 的教學裡,我們透過 Helm Chart 在 Kubernetes 安裝應用程式。在實際的軟體開發過程中,同樣的程式我們會分成 Dev、Stage、Prod 三套環境,分別提供撰寫、測試、部屬功能,每個環境的配置如 Replica 、 Image Tag 也會有些許不同,若想利用同個 Helm Chart 創建不同配置的環境,可以建立多個 values 檔案來達成需求。
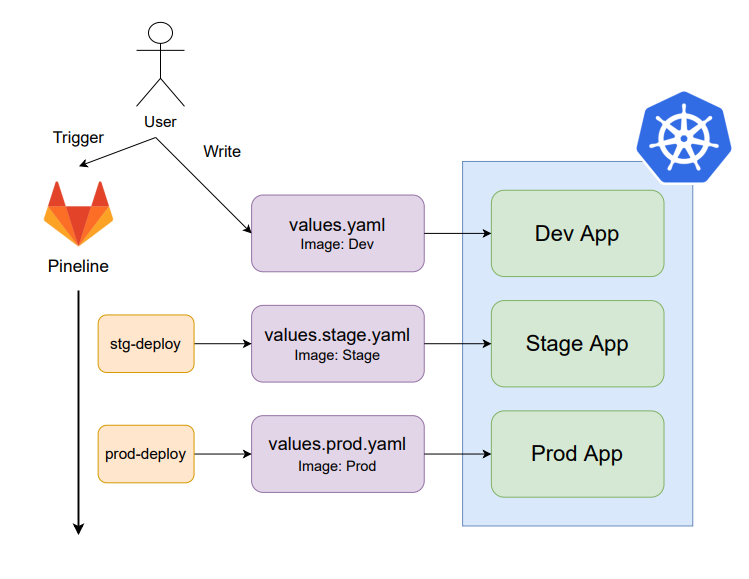
有了多個 values 檔案,GitLabCI 更新應用程式的方式就是修改對應環境的 values 檔案,將裡面的 Image Tag 修改到正確版本,透過 GitOps 的方式,就可以將應用程式同步到新的版本。
今天的目標是完成 Deploy Stage ,有兩個任務需要完成
進入 Cloud Shell 網站,點擊終端機輸入指令
建立 values.stage.yaml 及 values.production.yaml 檔案
cd ~/webapp
cp values.yaml values.stage.yaml
cp values.yaml values.production.yaml
ls
(輸出結果)
charts Chart.yaml templates values.production.yaml values.stage.yaml values.yaml
git add .
git commit -m "add stage and production values.yaml"
git push origin master
Enter
Username for 'https://gitlab.com':
Password for 'https://user@gitlab.com':
values 檔案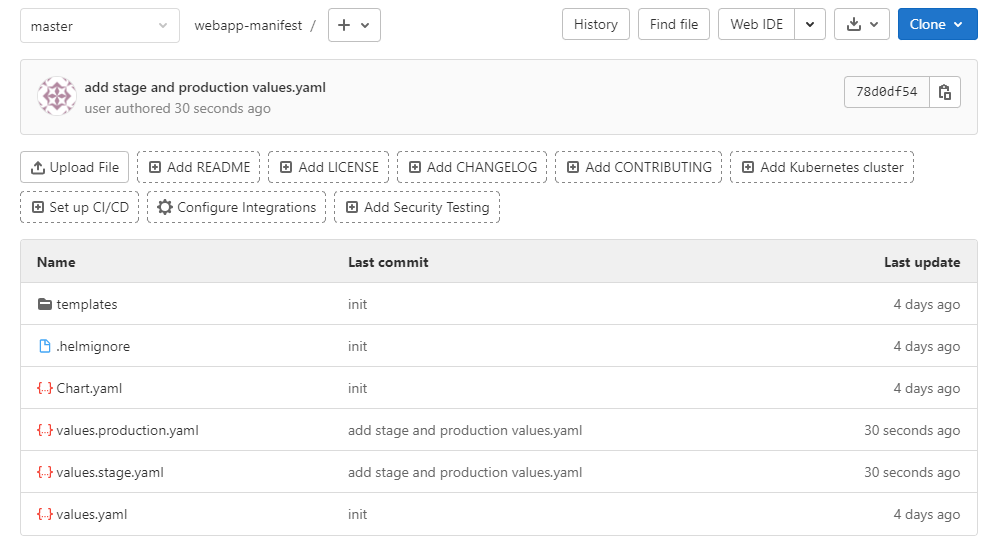
要讓 GitLabCI 可以更新 Values 檔案,需要有存取 Git Repository 的權限,可以藉由 Access Token 的方式,這裡就來介紹如何建置。
輸入以下資訊,完成後點擊 Create personal access token
Token name : GitLabCIread_repository : 打勾write_repository : 打勾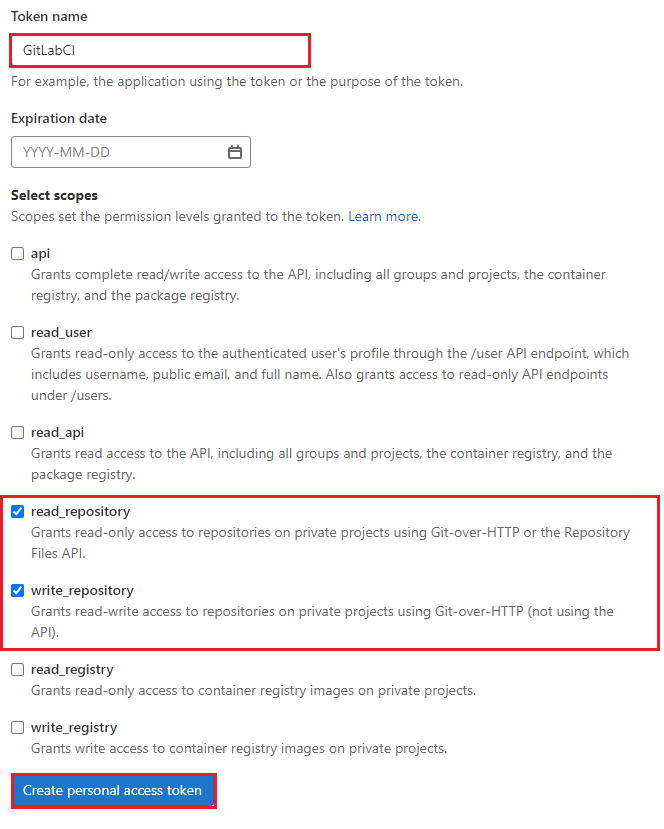
複製 Token
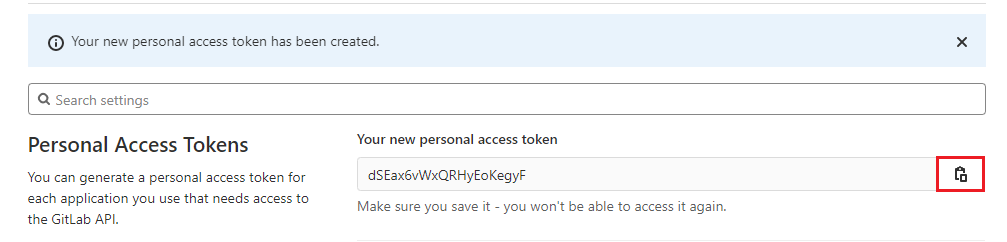
請確保 Token 有複製成功,重新整理後就不會再顯示出來了。
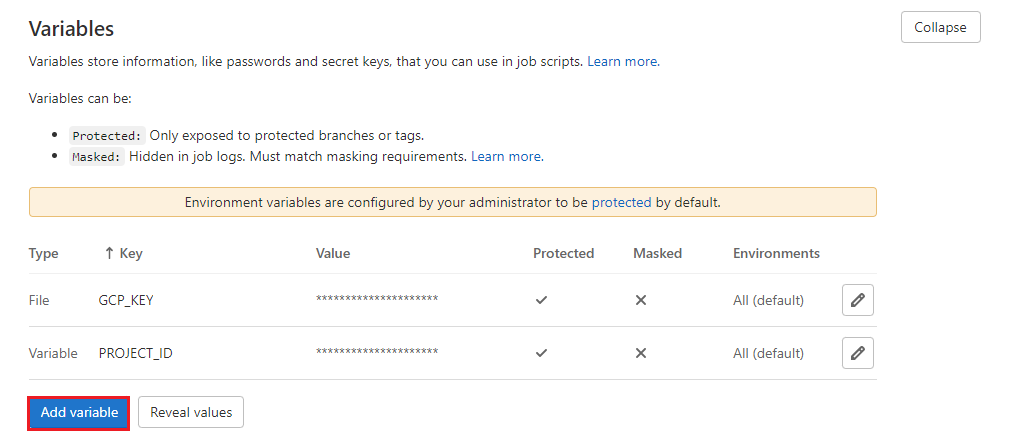
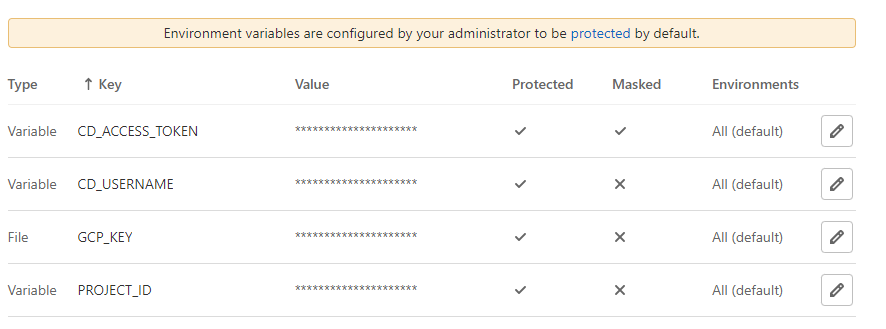
得到 Access Token 後,要把它塞入 GitLabCI 的環境變數裡,這樣就有 Git Repository 的 Read 、 Write 權限。
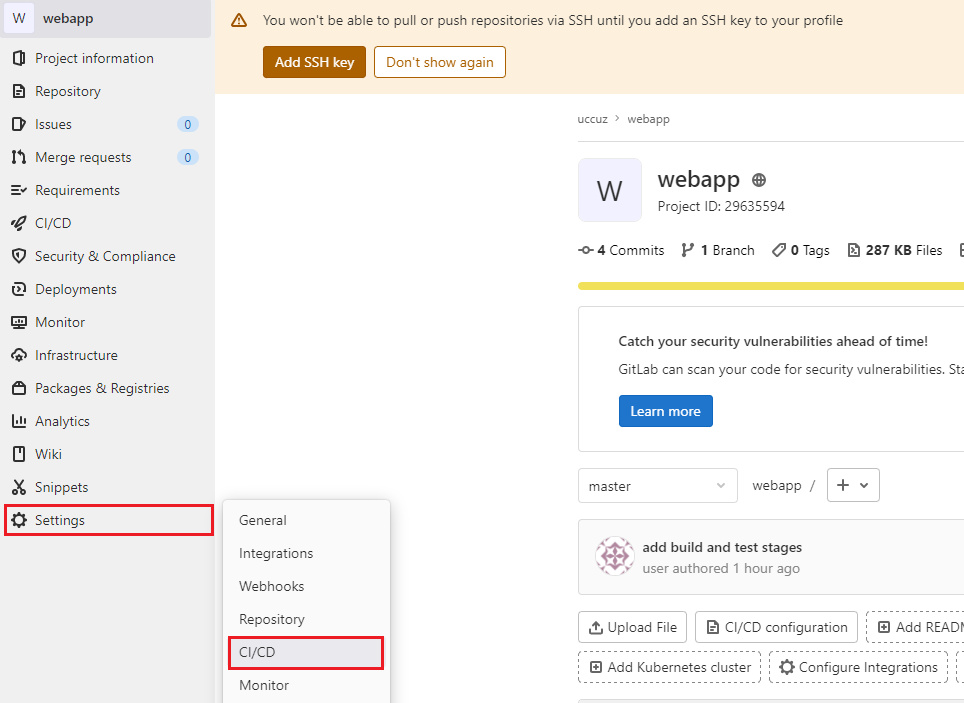
到 GitLab 網站,點擊之前建立的 web app 的 Repository
進入到 Repository 後,點擊 Settings -> CI/CD
Add variable
Add variable
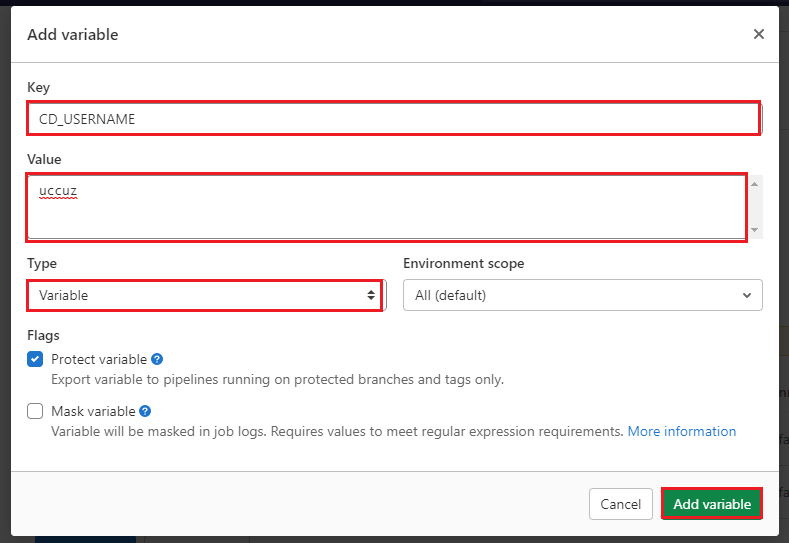
Add variable
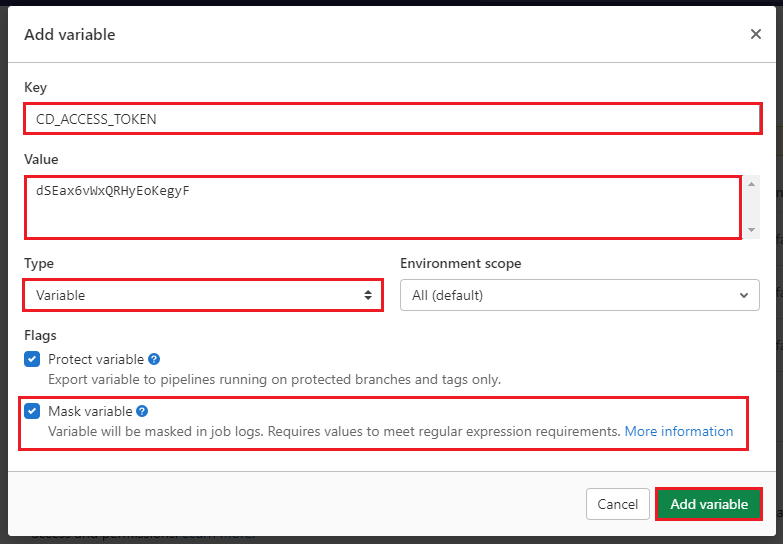
這樣 CD_USERNAME 以及 CD_PUSH_TOKEN 的環境變數就建置完成。
前置工作準備完成,就可以建立 Deploy Stage 了。
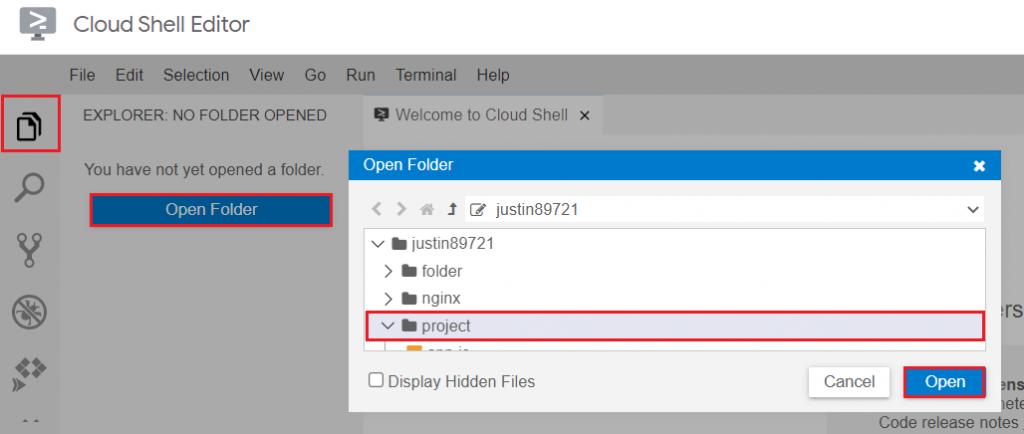
左上 Explorer -> Open Folder -> 選擇 project 資料夾 -> Open
.gitlab-ci.yml 檔案並用以下內容取代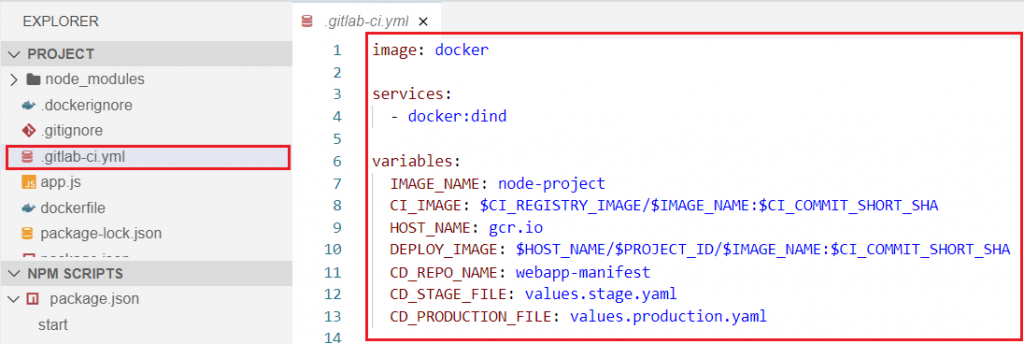
image: docker

services:
  - docker:dind

variables:
  IMAGE_NAME: node-project
  CI_IMAGE: $CI_REGISTRY_IMAGE/$IMAGE_NAME:$CI_COMMIT_SHORT_SHA
  HOST_NAME: gcr.io
  DEPLOY_IMAGE: $HOST_NAME/$PROJECT_ID/$IMAGE_NAME:$CI_COMMIT_SHORT_SHA
  CD_REPO_NAME: webapp-manifest
  CD_STAGE_FILE: values.stage.yaml
  CD_PRODUCTION_FILE: values.production.yaml

stages:
  - build
  - test
  - publish
  - stg-deploy
  - prod-deploy

build:
  stage: build
  only:
    - dev
    - master
  before_script:
    - docker login -u $CI_REGISTRY_USER -p $CI_REGISTRY_PASSWORD $CI_REGISTRY
  script:
    - docker build -t $CI_IMAGE .
    - docker push $CI_IMAGE

test:
  stage: test
  only:
    - dev
    - master
  before_script:
    - docker login -u $CI_REGISTRY_USER -p $CI_REGISTRY_PASSWORD $CI_REGISTRY
  script:
    - docker pull $CI_IMAGE
    - docker run $CI_IMAGE echo "run test script here"

publish:
  stage: publish
  only:
    - master
  before_script:
    - docker login -u $CI_REGISTRY_USER -p $CI_REGISTRY_PASSWORD $CI_REGISTRY
    - cat $GCP_KEY | docker login -u _json_key --password-stdin https://$HOST_NAME
  script:
    - docker pull $CI_IMAGE
    - docker tag $CI_IMAGE $DEPLOY_IMAGE
    - docker push $DEPLOY_IMAGE

stg-deploy:
  stage: stg-deploy
  image: alpine
  before_script:
  only:
    - master
  before_script:
    - apk add --no-cache git yq=4.6.3-r2
    - git config --global user.name GitLabCI
    - git config --global user.email "gitlab@gitlab.com"
    - git clone --single-branch --branch master https://$CD_USERNAME:$CD_ACCESS_TOKEN@gitlab.com/$CD_USERNAME/$CD_REPO_NAME.git
  script:
    - cd $CD_REPO_NAME
    - yq eval -i ".app.image.tag = \"$CI_COMMIT_SHORT_SHA\"" $CD_STAGE_FILE
    - git commit -am "stage image update"
    - git push origin master

prod-deploy:
  stage: prod-deploy
  image: alpine
  before_script:
  only:
    - master
  before_script:
    - apk add --no-cache git yq=4.6.3-r2
    - git config --global user.name GitLabCI
    - git config --global user.email "gitlab@gitlab.com"
    - git clone --single-branch --branch master https://$CD_USERNAME:$CD_ACCESS_TOKEN@gitlab.com/$CD_USERNAME/$CD_REPO_NAME.git
  script:
    - cd $CD_REPO_NAME
    - yq eval -i ".app.image.tag = \"$CI_COMMIT_SHORT_SHA\"" $CD_PRODUCTION_FILE
    - git commit -am "production image update"
    - git push origin master
  when: manual
Deploy Stage 目標是去更新 Manifest 裡 Values 檔案所設置 Image Tag ,作法這裡簡單介紹一下。
image: alpine
before_script
script
cd ~/project
git add .
git commit -m "add stg-deploy and prod-deploy stage"
git push origin master
Enter
Username for 'https://gitlab.com':
Password for 'https://user@gitlab.com':
CI/CD -> Pipelines

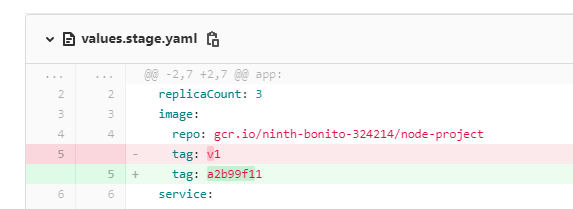
等待 Pipeline 執行完成後,到 Manifest Repo 查看,可以看到新的 Commmit 紀錄。

在 Commit 裡可以看到成功修改了 Image Tag。
經過好幾天的努力,終於建立好 GitLabCI 流水線了,最後來統整一下到底 GitLabCI 做了哪些事情
回到一開始設計的 DevOps 架構圖,是不是就能了解各步驟的詳細作法了。

明天開始就會介紹 ArgoCD,完成 GitOps 架構的最後一塊拼圖。


 iThome鐵人賽