蛤?重建 VPC?
幹嘛不調整好現有的架構就好了?
AWS 官方文件有提到,
官方預設都是 172.31.0.0/16,
Internet Gateway 預設是 0.0.0.0/0
所以只要有配置公有 IP,
就可以直接連外,
但現實生活中我們可能會遇到幾個問題,
公司內部網路配置不合規或是互相衝突,
與其他使用中的 AWS Account 配置衝突,
因此在不同的 VPC 互相串接時,
就可能因為網路配置,
導致路由不知道該怎麼導...(官方文件也有寫到 VPC 互聯的部分),
就算沒有 VPC 互聯的需求,
目前我們使用預設配置會涵蓋到 172.31.255.255,
比較好的拆法,
是至少將網段拆成 public 和 private,
private 網段 0.0.0.0 配置 nat gateway,
這樣 ssh 進去主機後既可以連外自己上 patch,
外部也連不進來,
不用擔心外部可以連到 private 網段的部分,
當然我們可以把 ap-northeast-1d 配置成公開網段,
其他都是配私有網段,
但...其實砍網段和砍 VPC 距離差不多了,
既然都痛一次,
要將資源搬移、網段重建,
不如乾脆把 VPC 砍掉,
重新配置 VPC 和 整個網段的 CIDR,
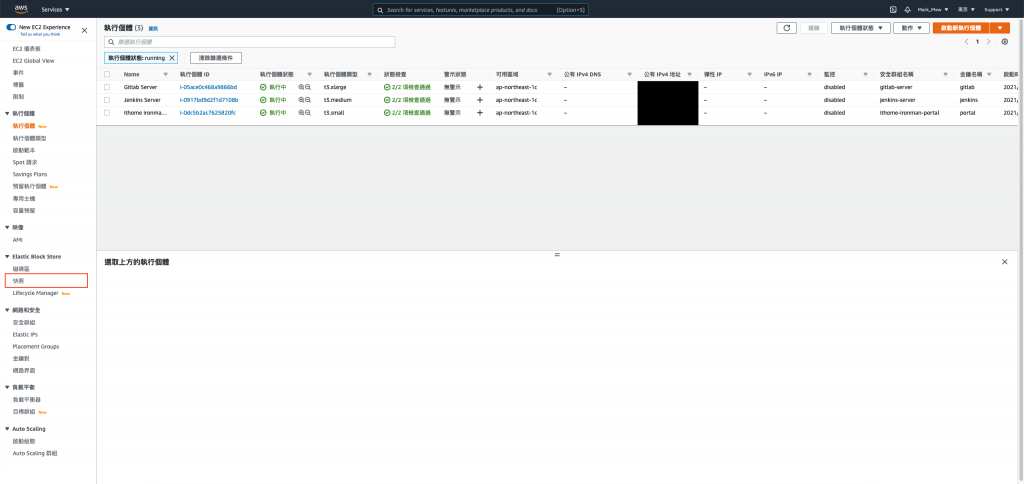
如果 AWS 使用的資源不多,
則可以將 EC2 take snapshot 資料庫備份以後就開始砍了,
那我們就開始吧。
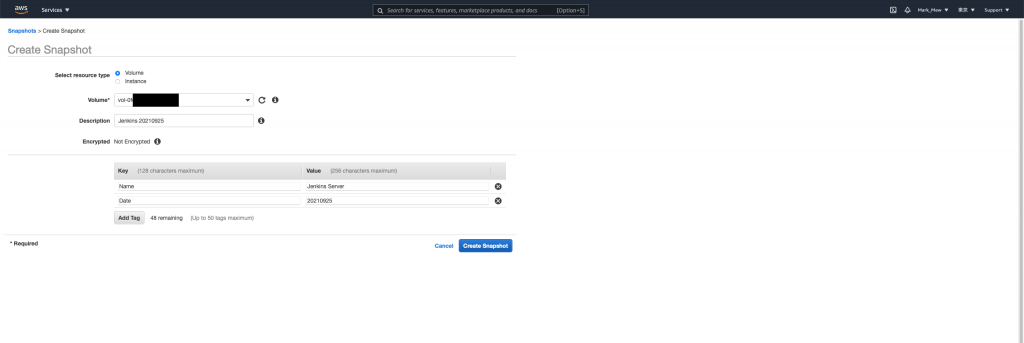
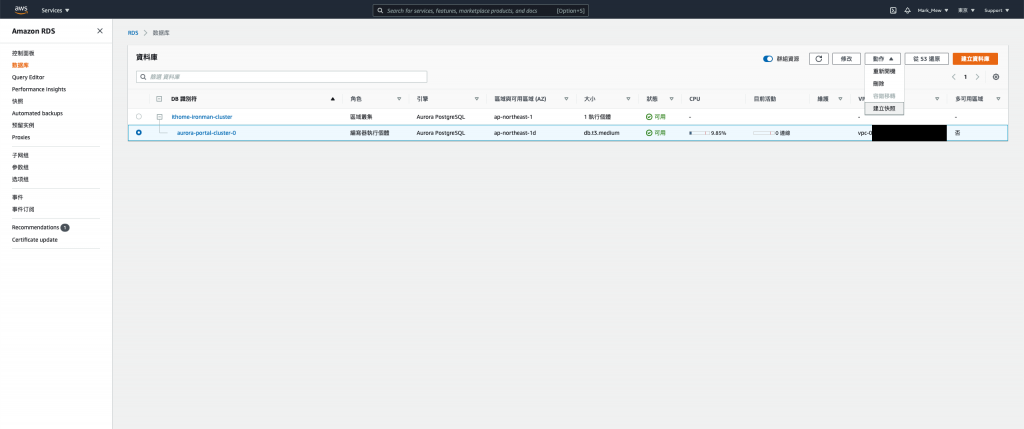
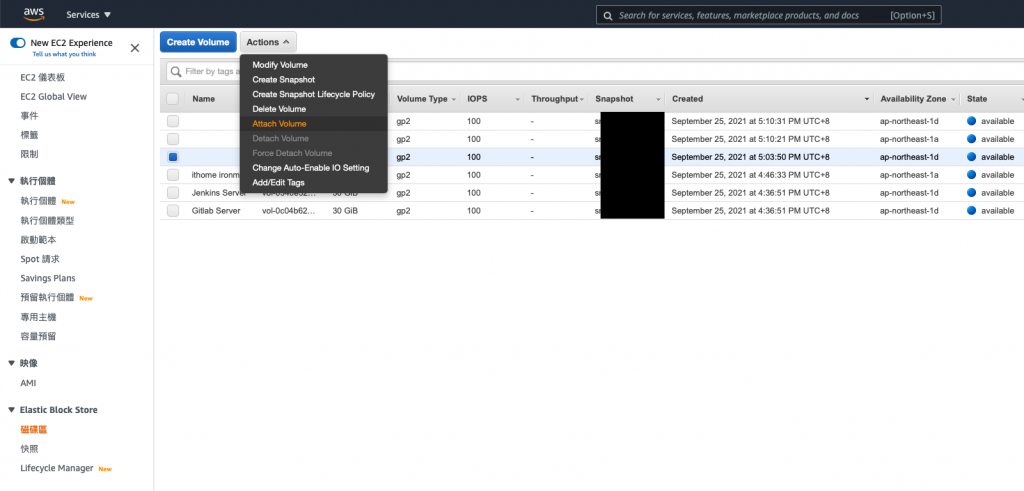
因為等等就要殺掉了
因此我們這次透過 AWS Cloud Console 去操作
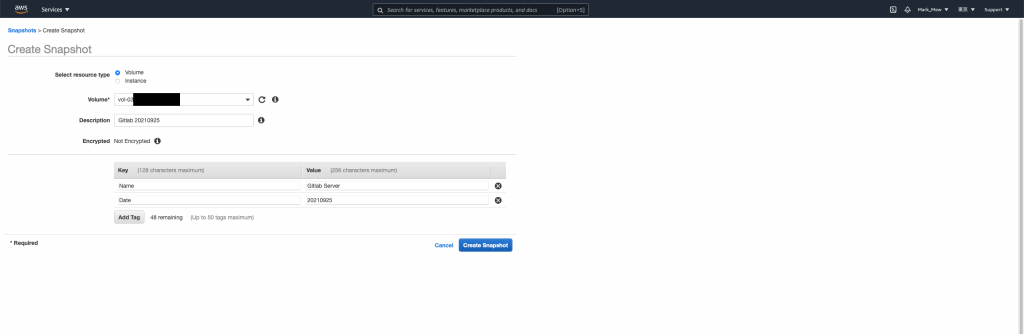
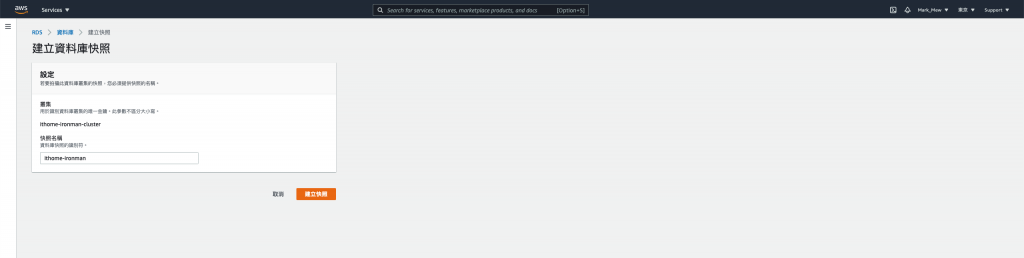
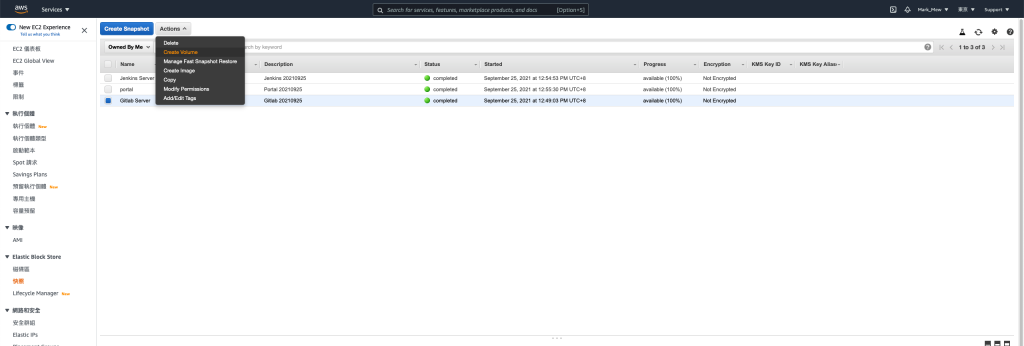
點選「Create Snapshot」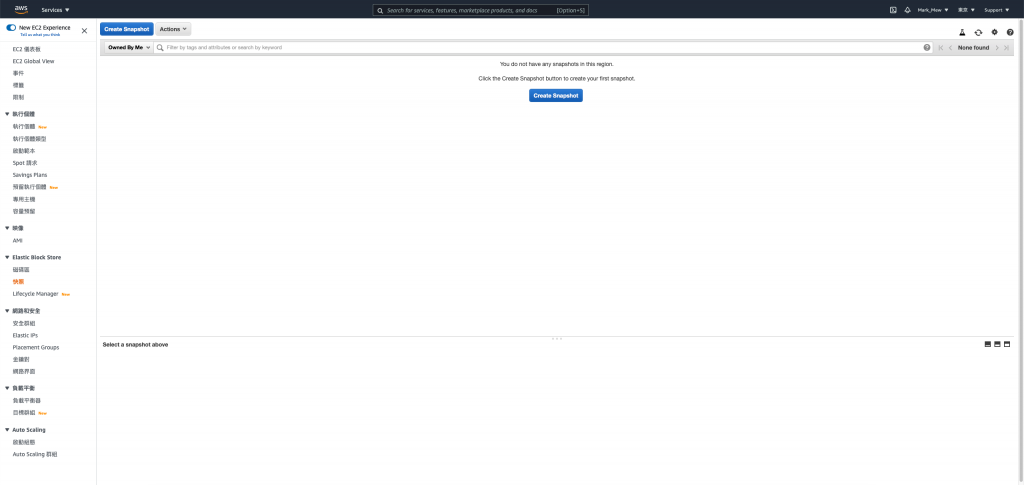
這邊說明一下備份 Instance 和 Volume 的差別
在 EC2 只有掛載一個 Volume 的狀況下
選哪一個沒有差異
如果 Instance 有掛載多顆 Volume
則備份 Instance 會將掛載的 Volume 全部備份
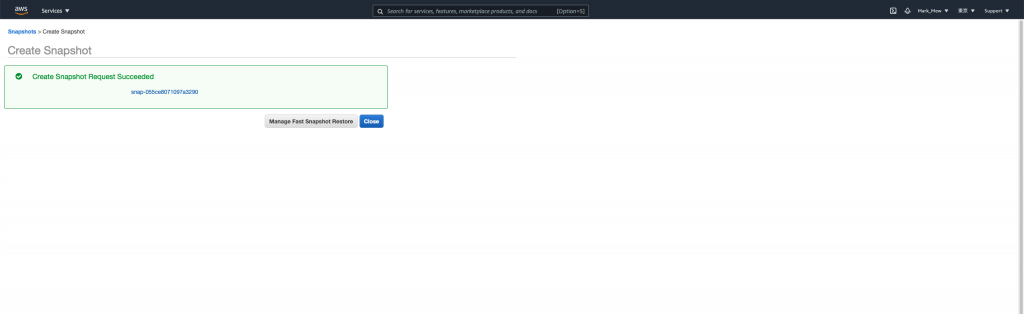
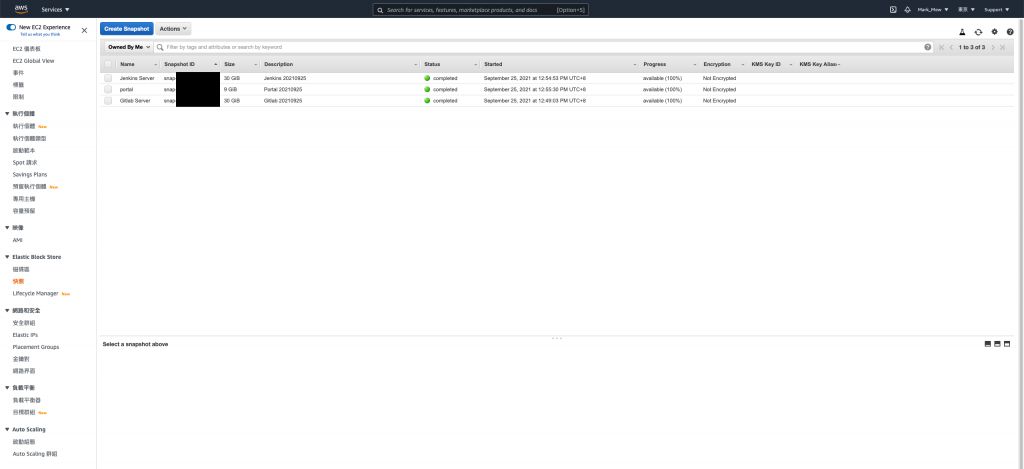
最後請直接關閉就好
千!萬!不!要!點!按! Manage Fast Restore
編輯裡面的任何屬性
都會造成鉅額的額外支出
將除了 kms、key pair、iam user、code deploy、rds parameter group 和 S3 bucket 以外的程式碼都註解
註解完後
terraform apply
進入 vpc 後選擇刪除 vpc
輸入「delete default vpc」驗證訊息以後即可刪除 default vpc
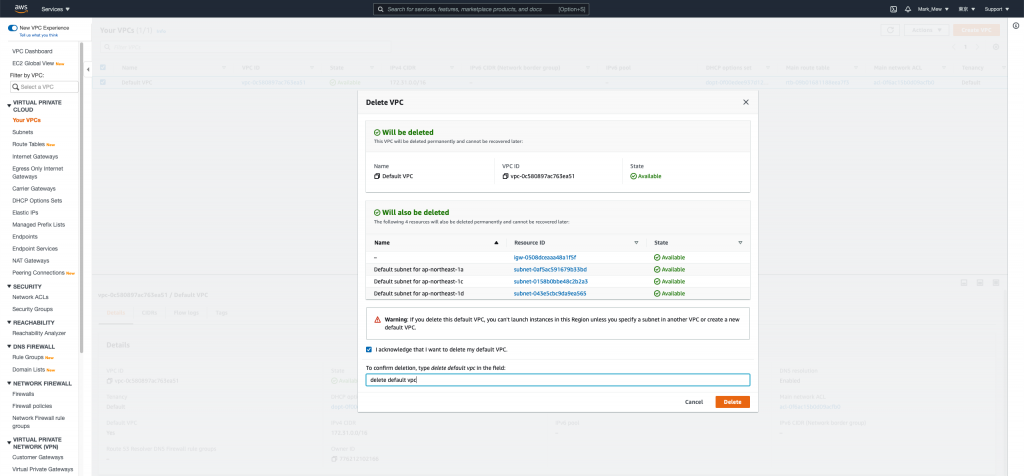
刪除完後
可以看到從 vpc、subnet到 internet gateway 都一併被刪除了我們就此躺平可以準備跑路了
新的 VPC 我們假設 172.31.0.0 ~ 172.31.15.255
已經被別的 VPC 佔用
為了使管理方便
因此 CIDR 配置 "172.31.16.0/20"
至於 CIDR 詳細代表的區間
建議大家可以透過 CIDR 計算機查看
新的 vpc 我們打算配置 "172.31.16.0/20"
有 4096 個 ip 可以用
其中 1a 我們配置 2048
一半公開網段、一半私有網段
1c 和 1d 共 2048
也是一半公開一半私有
路由的部分
我們直接透過 public 網段我是用 internet gateway 綁 0.0.0.0
這樣在建立時有配置 ip 就可以連接外網
而 private 網段則是用 nat gateway 綁定 0.0.0.0
這樣外部無法直接存取到內網
但是內網存取外網可以透過 nat gateway
廢話不多說,我們直接上 code
main.tf
resource "aws_vpc" "stage" {
    cidr_block = "172.31.16.0/20"
    tags       = {
        "Name" = "Stage VPC"
    }
}

resource "aws_subnet" "public_a" {
    vpc_id            = aws_vpc.stage.id
    cidr_block        = "172.31.16.0/22"
    availability_zone = "ap-northeast-1a"
    tags              = {
        "Name"        = "Stage public subnet a"
        "Environment" = "Stage"
        "Usage"       = "public"
        "Zone"        = "ap-northeast-1a"
        "Creator"     = "Terraform"
    }
}

resource "aws_subnet" "public_c" {
    vpc_id            = aws_vpc.stage.id
    cidr_block        = "172.31.20.0/23"
    availability_zone = "ap-northeast-1c"
    tags              = {
        "Name"        = "Stage public subnet c"
        "Environment" = "Stage"
        "Usage"       = "public"
        "Zone"        = "ap-northeast-1c"
        "Creator"     = "Terraform"
    }
}

resource "aws_subnet" "public_d" {
    vpc_id            = aws_vpc.stage.id
    cidr_block        = "172.31.22.0/23"
    availability_zone = "ap-northeast-1d"
    tags              = {
        "Name"        = "Stage public subnet d"
        "Environment" = "Stage"
        "Usage"       = "public"
        "Zone"        = "ap-northeast-1d"
        "Creator"     = "Terraform"
    }
}

resource "aws_subnet" "private_a" {
    vpc_id            = aws_vpc.stage.id
    cidr_block        = "172.31.24.0/22"
    availability_zone = "ap-northeast-1a"
    tags              = {
        "Name"        = "Stage private subnet a"
        "Environment" = "Stage"
        "Usage"       = "private"
        "Zone"        = "ap-northeast-1a"
        "Creator"     = "Terraform"
    }
}

resource "aws_subnet" "private_c" {
    vpc_id            = aws_vpc.stage.id
    cidr_block        = "172.31.28.0/23"
    availability_zone = "ap-northeast-1c"
    tags              = {
        "Name"        = "Stage private subnet c"
        "Environment" = "Stage"
        "Usage"       = "private"
        "Zone"        = "ap-northeast-1c"
        "Creator"     = "Terraform"
    }
}

resource "aws_subnet" "private_d" {
    vpc_id            = aws_vpc.stage.id
    cidr_block        = "172.31.30.0/23"
    availability_zone = "ap-northeast-1d"
    tags              = {
        "Name"        = "Stage private subnet d"
        "Environment" = "Stage"
        "Usage"       = "private"
        "Zone"        = "ap-northeast-1d"
        "Creator"     = "Terraform"
    }
}

resource "aws_internet_gateway" "stage" {
    vpc_id = aws_vpc.stage.id
    tags   = {
      "Name" = "Stage internet gateway"
    }
}

resource "aws_route_table" "stage_public" {
    depends_on = [aws_vpc.stage, aws_internet_gateway.stage]
    vpc_id = aws_vpc.stage.id
    route = [
        {
            carrier_gateway_id         = ""
            cidr_block                 = "0.0.0.0/0"
            destination_prefix_list_id = ""
            egress_only_gateway_id     = ""
            gateway_id                 = aws_internet_gateway.stage.id
            instance_id                = ""
            ipv6_cidr_block            = ""
            local_gateway_id           = ""
            nat_gateway_id             = ""
            network_interface_id       = ""
            transit_gateway_id         = ""
            vpc_endpoint_id            = ""
            vpc_peering_connection_id  = ""
        }
    ]
}

resource "aws_route_table_association" "stg_public_a" {
    depends_on     = [aws_subnet.public_a, aws_route_table.stage_public]
    subnet_id      = aws_subnet.public_a.id
    route_table_id = aws_route_table.stage_public.id
}

resource "aws_route_table_association" "stg_public_c" {
    depends_on     = [aws_subnet.public_c, aws_route_table.stage_public]
    subnet_id      = aws_subnet.public_c.id
    route_table_id = aws_route_table.stage_public.id
}

resource "aws_route_table_association" "stg_public_d" {
    depends_on     = [aws_subnet.public_d, aws_route_table.stage_public]
    subnet_id      = aws_subnet.public_d.id
    route_table_id = aws_route_table.stage_public.id
}

resource "aws_eip" "stg_ngw" {
    network_border_group = "ap-northeast-1"
    public_ipv4_pool     = "amazon"
}

resource "aws_nat_gateway" "stg" {
    depends_on = [ aws_eip.stg_ngw, aws_subnet.public_a ]
    allocation_id = aws_eip.stg_ngw.id
    subnet_id = aws_subnet.public_a.id
}

resource "aws_route_table_association" "stg_private_a" {
    subnet_id      = aws_subnet.private_a.id
    route_table_id = aws_vpc.stage.default_route_table_id
}

resource "aws_route_table_association" "stg_private_c" {
    subnet_id      = aws_subnet.private_c.id
    route_table_id = aws_vpc.stage.default_route_table_id
}

resource "aws_route_table_association" "stg_private_d" {
    subnet_id      = aws_subnet.private_d.id
    route_table_id = aws_vpc.stage.default_route_table_id
}

resource "aws_route" "stg_private_outbound" {
    route_table_id = aws_vpc.stage.default_route_table_id
    destination_cidr_block = "0.0.0.0/0"
    nat_gateway_id = aws_nat_gateway.stg.id
}
在撰寫 aws_route_table stage_public 區塊時
要特別注意
裡面的欄位很多
而且每個都要定義到
這裡的設定有點像是資料庫的貧血模型(Weak Entity)
只有在欄位有的時候
才會去找相對應的欄位建立關聯
執行配置
terraform apply
我們就可以看到我們配置好的基礎設施
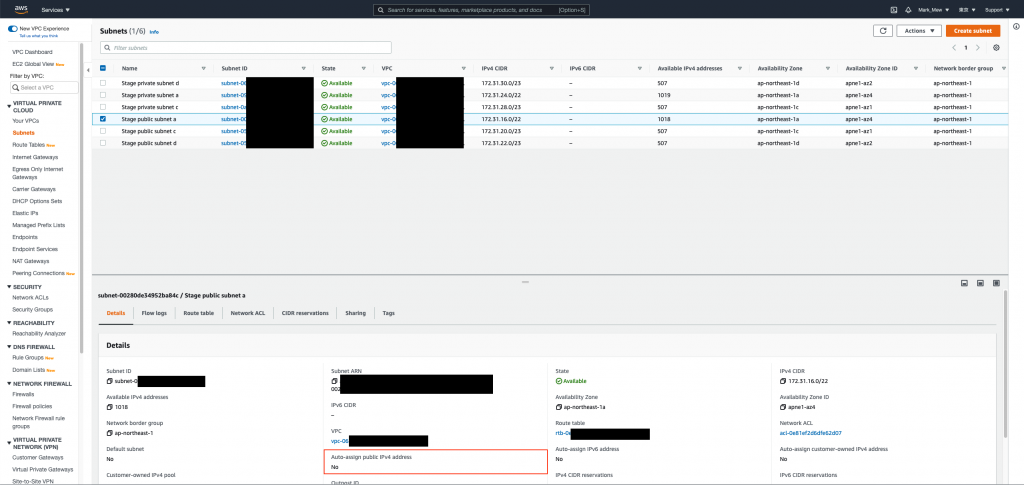
一開始我們只根據 vpc id 來查找
因為 default 沒有分網段沒差
但是既然重建了當然要把網段拆分好
並且將下 tag 來方便查詢
現在我們就可以根據使用方式來找公開網段和私有網段
data "aws_subnet_ids" "private_subnet_ids" {
    vpc_id = aws_vpc.stage.id
    tags   = {
      "Usage" = "private"
    }
}

data "aws_subnet_ids" "public_subnet_ids" {
    vpc_id = aws_vpc.stage.id
    tags   = {
      "Usage" = "public"
    }
}
既然我們已經可以預想 CI/CD 會放在內網
那我們就可以把 outbound 全開
inbound 只鎖特定 port 即可
stage/main.tf
gitlab
resource "aws_security_group" "gitlab" {
    name        = "gitlab-server"
    description = "It used for gitlab server."
    vpc_id      = aws_vpc.stage.id
    tags        = { Name = "Gitlab-Server" }
    revoke_rules_on_delete = null
}

resource "aws_security_group_rule" "gitlab_igress_22" {
    type              = "ingress"
    from_port         = 22
    to_port           = 22
    cidr_blocks       = ["0.0.0.0/0",]
    protocol          = "tcp"
    security_group_id = aws_security_group.gitlab.id
}

resource "aws_security_group_rule" "gitlab_igress_80" {
    type              = "ingress"
    from_port         = 80
    to_port           = 80
    cidr_blocks       = ["0.0.0.0/0",]
    protocol          = "tcp"
    security_group_id = aws_security_group.gitlab.id
}

resource "aws_security_group_rule" "gitlab_igress_443" {
    type              = "ingress"
    from_port         = 443
    to_port           = 443
    cidr_blocks       = ["0.0.0.0/0",]
    protocol          = "tcp"
    security_group_id = aws_security_group.gitlab.id
}

resource "aws_security_group_rule" "gitlab_egress" {
    type              = "egress"
    from_port         = 0
    to_port           = 0
    cidr_blocks       = ["0.0.0.0/0",]
    protocol          = "-1"
    security_group_id = aws_security_group.gitlab.id
}
stage/main.tf
jenkins
resource "aws_security_group_rule" "jenkins_igress_22" {
    type              = "ingress"
    from_port         = 22
    to_port           = 22
    cidr_blocks       = ["0.0.0.0/0",]
    protocol          = "tcp"
    security_group_id = aws_security_group.jenkins.id
}

resource "aws_security_group_rule" "jenkins_igress_80" {
    type              = "ingress"
    from_port         = 80
    to_port           = 80
    cidr_blocks       = ["0.0.0.0/0",]
    protocol          = "tcp"
    security_group_id = aws_security_group.jenkins.id
}

resource "aws_security_group_rule" "jenkins_igress_443" {
    type              = "ingress"
    from_port         = 443
    to_port           = 443
    cidr_blocks       = ["0.0.0.0/0",]
    protocol          = "tcp"
    security_group_id = aws_security_group.jenkins.id
}

resource "aws_security_group_rule" "jenkins_igress_8080" {
    type              = "ingress"
    from_port         = 8080
    to_port           = 8080
    cidr_blocks       = ["0.0.0.0/0",]
    protocol          = "tcp"
    security_group_id = aws_security_group.jenkins.id
}

resource "aws_security_group_rule" "jenkins_egress" {
    type              = "egress"
    from_port         = 0
    to_port           = 0
    cidr_blocks       = ["0.0.0.0/0",]
    protocol          = "-1"
    security_group_id = aws_security_group.jenkins.id
}
stage/main.tf
rds
resource "aws_security_group" "rds_portal" {
    name        = "rds-portal"
    description = "It used for RDS."
    vpc_id      = aws_vpc.stage.id
    tags        = { Name = "RDS Postgres" }
    revoke_rules_on_delete = null
}

resource "aws_security_group_rule" "rds_portal_igress_5432" {
    type              = "ingress"
    from_port         = 5432
    to_port           = 5432
    cidr_blocks       = ["0.0.0.0/0",]
    protocol          = "tcp"
    security_group_id = aws_security_group.rds_portal.id
}

resource "aws_security_group_rule" "rds_portal_egress_22" {
    type              = "egress"
    from_port         = 5432
    to_port           = 5432
    cidr_blocks       = ["0.0.0.0/0",]
    protocol          = "tcp"
    security_group_id = aws_security_group.rds_portal.id
}
portal 的部分有些尷尬
畢竟有 22 port
所以 portal 的部分就可不調整
繼續維持白名單
或是白名單的部分增加 "172.31.16.0/20"
也就是我們的 vpc 範圍
為了等等要在 ec2 上綁定 ip
因此 ec2 的模組需要 outputs ip
modules/ec2/outputs.tf
output "id" {
    value = aws_instance.this.id
}
蛤?這樣我不就得到一個全新的 EC2
別急,我們稍早有 take snapshot
是可以復原的
回過頭來說,我們另外租用一組 eip
而不使用自動配置
是因為自動配置在 EC2 重啟後就會消失
module "ec2_gitlab" {
    source                  = "../modules/ec2"
    name                    = "Gitlab Server"
    ami                     = "ami-09ac3ab1b7a1e9444"
    instance_type           = "t3.xlarge"
    subnet_id               = sort(data.aws_subnet_ids.private_subnet_ids.ids)[0]
    key_name                = module.key_pair_gitlab.key_name
    security_groups_id      = [ aws_security_group.gitlab.id ]
    iam_instance_profile    = ""
    volume_size             = 30
    tags                    = {
        Name  = "Gitlab Server"
        Usage = "For SCM"
        Creator = "Terraform"
    }
}

module "ec2_jenkins" {
    source                  = "../modules/ec2"
    name                    = "Jenkins Server"
    ami                     = "ami-09ac3ab1b7a1e9444"
    instance_type           = "t3.medium"
    subnet_id               = sort(data.aws_subnet_ids.private_subnet_ids.ids)[0]
    key_name                = module.key_pair_jenkins.key_name
    security_groups_id      = [ aws_security_group.jenkins.id ]
    iam_instance_profile    = ""
    volume_size             = 30
    tags                    = {
        Name  = "Jenkins Server"
        Usage = "CI Tools"
        Creator = "Terraform"
    }
}

resource "aws_eip" "portal" {
    network_border_group = "ap-northeast-1"
    public_ipv4_pool     = "amazon"
}

resource "aws_eip_association" "portal" {
    depends_on    = [aws_eip.portal, module.ec2_ithome_ironman_portal]
    instance_id   = module.ec2_ithome_ironman_portal.id
    allocation_id = aws_eip.portal.id
}

module "ec2_ithome_ironman_portal" {
    source                  = "../modules/ec2"
    name                    = "ithome ironman 2021 portal"
    ami                     = "ami-09ac3ab1b7a1e9444"
    subnet_id               = sort(data.aws_subnet_ids.public_subnet_ids.ids)[0]
    key_name                = module.key_pair_ithome_ironman_portal.key_name
    security_groups_id      = [ aws_security_group.ithome_ironman_portal.id ]
    iam_instance_profile    = aws_iam_instance_profile.ec2_profile.name
    tags                    = {
        Name  = "ithome ironman 2021 portal"
        Usage = "portal"
        Creator = "Terraform"
    }
}
執行配置後
我們就可以在 EC2 Dashboard 上看到已經綁上的 IP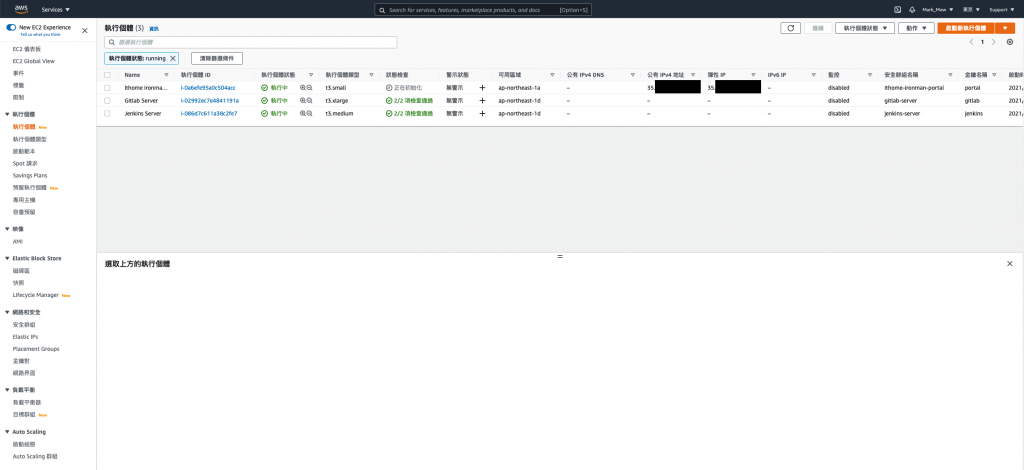
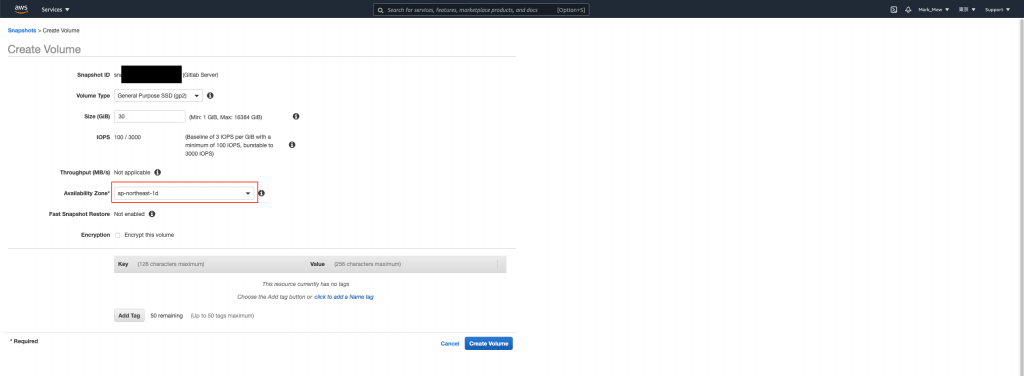
AWS 官方有提到要將 EC2 還原有兩種方式
一種是將 Snapshot 做成 AMI 後透過 AMI 還原
另一種則是將 Snapshot 製作成 EBS 後再替換掉原始的根目錄
兩者雖然都可達成
但是意義上不同
如果我們在還原後將製作的 AMI 砍掉
此時 EC2 會無法正常顯示作業系統資訊
而 AMI 提過比較接近是 Windows SP 更新或是 ISO 檔
如果我們有為作業系統客製環境
這種乾淨不包含任何其他檔案的環境
比較適合製作成 AMI
(比如說:製作一個 含有 Oracle 11g 的 RHEL 7.0 作業系統)
不然我一律建議使用 EBS 還原

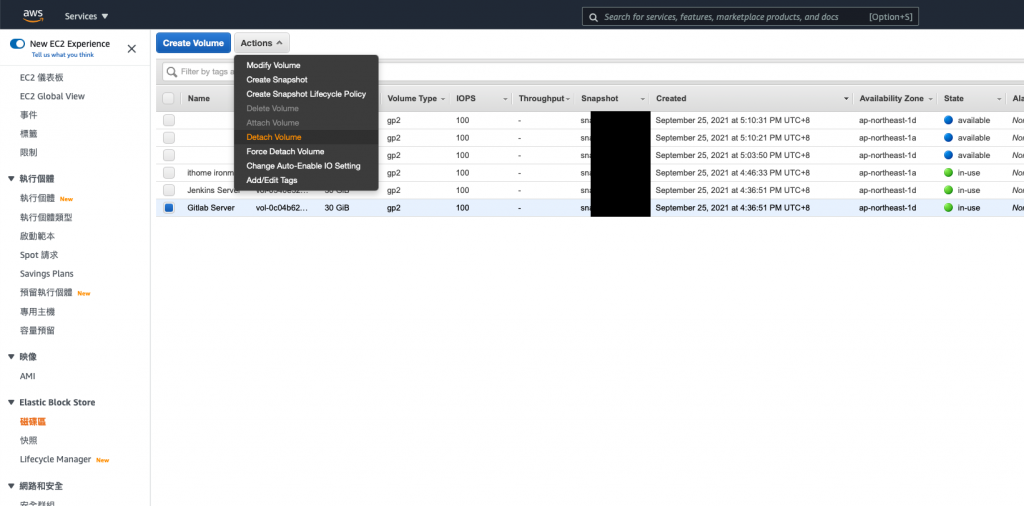
/dev/sda1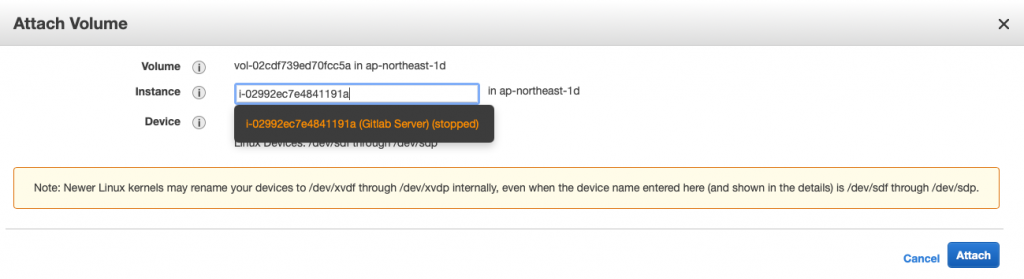
通常會做到這個地步
或是看到這篇
表示可能遇到緊急狀況
不建議像我這樣
一次還原全部
一次 detach 又 attach
還是一步一步來
確認好每個步驟比較重要
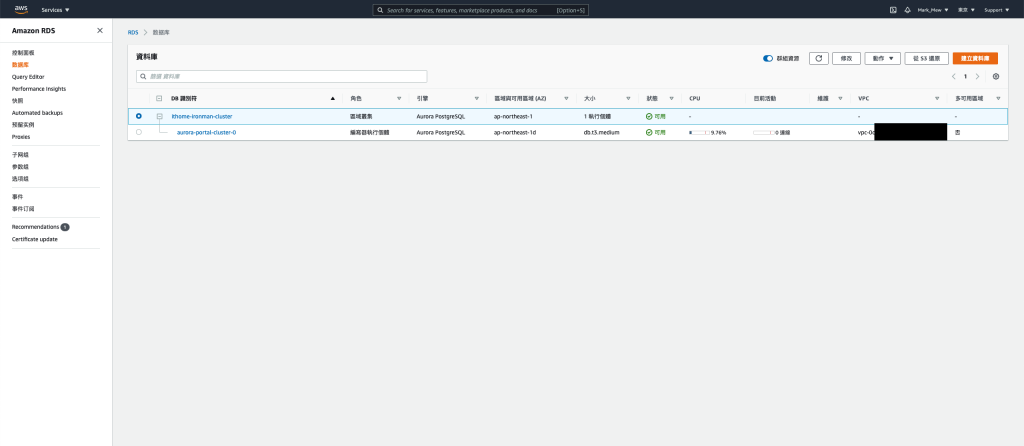
程式碼取消註解外
rds_subnet_group 需要調整一下
resource "aws_db_subnet_group" "rds_subnet_group" {
    name       = "database_subnet_group"
    subnet_ids = sort(data.aws_subnet_ids.private_subnet_ids.ids)

    tags = {
        "Name" = "Database subnet group"
    }
}
因為全部重建的關係
所以我們 Web ACLs 的關聯也刪除了
既然要重建
那我們也把事情做好一點
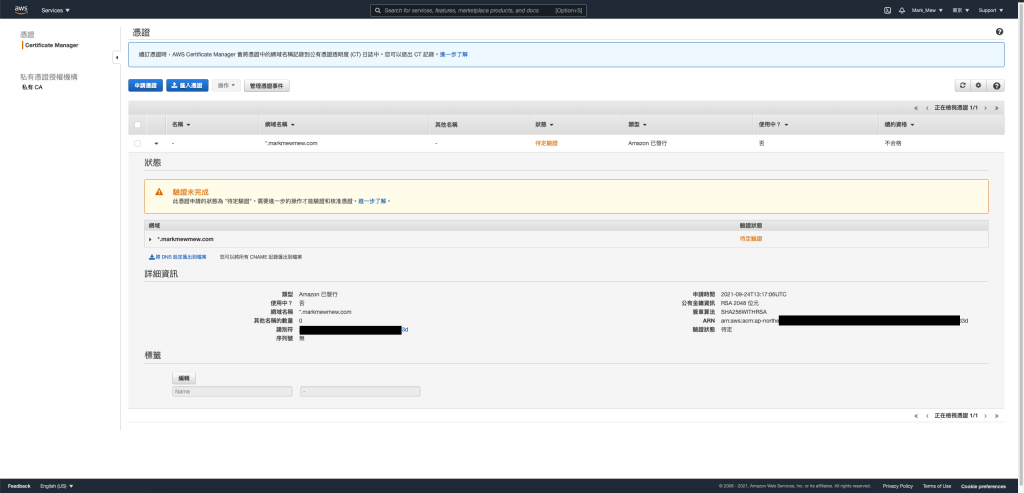
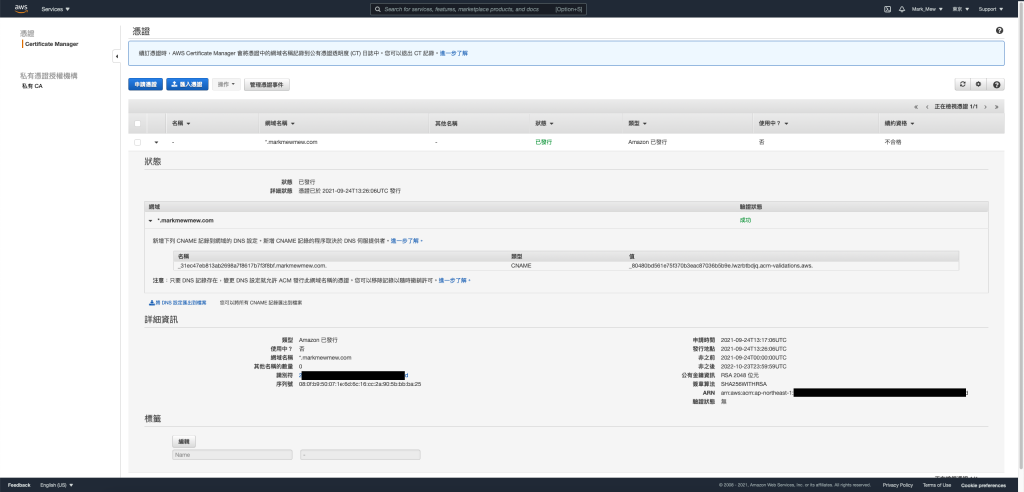
將憑證套上
不過我們會使用 AWS 來發證照
並且在 Load Balance 上掛上憑證
這樣 DNS 指向 Load Balance 時
就可以直接驗證
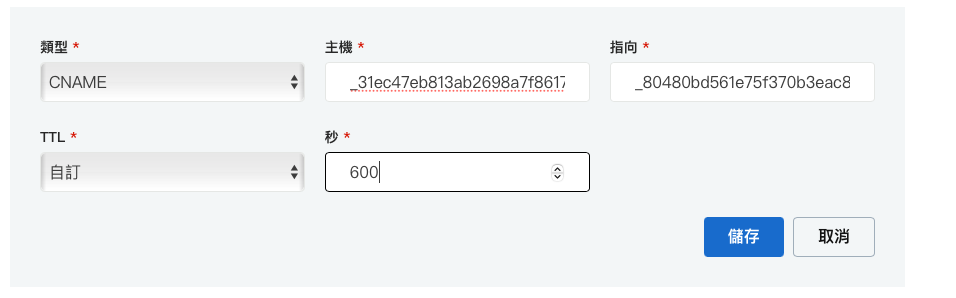
因為我們驗證方式是使用 DNS
所以需要透過 DNS 設定 CName Record
resource "aws_acm_certificate" "cert" {
    domain_name       = "*.markmewmew.com"
    validation_method = "DNS"

    lifecycle {
        create_before_destroy = true
    }
}
在建立 Load Balance 時
我們將 80 強制轉到 443
而 443 會直接指向內網的 IP
resource "aws_lb" "portal" {
    name               = "ithome-ironman-portal"
    internal           = false
    load_balancer_type = "application"
    security_groups    = [ aws_security_group.ithome_ironman_portal.id ]
    subnets            = data.aws_subnet_ids.public_subnet_ids

    enable_deletion_protection = false

    tags = {
        Creator = "Terraform"
    }
}

resource "aws_lb_target_group" "portal" {
    name        = "ithome-ironman-portal"
    port        = 80
    protocol    = "HTTP"
    target_type = "ip"
    vpc_id      = aws_vpc.stage.id

    stickiness {
        type = "lb_cookie"
    }
}

resource "aws_lb_target_group_attachment" "portal01" {
    target_group_arn = aws_lb_target_group.portal.arn
    target_id        = module.ec2_ithome_ironman_portal.private_ip
}

resource "aws_lb_listener" "portal_port443" {
    load_balancer_arn = aws_lb.octopus_deploy.arn
    port              = "443"
    protocol          = "HTTPS"
    ssl_policy        = "ELBSecurityPolicy-2016-08"
    certificate_arn   = data.aws_acm_certificate.cert.arn

    default_action {
        type             = "forward"
        target_group_arn = aws_lb_target_group.portal.arn
    }
}

resource "aws_lb_listener" "portal_port80" {
    load_balancer_arn = aws_lb.portal.arn
    port              = "80"
    protocol          = "HTTP"

    default_action {
        type             = "redirect"
        target_group_arn = aws_lb_target_group.portal.arn

        redirect {
            port        = "443"
            protocol    = "HTTPS"
            status_code = "HTTP_301"
        }
    }
}
web acls 不要忘了掛上去
resource "aws_wafv2_web_acl_association" "portal" {
    resource_arn = aws_lb.portal.arn
    web_acl_arn  = aws_wafv2_web_acl.fundamental_acl.arn
}
查看 Load Balance 的 Host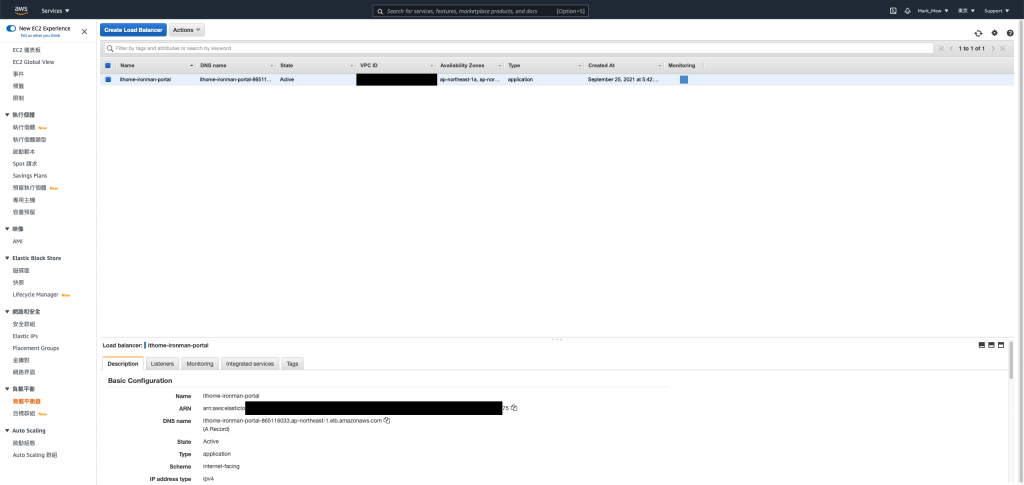
到 DNS Server 去設定指向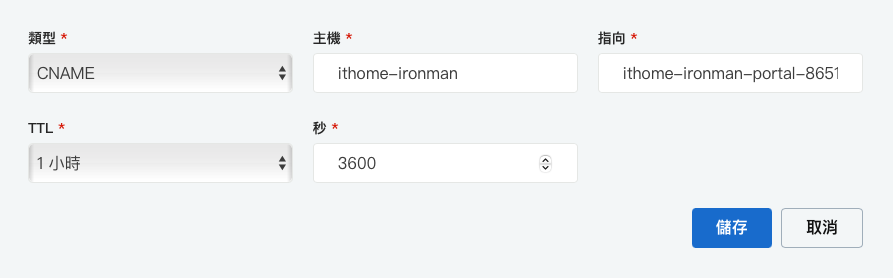
鐵人賽的測試網站就這樣掛上 Load Balance 和憑證了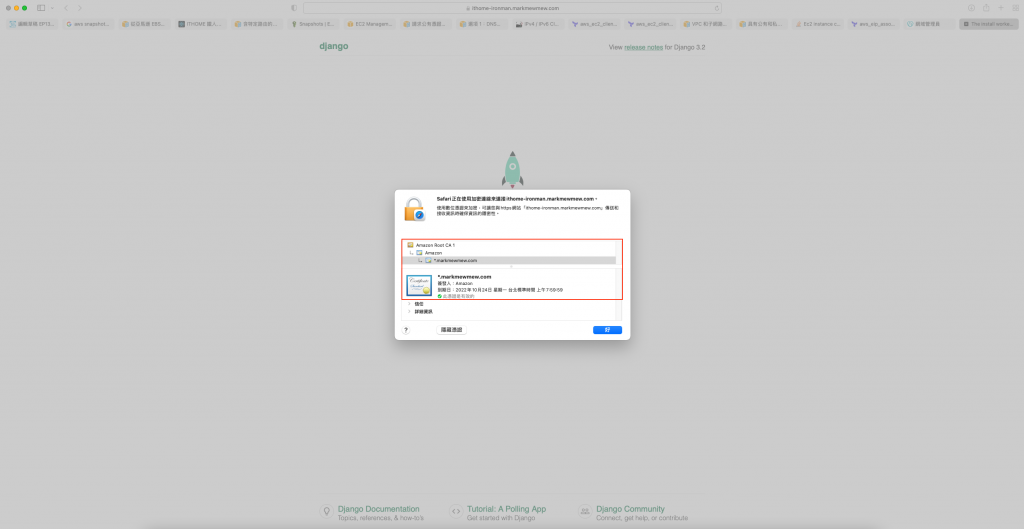
今天我們體驗了一下從刪庫到跑路的過程
重新整理架構的過程
讓網站重新復活
不過還有些事情還蠻調整完
就是 Jenkins 和 Gitlab 目前還算是半殘
因為架在 private 網段的關係
所以我們本機也連不進去
目前我頃向的做法是 Gitlab 比照 Portal 掛 Load Balance 這樣外網也可以連到
而 Jenkins 則是架設跳板機來使用
但,我累了
明天再說好了
在下方留言的朋友
我帳號還沒走完新手任務
還沒辦法回覆大家
敬請見諒
參考資料:


 iThome鐵人賽