傳統的架構上,
我們會使用獨立機械建置 Git、Jenkins,
最後部署至目標環境,
到目前為止,
我們已經用 Terraform 將整個環境大致上架起來,
但是環境僅止於堪用的程度,
既然 Gitlab 和 Jenkins 不對外,
那理當不配置 IP,
但是不配置 IP 的同時又要能夠上 Patch 本機環境又要能夠連上,
又要設置 NAT Gateway 和 VPN,
撇開這些條件不提,
Terraform 寫了幾天,
是該適時重構一下,
或是將有重複用到的資源模組化,
今天我們會試著將之前帳號建立時的 default 設定納管,
修正前幾天建立資源時名稱有錯字的問題,
並且撰寫模組來整理部分重複出現的資源,
讓整體程式碼看起來更簡潔。
前幾天我們在建立 portal 時命名為 ithome_ironman_portla
不小心把 portal 拼錯
但是 portal 確實已經建立好
如果我們在這時候直接更正 ithome_ironman_portal 並 apply
那前幾天架設的 portal 就會被刪除重建一個新的
這幾天的努力都是一場誤會
資源更名的時候我們需要做 state mv "來源" "目的"
將 tfstate 中我們建好的設定
搬移到另外一個地方
在 vagrant console 中下 state mv 指令
terraform state mv aws_instance.ithome_ironman_portla aws_instance.ithome_ironman_portal
搜尋 main.tf 中 ithome_ironman_portal
取代為正確名稱的 ithome_ironman_portal
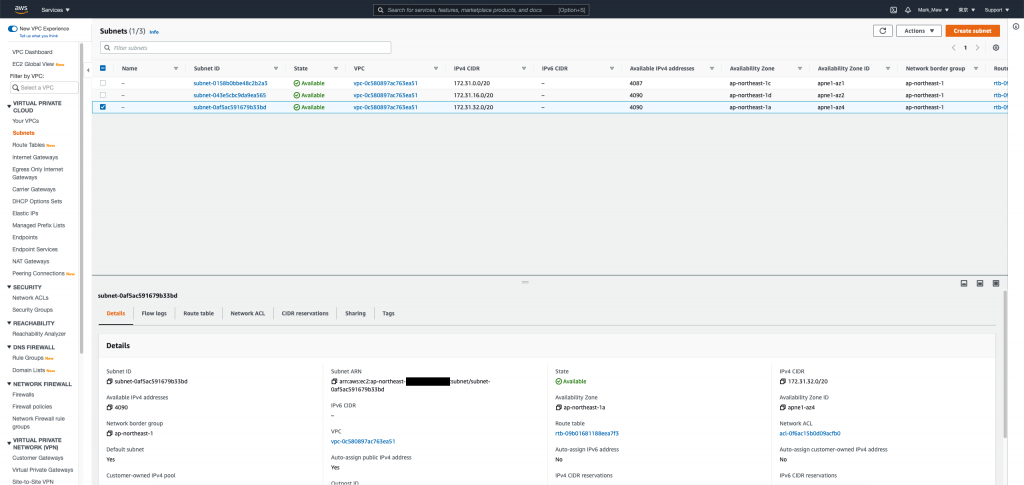
一開始我們建立 aws account 的時候
預設就建立 vpc、subnet、route table 和 internet gateway
我們需要把這些資源納管
main.tf
resource "aws_default_vpc" "default" {
    tags = {
        Name = "Default VPC"
    }
}

resource "aws_default_subnet" "default_az1" {
    availability_zone = "ap-northeast-1a"

    tags = {
        Name = "Default subnet for ap-northeast-1a"
    }
}

resource "aws_default_subnet" "default_az2" {
    availability_zone = "ap-northeast-1c"

    tags = {
        Name = "Default subnet for ap-northeast-1c"
    }
}

resource "aws_default_subnet" "default_az3" {
    availability_zone = "ap-northeast-1d"

    tags = {
        Name = "Default subnet for ap-northeast-1d"
    }
}

resource "aws_default_subnet" "default_az4" {
    availability_zone = "ap-northeast-1d"

    tags = {
        Name = "Default subnet for ap-northeast-1d"
    }
}
在 vagrant 中的 console 下 import 指令
terraform import aws_default_vpc.default 你的VPC_ID
terraform import aws_default_subnet.default_az1 你的子網路1
terraform import aws_default_subnet.default_az2 你的子網路2
terraform import aws_default_subnet.default_az3 你的子網路3
眼尖的人應該會發現
其實建立 EC2 的時候有自動配發 DNS 和 IP
這是因為預設 VPC 有開啟 DNS hostnames
預設的 subnet 有開啟 Auto-assign public IPv4 address
大概是怕大家不會操作 AWS 所以預設都幫你開
大家只需要煩惱 security group 就好
但是我們建立的每個資源不見得都需要
甚至...我們可以全部不配發 public ip
透過 load balance 對外就可以了
但,這個就之後再做
我們先延續剛剛的 default 設定
將它們改成下面的寫法後
就可以把 自動配發IP和自動配發 host 關閉
resource "aws_default_vpc" "default" {
    enable_dns_hostnames = false
    tags                 = {
        Name = "Default VPC"
    }
}

resource "aws_default_subnet" "default_az1" {
    availability_zone       = "ap-northeast-1a"
    map_public_ip_on_launch = false
    tags                    = {
        Name = "Default subnet for ap-northeast-1a"
    }
}

resource "aws_default_subnet" "default_az2" {
    availability_zone       = "ap-northeast-1c"
    map_public_ip_on_launch = false
    tags                    = {
        Name = "Default subnet for ap-northeast-1c"
    }
}

resource "aws_default_subnet" "default_az3" {
    availability_zone       = "ap-northeast-1d"
    map_public_ip_on_launch = false
    tags                    = {
        Name = "Default subnet for ap-northeast-1d"
    }
}
經過幾次建立程式碼以後
我們發現我們要建立的 key 的時候
都需要同時建立 tls_private_key 和 aws_key_pair
建立 EC2 所需要的屬性也差不多
此時我們就可以把這些包裝成模組
我們需要在專案的根目錄建立 modules
並在 modules 底下建立 key 資料夾
資料夾底下還是照標準規格 main.tf、outputs.tf、variables.tf 擺放
outputs.tf 一般在執行的時候
當作單純印在畫面上輸出使用
而在模組裡面
則當作回傳值使用
模組中 outputs 有定義的值
引用模組的地方才可以拿來做使用
modules/key/main.tf
resource "tls_private_key" "private_key" {
    algorithm = "RSA"
    rsa_bits  = 4096
}

resource "aws_key_pair" "key_pair" {
    key_name   = var.key_name
    public_key = tls_private_key.private_key.public_key_openssh
}
modules/key/variables.tf
variable "key_name" {
    description = "Name to be used on all the resources as identifiers"
    default     = ""
}
modules/key/outputs.tf
output "private_key" {
    value       = tls_private_key.private_key.private_key_pem
    description = "private key"
    sensitive   = true
}

output "key_name" {
    value       = aws_key_pair.key_pair.key_name
    description = "key pair name"
}
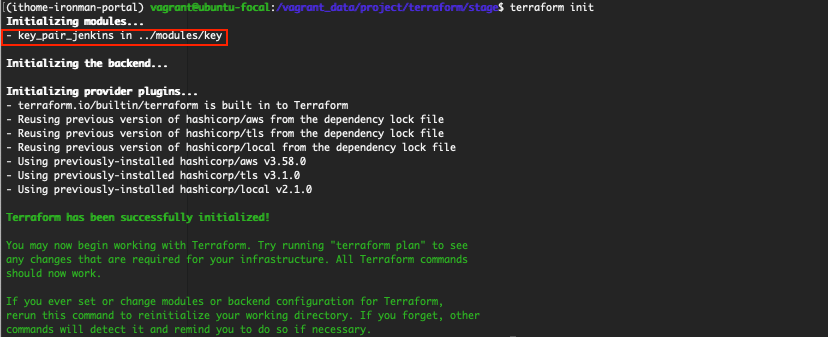
先在 main.tf 中引用模組後
在 console 介面初始化
就算完成安裝
stage/main.tf
module "key_pair_jenkins" {
    source   = "../modules/key"
    key_name = "jenkins"
}
terraform init
記得先別急著執行配置
如果執行 terraform apply
它會不認得這個資源而建立新的 key
因為在 tfstate 裏面
我們的 key 是來自 tls_private_key 和 aws_key_pair
而不是 module
因此我們還需要再做一次 mv state
terraform state mv aws_key_pair.jenkins module.key_pair_jenkins.aws_key_pair.key_pair
terraform state mv tls_private_key.jenkins module.key_pair_jenkins.tls_private_key.private_key

剛剛我們搬移完了
此時除了要刪除舊的 resource 以外
把 Key 包裝成模組以後
還要修改 EC2 和 local file 使用 key pair 的設定
不然執行配置時也同樣會出錯
aws_key_pair.jenkins.key_name 改成 module.key_pair_jenkins.key_name
stage/main.tf
resource "local_file" "jenkins" {
content = module.key_pair_jenkins.private_key
filename = format("%s.pem", module.key_pair_jenkins.key_name)
}
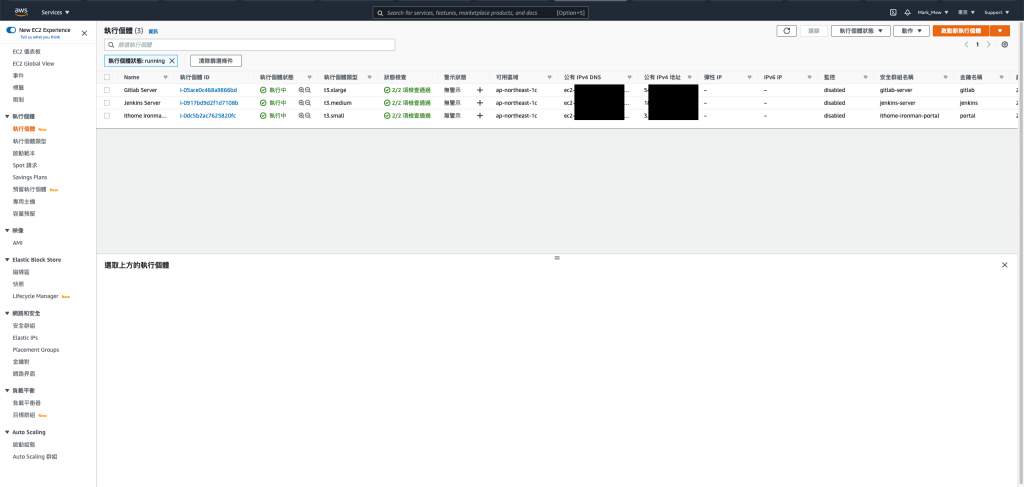
resource "aws_instance" "jenkins" {
ami = data.aws_ami.ubuntu.id
instance_type = "t3.medium"
subnet_id = sort(data.aws_subnet_ids.subnet_ids.ids)[0]
key_name = module.key_pair_jenkins.key_name
vpc_security_group_ids = [ aws_security_group.jenkins.id ]
disable_api_termination = false
ebs_optimized = true
hibernation = false
tags = {
Name = "Jenkins Server"
Usage = "CI Tools"
Creator = "Terraform"
}
root_block_device {
delete_on_termination = true
encrypted = false
throughput = 0
volume_size = 30
volume_type = "gp2"
tags = {
Name = "Jenkins Server"
Attached = "Jenkins Server"
}
}
}
執行配置
terraform apply
如果剛剛的動作執行無誤
則會顯示無任何變更才對

同樣的配置套用在 Gitlab 和 Portal 上
stage/main.tf
module "key_pair_ithome_ironman_portal" {
    source   = "../modules/key"
    key_name = "portal"
}

resource "local_file" "ithome_ironman_portal" {
    content  = module.key_pair_ithome_ironman_portal.private_key
    filename = format("%s.pem", module.key_pair_ithome_ironman_portal.key_name)
}

resource "aws_instance" "ithome_ironman_portal" {
    ami                     = data.aws_ami.ubuntu.id
    instance_type           = "t3.small"
    subnet_id               = sort(data.aws_subnet_ids.subnet_ids.ids)[0]
    key_name                = module.key_pair_ithome_ironman_portal.key_name
    vpc_security_group_ids  = [ aws_security_group.ithome_ironman_portal.id ]
    disable_api_termination = false
    ebs_optimized           = true
    hibernation             = false
    iam_instance_profile    = aws_iam_instance_profile.ec2_profile.name

    tags = {
        Name  = "ithome ironman 2021 portal"
        Usage = "portal"
        Creator = "Terraform"
    }

    root_block_device {
        delete_on_termination = true
        encrypted             = false
        throughput            = 0
        volume_size           = 9
        volume_type           = "gp2"
        tags                  = {
            Name     = "ithome ironman 2021 portal"
            Attached = "ithome ironman 2021 portal"
        }
    }
}

module "key_pair_gitlab" {
    source   = "../modules/key"
    key_name = "gitlab"
}

resource "local_file" "gitlab" {
    content  = module.key_pair_gitlab.private_key
    filename = format("%s.pem", module.key_pair_gitlab.key_name)
}

resource "aws_instance" "gitlab" {
    ami                     = data.aws_ami.ubuntu.id
    instance_type           = "t3.xlarge"
    subnet_id               = sort(data.aws_subnet_ids.subnet_ids.ids)[0]
    key_name                = module.key_pair_gitlab.key_name
    vpc_security_group_ids  = [ aws_security_group.gitlab.id ]
    disable_api_termination = false
    ebs_optimized           = true
    hibernation             = false

    tags = {
        Name  = "Gitlab Server"
        Usage = "For SCM"
        Creator = "Terraform"
    }

    root_block_device {
        delete_on_termination = true
        encrypted             = false
        throughput            = 0
        volume_size           = 30
        volume_type           = "gp2"
        tags                  = {
            Name     = "Gitlab Server"
            Attached = "Gitlab Server"
        }
    }
}
terraform state mv aws_key_pair.ithome_ironman_portal module.key_pair_ithome_ironman_portal.aws_key_pair.key_pair

terraform state mv tls_private_key.ithome_ironman_portal module.key_pair_ithome_ironman_portal.tls_private_key.private_key

terraform state mv aws_key_pair.gitlab module.key_pair_gitlab.aws_key_pair.key_pair

terraform state mv tls_private_key.gitlab module.key_pair_gitlab.tls_private_key.private_key
EC2 的 ami 可以理解成固定出 SP 更新的 ISO 檔
創建時需要指定我們從哪個 ami 建立這台 EC2
但一開始的時候我們是使用 data 去尋找最新版本
這意味著當 ami 版本更新後
在執行配置時
我們的版本可能會因為 ami 版本更新而把舊的機械 terminate
stage/main.tf
resource "aws_instance" "gitlab" {
    ami                     = "ami-09ac3ab1b7a1e9444"
    .
    .
    .
}

resource "aws_instance" "jenkins" {
    ami                     = "ami-09ac3ab1b7a1e9444"
    .
    .
    .
}

resource "aws_instance" "ithome_ironman_portal" {
    ami                     = "ami-09ac3ab1b7a1e9444"
    .
    .
    .
}
有了 key pair 小試身手
我們可以再接再厲
將常用到的 EC2 封裝成模組來使用
這裡需要注意的是 tags 的型態是 map(string)
其他部分有用到 bool 和 list
可以在建立模組的過程中
更熟悉 terraform 的型別
modules/ec2/main.tf
resource "aws_instance" "this" {
    ami                     = var.ami
    instance_type           = var.instance_type
    subnet_id               = var.subnet_id
    key_name                = var.key_name
    vpc_security_group_ids  = var.security_groups_id
    disable_api_termination = var.disable_api_termination
    ebs_optimized           = var.ebs_optimized
    hibernation             = var.hibernation
    iam_instance_profile    = var.iam_instance_profile
    tags                    = var.tags

    root_block_device {
        delete_on_termination = true
        encrypted             = false
        throughput            = 0
        volume_size           = var.volume_size
        volume_type           = var.volume_type
        tags                  = {
            Name     = var.name
            Attached = var.name
        }
    }
}
modules/ec2/outputs.tf
output "private_ip" {
    value       = aws_instance.this.private_ip
    description = "The private ip of aws instance"
}
modules/ec2/variables.tf
variable "name" {
    description = "The instance name"
}

variable "ami" {
    description = "AWS instance ami verion"
}

variable "instance_type" {
    description = "The default ec2 instance type"
    default      = "t3.small"
}

variable "subnet_id" { }
variable "key_name" { }

variable "security_groups_id" {
    type    = list
    default = []
}

variable "disable_api_termination" {
    type    = bool
    default = false
}

variable "ebs_optimized" {
    type    = bool
    default = true
}

variable "hibernation" {
    type    = bool
    default = false
}

variable "iam_instance_profile" { }

variable "tags" {
    type    = map(string)
    default = {}
}

variable "volume_size" {
    default = 9
}

variable "volume_type" {
    default = "gp2"
}
在 main.tf 底下放 module 後
要先下 terraform init 安裝模組
stage/main.tf
module "ec2_ithome_ironman_portal" {
    source                  = "../modules/ec2"
    name                    = "ithome ironman 2021 portal"
    ami                     = "ami-09ac3ab1b7a1e9444"
    subnet_id               = sort(data.aws_subnet_ids.subnet_ids.ids)[0]
    key_name                = module.key_pair_ithome_ironman_portal.key_name
    security_groups_id      = [ aws_security_group.ithome_ironman_portal.id ]
    iam_instance_profile    = aws_iam_instance_profile.ec2_profile.name
    tags                    = {
        Name  = "ithome ironman 2021 portal"
        Usage = "portal"
        Creator = "Terraform"
    }
}
最後別忘了再將 tfstate 上的設定做搬移
terraform state mv aws_instance.ithome_ironman_portal module.ec2_ithome_ironman_portal.aws_instance.this
terraform apply
實際示範 key pair 和 ec2 模組的寫法和重構
剩下的 Gitlab Server 和 Jenkins Server 有興趣大家就自己寫了
把 Security Group 和 Security Group Rule 包成模組也是個不錯的方式
我就不在這裡騙文章行數
今天我們嘗試重構了一下 terraform 程式碼
並且實際示範怎麼撰寫模組
不得不說 AWS 預設提供的 default vpc 和 default subnet 綁蠻多設定的
不仔細查看後關閉
還真的不知道該怎麼「配置好環境」
明天本來預計是要調整 Infra 架構
雖然我們目前把 host 功能關閉
讓 EC2 不會預設建立 host
但 EC2 一開始如果有 assign ip
要 terminate 後重建才能將配置的 ip 移除
重新啟動 EC2,計算 IP 沒移除也會改變
這樣對於整體架構並不是很理想
這部分我目前還在考量要怎麼進行
明天大家再期待一下我會怎麼調整架構吧
參考資料:
好文推推
能夠撞題材也是有緣XD,大大有興趣的話可以互相交流一下
感謝
您謙虛了
Terraform 的部分我覺得您說的比較好
題材上,我其實主旨是想要將 CI/CD 建起來
但是是用 Terraform 有些東西又不得不說
就邊做邊說


 iThome鐵人賽