昨天加班加的兇,
到現在為止都還在挑燈夜戰,
不過,在不景氣的日子人就要想著變通,
才會有機會的到來,
如果沒有表現的機會與舞台,
人的一生平平淡淡也賺不了什麼錢,
有時候機會到來還必須身心條件具備,
除了身體必須能夠承受工作用腦的壓力外
更需心靈承受到足以負荷他人所不能,
否則最後淪於機會轉到別人身上,
但若過程中有好的工具可以加速或是貴人的幫忙,
那人生的光明大道可謂如虎添翼般,
多希望BP特助能夠來幫幫忙啊!
.
要成功,選擇是個很重要的因素,
如果有人可以指引你對的路將會讓人生的旅程更為順遂,
Blue Prism就具有昨日設定後自動選定功能的輔助模式,
讓原本由人來操作的軟體功能選擇沒了失誤的機會,
在功能的十字路口上不再猶豫不前遺忘功能路徑而浪費時間,
今天有機會可看到他自動登打的能力,真是好福氣。
BP自動選定功能
(1)運用Application Modeller把應用程式與BP的關聯設定好,設定好自動選定功能。
BP自動登打訂單
(1)運用Application Modeller把應用程式的New Order與BP的關聯設定好,並設定好填寫訂單資料功能。
我們接著來看看「BP自動登打訂單」如何作到吧!
B. Name 輸入New Order,按下Clear 鈕(清空一下目前的屬性資訊)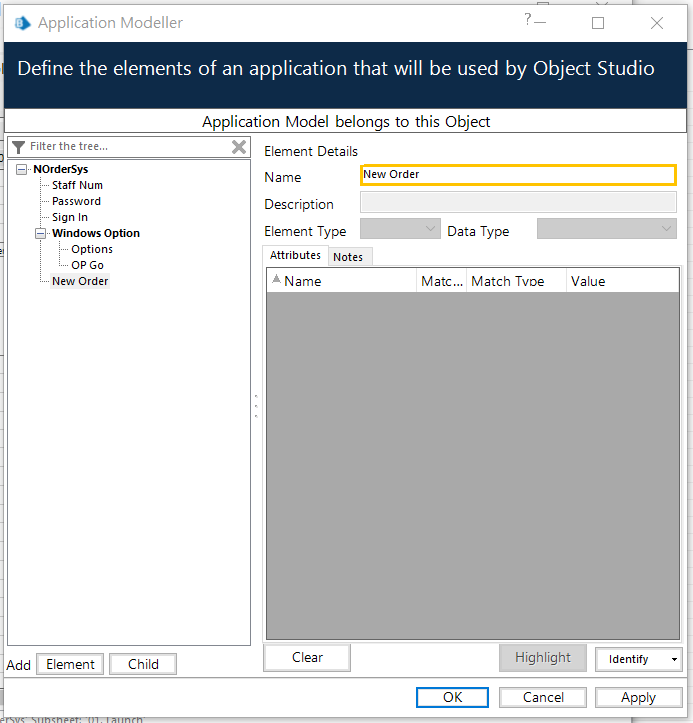
C. 按下Identify開啟對焦鎖定模式(Alt 切換模式)
(若是連續幾天設計下來,看到的會是Identify[因為應用軟體已開啟,且已到了New Order頁]
若是分段設計就需要先開啟應用軟體,輸入帳密登入完、選定功能後才會進入到New Order頁)
以上假設為連續設計下來的情況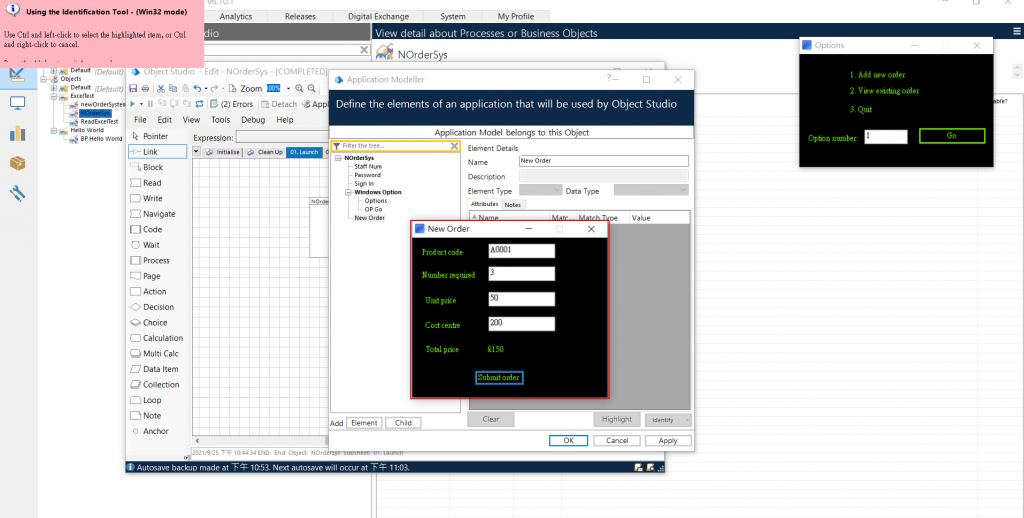
D. Ctrl + 滑鼠左鍵 確認對焦範圍,Ctrl + 滑鼠右鍵 取消
按下Highlight鈕,可再次確認對焦範圍是否如預期,
若聚焦如預期則按下Apply。
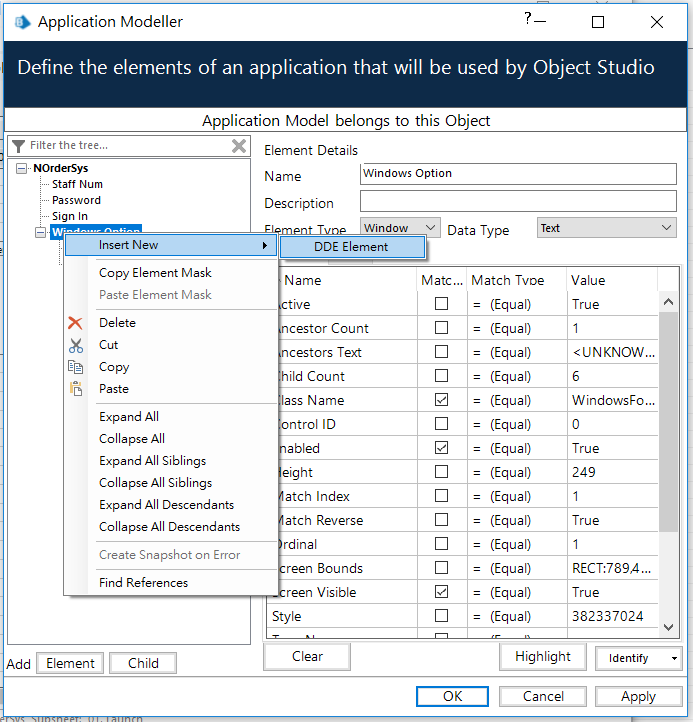
(2). 新增Options為Windows Option下的第一個子Element
A. 在New Order的Element上按下滑鼠右鍵 Copy
B. 在New Order的Element上按下滑鼠右鍵 Paste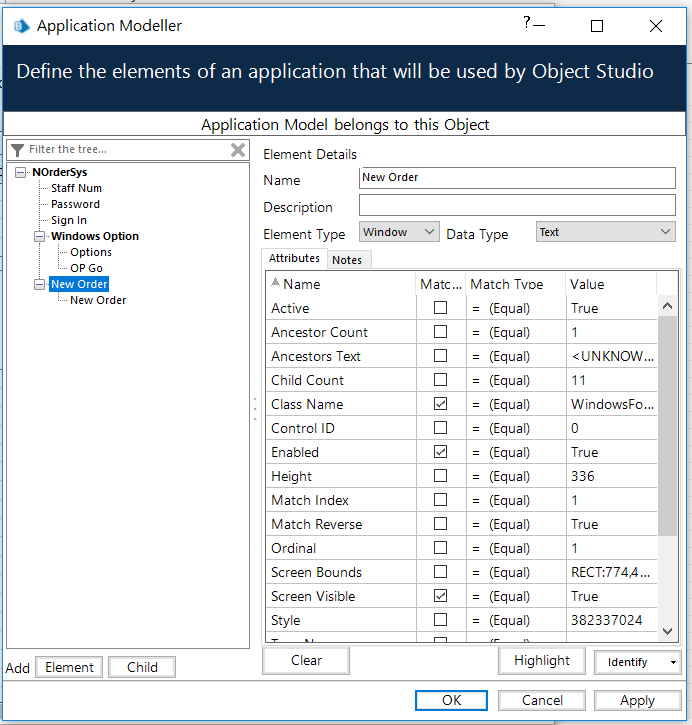
C. Name 輸入Product Code,按下Clear 鈕(清空一下目前的屬性資訊)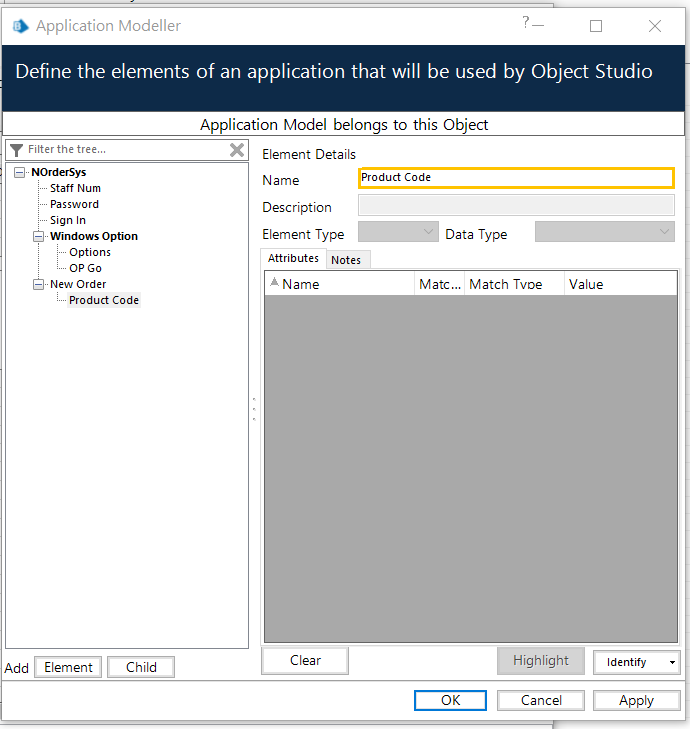
D. 按下Identify開啟對焦鎖定模式(Alt 切換模式)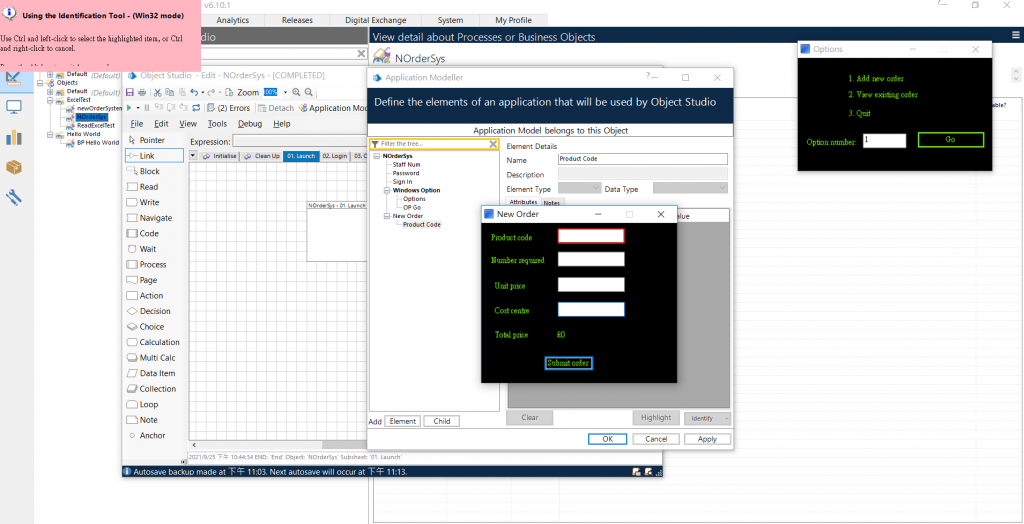
E. Ctrl + 滑鼠左鍵 確認對焦範圍,Ctrl + 滑鼠右鍵 取消
按下Highlight鈕,可再次確認對焦範圍是否如預期,
若聚焦如預期則按下Apply。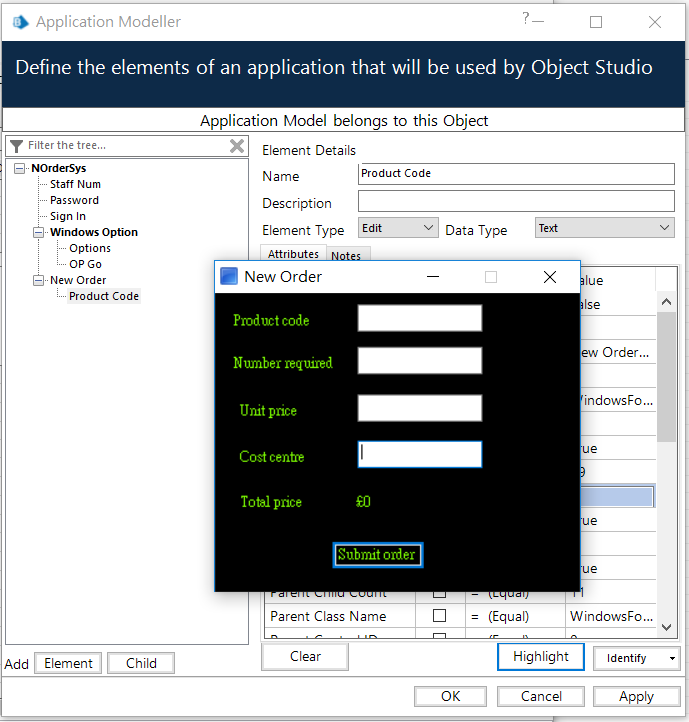
(3). 新增Num為New Order下的第二個子Element
A. 在Product Code的Element上按下滑鼠右鍵 Insert New >DDE Element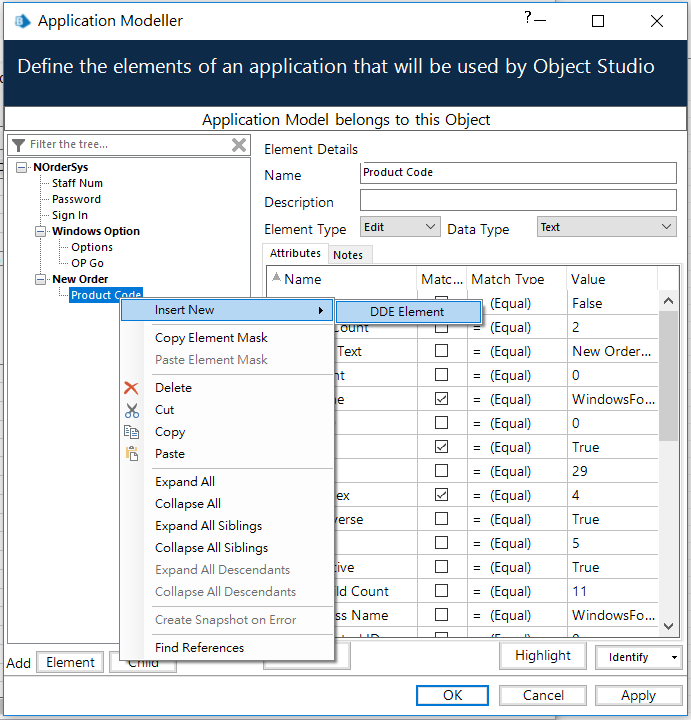
B. Name 輸入Num,按下Clear 鈕(清空一下目前的屬性資訊)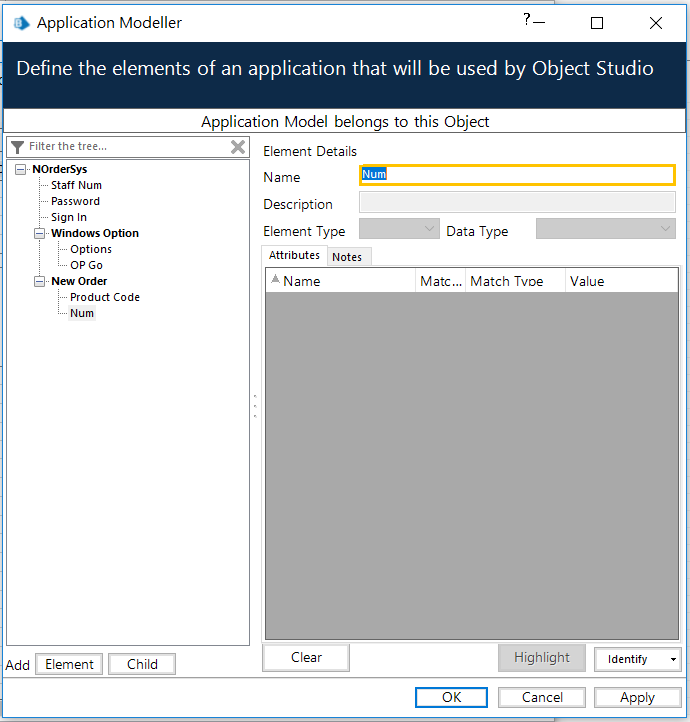
C. 按下Identify開啟對焦鎖定模式(Alt 切換模式)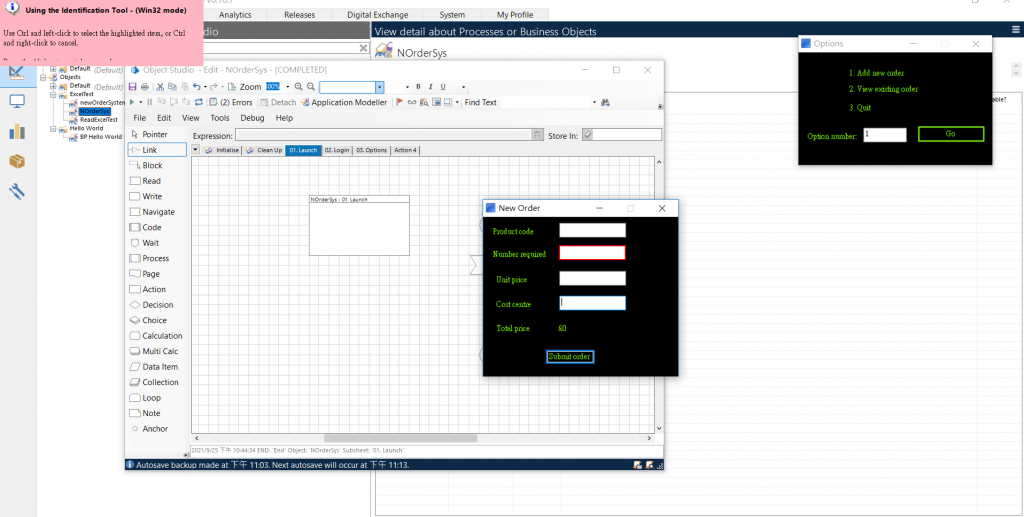
D. Ctrl + 滑鼠左鍵 確認對焦範圍,Ctrl + 滑鼠右鍵 取消
按下Highlight鈕,可再次確認對焦範圍是否如預期,
若聚焦如預期則按下Apply。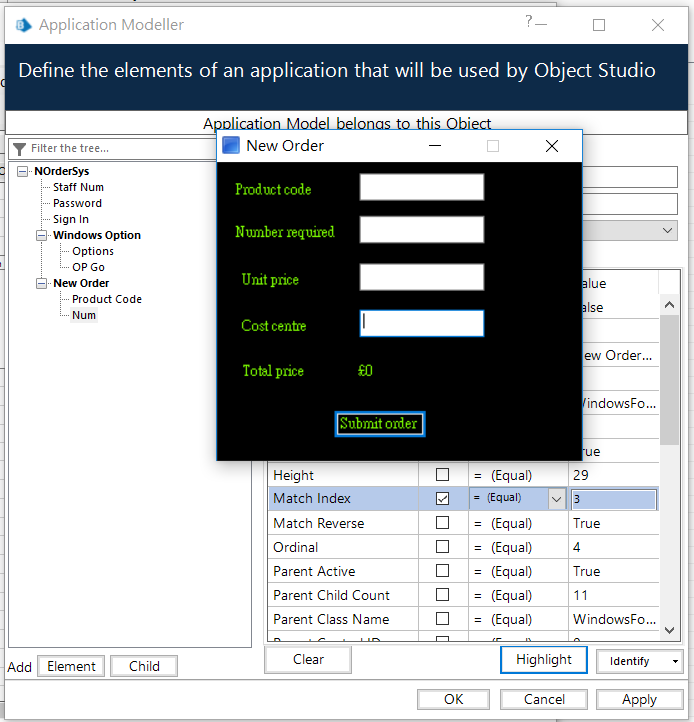
(4). 新增Unit Price為New Order下的第三個子Element
E. 在Num的Element上按下滑鼠右鍵 Insert New >DDE Element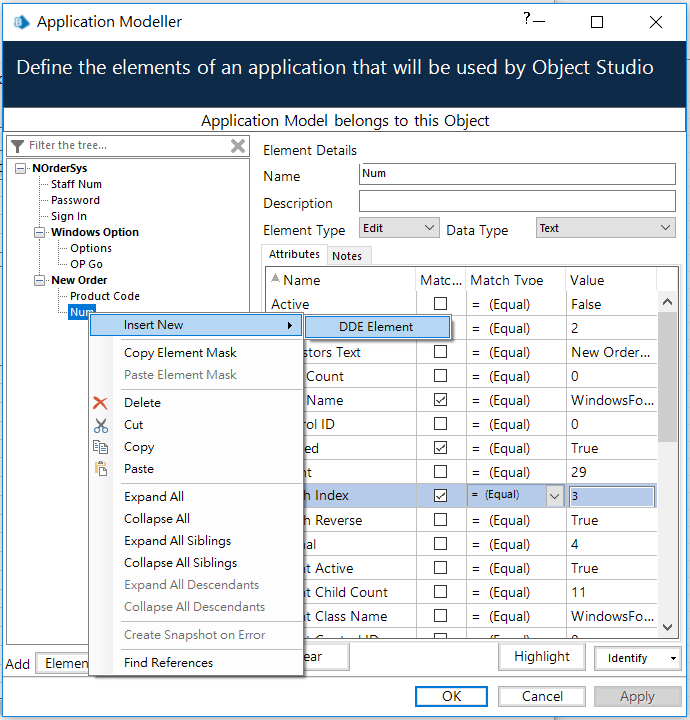
F. Name 輸入Num,按下Clear 鈕(清空一下目前的屬性資訊)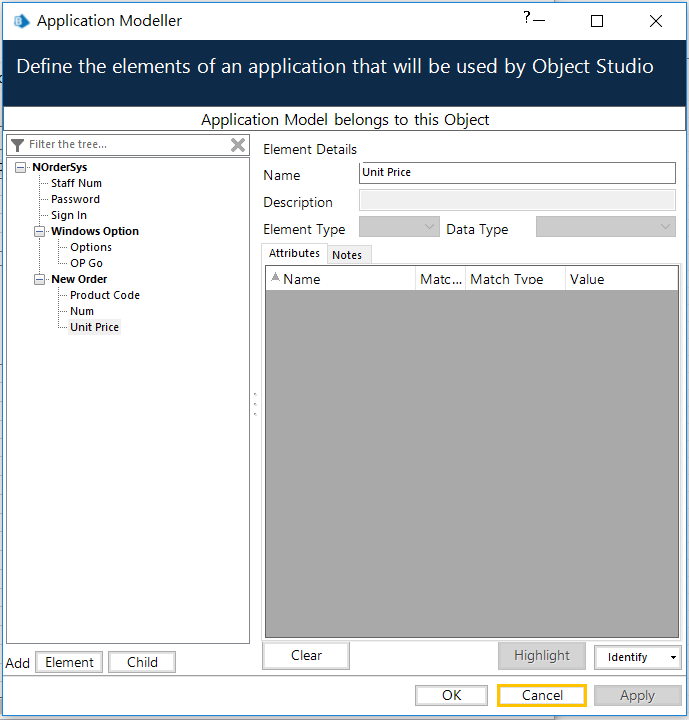
G. 按下Identify開啟對焦鎖定模式(Alt 切換模式)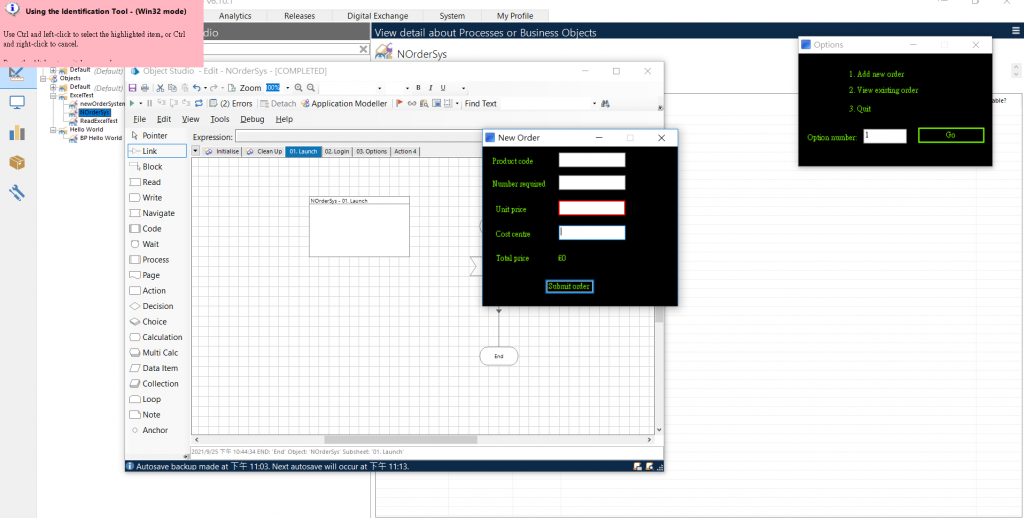
H. Ctrl + 滑鼠左鍵 確認對焦範圍,Ctrl + 滑鼠右鍵 取消
按下Highlight鈕,可再次確認對焦範圍是否如預期,
若聚焦如預期則按下Apply。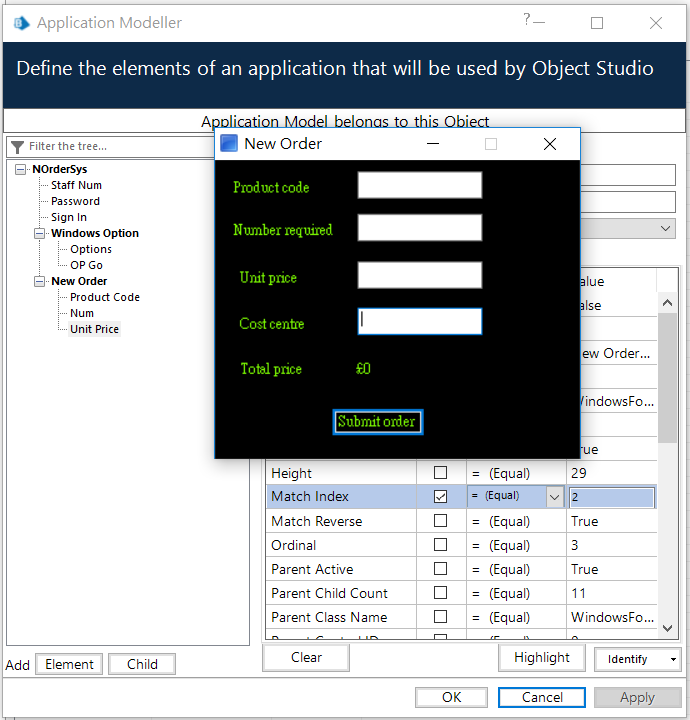
(5). 新增Cost centre為New Order下的第四個子Element
A. 在Unit Price的Element上按下滑鼠右鍵 Insert New >DDE Element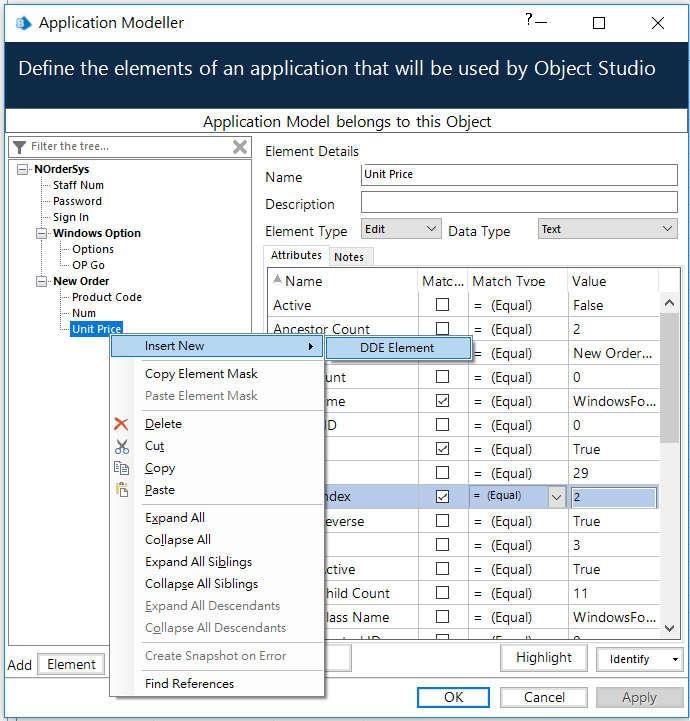
B. Name 輸入Cost centre,按下Clear 鈕(清空一下目前的屬性資訊)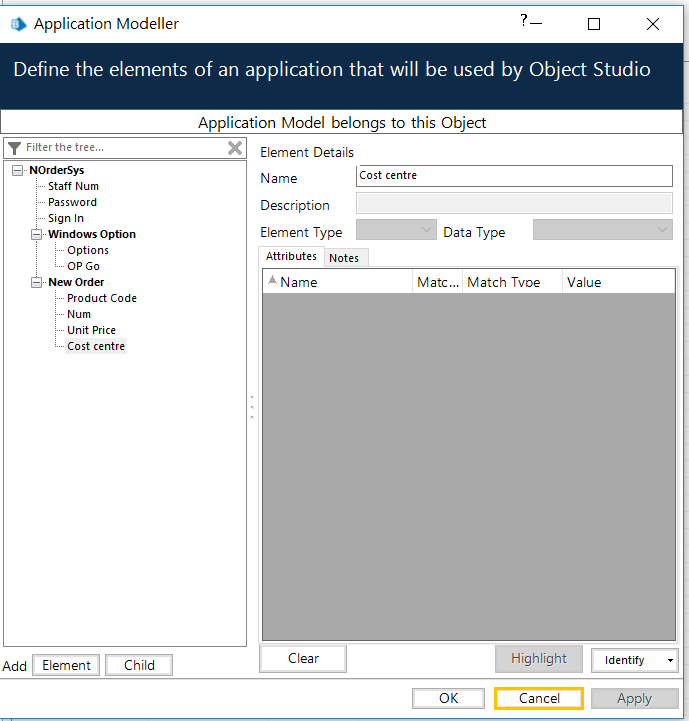
C. 按下Identify開啟對焦鎖定模式(Alt 切換模式)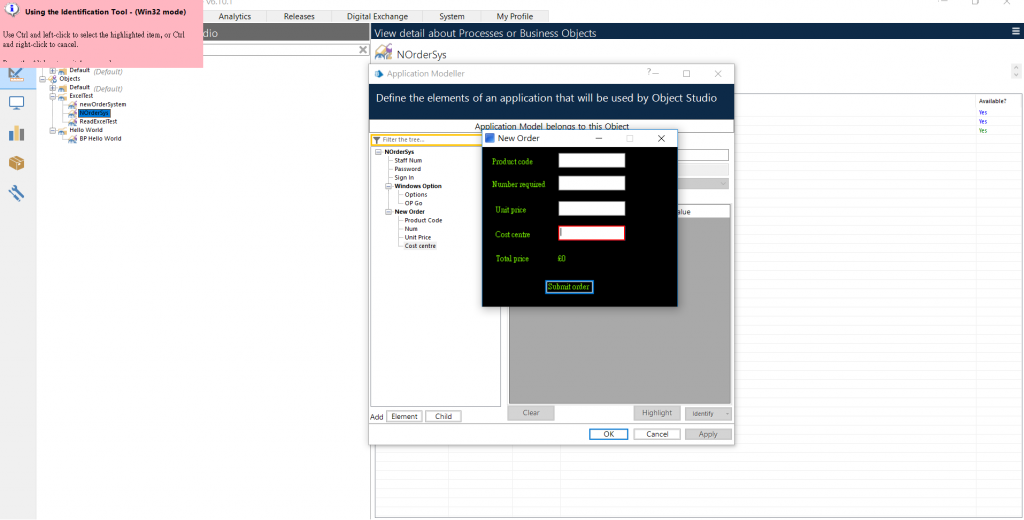
D. Ctrl + 滑鼠左鍵 確認對焦範圍,Ctrl + 滑鼠右鍵 取消
按下Highlight鈕,可再次確認對焦範圍是否如預期,
若聚焦如預期則按下Apply。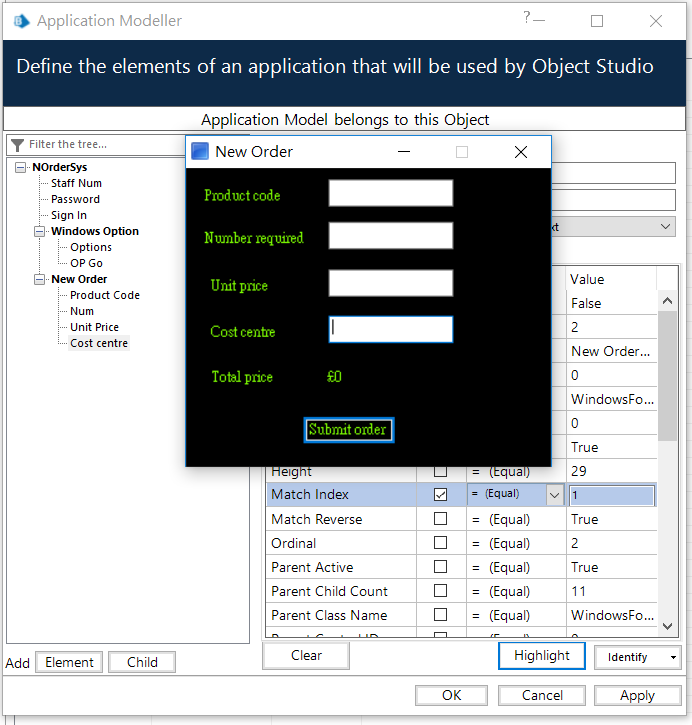
(6). 新增Submit Order為New Order下的第五個子Element
E. 在Cost centre的Element上按下滑鼠右鍵 Insert New >DDE Element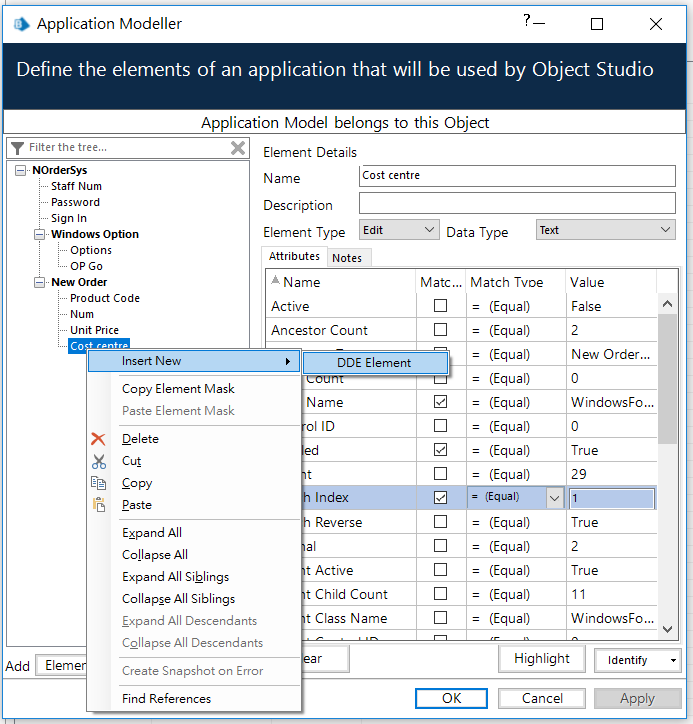
F. Name 輸入Submit Order,按下Clear 鈕(清空一下目前的屬性資訊)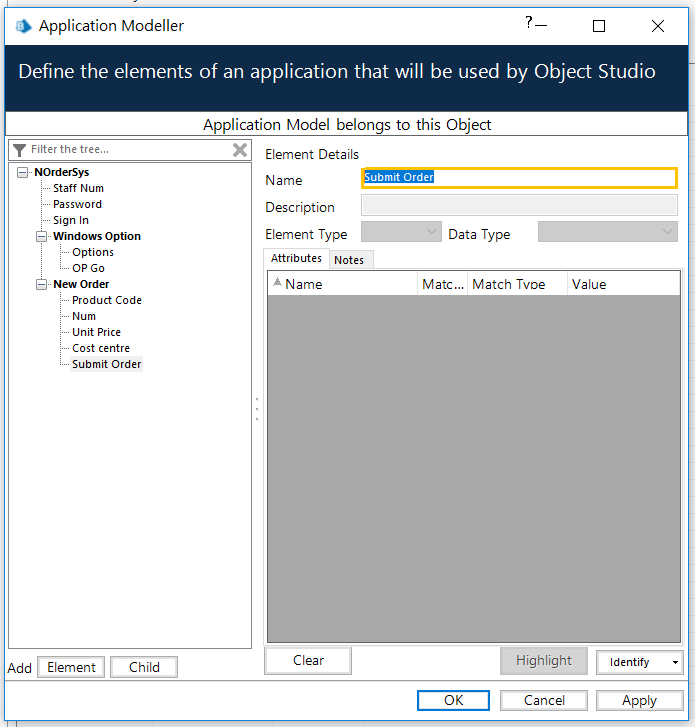
G. 按下Identify開啟對焦鎖定模式(Alt 切換模式)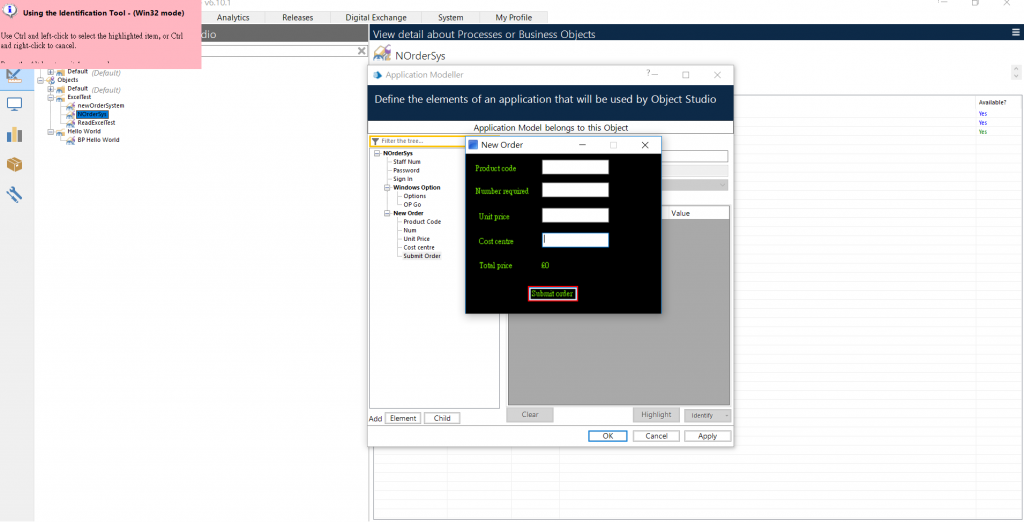
H. Ctrl + 滑鼠左鍵 確認對焦範圍,Ctrl + 滑鼠右鍵 取消
按下Highlight鈕,可再次確認對焦範圍是否如預期,
若聚焦如預期則按下Apply。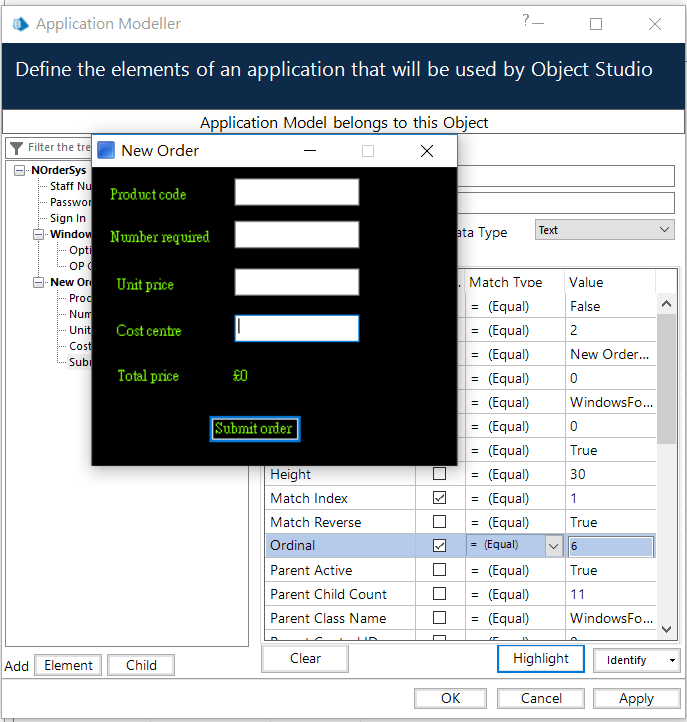
(7). 新增一個04. New Order 的Object Page
A. 到Object 頁籤列上按下滑鼠右鍵 New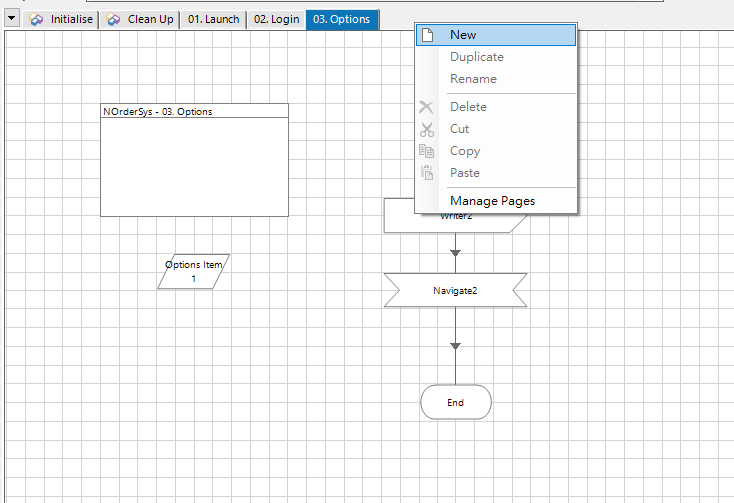
B. 輸入04. New Order,按下OK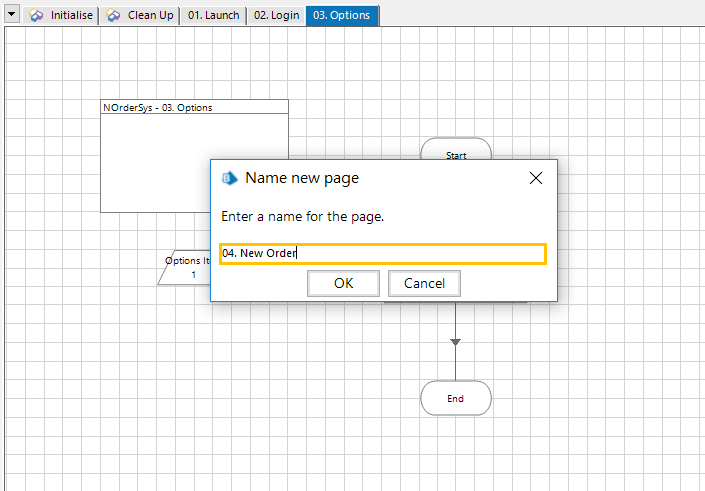
(2). 新增一個Num的Data Item,按下OK
Data Type: Number
Initial Value:3 (依照實際輸入)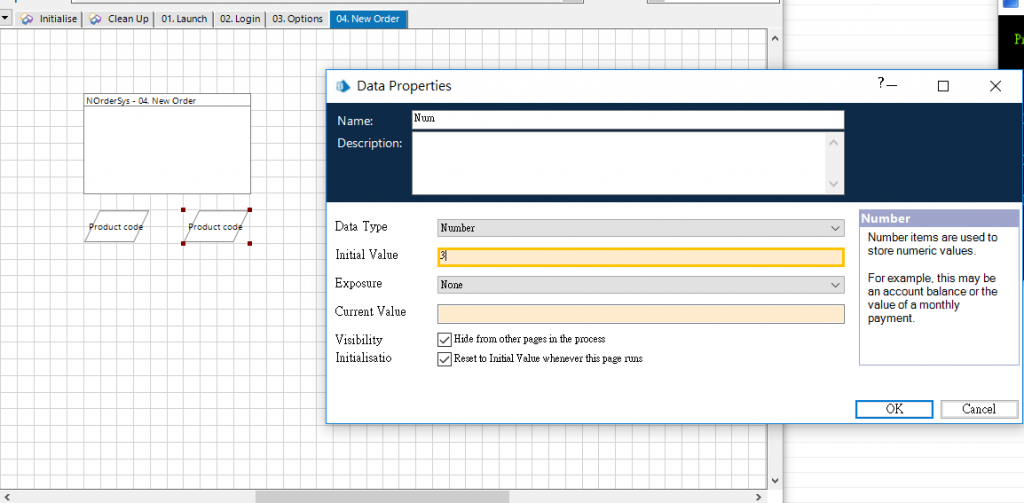
(3). 新增一個Unit Price的Data Item,按下OK
Data Type: Number
Initial Value: 200 (依照實際輸入)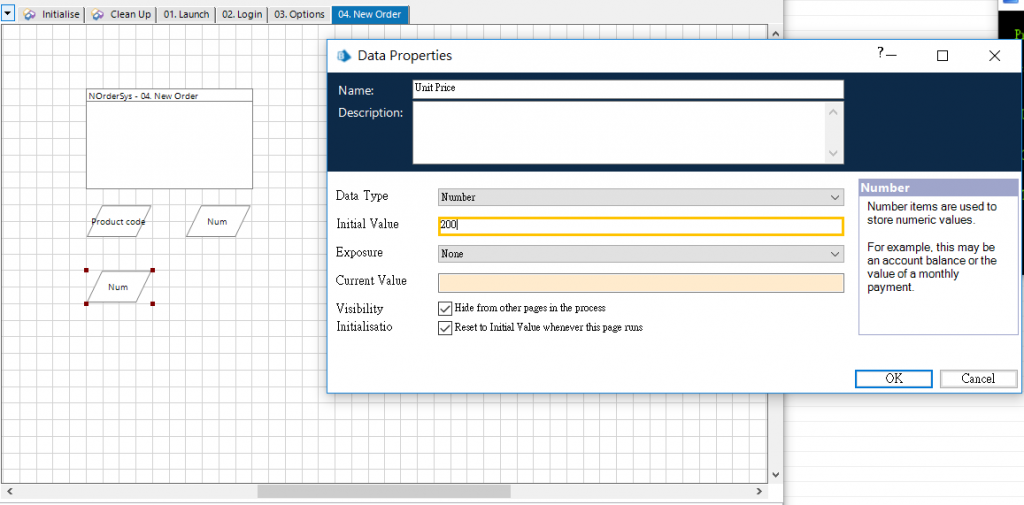
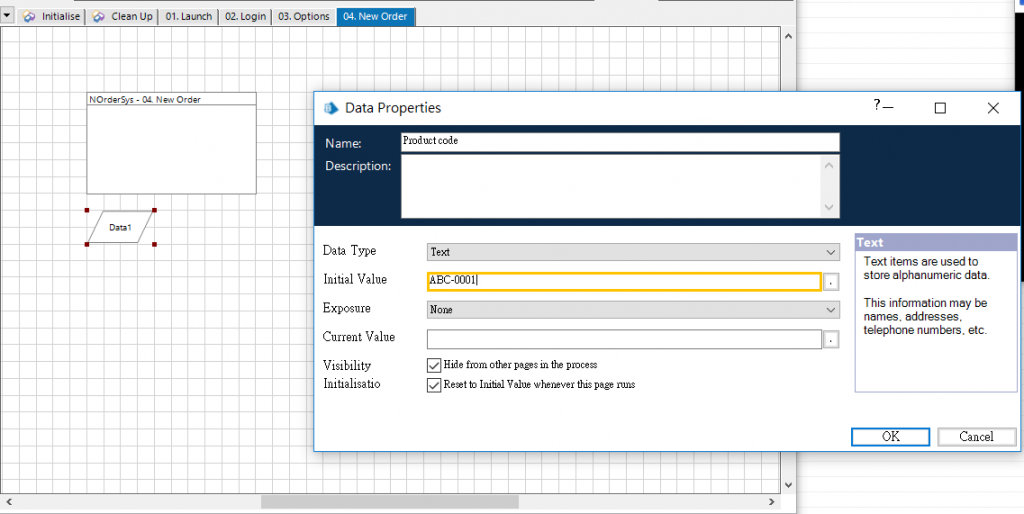
(4). 新增一個Product code的Data Item,按下OK
Data Type: Text
Initial Value: 3(依照實際輸入)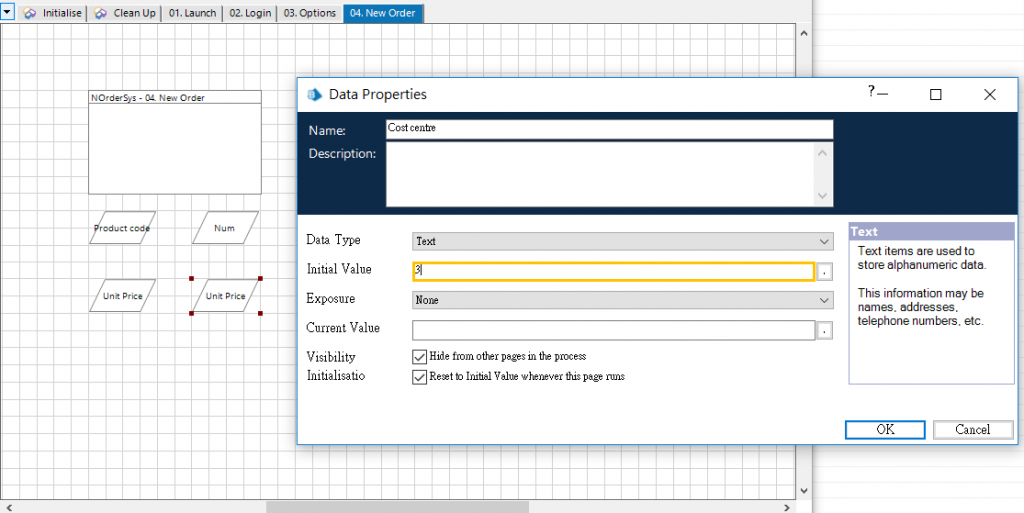
(5). 新增一個Write,按下OK
新增4筆參數。
Value從左邊拖曳帶入,Element從右邊拖曳帶入(內容詳下圖)
(6). 新增一個Navigate,按下OK
拖曳左邊的Submit Order到Element中,Acton選Global Mouse Click Cent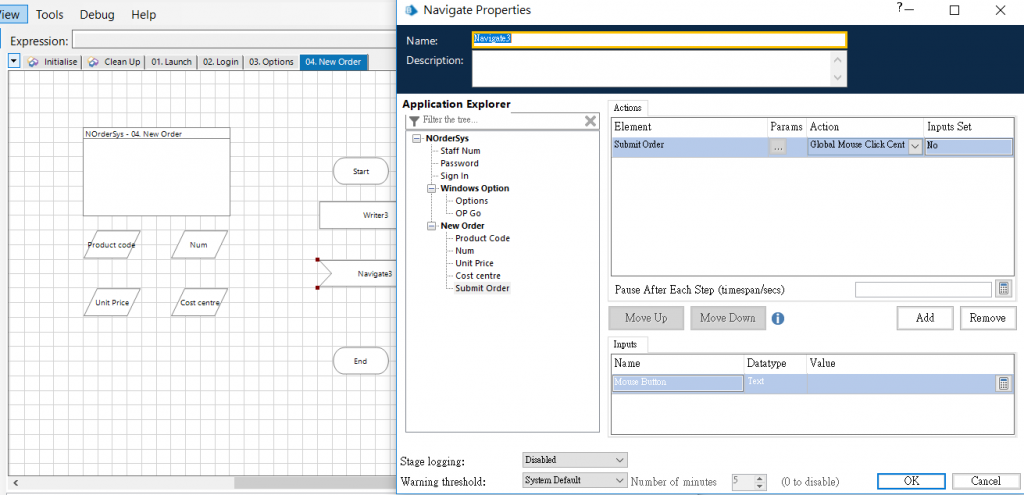
3. 串起流程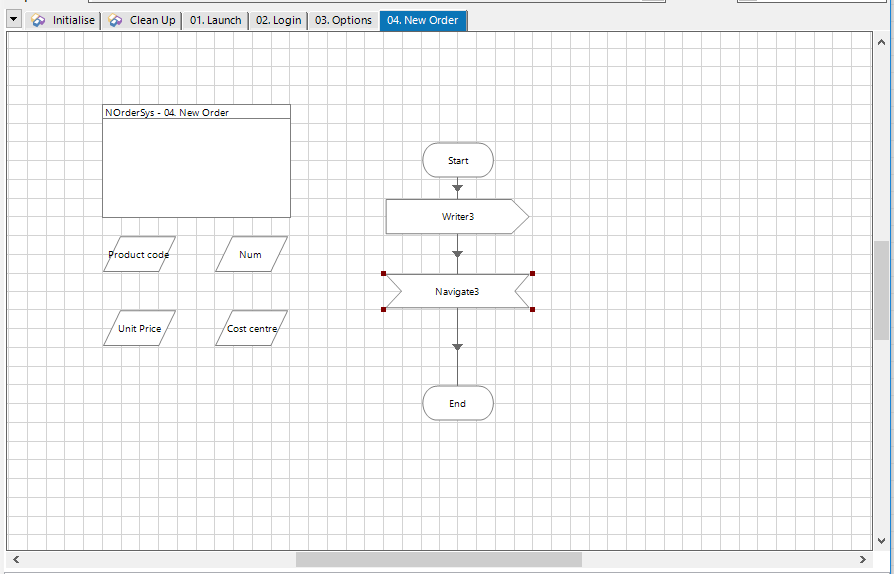
4. 執行流程:
(1). 若已執行過,建議先按下Reset按鈕(循環圖示),再按下執行圖示。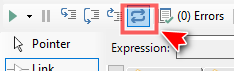
(2). 執行流程:
點擊左上角的三角形執行圖示,即開始執行流程。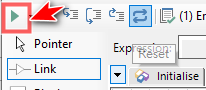
溫馨提醒:
由於這個流程的主要用途不在啟動應用軟體,
因此可先啟動應用軟體再執行,(可考慮先執行昨天的流程)才不會出現以下錯誤訊息。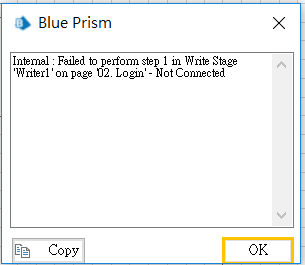
(3). 檢視結果:
A. 執行完流程將開始填寫New Order 選定功能項目
,並自動按下Submit Order按鈕。
B. 按完後進入下一頁取得訂單號碼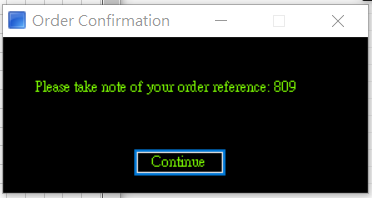
整個登打過程一氣呵成,
絲毫沒有人喊累嘆氣的聲音,
Blue Prism光這樣的展示能力就令不少老闆想為此買單了,
以後熬夜交給BP,人只要做不熬夜但有創意的工作即可。
以下我們再來增長一下BP知識吧!
BP小教室:
完成嚮導 (Complete the wizard)
選擇應用類型
第一個任務是選擇應用程序類型。應用程序類型的名稱應該是不言自明的,並且一個明顯的選擇應該防止它自己。如果>有疑問,那麼您應該選擇Windows 應用程序選項。
請注意,某些應用程序類型受到許可限制。這可能會限制您的選擇,使您無法選擇最合適的應用程序類型。如果您發現>自己處於這種情況,請聯繫 Blue Prism 尋求建議。提供更多信息
一系列問題通常跟隨在應用程序類型的選擇之後。後面的問題通常取決於提供給前面問題的答案,特別是取決於應用程>序類型。總的來說,此信息被稱為 詳細說明目標應用程序性質及其運行時環境的參數集。有關各個參數的信息以及有效值範圍的說明,請參閱參數幫助。(以上小知識擷取自Blue Prism online help)