第 16 天~
在前面說了那麼多的理論,
今天我們試著做一個簡單的東西,
就是大家都很不陌生的 TO。DO。LIST
首先先開個新專案出來吧
react-native init todoList
再來在專案的根目錄上,我們建一個 src 來存放我們的開發的程式碼,
把 App.js 放入 src資料夾裡,
調整 index.js 裡 App component 的位置,
這樣我們專案的初始化算是完成了
結構大概是這樣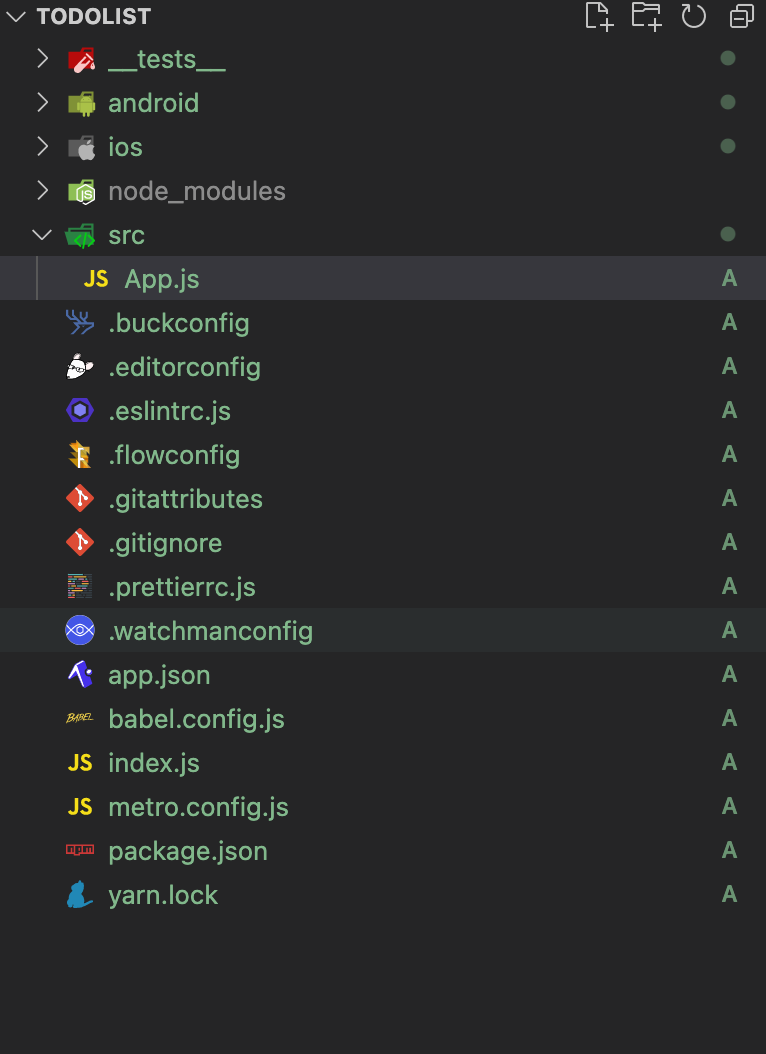
先來決定 ToDoList 要有什麼功能:
那我們的最終結果大概是這樣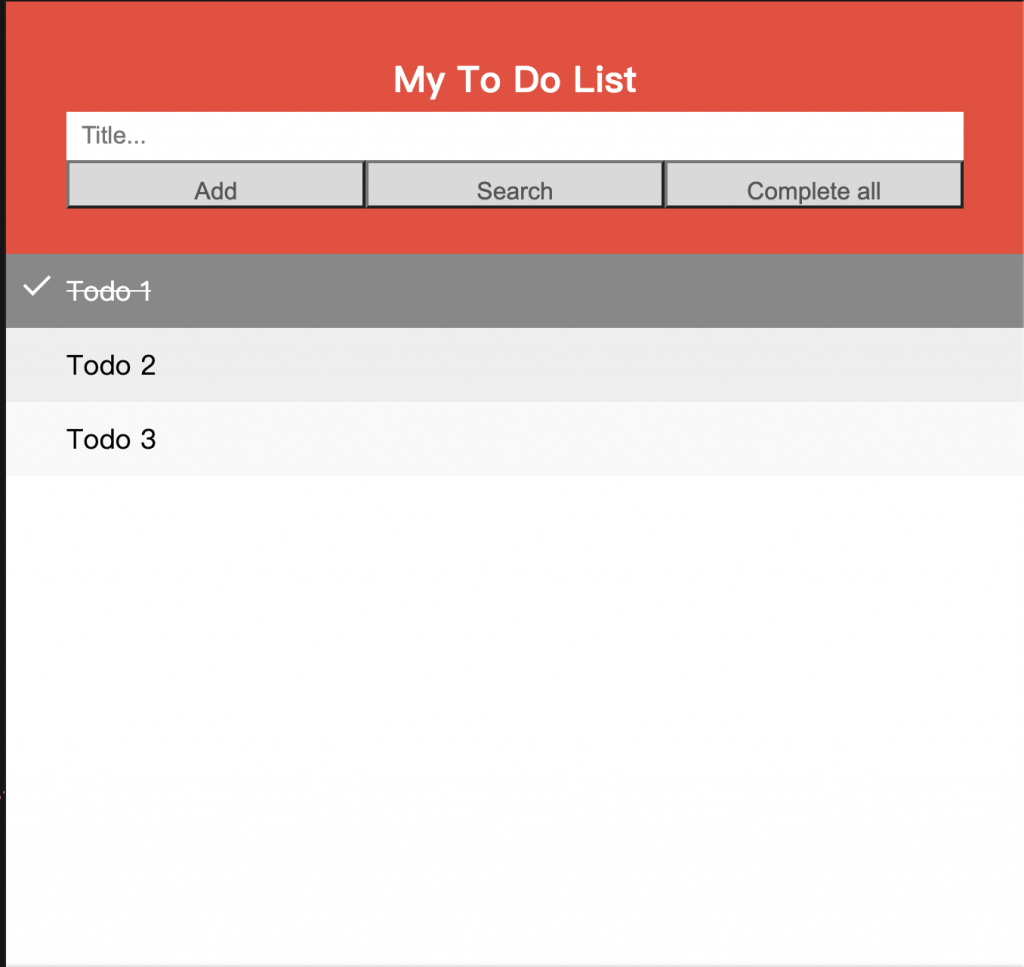
那首先,
我們先做橘色那塊,
內容有:
因為 react-native 沒有提供 h1、 h2 ...
所以我們只能用 Text component 然後自己去刻一個出來
使用 react-native 提供的 TextInput component
TextInput 相當於 html input,
比較常用到的 value 、 onchange、 placeholder 這些屬性都會有,
當然 TextInput 還有一些額外的屬性,
可以在官網上研究看看喔
按鈕來說, react-native 是有提供我們一個 Button component,
但是, android 跟 ios 的樣式不一樣,
既然這樣,那我們使用別的方式...自己手動刻一個
使用 TouchableOpacity component 搭配 Text component
大概是這樣:
<TouchableOpacity>
  <Text>Button</Text>
</TouchableOpacity>
TouchableOpacity 是 react-native 提供偵測 touch 的反應,並且當按下時,可以有 按下去 的效果
那整個出來的結構大約是這樣
const App = () => {
  return (
    <SafeAreaView>
      <View>
        <Text>My To Do List</Text>
        <TextInput />
        <View>
          <TouchableOpacity>
            <Text>Add</Text>
          </TouchableOpacity>
          <TouchableOpacity>
            <Text>Search</Text>
          </TouchableOpacity>
          <TouchableOpacity>
            <Text>Complete All</Text>
          </TouchableOpacity>
        </View>
      </View>
    </SafeAreaView>
  );
};
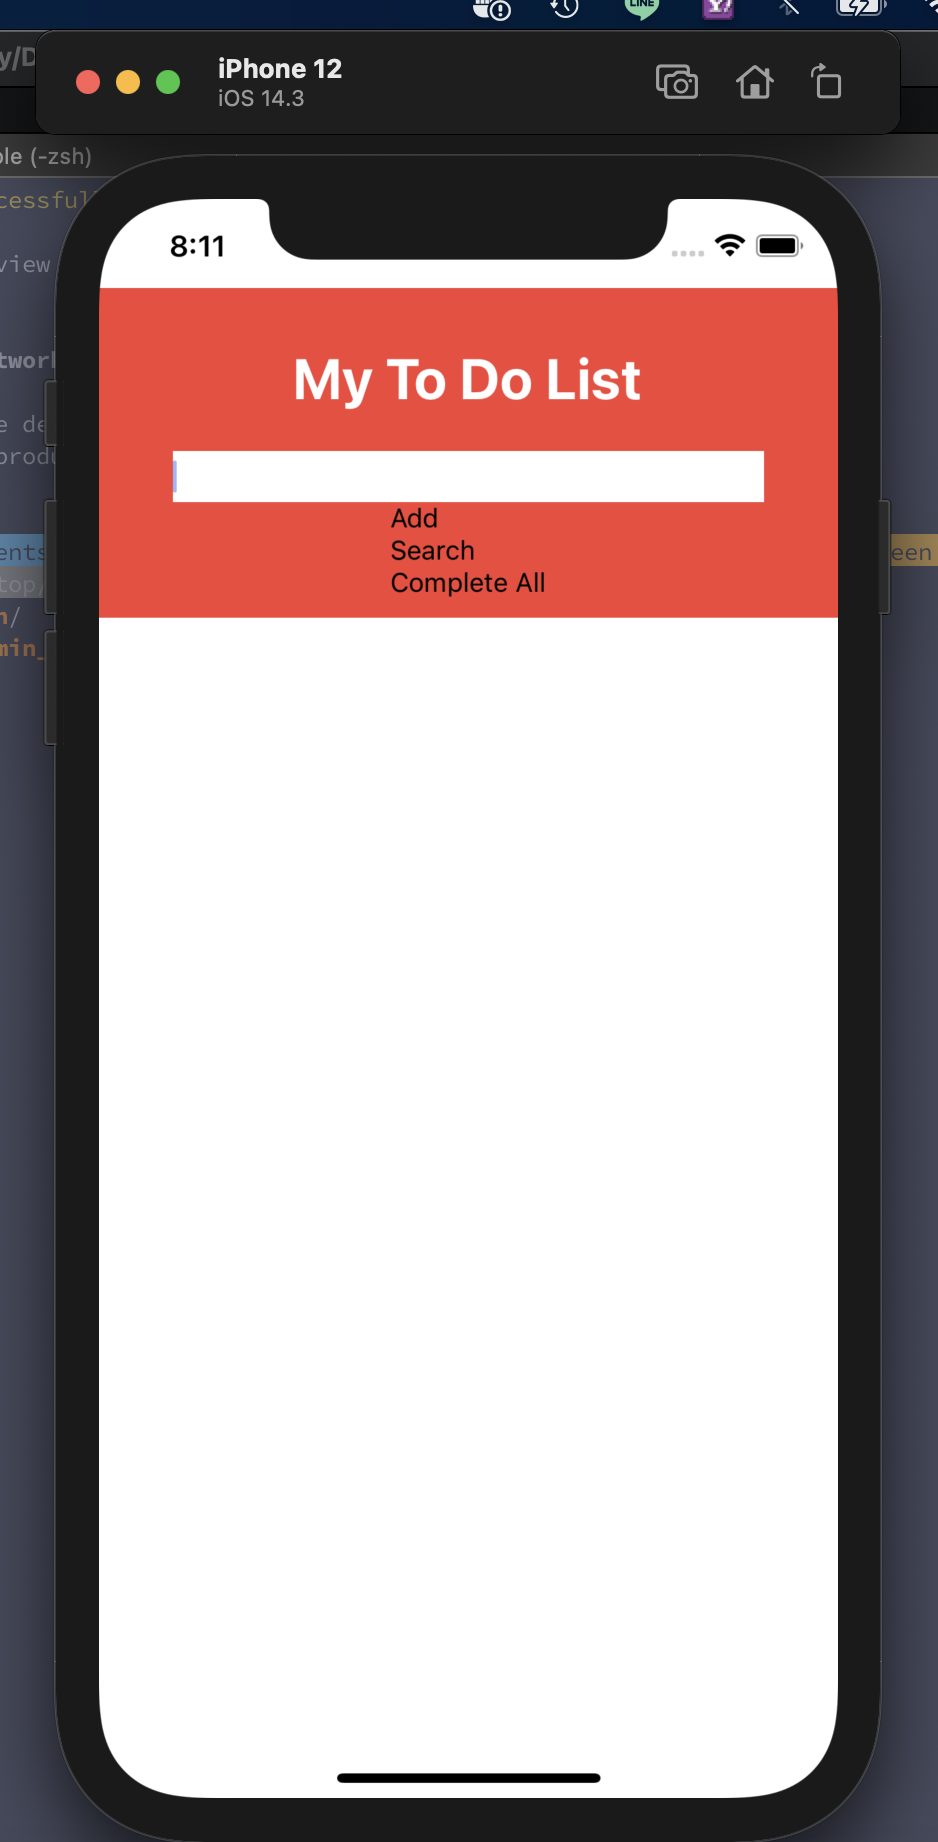
假如我們不加任何樣式,
結果畫面會是這樣的,
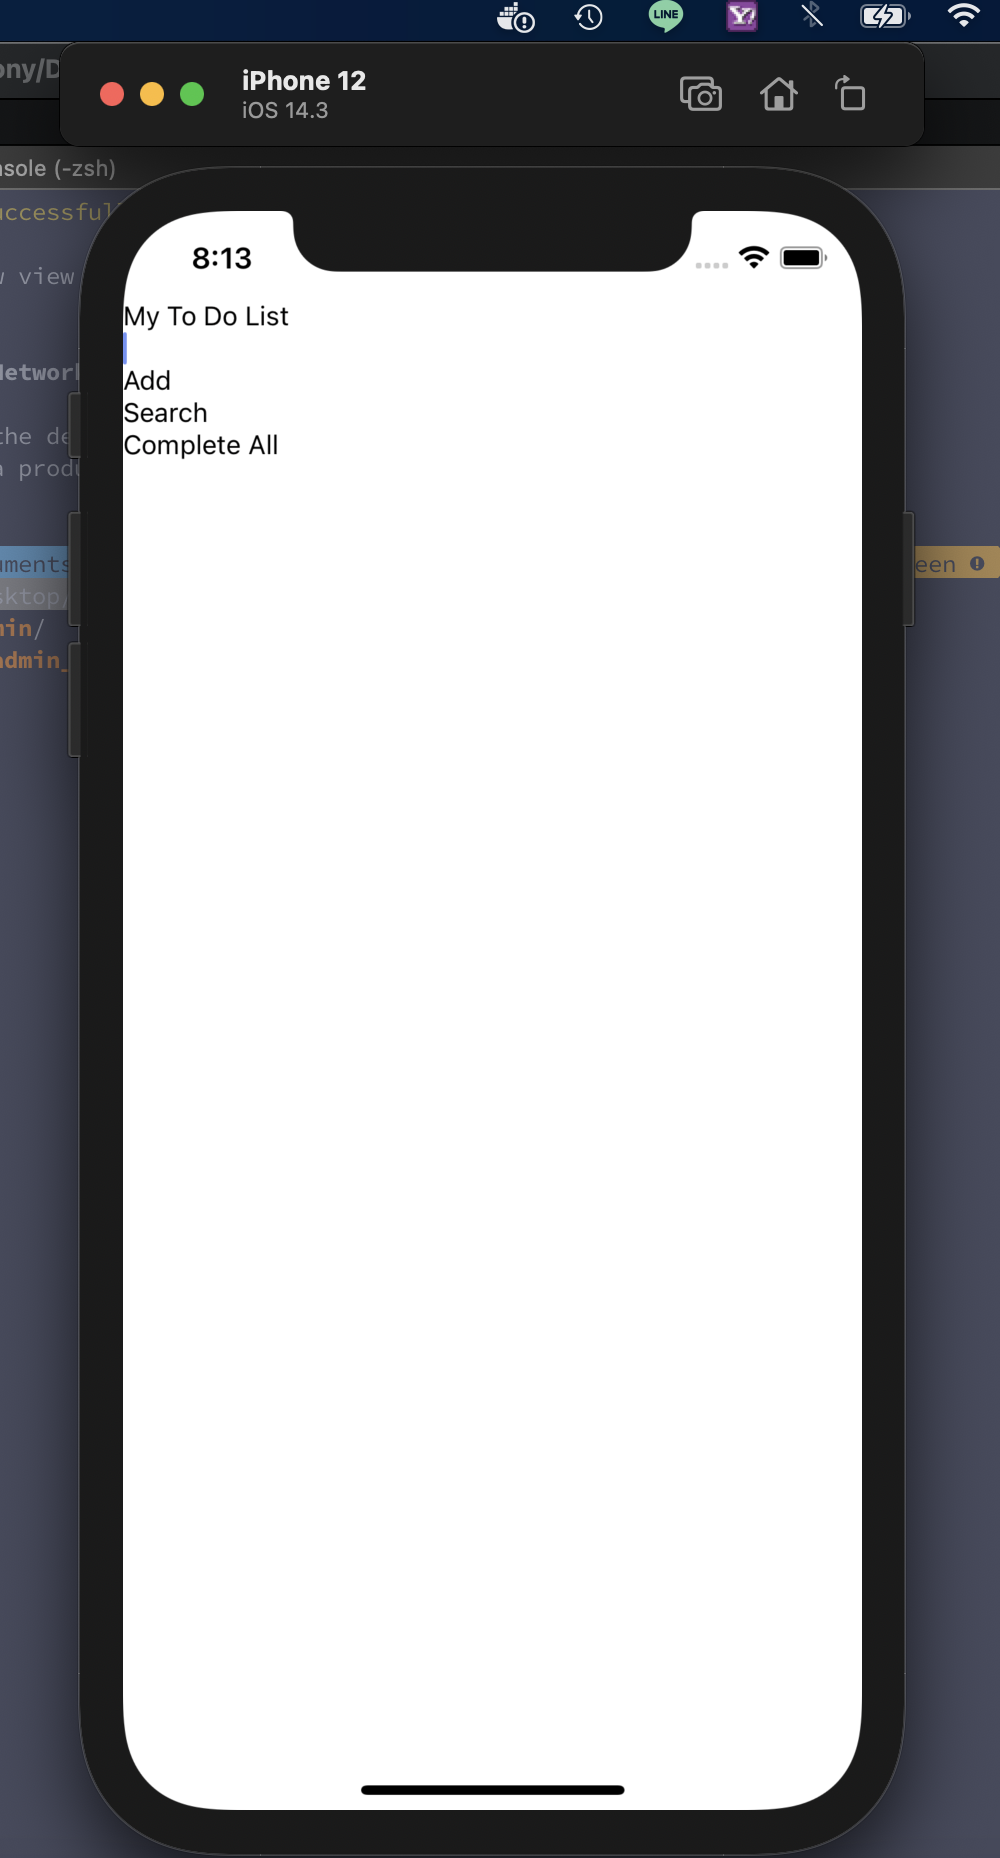
嗯... 亂七八糟的,
這時我們就把樣式給加進來,
使用 StyleSheet.create
我們先設定幾個 style
const styles = StyleSheet.create({
  root: {},
  header: {},
  title: {},
  input: {},
  buttonGroup:{},
  button:{},
  buttonText:{}
});
分別對應到 component ,
const App = () => {
  return (
    <SafeAreaView style={styles.root}>
      <View style={styles.header}>
        <Text style={styles.title}>My To Do List</Text>
        <TextInput style={styles.input} />
        <View style={styles.buttonGroup}>
          <TouchableOpacity style={styles.button}>
            <Text style={styles.buttonText}>Add</Text>
          </TouchableOpacity>
          <TouchableOpacity style={styles.button}>
            <Text style={styles.buttonText}>Search</Text>
          </TouchableOpacity>
          <TouchableOpacity style={styles.button}>
            <Text style={styles.buttonText}>Complete All</Text>
          </TouchableOpacity>
        </View>
      </View>
    </SafeAreaView>
  );
};
先調整 header,
{
  backgroundColor: '#f44336',
  flexDirection: 'column',
  alignItems: 'center',
  paddingVertical: 10,
},
這時畫面長這樣,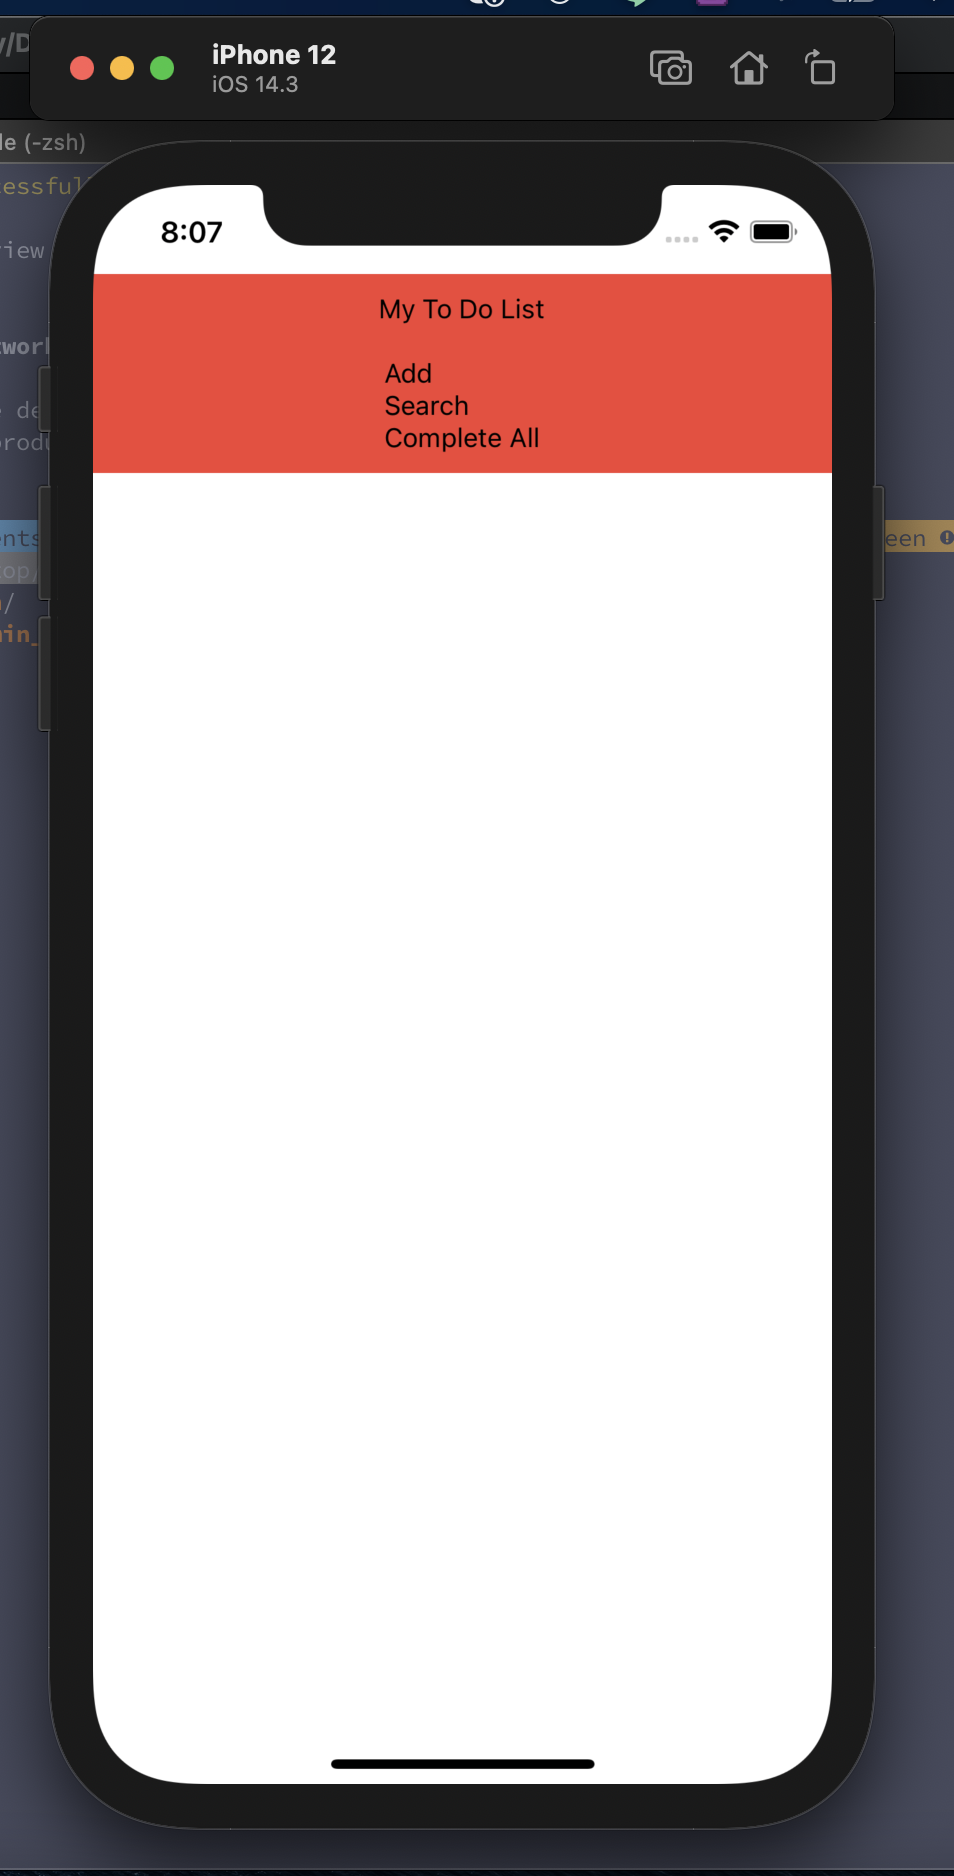
在設定 title & input
title: {
  color: '#fff',
  fontSize: 30,
  fontWeight: 'bold',
  marginVertical: 20,
},
input: {
  backgroundColor: '#fff',
  width: '80%',
  paddingVertical: 5,
},
結果會是:
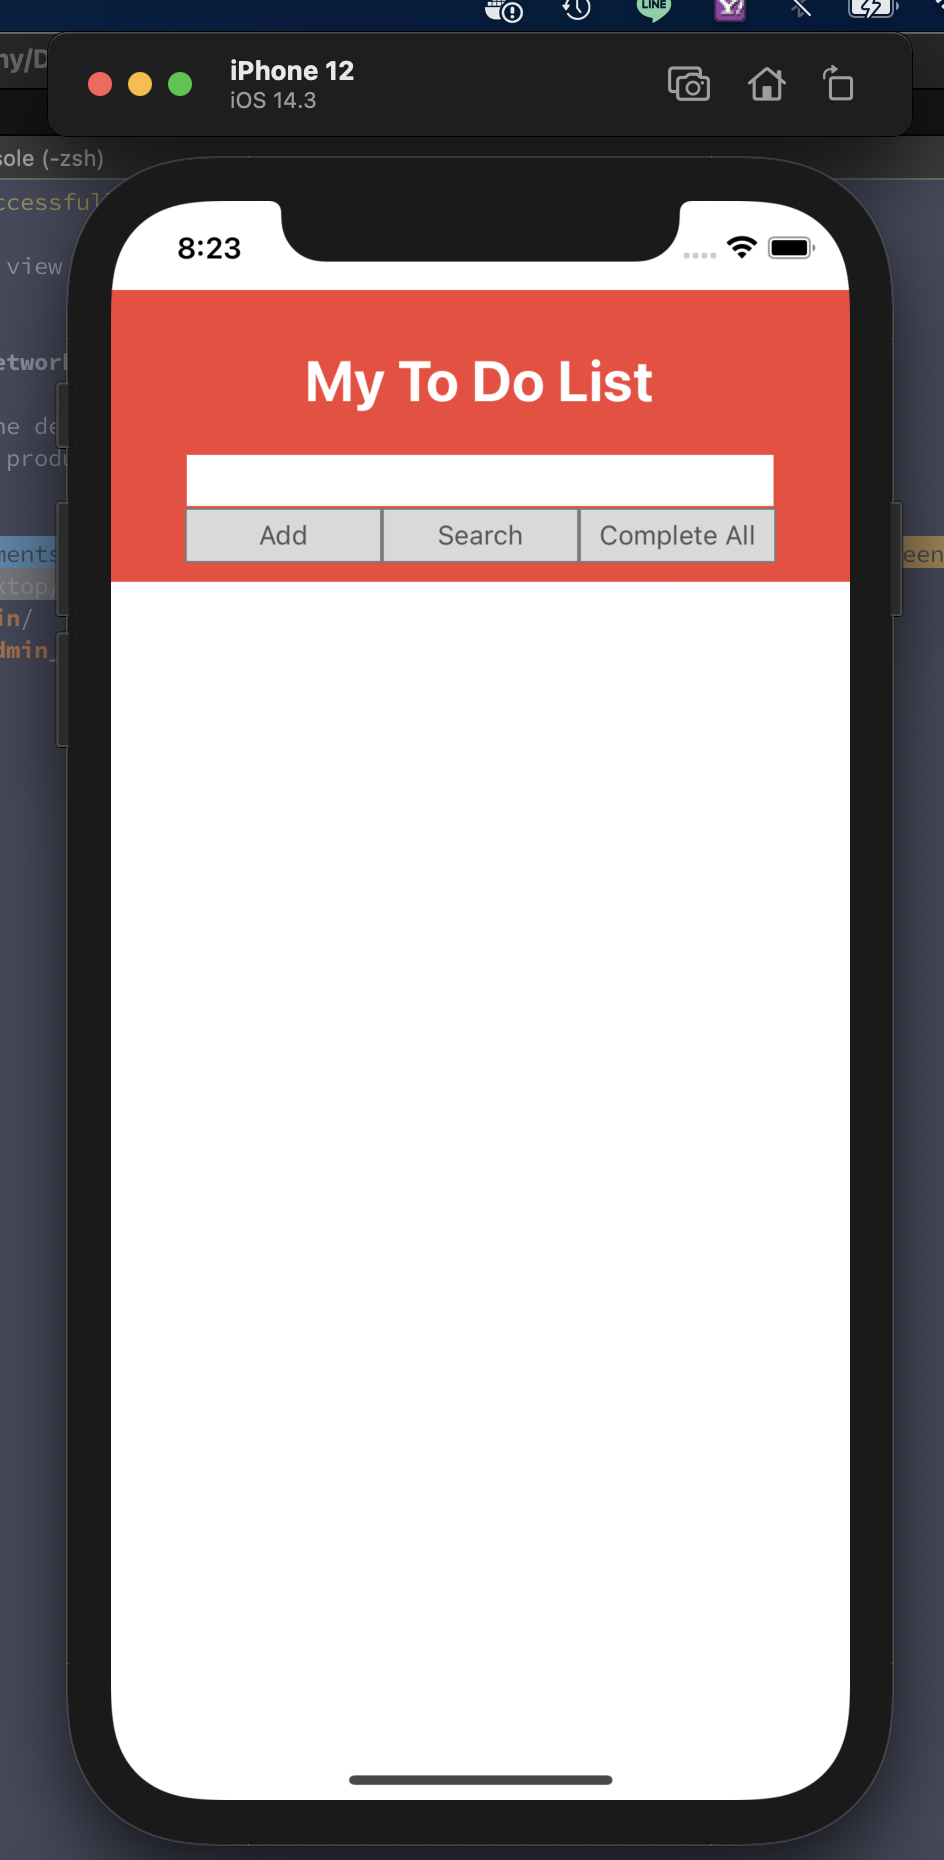
最後在把按鈕樣式加上去,
buttonGroup: {
  flexDirection: 'row',
  width: '80%',
  justifyContent: 'space-around',
},
button: {
  flex: 1,
  backgroundColor: '#d9d9d9',
  borderColor: '#7c7c7c',
  borderWidth: 1,
  padding: 5,
},
buttonText: {
  textAlign: 'center',
  color: '#555',
},
結果:


 iThome鐵人賽