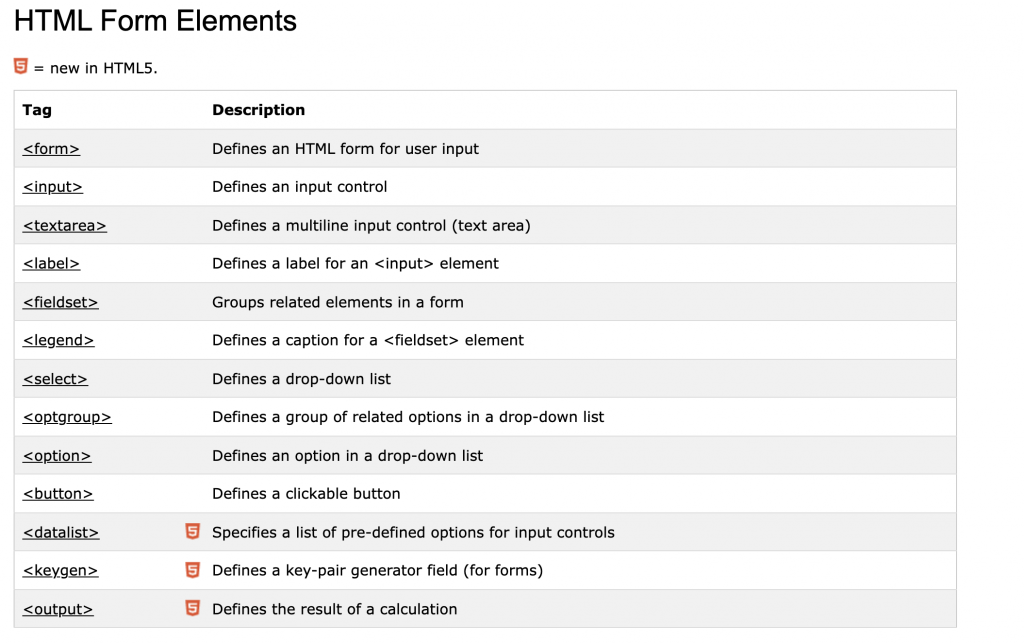
幾乎每個網站都會使用到表單元素 (Form Elements),例如登入頁、註冊頁就有非常多個輸入框(<input>)在其中,又或者是網站的 header 中可能會有下拉選單(<select>),也因此我今天要來和大家分享如何為表單元素攥寫測試,如何為表單元素設置值與觸發事件。

我們來看一個最基本的 input element 的例子。
import { ref } from 'vue'

const Component = {
  template: `
    <div>
      <input type="email" v-model="email" data-test="email" />
    </div>
  `,
  setup () {
    const email = ref('')

    return {
      email
    }
  }
在 Vue 中我們常見方法是使用 v-model 作雙向數據綁定,它會根據輸入類型自動選擇更新元素的正確方法,使我們可以輕鬆地使用表單元素。
要測試這個元件是否正常,我們應該驗證兩種情況是否正確運行:
Case 1 和 Case 2 看起來很像,但兩著的差別在於, Case 1 是驗證 Input 欄位中是否有正確顯示輸入的值,Case 2 則是驗證 v-model 是否有確定雙向綁定成功,將輸入的內容同步至綁定的變數上。
test('value of input element should be my@mail.com', async () => {
  const wrapper = mount(Component)
  const input = wrapper.get('[data-test="email"]')

  await input.setValue('my@mail.com')

  expect(input.element.value).toBe('my@mail.com')
})
語法說明:
test('after setted value, value of email should be my@mail.com', async () => {
  const wrapper = mount(Component)

  await wrapper.get('[data-test="email"]').setValue('my@mail.com')

  expect(wrapper.vm.email).toBe('my@mail.com')
})
語法說明:
我們來看一個更複雜的表單,它有更多的輸入類型,以及最後有一個 submit 的按鈕與行為。
import { reactive } from 'vue'

const Component = {
  template: `
    <form data-test="form" @submit.prevent="submit">
      <input data-test="email" type="email" v-model="form.email" />

      <textarea data-test="description" v-model="form.description" />

      <select data-test="city" v-model="form.city">
        <option value="taipei">Taipei</option>
        <option value="tainan">Tainan</option>
      </select>

      <input data-test="subscribe" type="checkbox" v-model="form.subscribe" />

      <input data-test="interval.weekly" type="radio" value="weekly" v-model="form.interval" />
      <input data-test="interval.monthly" type="radio" value="monthly" v-model="form.interval" />

      <button type="submit">Submit</button>
    </form>
  `,
  emits: ['submit'],
  setup (props, { emit }) {
    const form = reactive({
      email: '',
      description: '',
      city: '',
      subscribe: false,
      interval: ''
    })

    const submit = () => {
      emit('submit', form)
    }

    return {
      form,
      submit
    }
  }
}
要測試這個元件是否正常,我們應該驗證兩種情況是否正確運行:
test('fill up form', async () => {
  const wrapper = mount(Component)

  const email = 'name@mail.com'
  const description = 'Lorem ipsum dolor sit amet'
  const city = 'taipei'
  const subscribe = true

  await wrapper.get('[data-test="email"]').setValue(email)
  await wrapper.get('[data-test="description"]').setValue(description)
  await wrapper.get('[data-test="city"]').setValue(city)
  await wrapper.get('[data-test="subscribe"]').setValue()
  await wrapper.get('[data-test="interval.weekly"]').setValue()

  expect(wrapper.vm.form).toEqual({
    email,
    description,
    city,
    subscribe,
    interval: 'weekly'
  })
})
語法說明:
test('submits the form', async () => {
  const wrapper = mount(Component)

  const email = 'name@mail.com'
  const description = 'Lorem ipsum dolor sit amet'
  const city = 'taipei'
  const subscribe = true

  await wrapper.get('[data-test="email"]').setValue(email)
  await wrapper.get('[data-test="description"]').setValue(description)
  await wrapper.get('[data-test="city"]').setValue(city)
  await wrapper.get('[data-test="subscribe"]').setValue(subscribe)
  await wrapper.get('[data-test="interval.monthly"]').setValue()

  await wrapper.get('[data-test="form"]').trigger('submit.prevent')

  expect(wrapper.emitted('submit')[0][0]).toEqual({
    email,
    description,
    city,
    subscribe,
    interval: 'monthly'
  })
})
語法說明:
今天的分享就到這邊,如果大家對我分享的內容有興趣歡迎點擊追蹤 & 訂閱系列文章,如果對內容有任何疑問,或是文章內容有錯誤,都非常歡迎留言討論或指教的!
明天要來分享的是 Vue3 單元測試 (Unit Testing) 主題的第六篇 Props & Computed ,那我們明天見!
