今天是要來填之前未補之坑,
那就是建立 VPN 連線,
以小公司來說,
其實能夠快速加快產品上市比較重要,
因此能夠內部 CI/CD 服務能夠使用就好,
真的要卡控就卡公司內的 IP,
有需要的話就使用遠端遙控工具到公司的電腦做操作。
當組織規模持續過大,
甚至採用不同的開發方法(如:成對開發),
我們會發現的確還是需要一台 VPN,
小公司也許沒辦法花費太多預算在基礎設施上,
這時候使用 AWS 託管的 VPN 服務就是個不錯的選擇,
我們可以建立一個 VPN 連線,
讓我們直接連到 AWS 的 Endpoint,
這樣我們就可以直接存取 private subnet 的資源,
不用在 public subnet 另外架設負載平衡器,
還要消耗多個 public ip 和 private ip。
中間穿插一個與 VPN 無關的元件做為暖身
會先回顧負載平衡器
只是為了要在建立 VPN 以後
再次調整 AWS 上的架構
從程式碼的角度來看
我們可以看到 internal 是 false
因此外網可以讀取得到
在 subents 中填入所有 public 的 subnets
可以理解成我們可能會隨機從一個 public 的 subnets 中連進去
並且這個接口可視為 DMZ 網段
因此也可以直接連到我們放在 aws 上 private subnet 的其他資源
resource "aws_lb" "jenkins" {
    name               = "jenkins"
    internal           = false
    load_balancer_type = "application"
    security_groups    = [ aws_security_group.elb_internal.id ]
    subnets            = data.aws_subnet_ids.public_subnet_ids.ids

    enable_deletion_protection = false

    tags = {
        Creator = "Terraform"
    }
}
從 AWS Cloud Console 登入後
在 EC2 的畫面中左側選擇網路介面
可以看到我們為 Jenkins 建立的負載平衡器
實際上 subnets 會關係到我們建立的負載平衡器
會在每個 subnet 上各配置一個專屬的 private ip
並且每個 subnet 也都會配置一個 public ip
這樣在其他可用區域掛掉之後
可由其他可用區域接手繼續運作
因此 AWS 負載平衡器貴雖貴
但還是貴的有其道理
可以在多個可用區域作用
可以掛 Web ACLs(雖然只有 ALB 可以用)
可以掛 SSL 憑證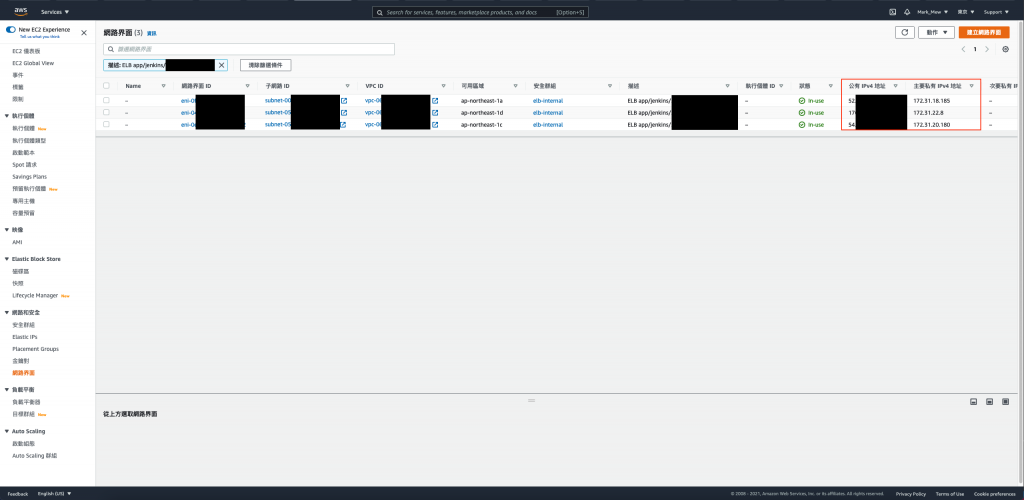
負載平衡器老實說是個不小的花費
但是如果都架設在內網
可以想要的話也可以將 Gitlab 和 Jenkins 的負載平衡器拔除
Gitlab 有整合 Let's Encrypt
Jenkins 則可以考慮在上面架設 Nginx
並且自簽憑證然後設定於 Nginx 上
最後再將 DNS 設定直接指向 Jenkins 和 Gitlab 的 private ip 上
剛剛說的只是其中一個做法
真心覺得 AWS 可以幫你申請套用憑證真的太方便了
因此我們不考慮把憑證改回設定在 EC2 上
但是負載平衡器會改成內部使用
不可公開存取
以下建立 VPN 連線的做法
是參考自這個 Youtube 影片
覺得字數太多有點煩躁的人
建議可以直接觀看影片
照著影片一步一步實作
easy-rsa 專案easy-rsa 是一個可以憑證產生工具
可以使用 cli 的方式去產生及管理這些產生的 CA 和 PKI
cd /vagrant_data/project
git clone https://github.com/OpenVPN/easy-rsa.git
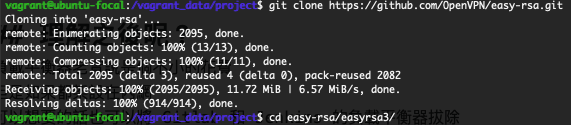
cd easy-rsa/easyrsa3/
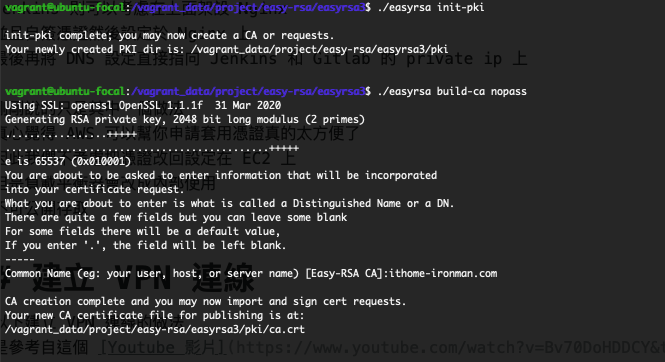
./easyrsa init-pki
./easyrsa build-ca nopass
./easyrsa build-server-full ithome-ironman.com nopass

./easyrsa build-client-full markmewmew.ithome-ironman.com nopass
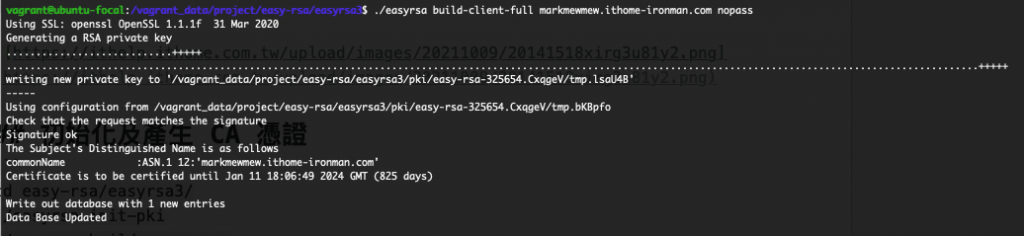
剛剛根據 CA 產生的 crt 會放在 issued 底下
而 private key 則會放在 private 底下
mkdir acm
cp pki/ca.crt acm
cp pki/issued/ithome-ironman.com.crt acm
cp pki/issued/markmewmew.ithome-ironman.com.crt acm
cp pki/private/ithome-ironman.com.key acm
cp pki/private/markmewmew.ithome-ironman.com.key acm
分別將 Server Side 和 Client Side 的 憑證使用 aws cli 匯入到 aws
匯入後可以會出現憑證的 ARN
Server 憑證
aws acm import-certificate --certificate fileb://ithome-ironman.com.crt --private-key fileb://ithome-ironman.com.key --certificate-chain fileb://ca.crt --region ap-northeast-1

Client 憑證
aws acm import-certificate --certificate fileb://markmewmew.ithome-ironman.com.crt --private-key fileb://markmewmew.ithome-ironman.com.key --certificate-chain fileb://ca.crt --region ap-northeast-1

匯入後我們就可以在 AWS Cloud Console 的 Cert Manager 中
看到我們目前使用的憑證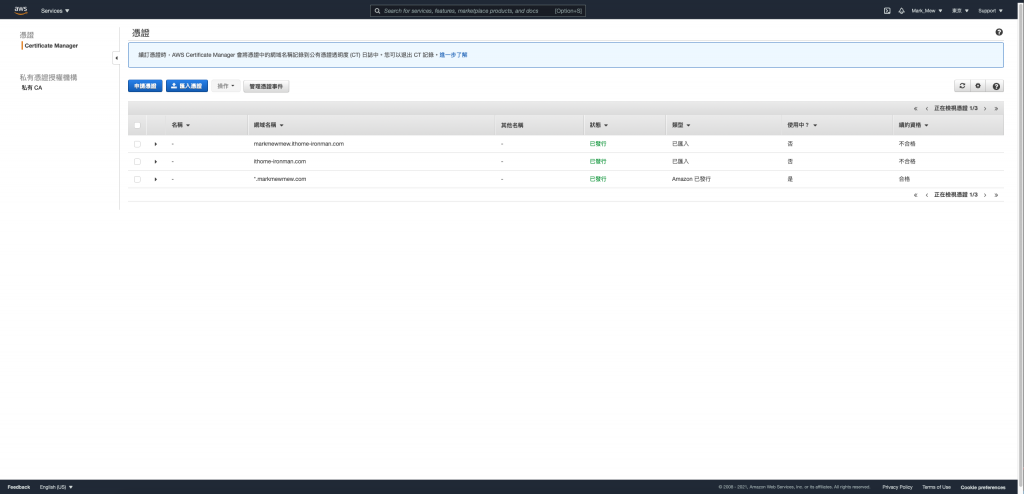
首先我們用 data 將匯入的憑證查詢出來
讓我們在建立 clien vpn endpoint 時
可以直接拿來使用
stage/main.tf
data "aws_acm_certificate" "vpn_server_cert" {
    domain   = "ithome-ironman.com"
    statuses = ["ISSUED"]
}

data "aws_acm_certificate" "vpn_client_cert" {
    domain   = "markmewmew.ithome-ironman.com"
    statuses = ["ISSUED"]
}
stage/main.tf
resource "aws_ec2_client_vpn_endpoint" "markmew_ithome_ironman" {
    description            = "markmew-ithome-ironman"
    server_certificate_arn = data.aws_acm_certificate.vpn_server_cert.arn
    client_cidr_block      = "172.31.0.0/20"

    authentication_options {
        type                       = "certificate-authentication"
        root_certificate_chain_arn = data.aws_acm_certificate.vpn_client_cert.arn
    }

    connection_log_options {
        enabled               = false
    }
}
在建立 vpn 網路的關聯需要花費不少時間(大概七到十分鐘)
建議這裡可以先去喝杯咖啡稍待一下
網路的部分要設定 public 或 private 都沒差
因為在連上之後
會因為路由的關係
只能連到 AWS 上的資源
但是外網都連不到
main.tf
resource "aws_ec2_client_vpn_network_association" "public_a" {
    client_vpn_endpoint_id = aws_ec2_client_vpn_endpoint.markmew_ithome_ironman.id
    subnet_id              = aws_subnet.public_a.id
}

resource "aws_ec2_client_vpn_network_association" "public_c" {
    client_vpn_endpoint_id = aws_ec2_client_vpn_endpoint.markmew_ithome_ironman.id
    subnet_id              = aws_subnet.public_c.id
}

resource "aws_ec2_client_vpn_network_association" "public_d" {
    client_vpn_endpoint_id = aws_ec2_client_vpn_endpoint.markmew_ithome_ironman.id
    subnet_id              = aws_subnet.public_d.id
}
terraform apply
登入 AWS Cloud Console
在 VPC 頁面的側欄中 VIRTUAL PRIVATE NETWORK (VPN) 的區塊
點按 Client VPN Endpoints 進入 VPN 列表頁
選擇我們剛剛建立的 VPN 後
點按上方的 Download Client Configuration 即可下載設定檔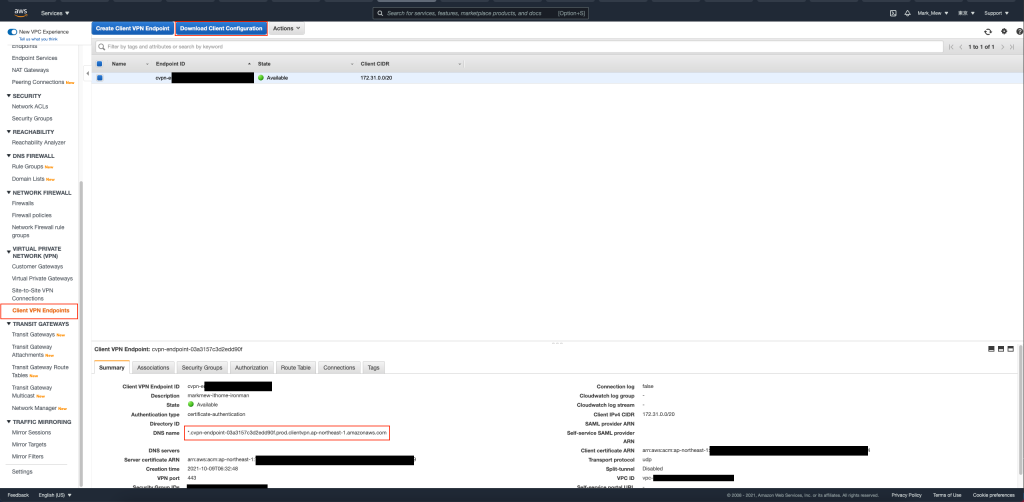
如果有仔細前一個步驟 VPN 的資訊
會發現它給的 DNS 是 Wild Card
因此網址我們可以任意加前綴字
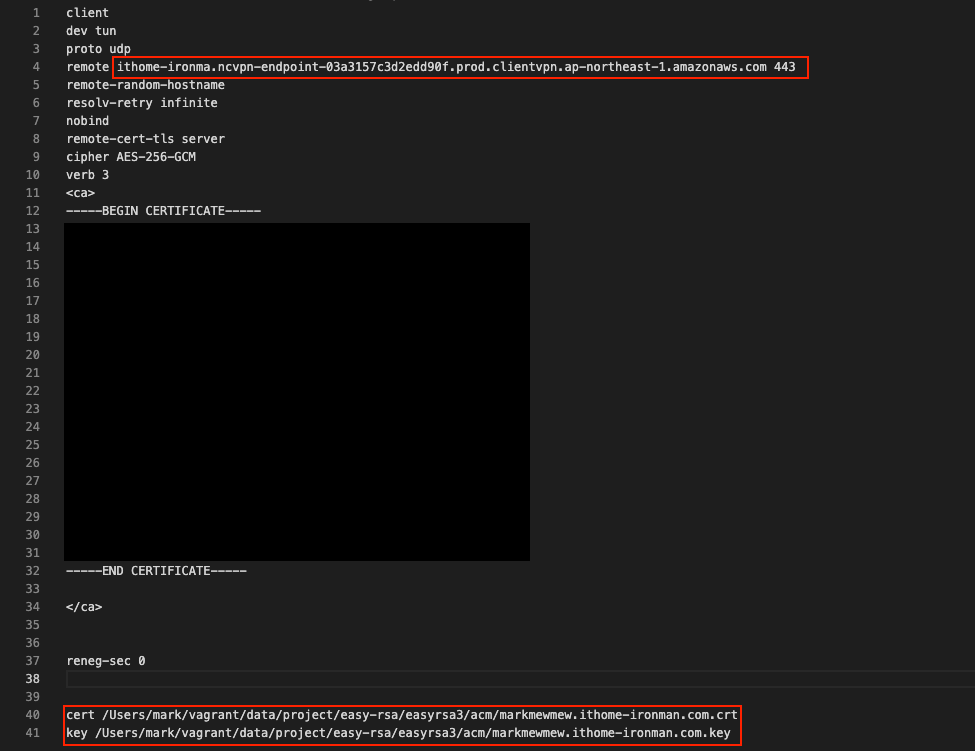
使用文字編輯器打開下載的 ovpn 檔
remote 後方的 vpn 網址
在網址的前方加上任意網址
讓其變成 sub domain
remote ithome-ironma.ncvpn-endpoint-03a3157c3d2edd90f.prod.clientvpn.ap-northeast-1.amazonaws.com 443
設定檔末
加上 client 的 cert 和 key 的位置
cert /Users/mark/vagrant/data/project/easy-rsa/easyrsa3/acm/markmewmew.ithome-ironman.com.crt
key /Users/mark/vagrant/data/project/easy-rsa/easyrsa3/acm/markmewmew.ithome-ironman.com.key
我們到這個網址 https://aws.amazon.com/tw/vpn/client-vpn-download/
下載 AWS 的 VPN Client 工具並安裝
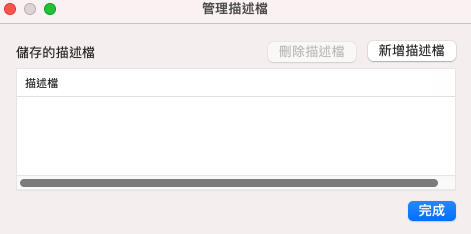
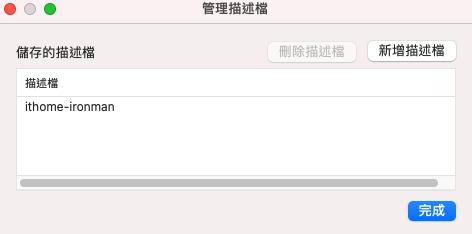
打開 VPN Client
選擇管理描述檔
將剛剛修改完後的描述檔加入
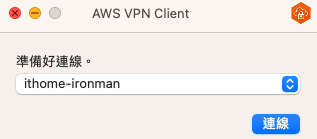
連上 VPN 以後
就可以直接從 web 打內網 IP 連到 Jenkins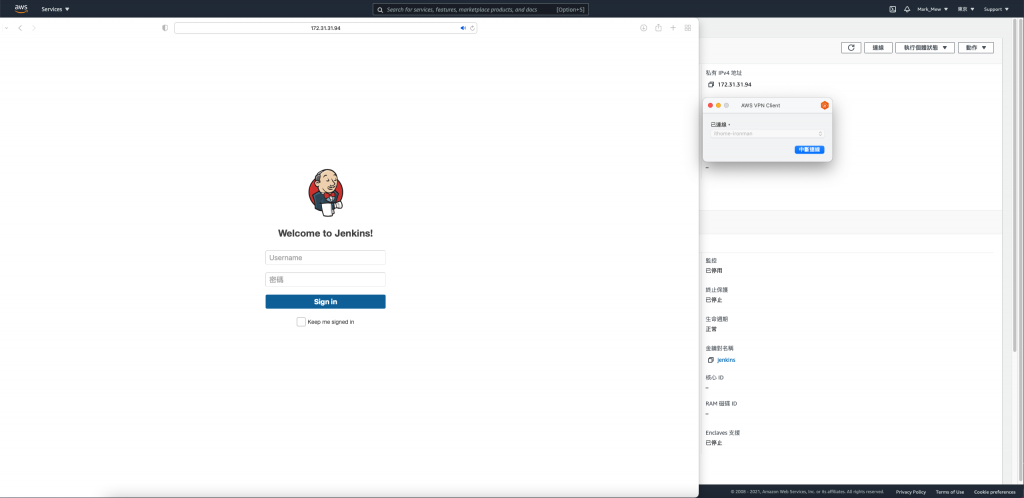
在 VPC 頁面中
確認 DNS hostnames 和 DNS resolutions 都是 enabled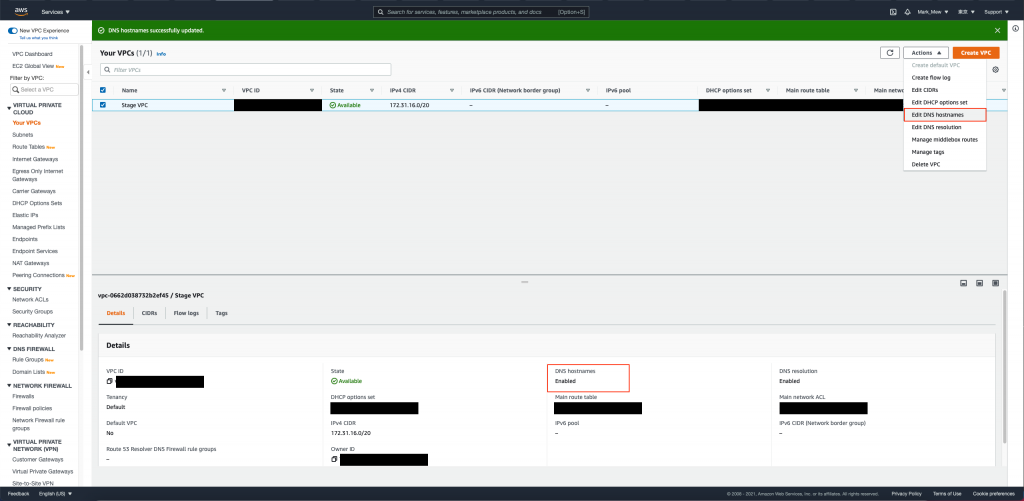
在 AWS 上的 DNS Server
預設是 VPC 的 CIDR 固定保留給 AmazonProvidedDNS
而 AmazonProvidedDNS 可以解析 Route53 上的私有託管區域
說是這樣說
但是我建立好 VPN 連線以後
SSH 到 Jenkins Server 上
查看 DHCP 套用的設定 cat /etc/resolv.conf
發現 nameserver 是 127.0.0.53
因此掛載 DNS 的部分可能會因人而異
修改剛剛設定的 aws_ec2_client_vpn_endpoint
stage/main.tf
resource "aws_ec2_client_vpn_endpoint" "markmew_ithome_ironman" {
    description            = "markmew-ithome-ironman"
    server_certificate_arn = data.aws_acm_certificate.vpn_server_cert.arn
    client_cidr_block      = "172.31.0.0/20"
    dns_servers            = ["172.31.16.2", "127.0.0.53"]

    authentication_options {
        type                       = "certificate-authentication"
        root_certificate_chain_arn = data.aws_acm_certificate.vpn_client_cert.arn
    }

    connection_log_options {
        enabled               = false
    }
}
將 jenkins 的負載平衡器 internal 改為 true
subnets 改為 private
stage/main.tf
resource "aws_lb" "jenkins" {
    name               = "jenkins"
    internal           = true
    load_balancer_type = "application"
    security_groups    = [ aws_security_group.elb_internal.id ]
    subnets            = data.aws_subnet_ids.private_subnet_ids.ids

    enable_deletion_protection = false

    tags = {
        Creator = "Terraform"
    }
}
terraform apply
我們建立一個私有託管網域
跟我在 GoDaddy 上的網域名稱是相同的
如此就可以營造出外部 DNS 和內部 DNS 的情境
stage/main.tf
resource "aws_route53_zone" "private" {
    name = "markmewmew.com"

    vpc {
        vpc_id = aws_vpc.stage.id
    }
}

resource "aws_route53_record" "jenkins" {
    zone_id = aws_route53_zone.private.zone_id
    name    = "jenkins.markmewmew.com"
    type    = "A"

    alias {
        name                   = aws_lb.jenkins.dns_name
        zone_id                = aws_lb.jenkins.zone_id
        evaluate_target_health = true
    }
}
連上 VPN 以後
我們打開網頁確認網址是可用的

並且試著在 vagrant 的 console 中
確認網址會解析到內部 IP

目前還需要調整 Gitlab 的 load balance 設定
在EP13 - 災難演練,重建你的 VPC中
有教各位如何重建 EC2
而重建 Octopuse Deploy 的工作也就交給各位了
之前我們在設定 Jenkins Pipeline 時
有些還是使用 private ip
如果拔掉 public 網段中的 alb 改用 NLB
就可以同時支援 22、80、443 port 的轉發
既然已經要 VPN 才能連到
其實有沒有使用到 Web ACLs 的保護就是其次了
這部分就不太重要了
如果公司規模日益增長
或是目前服務的公司規模很大
那就建議改用其他方式
Customer Gateways + Virtual Private Gateways + Site-to-Site VPN Connections
就適用於大型規模的架構
讓我們可以根據 VPN 的終端設備
直接設定連到 AWS 上
並且預設支援的設備也有提供相對應的組態檔
設定上就需要與公司的網管合作
並討論如何規劃目前公司內部網路
及安全性的問題
參考資料:


 iThome鐵人賽