
上一篇先將頁面基本功能建立好了,現在就要來處理最麻煩的後端驗證了~
userModel.js
簡單定義一下,(select: false 代表回傳資料時不會顯示 password 這個欄位的資料)
const mongoose = require('mongoose');

const userSchema = new mongoose.Schema({
    name: {
        type: String,
        required: true,
    },
    email: {
        type: String,
        required: true,
        unique: true,
        lowercase: true,
    },
    photo: String,
    password: {
        type: String,
        required: true,
        minlength: 8,
        select: false,
    },
});

const User = mongoose.model('User', userSchema);

module.exports = User;
userController.js
接著建立 register 以及 login ,目前先將基本功能寫上來,之後再修正:
register 傳入 name, email, password 來建立使用者到資料庫中login 使用 Model.findOne() 來尋找 email 對應的使用者const User = require('../models/userModel');
exports.register = async (req, res) => {
try {
const user = await User.create({
name: req.body.name,
email: req.body.email,
password: req.body.password,
});
res.json({
status: 'success',
data: {
user,
},
});
} catch (err) {
console.log(err);
res.json({
status: 'error',
});
}
};
exports.login = async (req, res) => {
const { email, password } = req.body;
try {
const user = await User.findOne({ email });
res.json({
status: 'success',
data: {
user,
},
});
} catch (err) {
console.log(err);
res.json({
status: 'error',
});
}
};
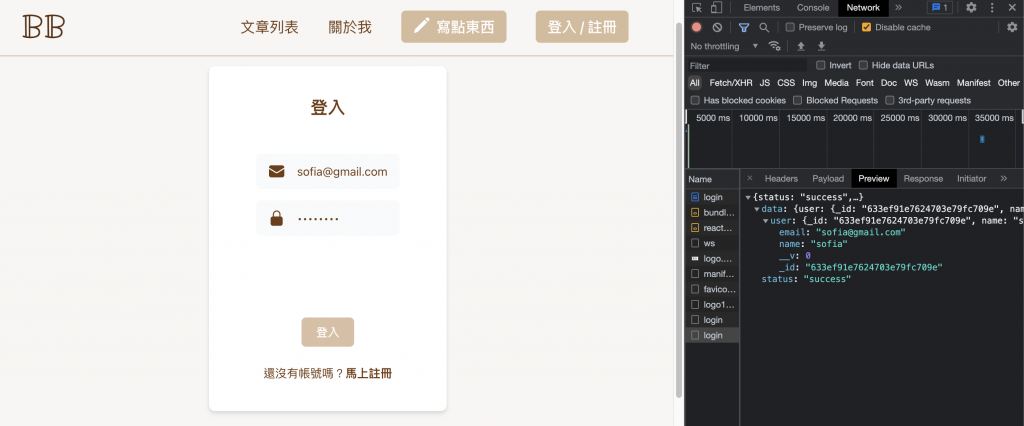
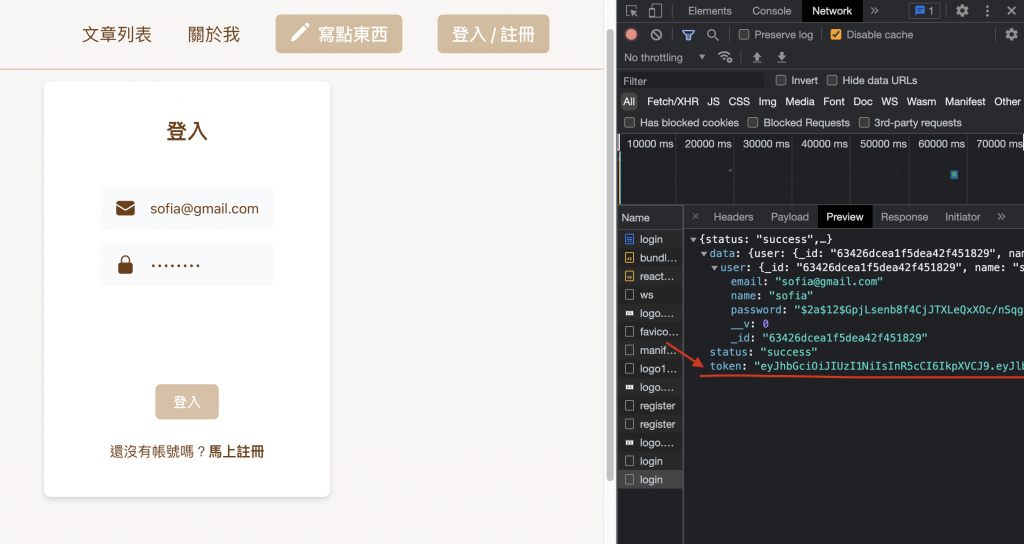
試著使用註冊然後登入的結果會是這樣
userRoutes.js
然後再定義路徑及相應的 controller
const express = require('express');
const userController = require('../controllers/userController');

const router = express.Router();

router.post('/register', userController.register);
router.post('/login', userController.login);

module.exports = router;
index.js
記得在 index.js 中也要加上 route 的基本路徑
const userRouter = require('./routes/userRoutes');

app.use('/api/v1/users', userRouter);
yarn add bcryptjs
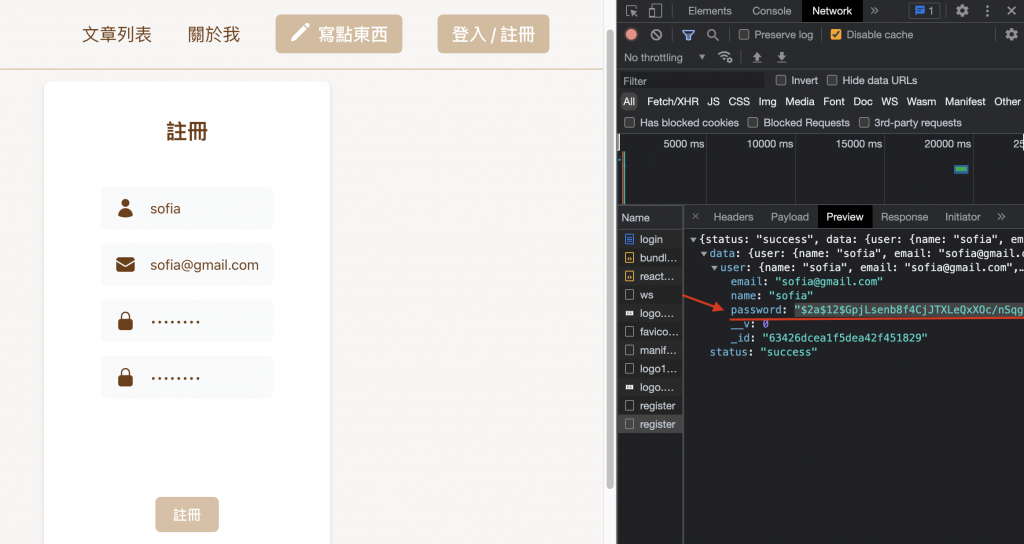
接著將使用者的密碼經過「加密處理」再存進資料庫中!
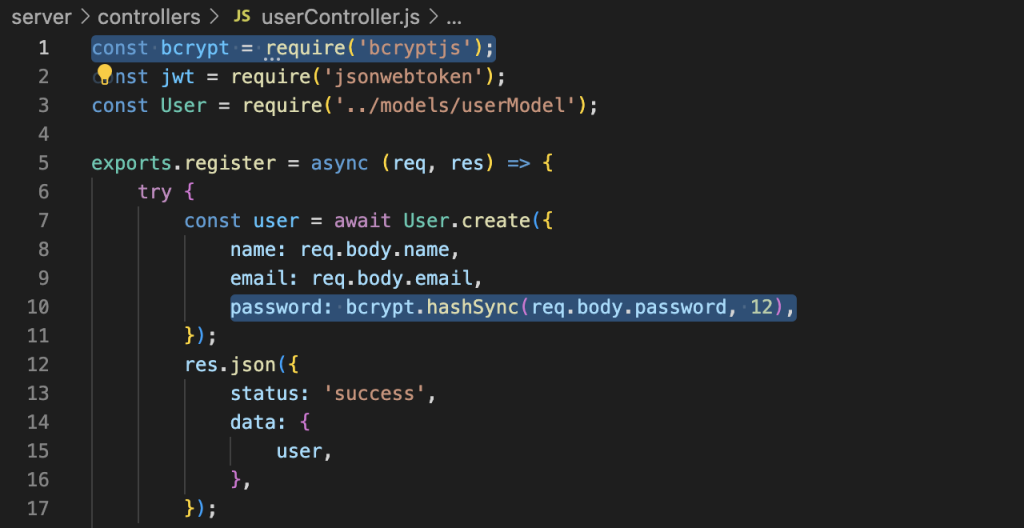
bcrypt 會幫我們產生一段字串,這樣就能避免將密碼暴露在資料中了
yarn add jsonwebtoken
然後來處理使用者登入後會產生的驗證 token 字串
.select(’+password’) → 取得 user 的 password 資料bcrypt.compare(password, user.password) → 比對使用者的密碼是否正確jwt.sign() → 產生 token,傳入 payload 及 secret,這邊以物件格式的使用者 email 作為 payload,另外在 .env 中定義一個 JWT_SECRET 字串來作為自訂密鑰(可以任意輸入一個字串)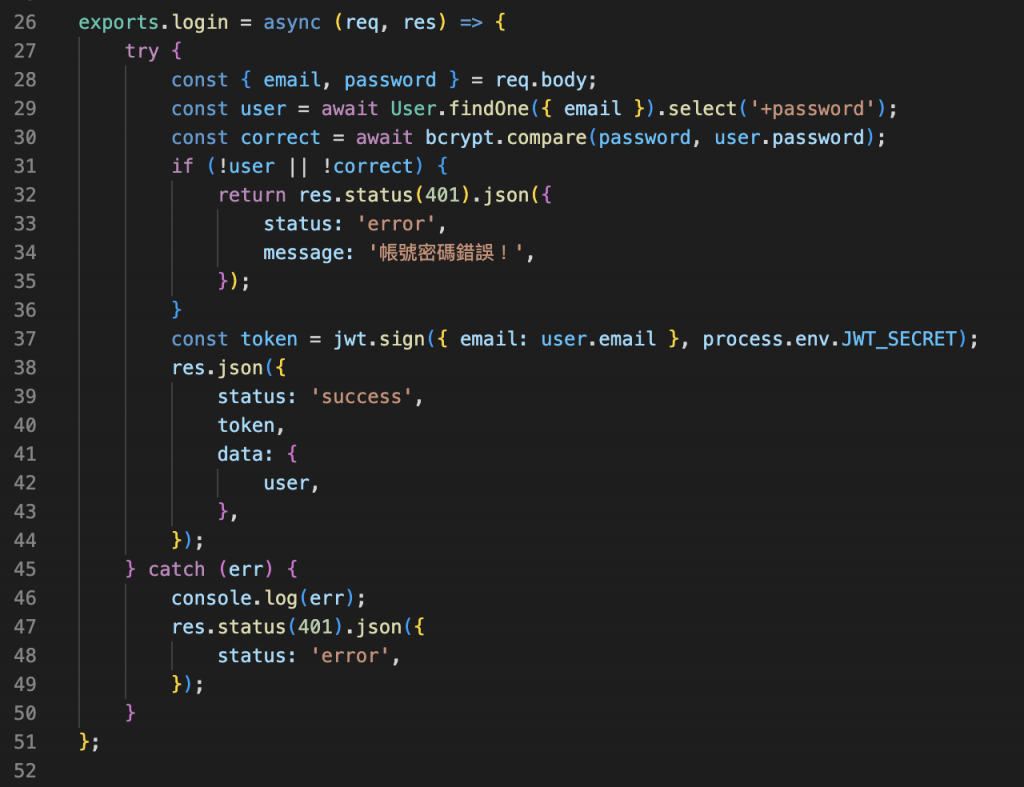
這樣在登入成功時,就能得到使用者的驗證 token 了
目前差不多就完成簡易的註冊登入功能啦~~~ 接下來就是處理前端的部分了
