大家好,我是 Yubin
本篇介紹利用 Fastify 官方團隊的 CLI 工具: Fastify-CLI 來快速建立 Fastify 專案
npm i -g fastify-cli
加上 -g 的參數,以全域的方式安裝 fastify-cli
假設要建立的專案名為 my-app,開啟 terminal 敲入以下指令
fastify generate my-app --lang=typescript
fastify-cli 會建立好專案目錄及基本的檔案,--lang=typescript 代表使用的是 TypeScript 的專案樣板。(開發 Fastify 的應用程式當然要用 TypeScript)
產生的專案檔案如下
.
├── package.json
├── package-lock.json
├── README.md
├── src
│   ├── app.ts
│   ├── plugins
│   │   ├── README.md
│   │   ├── sensible.ts
│   │   └── support.ts
│   └── routes
│       ├── example
│       │   └── index.ts
│       ├── README.md
│       └── root.ts
├── test
│   ├── helper.ts
│   ├── plugins
│   │   └── support.test.ts
│   ├── routes
│   │   ├── example.test.ts
│   │   └── root.test.ts
│   └── tsconfig.json
└── tsconfig.json
src/app.ts 是整個專案的進入點。
routes/ 及 plugins/ 目錄,分別放置 route 及 plugin 的定義,預設會透過 @fastify/autoload 這個工具,把兩個目錄中的所有檔案註冊進 server 中。
test/ 目錄,放置整個專案的測試檔,測試框架使用 tap。
接著進入該目錄,安裝相依套件
cd my-app
npm i
該專案預先建立了一些 scripts 方便開發者使用
npm start,編譯當前 .ts 檔案,並透過 node 執行編譯出來的 dist/app.js
npm run dev,開發模式,會偵測檔案的變更,自動觸發編譯重新執行npm run test,執行所有的測試使用 npm start
會看到有一個預設的 log: Server listening at http://127.0.0.1:3000

Fastify 預設會把 port 開在 3000 port,且只會聽來自 127.0.0.1 的請求。
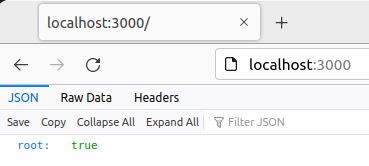
可以打開瀏覽器,瀏覽 localhost:3000

可以參考 routes/example/index.ts 的範例
新增一個 routes/hello.ts
import { FastifyPluginAsync } from 'fastify'

const hello: FastifyPluginAsync = async (fastify, opts): Promise<void> => {
  fastify.get('/hello', async function (request, reply) {
    return { message: 'Hello World' }
  })
}

export default hello
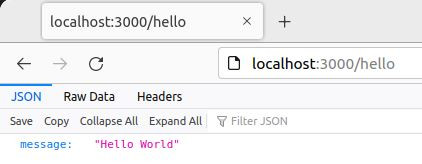
執行 npm start 或 npm run dev,打開瀏覽器瀏覽 localhost:3000/hello

以上為透過 fastify-cli 快速建立專案的方法。
好處是可以快速獲得一個結構完整的專案,但很多東西由於不是自己控制的 (走預設值),或 fastify-cli 把一些實作包起來了 (魔法),不熟悉的朋友可能需要多花一些時間看文件。
以上完整專案可以參考這邊
