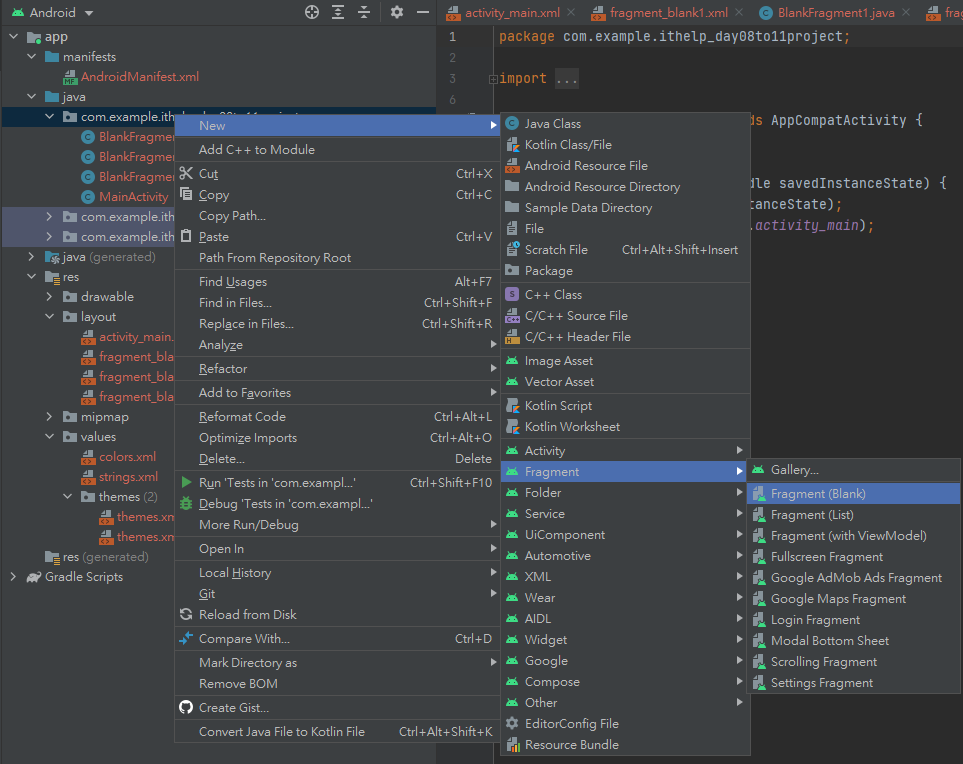
這個物件的效果是畫面之間的轉換,fragment與其他的畫面跳轉更加節省資源,其原因是因為他有刪除你上一個畫面的資源,然後新增下一個你點選的畫面資源,而這個動作有涉及到Fragment的生命週期的運作,我目前並沒有實際操作過Fragment生命週期,只知道它的流程,我這邊先貼上官方的生命週期圖,有興趣的可以到官方網站研究。
參考來源:AndroidStudio官方網站的環境設定
def fragment_version = "1.5.2"
    // Java language implementation
    implementation "androidx.fragment:fragment:$fragment_version"

<?xml version="1.0" encoding="utf-8"?>
<FrameLayout xmlns:android="http://schemas.android.com/apk/res/android"
    xmlns:tools="http://schemas.android.com/tools"
    android:layout_width="match_parent"
    android:layout_height="match_parent"
    tools:context=".BlankFragment_Scene01">

    <!-- TODO: Update blank fragment layout -->
    <TextView
        android:layout_width="match_parent"
        android:layout_height="match_parent"
        android:text="Fragment01"
        android:textAlignment="center"
        android:textSize="50dp"/>

</FrameLayout>
    <androidx.fragment.app.FragmentContainerView
        android:id="@+id/fragmentView"
        android:layout_width="match_parent"
        android:layout_height="0dp"
        app:layout_constraintTop_toBottomOf="@id/toolbar0001"
        app:layout_constraintStart_toStartOf="parent"
        app:layout_constraintEnd_toEndOf="parent"
        app:layout_constraintBottom_toBottomOf="@id/guideline5"
        tools:ignore="MissingConstraints" />
.replace替換成指定的fragment。 public void getFrag01(){
BlankFragment_Scene01 fragment01= BlankFragment_Scene01.newInstance(null,null);
this.redirectTo(fragment01);
}
public void getFrag02(){
BlankFragment_Scene02 fragment02 = BlankFragment_Scene02.newInstance(null,null);
this.redirectTo(fragment02);
}
public void getFrag03(){
BlankFragment_Scene03 fragment03 = BlankFragment_Scene03.newInstance(null,null);
this.redirectTo(fragment03);
}
private void redirectTo(Fragment fragment)
{
FragmentManager fragmentManager = this.getSupportFragmentManager();
FragmentTransaction fragmentTransaction = fragmentManager.beginTransaction();
fragmentTransaction.replace(R.id.fragmentView,fragment);
fragmentTransaction.setTransition(FragmentTransaction.TRANSIT_FRAGMENT_FADE);
fragmentTransaction.commit();
}
        button01 = findViewById (R.id.Button01);
        button02 = findViewById (R.id.Button02);
        button03 = findViewById (R.id.Button03);


        button01.setOnClickListener (new View.OnClickListener () {
            @Override
            public void onClick (View view) {
                getFrag01 ();
            }
        });
        button02.setOnClickListener (new View.OnClickListener () {
            @Override
            public void onClick (View view) {
                getFrag02 ();
            }
        });
        button03.setOnClickListener (new View.OnClickListener () {
            @Override
            public void onClick (View view) {
                getFrag03 ();
            }
        });
點選按鈕後就會執行點擊事件將畫面替換成該指定的fragment頁面。


