看完了那麼多文字之後,勢必須要一點實際範例來幫助我們更了解React State&props的實際作用吧!
今天的範例都會參考React官網範例。
首先來看看props的實例吧!
function Welcome(props) {
  return <h1>my customer ID is, {props.customerID}</h1>;
}
這裡以顧客ID為例
const element = <Welcome customerID="morris" />;function Welcome(props) {
return <h1>my customer ID is {props.customerID}</h1>;
}
const root = ReactDOM.createRoot(document.getElementById('root'));
const element = <Welcome customerID="morris" />;
root.render(element);
如果要 render 一個 React element ,傳入兩者到 ReactDOM.createRoot(),接著傳入 React element 到 root.render(),接著就可以顯示出我們所想要顯示的樣子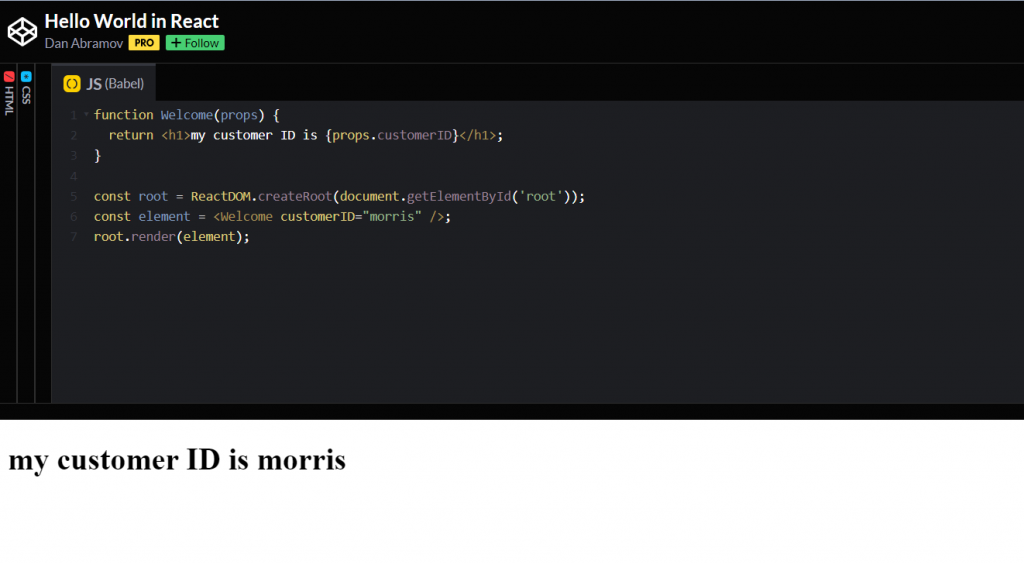
state的範例較為複雜,我們依照react網站給的時鐘範例作為這次介紹的主要內容,這樣可以比較好的全盤理解,
首先我們要先創建一個ES6類別並擴展componentclass Clock extends React.Component
接著建立一個render(),裡面包含需要return的函數
其中的
<div>
      <h1>Hello, world!</h1>
      <h2>It is {this.state.date.toLocaleTimeString()}.</h2>
    </div>
然後添加一個分配初始值的類構造函數this.state
  constructor(props) {
    super(props);
    this.state = {date: new Date()};
  }
大概的雛型長成這個樣子,但是這時候的時鐘還不能自己讀秒以及時刻的更新時間,我們如果想要達到每秒更新的功能就必須還要繼續寫下去
class Clock extends React.Component {
  constructor(props) {
    super(props);
    this.state = {date: new Date()};
  }

  render() {
    return (
      <div>
        <h1>Hello, world!</h1>
        <h2>It is {this.state.date.toLocaleTimeString()}.</h2>
      </div>
    );
  }
}
const root = ReactDOM.createRoot(document.getElementById('root'));
root.render(<Clock />);
接著我們要來解決沒辦法讀秒的問題,這時候就需要用到在DAY04所介紹到的生命週期(Lifecycle),
這次我們須用到的是componentDidMount()方法,這是一個設置計時器的好地方,componentDidMount()方法在compnnent掛載後(插入DOM樹中)立即調用。
  componentDidMount() {
    this.timerID = setInterval(
      () => this.tick(),
      1000
    );
  }
這時候我們要寫一個tick來讓 componentDidMount() 裡面的 this.tick調用,因為需要時刻更新,所以需要每秒都要調用tick()方法。
  tick() {
    this.setState({
      date: new Date()
    });
  }
瀏覽器每秒都會調用該tick()方法。其中,component會安排進行UI的更新。this.state.date在render()方法中會有相比setState()有些不同,因此渲染輸出將包括更新時間。
const element = <Welcome customerID="morris" />;
function Welcome(props) {
  return <h1>my customer ID is {props.customerID}</h1>;
}


class Clock extends React.Component {
  constructor(props) {
    super(props);
    this.state = {date: new Date()};
  }

   componentDidMount() {
    this.timerID = setInterval(
      () => this.tick(),
      1000
    );
  }

    tick() {
    this.setState({
      date: new Date()
    });
  }


  render() {
    return (
      <div>

        <h2>現在是{this.state.date.toLocaleTimeString()}.</h2>
      </div>
    );
  }
}

const root = ReactDOM.createRoot(document.getElementById('root'));
root.render(<Clock />);
以上就是state以及props的實際範例,這次是參考react的範例,但是自己也做了一些小小的變動,那我們明天再繼續吧!