製作文黨需要透過 go 先下載 godoc ,可以透過 go get golang.org/x/tools/cmd/godoc 或其他方式載入,但我在安裝過程中遇到 zsh: command not found: godoc 的問題,可以先透過 go env 的指令看一下當前 go 的路徑,然後解決的方式可以參考 參考來源1 與 參考來源2,基本上就是資料庫路徑問題,可以透過 godoc --help 來確認是否安裝好,只要沒有出現認不得 godoc 的訊息,基本上就是設定完成,那安裝好後,接下來就是介紹如何使用,首先先在相對應路徑的終端機中輸入以下指令
godoc -http=localhost:6060
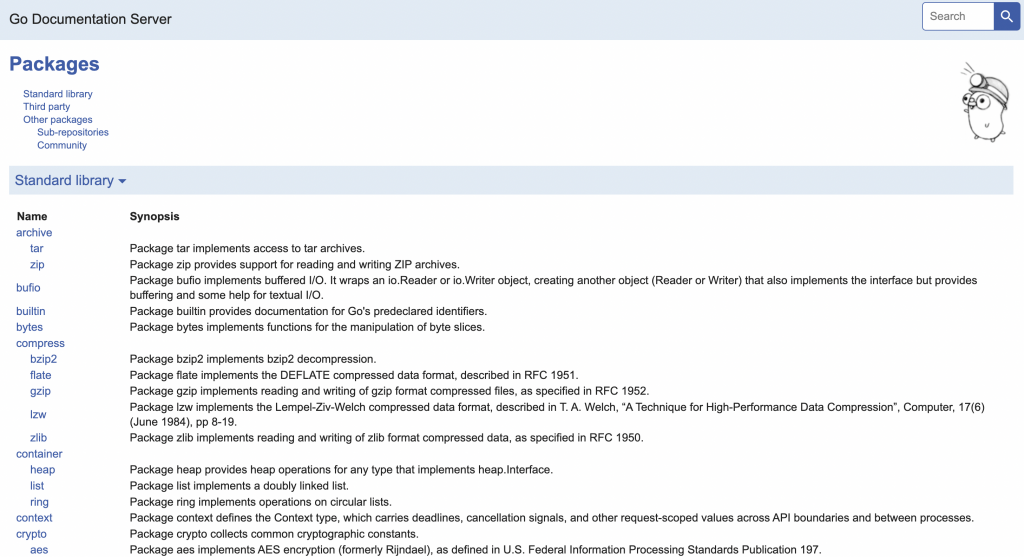
然後在瀏覽器的網址中輸入 localhost:6060 ,可以看到類似下面的畫面
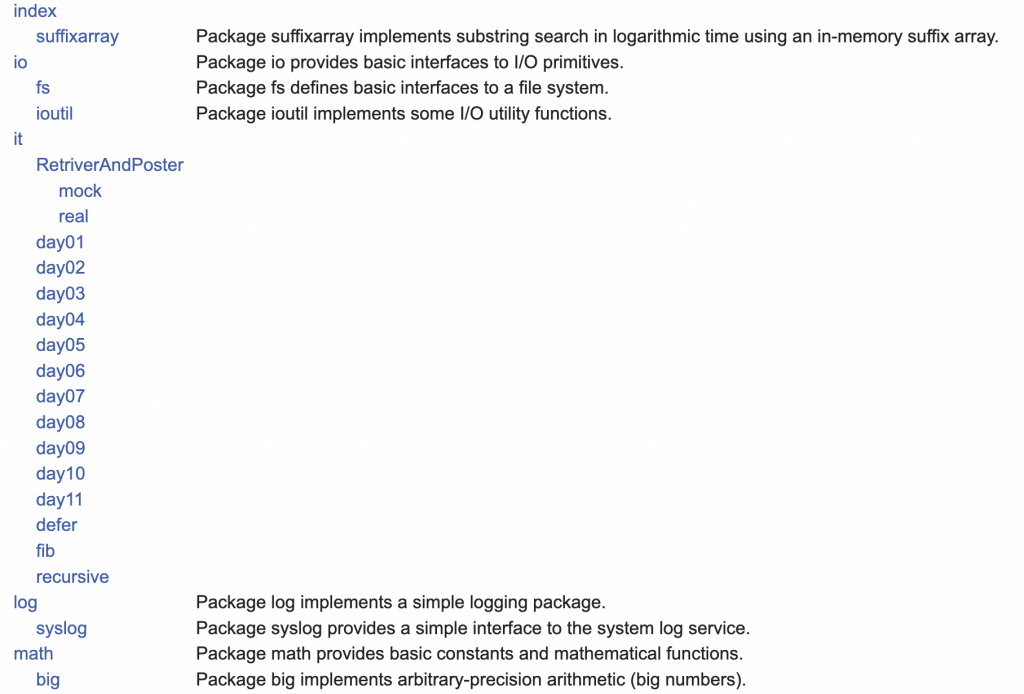
往下面找應該可以看到自己的檔案,我建的專案名稱為 it (為 ithome 的縮寫),所以可以看到在 it 裡面有 day01 到 day11 專案,結果如下
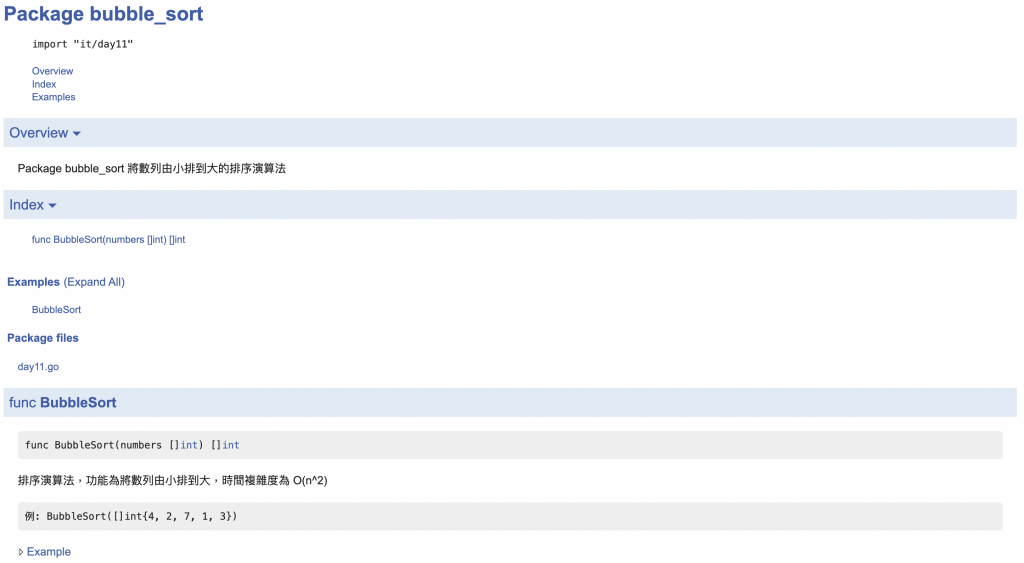
那文檔的製作主要是透過註解,程式碼的部分皆與前幾天的內容一樣,只有 Equal 這個函數的開頭改成小寫 equal,所以這一部分主要看的東西是註解的地方
// Package bubble_sort 將數列由小排到大的排序演算法
package bubble_sort

import (
	"fmt"
	"reflect"
	"testing"
)

// 排序演算法,功能為將數列由小排到大,時間複雜度為 O(n^2)
//
//	例: BubbleSort([]int{4, 2, 7, 1, 3})
func BubbleSort(numbers []int) []int {
	unsortedUntilIndex := len(numbers) - 1
	swap := true

	for swap {
		swap = false
		for i := 0; i < unsortedUntilIndex; i++ {
			first := numbers[i]
			second := numbers[i+1]

			if first > second {
				numbers[i] = second
				numbers[i+1] = first
				swap = true
			}
		}
		unsortedUntilIndex--
	}

	return numbers
}

func equals(t *testing.T, module string, given string, should string, result interface{}, expected interface{}) {
	message := createTestMessage(module, given, should, result, expected)

	if reflect.DeepEqual(result, expected) {
		// fmt.Print(message)
	} else {
		t.Errorf(message)
	}
}

func createTestMessage(module string, given string, should string, result interface{}, expected interface{}) string {
	return fmt.Sprintf(
		`
%v
given:    %v
should:   %v
result:   %v
expected: %v
	`, module, given, should, result, expected)
}
再回到瀏覽器中可以找到自己的檔案:
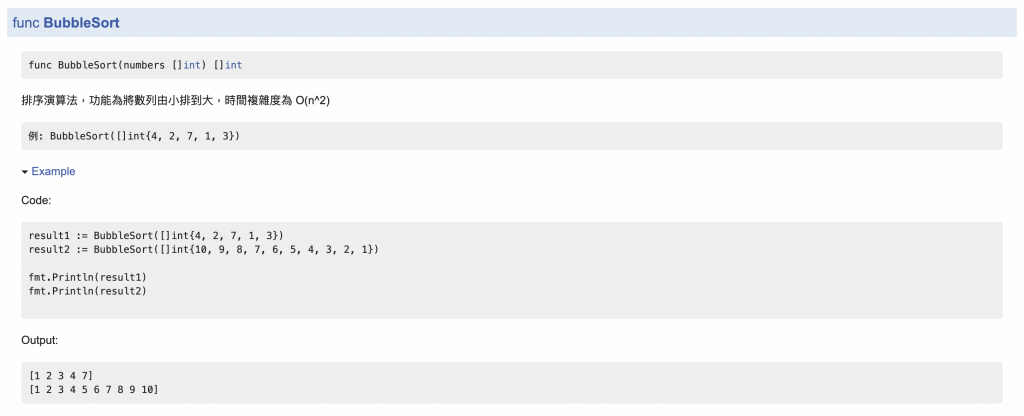
接下來如果想要在文檔中介紹如何使用的範例,那有一個重點,就是新增一個範例函數,但這個範例函數的開頭必須為 Example,如下所示,在文檔中就會顯示在 code 的部分,另外如果想要提供跑完的結果,就透過下面的 // Output 註解,提供正確的結果
func ExampleBubbleSort() {
	result1 := BubbleSort([]int{4, 2, 7, 1, 3})
	result2 := BubbleSort([]int{10, 9, 8, 7, 6, 5, 4, 3, 2, 1})

	fmt.Println(result1)
	fmt.Println(result2)

	// Output:
	// [1 2 3 4 7]
	// [1 2 3 4 5 6 7 8 9 10]
}
在瀏覽器中顯示的結果如下:
https://github.com/luckyuho/ithome30-golang/tree/main/day11


 iThome鐵人賽