在開始作業功能開發之前,先來看看我們的首頁要如何呈現,為了方便開發,就以預設的首頁來進行調整,把用到的作業一一加上,最終畫面如下。
完成清單功能後,就先來製作一支[縣市]基本作業吧!
範例會從頭開始操作如何建立作業及其中的新增、編輯及刪除等功能;一步一步來即可完成。
1. 首頁內容調整:
[Views] --> [Home] --> [Index.cshtml]。ViewBag.Title --> 網頁呈現的名稱。div --> 調整內容成您想要的內容,參考如下。@{
ViewBag.Title = "艾咪燙髮 系統";
}
<div class="jumbotron">
<h1>艾咪燙髮</h1>
<p class="lead">成立於100年4月15日,位於台南市中西區民權里金華路4段52號1樓,店長為李彗嘉。</p>
<p>屬於預約制的家庭式美髮中心;為了避免來店時需要費時等待,請先行電話預約可加速您的美髮造型。</p>
<p>預約專線:06-2260168</p>
<p><a href="https://www.facebook.com/AmyHairTW/" class="btn btn-primary btn-lg" target="_blank">粉絲專頁 »</a></p>
<h2>服務內容:</h2>
<p>
<ol>
<li>
洗髮
<ul>
<li>店內材料:200 ~ 250</li>
<li>自備材料:170 ~ 200</li>
</ul>
</li>
<li>
剪髮
<ul>
<li>兒童:100 ~ 200</li>
<li>大人:200 ~ 400</li>
</ul>
</li>
<li>
染髮
<ul>
<li>店內材料:1000 ~ 2500</li>
<li>自備材料:300 ~ 600</li>
</ul>
</li>
<li>
護髮
<ul>
<li>店內材料:600 ~ 800</li>
<li>自備材料:300 ~ 500</li>
</ul>
</li>
<li>
燙髮
<ul>
<li>一般藥水:1500 ~ 2000</li>
<li>高效藥水:2500 ~ 4000</li>
</ul>
</li>
<li>
修指甲
<ul>
<li>手甲:200 ~ 300</li>
<li>腳甲:300 ~ 500</li>
</ul>
</li>
<li>
眼睫毛
<ul>
<li>一般毛數: 600 ~ 1000</li>
<li>濃密毛數:1000 ~ 1500</li>
</ul>
</li>
<li>
會員洗髮卡
<ul>
<li>無上捲自備材料:1700</li>
<li>無上捲店內材料:2000</li>
<li>有上捲自備材料:2000</li>
<li>有上捲店內材料:2500</li>
</ul>
</li>
</ol>
</p>
</div>
2. 功能清單調整:
[Views] --> [Shared] --> [_Layout.cshtml]。<head>內容,將前一步驟的網頁名稱秀在系統名稱位置。<head>
<meta http-equiv="Content-Type" content="text/html; charset=utf-8"/>
<meta charset="utf-8" />
<meta name="viewport" content="width=device-width, initial-scale=1.0">
<title>@ViewBag.Title</title> //就是這兒
@Styles.Render("~/Content/css")
@Scripts.Render("~/bundles/modernizr")
</head>
<body>內容,將清單呈現出來。<body>
<div class="navbar navbar-inverse navbar-fixed-top">
<div class="container">
<div class="navbar-header">
<button type="button" class="navbar-toggle" data-toggle="collapse" data-target=".navbar-collapse">
<span class="icon-bar"></span>
<span class="icon-bar"></span>
<span class="icon-bar"></span>
</button>
@Html.ActionLink("艾咪燙髮 系統", "Index", "Home", new { area = "" }, new { @class = "navbar-brand" })
</div>
<div class="navbar-collapse collapse">
<ul class="nav navbar-nav">
<li>@Html.ActionLink("產品檔", "Index", "Product")</li>
<li>@Html.ActionLink("員工檔", "Index", "Employee")</li>
<li>@Html.ActionLink("客戶檔", "Index", "Customer")</li>
<li>@Html.ActionLink("工作單", "Index", "WorkOrder")</li>
<li class="dropdown">
<a class="dropdown-toggle" data-toggle="dropdown" href="#">設定作業<span class="caret"></span></a>
<ul class="dropdown-menu">
<li>@Html.ActionLink("產品類別", "Index", "ProductType")</li>
<li>@Html.ActionLink("產品單位", "Index", "Unit")</li>
<li>@Html.ActionLink("產品庫存", "Index", "ProductStock")</li>
<li>@Html.ActionLink("縣市", "Index", "City")</li>
<li>@Html.ActionLink("區域", "Index", "Area")</li>
<li>@Html.ActionLink("薪資類別", "Index", "SalaryType")</li>
<li>@Html.ActionLink("會員卡", "Index", "Card")</li>
<li>@Html.ActionLink("工作類別", "Index", "WorkType")</li>
</ul>
</li>
<li>@Html.ActionLink("明細查詢作業", "Index", "WorkSearch")</li>
</ul>
</div>
</div>
</div>
<div class="container body-content">
@RenderBody()
<hr />
<footer>
<p>© @DateTime.Now.Year - 艾咪燙髮 系統</p>
</footer>
</div>
@Scripts.Render("~/bundles/jquery")
@Scripts.Render("~/bundles/bootstrap")
@RenderSection("scripts", required: false)
</body>
3. 新增設定作業-縣市基本資料:
[Controllers] --> 加入 --> 控制器。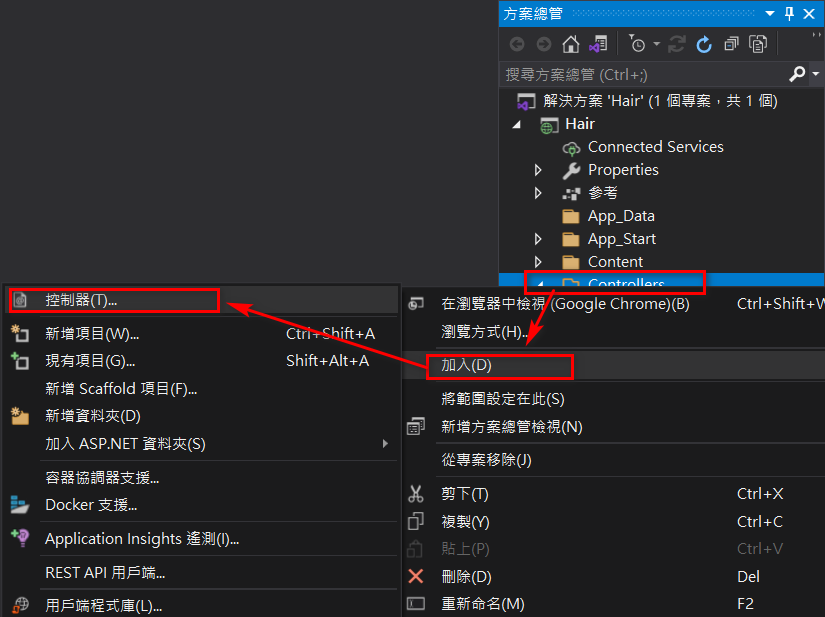
選擇空白控制器,等未來熟悉之後,再讓工具幫您產出有內建程式的控制器吧!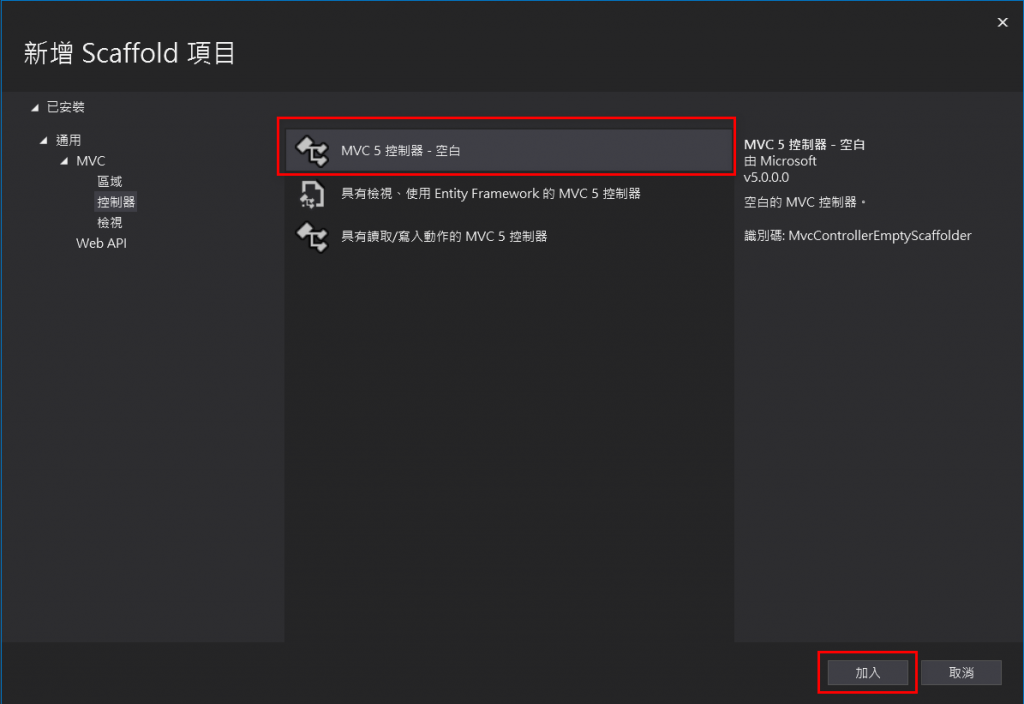
填入控制器名稱,我習慣以資料表名稱來填入。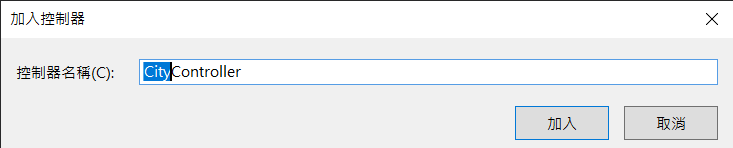
Index:就是功能首頁,來調整一下讓其可以秀出表格資料。
public ActionResult Index()
{
    //宣告回傳縣市列表
    List<Models.city> result = new List<Models.city>();
    //接收成功與否的訊息
    ViewBag.ResultMessage = TempData["ResultMessage"];
    //使用Entities類別,名稱為db
    using (Models.HairSystemEntities db = new Models.HairSystemEntities())
    {
        //Linq方式取得Citys資料
        result = (from s in db.city orderby s.no select s).ToList();
    }
    //回傳給檢示頁面
    return View(result);
}
新增檢視頁面:在[View]上按右鍵 --> [新增檢視]。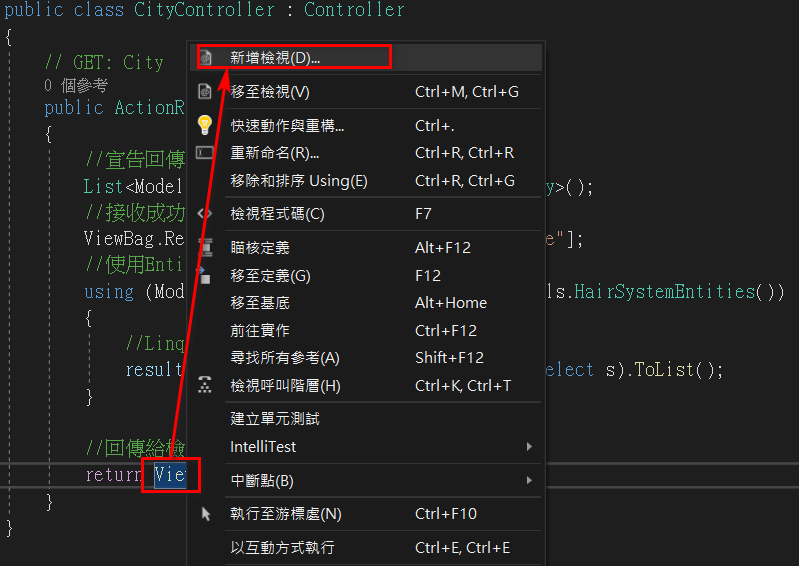
預設選項,再按下[加入]。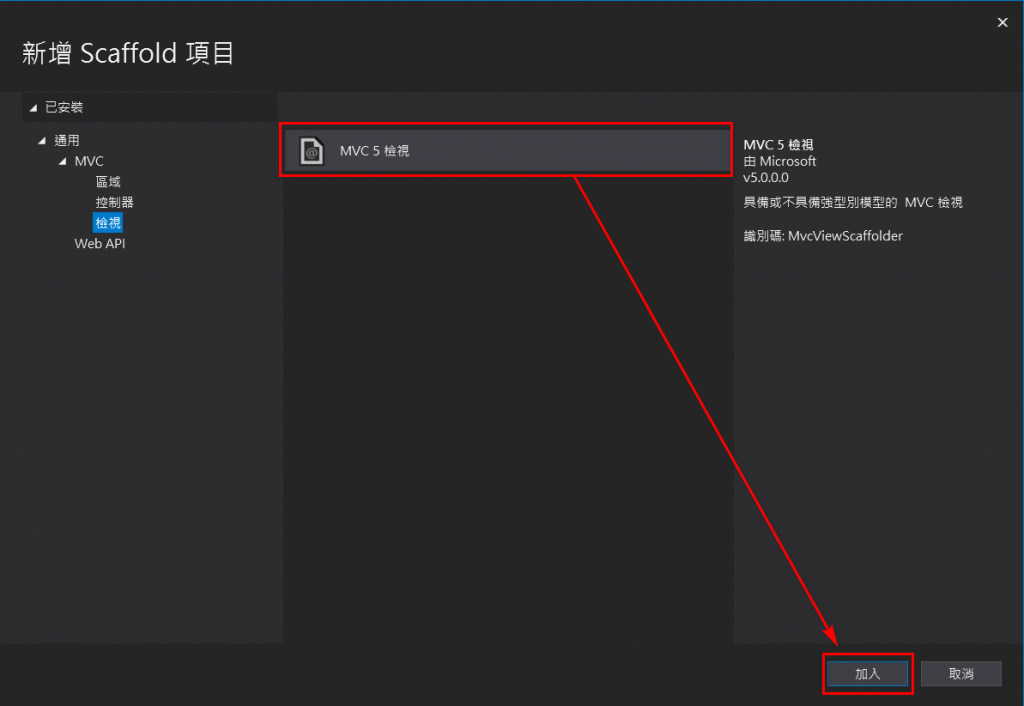
填入相關資料,範本選擇List(清單),模型及類別選擇建立的Models。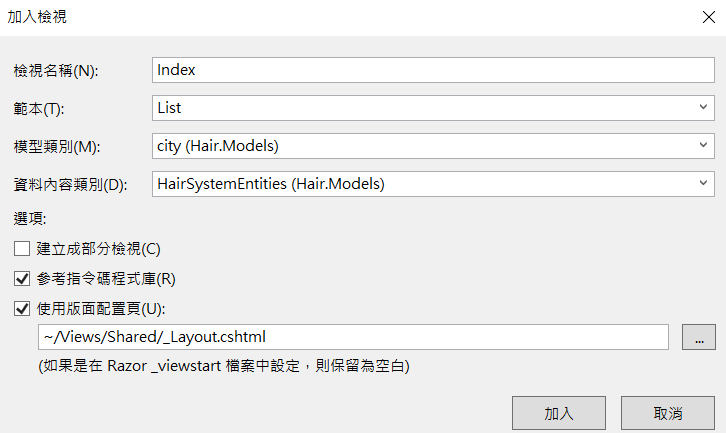
完成的檢視畫面,看起來實在不怎麼樣,稍為調整一下,讓它看起來專業一點;調整前就可以先行執行看看,再跟調整後差別比較看看,如果本身懂得CSS也可以自行再美化一下喔!
@model IEnumerable<Hair.Models.city>

@{
    ViewBag.Title = "縣市清單";
    Layout = "~/Views/Shared/_Layout.cshtml";
}

<h2>縣市首頁</h2>

@if (ViewBag.ResultMessage != null) //判斷有訊息就顯示
{
    @Html.Label("info", (string)ViewBag.ResultMessage, new { @class = "text-info" })
}

<p>
    @Html.ActionLink("新增縣市", "Create")
</p>

<table class="table" border="1">
    <tr>
        <th style="text-align: center">
            @Html.DisplayNameFor(model => model.no)
        </th>
        <th style="text-align: center">
            @Html.DisplayNameFor(model => model.name)
        </th>
        <th style="text-align: center" colspan="2">操作項目</th>
    </tr>

    @foreach (var item in Model)
    {
        <tr>
            <td>
                @Html.DisplayFor(modelItem => item.no)
            </td>
            <td>
                @Html.DisplayFor(modelItem => item.name)
            </td>
            <td>
                @Html.ActionLink("編輯", "Edit", new { id = item.no }, new { @Class = "btn btn-default" })
            </td>
            <td>
                @using (@Html.BeginForm("Delete", "city", FormMethod.Post, new { @class = "Delete" }))
                {
                    @Html.Hidden("id", item.no)
                    <input type="submit" value="刪除" class="btn btn-default" />
                }
            </td>
        </tr>
    }

</table>
Create:就是新增的頁面,程式碼有兩段;一段是後端帶出資料到前端,一段是前端傳遞資料到後端。/// <summary>
/// 新增縣市
/// </summary>
/// <returns></returns>
public ActionResult Create()
{
return View();
}
/// <summary>
/// 新增縣市,利用Entities回存資料庫
/// </summary>
/// <param name="postback"></param>
/// <returns></returns>
[HttpPost]
public ActionResult Create(Models.city postback)
{
//資料驗證成功
if (this.ModelState.IsValid)
{
using (Models.HairSystemEntities db = new Models.HairSystemEntities())
{
//將回傳資料postback加入至Products
db.city.Add(postback);
//儲存異動資料
db.SaveChanges();
//成功顯示訊息
TempData["ResultMessage"] = string.Format("縣市[{0}]成功建立!", postback.name);
//頁面轉至瀏覽頁
return RedirectToAction("Index");
}
}
//失敗顯示訊息
ViewBag.ResultMessage = "資料有誤,請檢查!";
//停留在Create頁面
return View(postback);
}
新增檢視頁面:在[View]上按右鍵 --> [新增檢視]。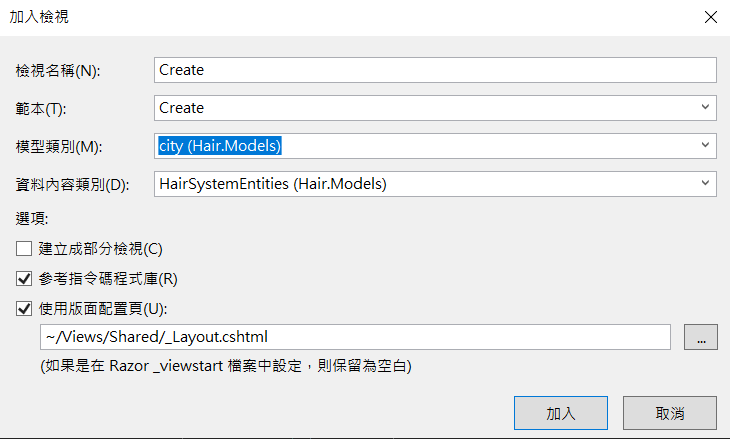
完成的檢視畫面,看起來也不怎麼樣,一樣就稍為來調整一下,讓它看起來專業一點。
@model Hair.Models.city

@{
    ViewBag.Title = "縣市新增";
    Layout = "~/Views/Shared/_Layout.cshtml";
}

<h2>新增縣市</h2>

@if (ViewBag.ResultMessage != null) //判斷有訊息就顯示
{
    @Html.Label("info", (string)ViewBag.ResultMessage, new { @class = "text-info" })
}

@using (Html.BeginForm())
{
    @Html.AntiForgeryToken()

    <div class="form-horizontal">
        <hr />
        @Html.ValidationSummary(true, "", new { @class = "text-danger" })
        <div class="form-group">
            @Html.LabelFor(model => model.no, htmlAttributes: new { @class = "control-label col-md-2" })
            <div class="col-md-10">
                @Html.EditorFor(model => model.no, new { htmlAttributes = new { @class = "form-control" } })
                @Html.ValidationMessageFor(model => model.no, "", new { @class = "text-danger" })
            </div>
        </div>

        <div class="form-group">
            @Html.LabelFor(model => model.name, htmlAttributes: new { @class = "control-label col-md-2" })
            <div class="col-md-10">
                @Html.EditorFor(model => model.name, new { htmlAttributes = new { @class = "form-control" } })
                @Html.ValidationMessageFor(model => model.name, "", new { @class = "text-danger" })
            </div>
        </div>

        <div class="form-group">
            <div class="col-md-offset-2 col-md-10">
                <input type="submit" value="確認" class="btn btn-default" />
            </div>
        </div>
    </div>
}

<div>
    @Html.ActionLink("回縣市首頁", "Index")
</div>

@section Scripts {
    @Scripts.Render("~/bundles/jqueryval")
}
Edit:就是編輯的頁面,程式碼有兩段;一段是後端帶出資料到前端,一段是前端傳遞資料到後端。/// <summary>
/// 縣市編輯
/// </summary>
/// <param name="id"></param>
/// <returns></returns>
public ActionResult Edit(string id)
{
using (Models.HairSystemEntities db = new Models.HairSystemEntities())
{
//取得ID資料
var result = (from s in db.city where s.no == id select s).FirstOrDefault();
//判斷是否有資料
if (result != default(Models.city))
{
return View(result);
}
else
{
TempData["resultMessage"] = "資料有誤,請重新操作!";
return RedirectToAction("Index");
}
}
}
/// <summary>
/// 縣市編輯,利用Entities回存資料庫
/// </summary>
/// <param name="postback"></param>
/// <returns></returns>
[HttpPost]
public ActionResult Edit(Models.city postback)
{
if (this.ModelState.IsValid)
{
using (Models.HairSystemEntities db = new Models.HairSystemEntities())
{
//取得ID資料
var result = (from s in db.city where s.no == postback.no select s).FirstOrDefault();
//儲存使用者變更資料
result.no = postback.no;
result.name = postback.name;
//儲存所有變更
db.SaveChanges();
//成功顯示訊息
TempData["ResultMessage"] = string.Format("縣市[{0}]成功編輯!", postback.name);
//頁面轉至瀏覽頁
return RedirectToAction("Index");
}
}
else
{
//停留在Edit頁面
return View(postback);
}
}
新增檢視頁面:在[View]上按右鍵 --> [新增檢視]。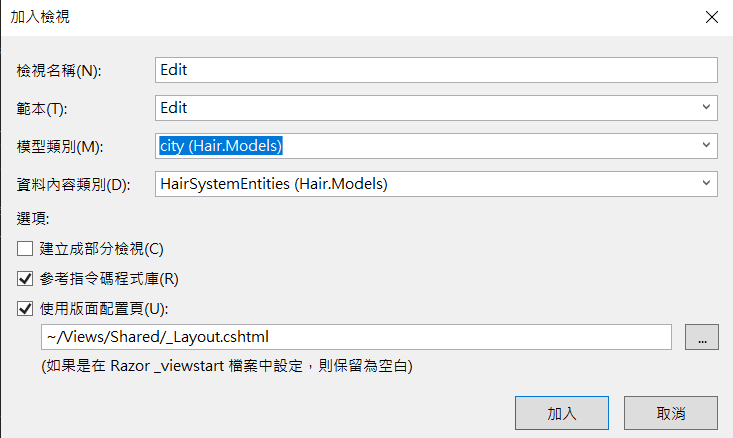
完成的檢視畫面,看起來也不怎麼樣,一樣就稍為來調整一下,調它看起來專業一點。
@model Hair.Models.city

@{
    ViewBag.Title = "縣市編輯";
    Layout = "~/Views/Shared/_Layout.cshtml";
}

<h2>編輯縣市</h2>

@if (ViewBag.ResultMessage != null) //判斷有訊息就顯示
{
    @Html.Label("info", (string)ViewBag.ResultMessage, new { @class = "text-info" })
}

@using (Html.BeginForm())
{
    @Html.AntiForgeryToken()

    <div class="form-horizontal">
        <hr />
        @Html.ValidationSummary(true, "", new { @class = "text-danger" })
        @Html.HiddenFor(model => model.no)

        <div class="form-group">
            @Html.LabelFor(model => model.name, htmlAttributes: new { @class = "control-label col-md-2" })
            <div class="col-md-10">
                @Html.EditorFor(model => model.name, new { htmlAttributes = new { @class = "form-control" } })
                @Html.ValidationMessageFor(model => model.name, "", new { @class = "text-danger" })
            </div>
        </div>

        <div class="form-group">
            <div class="col-md-offset-2 col-md-10">
                <input type="submit" value="確認" class="btn btn-default" />
            </div>
        </div>
    </div>
}

<div>
    @Html.ActionLink("回縣市首頁", "Index")
</div>

@section Scripts {
    @Scripts.Render("~/bundles/jqueryval")
}
Del:就是刪除的動作,只有程式碼沒有檢視頁面。/// <summary>
/// 刪除縣市
/// </summary>
/// <param name="id"></param>
/// <returns></returns>
[HttpPost]
public ActionResult Delete(string id)
{
using (Models.HairSystemEntities db = new Models.HairSystemEntities())
{
//取得ID資料
var result = (from s in db.city where s.no == id select s).FirstOrDefault();
//判斷是否有資料
if (result != default(Models.city))
{
//刪除所選資料
db.city.Remove(result);
//儲存所有變更
db.SaveChanges();
//成功顯示訊息
TempData["ResultMessage"] = string.Format("縣市[{0}]成功刪除!", result.name);
//頁面轉至瀏覽頁
return RedirectToAction("Index");
}
else
{
TempData["resultMessage"] = "資料不存在,請重新操作!";
return RedirectToAction("Index");
}
}
}
[Controllers]及[Views] --> [City]內分別會產出相關程式作業。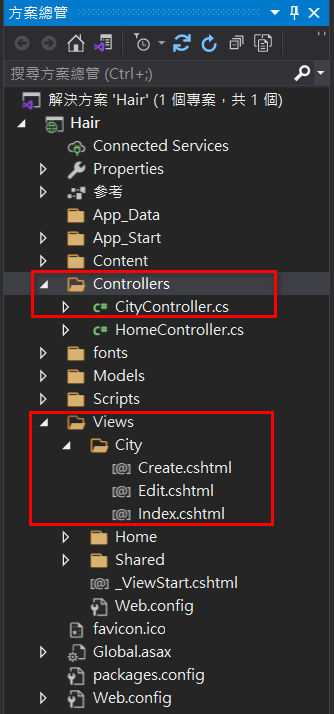
4. 重點提示:
Index就是查詢功能頁面,只會有一段程式碼。Create及Edit分別為新增及編輯功能頁面,各有二段程式碼。Del就是刪除功能,沒有畫面,只會有一段程式碼。[Copy]的方式來做調整。終於完成完整的一支作業啦~~~有沒有信心大增??
好好吸收一下,再來看下一篇!
由於程式碼太大,下一個功能會拆解成兩篇哦~


 iThome鐵人賽