前面已經把CI Pipeline完成了,這一篇就來建立CD的Release Pipeline吧!

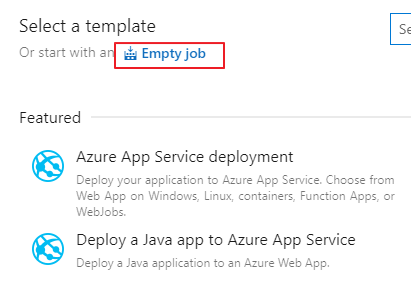
選擇建立Empty job,不使用下面的範本,因為Task不多,從空的建立比較快。
Stage name改一下方便識別的名稱,例如「Deploy to Stage」。

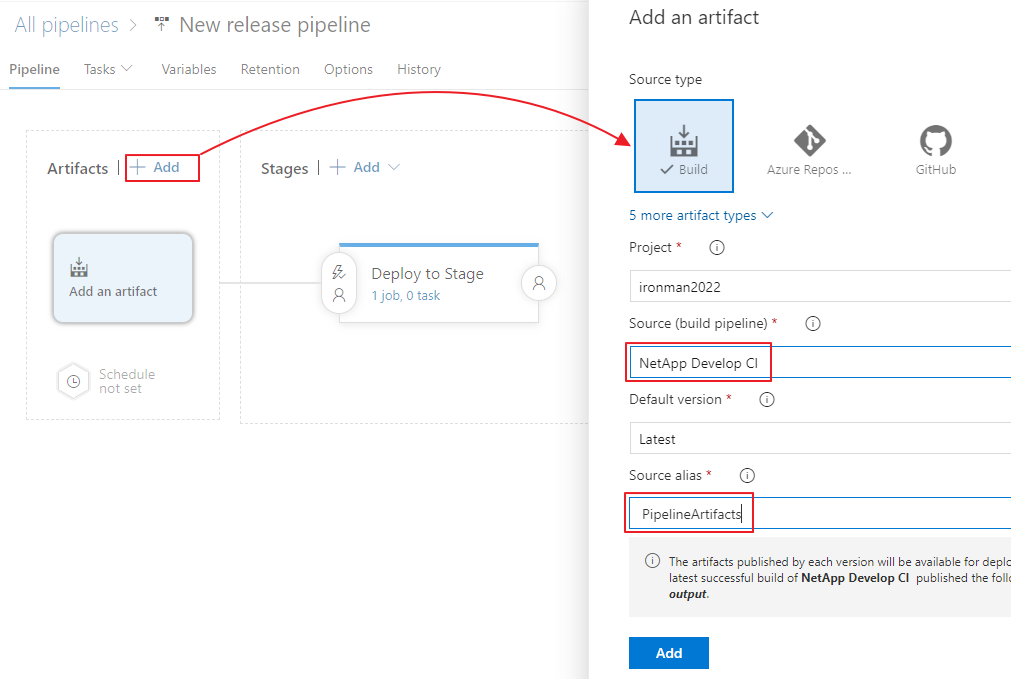
新增前面CI Pipeline執行結果作為Artifacts來源項目之一,Source alias設定的名稱會是等一下Script中存取的資料夾名稱:
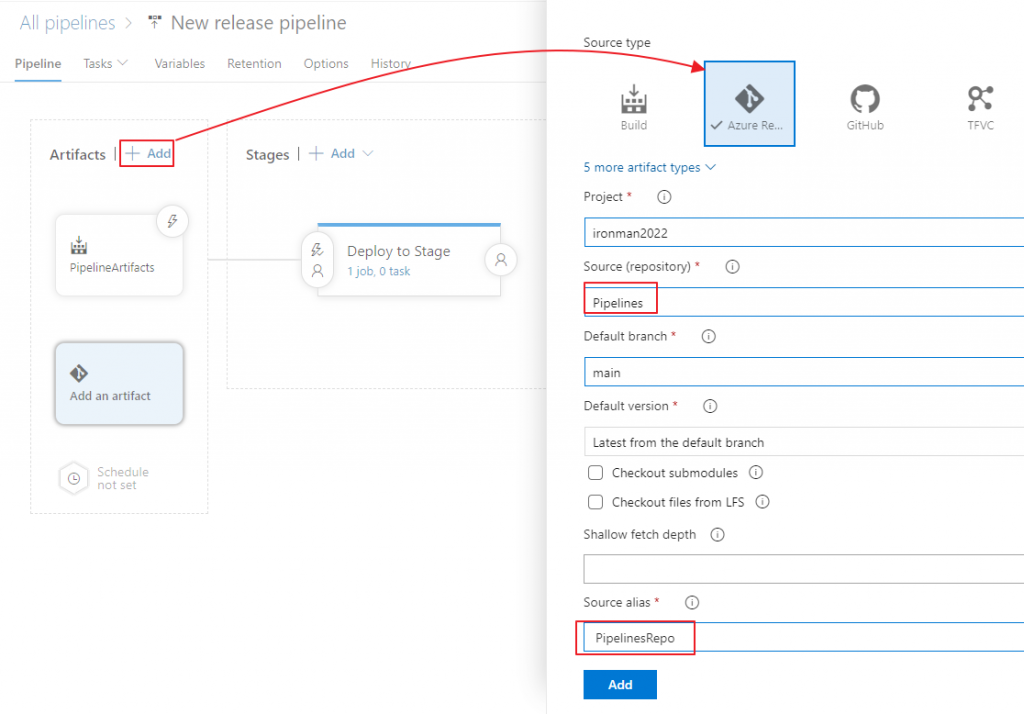
再把Pipelines Git Repo新增進來,因為要Deploy到CloudRun的時候會需要放在裡面的身份驗證Json檔案:
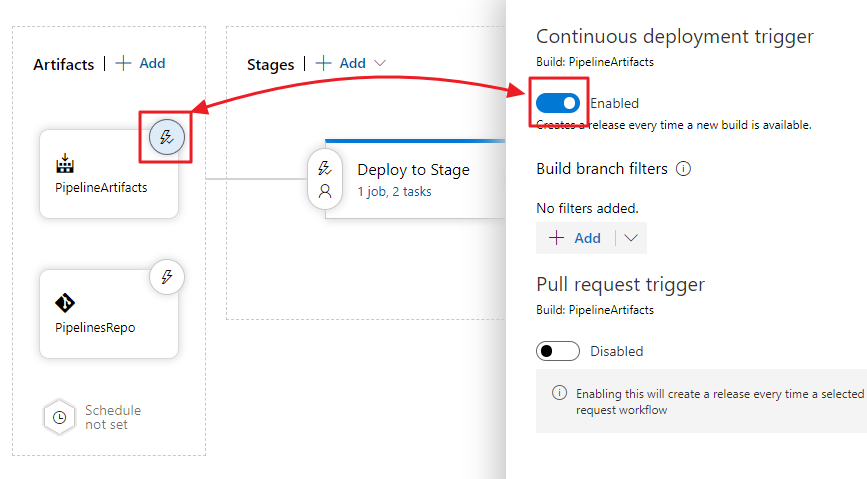
接著在PipelineArtifacts項目(也就是CI Pipeline的結果)上面設定CD Trigger:
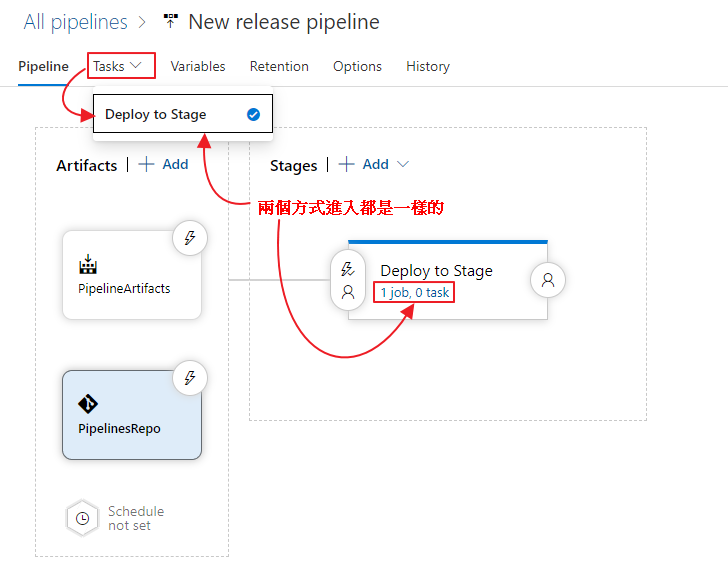
接著就可以進入Jobs的設計了:
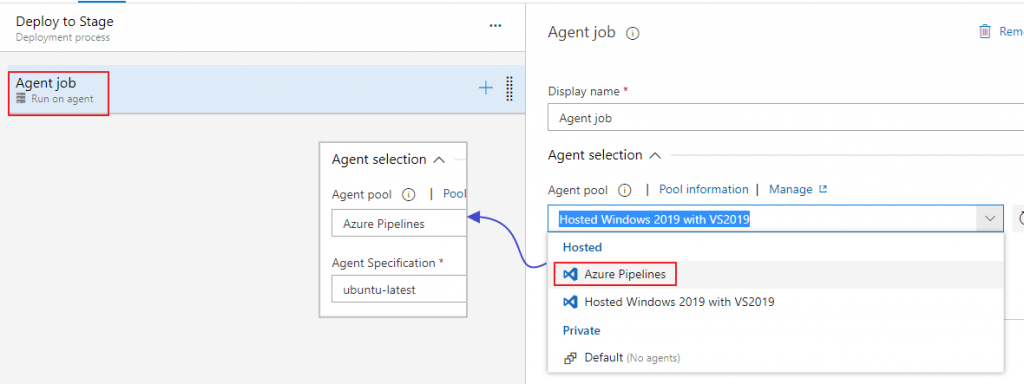
進入之後先設定Agent job的規格,在Stage的部份只會使用到Linux環境的Agent:
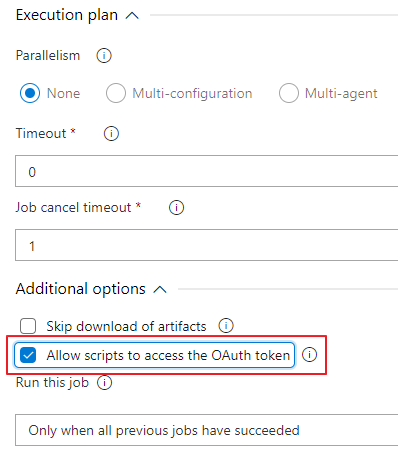
設定完Agent job的規格之後,再往下捲動,找到Additonal options裡面的Allow scripts to access the OAuth token選項把它打勾,這樣在Script裡面才方便利用身份驗證的Token操作Git Repo:
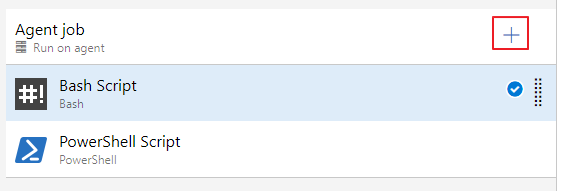
接下來在Agent job裡面加入兩個Task,分別是Bash和PowerShell:
在Bash task中選擇Inline類型直接輸入Script,script的內容如下,基本上就是前面CI Pipeline內的YAML內容,只是在-v後面有點不太一樣,必須以前面設定的Source alias名稱為路徑找檔案:
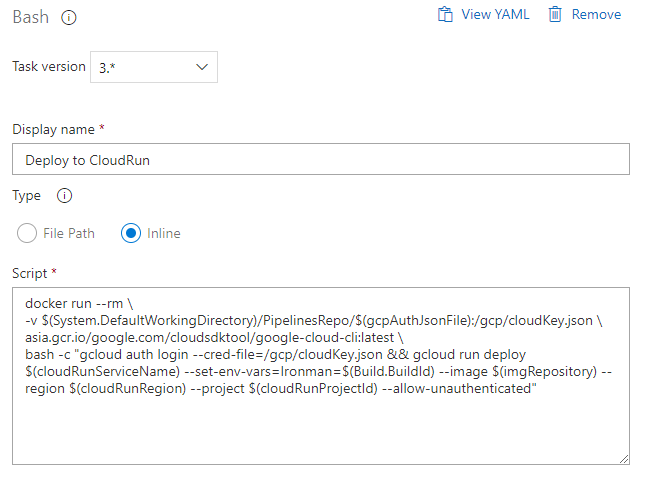
docker run --rm \
-v $(System.DefaultWorkingDirectory)/PipelinesRepo/$(gcpAuthJsonFile):/gcp/cloudKey.json \
asia.gcr.io/google.com/cloudsdktool/google-cloud-cli:latest \
bash -c "gcloud auth login --cred-file=/gcp/cloudKey.json && gcloud run deploy $(cloudRunServiceName) --set-env-vars=Ironman=$(Build.BuildId) --image $(imgRepository) --region $(cloudRunRegion) --project $(cloudRunProjectId) --allow-unauthenticated"
CD Pipeline存放的位置是$(System.DefaultWorkingDirectory),而PipelinesRepo則是上面加入Git Repo來源的時候設定的Source alias名稱,其它Script內容和CI Pipeline YAML內容都相同,自定義的變數名稱也相同,下面的步驟會再設定變數的內容。
下一步則是加入PowerShell task內的Script,一樣是改成Inline類型,在Script中會取得前面在CI Pipeline輸出的gitCommitSHA.txt檔案,從裡面取得CommitSHA內容再處理Tag source的動作。
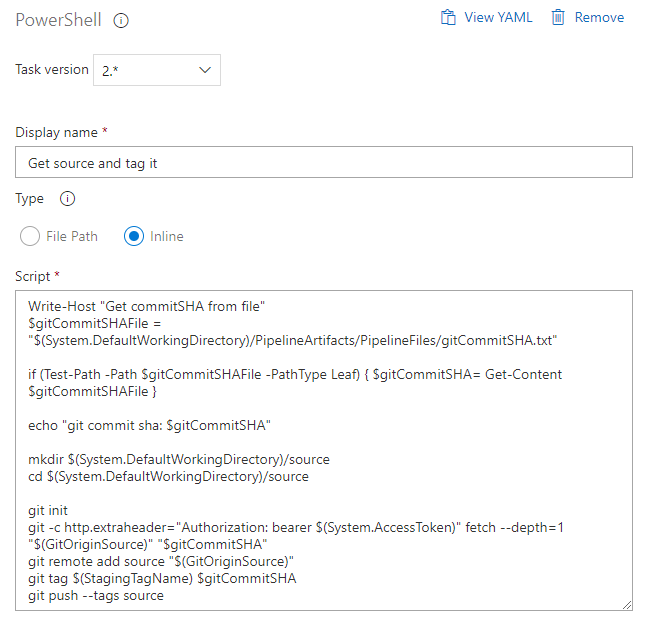
Write-Host "Get commitSHA from file"
$gitCommitSHAFile = "$(System.DefaultWorkingDirectory)/PipelineArtifacts/PipelineFiles/gitCommitSHA.txt"

if (Test-Path -Path $gitCommitSHAFile -PathType Leaf) { $gitCommitSHA= Get-Content $gitCommitSHAFile }

echo "git commit sha: $gitCommitSHA"

mkdir $(System.DefaultWorkingDirectory)/source
cd $(System.DefaultWorkingDirectory)/source

git init
git -c http.extraheader="Authorization: bearer $(System.AccessToken)" fetch --depth=1 "$(GitOriginSource)" "$gitCommitSHA"
git remote add source "$(GitOriginSource)"
git tag $(StagingTagName) $gitCommitSHA
git push --tags source
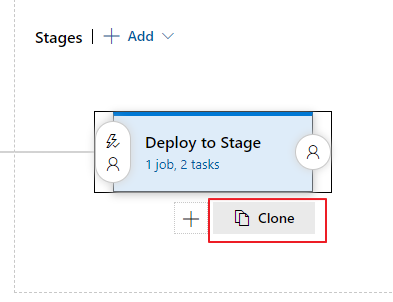
Stage的部份就只有這兩個Task,再回到前面的畫面將滑鼠移到下圖的畫面就會出現Clone的選項,可以直接複製一份來改成Deploy to Production:
不過Production的部份因為要建立PR task,它只能執行在Windows Agent,所以我們要多增加一個Agent job,並且把PowerShell task透過拖拉的方式移到新增的Agent job裡:

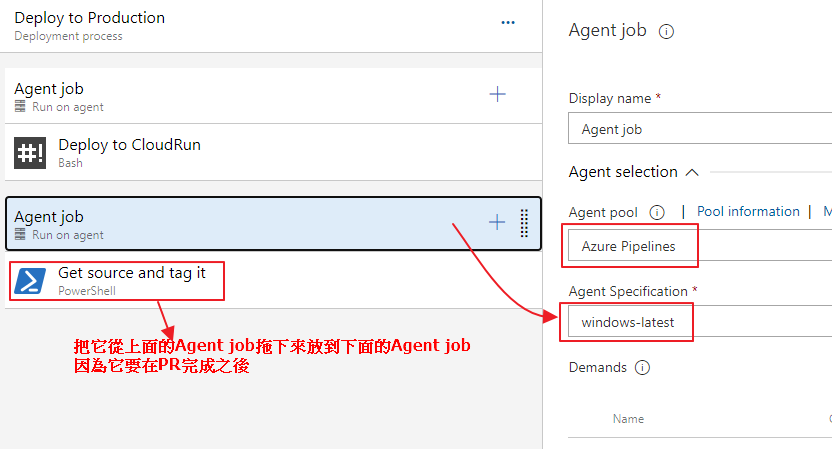
PowerShell task按滑鼠右鍵複製一份,但是兩個task裡面的script都不會和Stage的相同,只是這樣做可以省下一點新增task的時間:
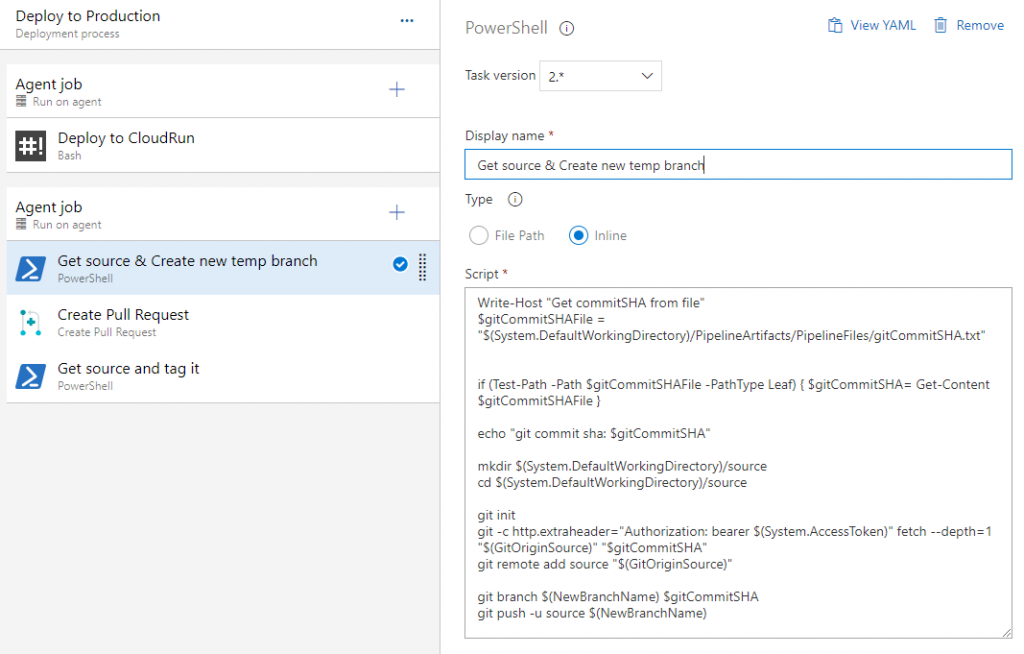
上圖有中間有個Create Pull Request的task,這個是必須從Marketplace安裝進來的Extension,在新增Task的畫面搜尋Pull Request關鍵字就會看到下面的畫面:
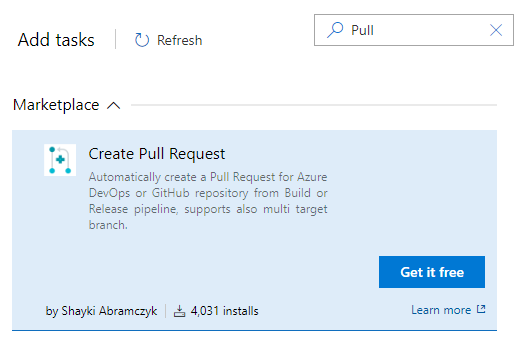
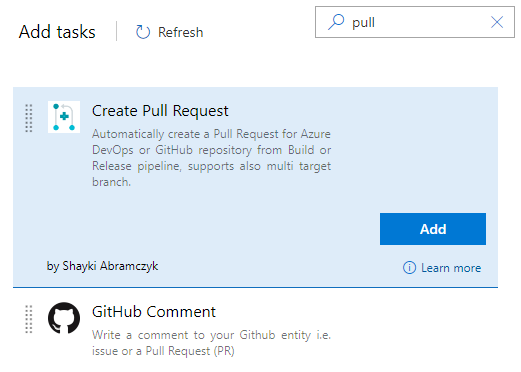
按下Get it free就會導引到相關頁面可以選擇安裝,完成之後再重新Refresh整理重新搜尋就會變成Add,如下圖,過程我就省略了,不困覆:
下面的PowerShell內容是第一個Task(Get source & Create new temp branch)的內容:
Write-Host "Get commitSHA from file"
$gitCommitSHAFile = "$(System.DefaultWorkingDirectory)/PipelineArtifacts/PipelineFiles/gitCommitSHA.txt"


if (Test-Path -Path $gitCommitSHAFile -PathType Leaf) { $gitCommitSHA= Get-Content $gitCommitSHAFile }

echo "git commit sha: $gitCommitSHA"

mkdir $(System.DefaultWorkingDirectory)/source
cd $(System.DefaultWorkingDirectory)/source

git init
git -c http.extraheader="Authorization: bearer $(System.AccessToken)" fetch --depth=1 "$(GitOriginSource)" "$gitCommitSHA"
git remote add source "$(GitOriginSource)"

git branch $(NewBranchName) $gitCommitSHA
git push -u source $(NewBranchName)
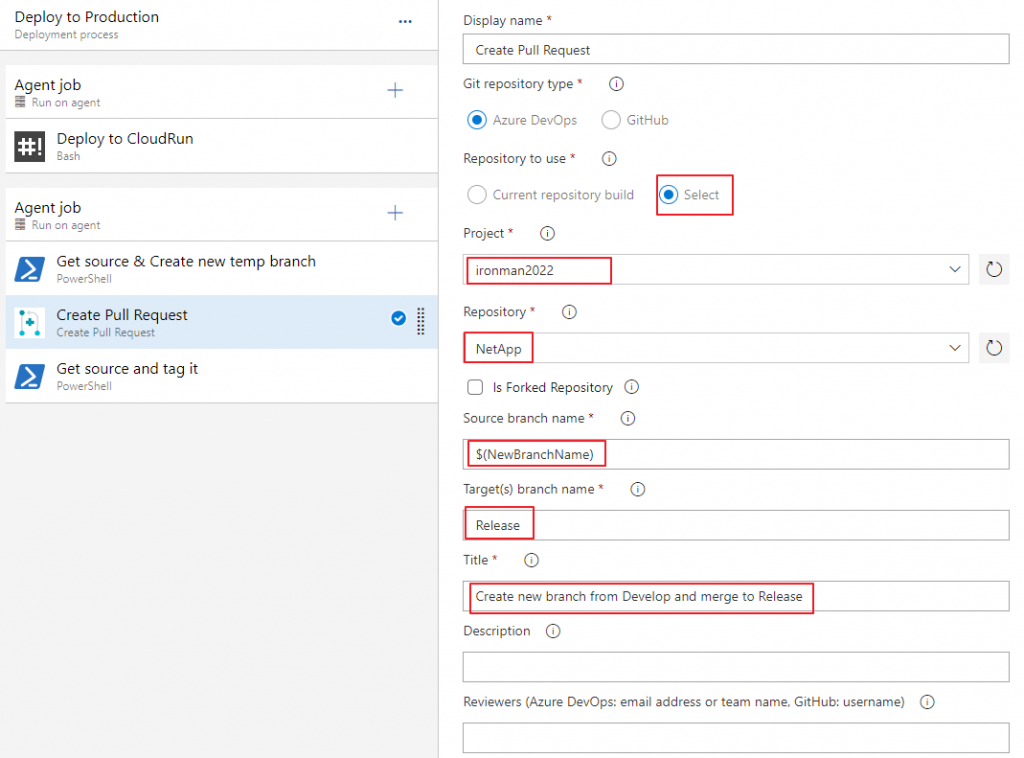
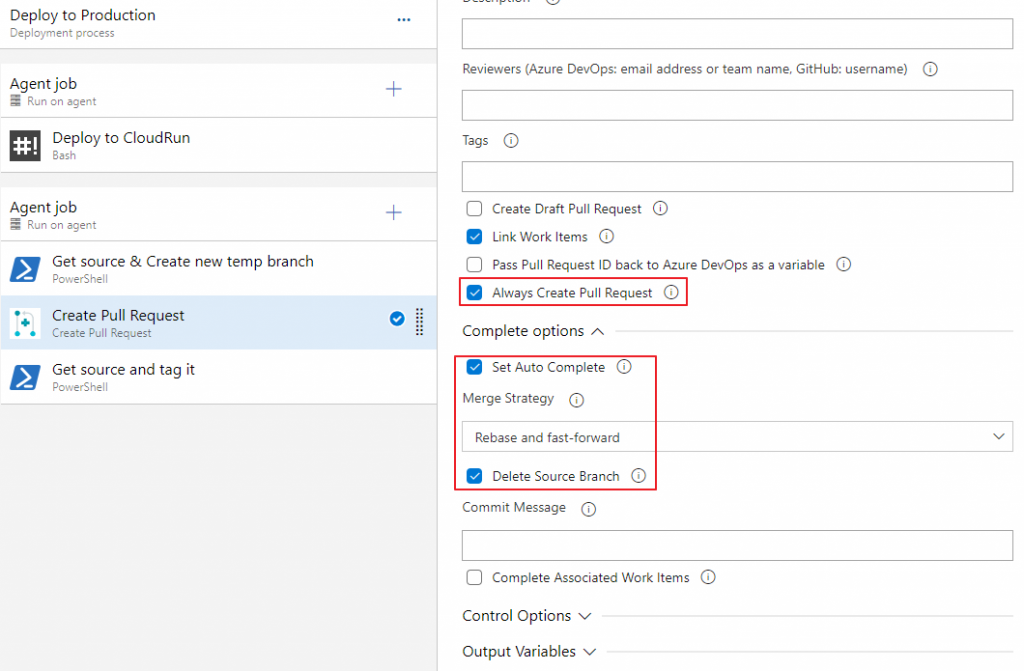
接著是設定Create Pull Request task的內容,紅框的就是要設定的部份:
最後是第二個PowerShell task的內容(Get sources and tag it):
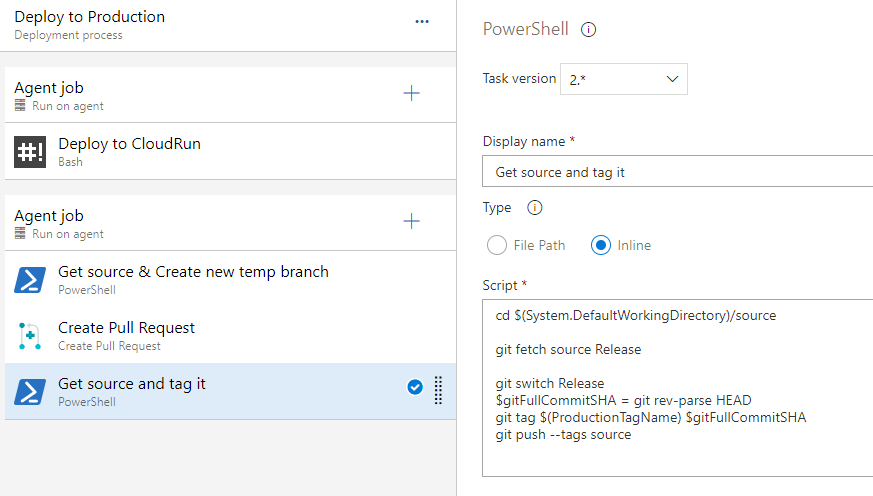
cd $(System.DefaultWorkingDirectory)/source

git fetch source Release

git switch Release
$gitFullCommitSHA = git rev-parse HEAD
git tag $(ProductionTagName) $gitFullCommitSHA
git push --tags source
這部份其實是把PowerShell script拆成了兩段,前面建立了一個新的暫時用的Branch,名稱就是放在$(NewBranchName)變數中的名稱,後面在同一個位置繼續處理tag source的部份(切換到Release分支)。
接著就是設定Variables變數的部份
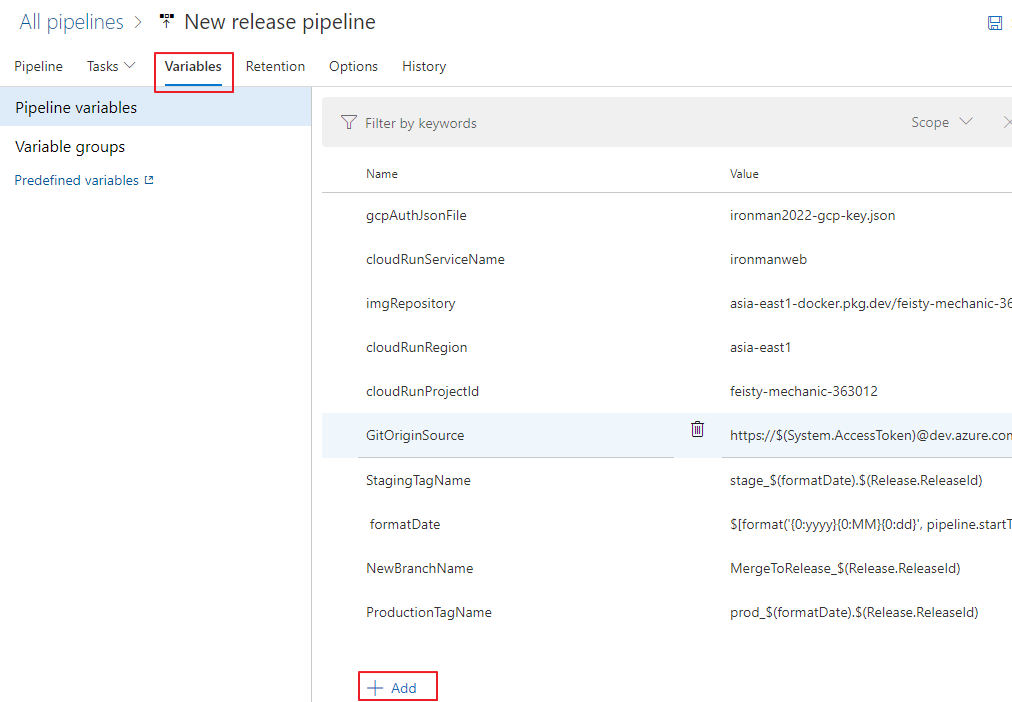
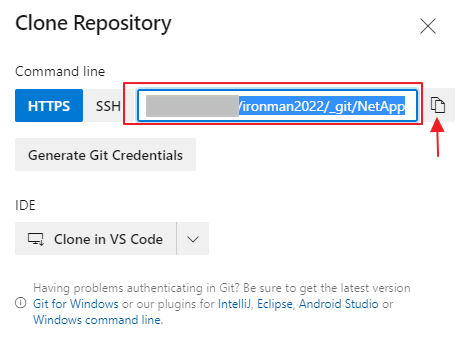
基本上大部份的變數名稱和內容值都是和CI Pipeline設定的變數相同,只是多了GitOriginSource、StagingTagName、formatDate、NewBranchName、ProductionTagName這幾個,而GitOriginSource的部份就是來自己Git Repo的Clone網址,把@的最前面改成$(System.AccessToken)取得Token內容。
