
接下來會將第十一天所實作的 TodoList 從 CodePen 移植過來,因此這章節也會整理一下 CRA 順便安裝 Tailwind CSS,讓我們的 TodoList 看起來更好看一點。
為了避免過度讓專案複雜化,所以這邊會稍微整理一下 CRA,這邊我們先輸入以下指令移除相關用不到的套件
npm uninstall @testing-library/jest-dom @testing-library/react @testing-library/user-event web-vitals
接下來刪除以下檔案
另外 App.css 可以先刪除,因為我們並不會使用到這一隻檔案
刪除之後,接下來打開 src/index.js 將內容改成以下
import React from 'react';
import ReactDOM from 'react-dom/client';
import './index.css';
import App from './App';


const root = ReactDOM.createRoot(document.getElementById('root'));

root.render(
  <React.StrictMode>
    <App />
  </React.StrictMode>
);
這樣子整體程式碼就會乾淨一點,稍後比較可以方便你將 CodePen 程式碼轉移過來。
由於我們在 CodePen 上面有使用到 Tailwind CSS,所以目前 CRA 的專案也要安裝 Tailwind CSS,否則程式碼移動進來也會無法正常呈現畫面的。
首先先安裝 Tailwind CSS
npm install -D tailwindcss postcss autoprefixer
安裝好後再來初始化 Tailwind CSS
npx tailwindcss init -p
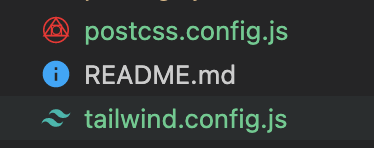
初始化後你會看到專案底下多了 postcss.config.js 與 tailwind.config.js 兩個檔案
接下來打開 tailwind.config.js,我們要將內容調整成改成以下
/** @type {import('tailwindcss').Config} */
module.exports = {
  content: ["./src/**/*.{js,jsx,ts,tsx}",],
  theme: {
    extend: {},
  },
  plugins: [],
}
content 主要是告知 TailWind CSS 要檢測哪些檔案,好讓 PostCSS 除去沒有使用的 class,只保留有在使用的 class。
接下來打開 src/index.css 並且將裡面刪除加入以下
@tailwind base;
@tailwind components;
@tailwind utilities;
這樣子就大功告成啦~
詳細的 TailWind CSS 細節就不多說了,畢竟不是這一系列文章要講的內容因此只是帶到而已,到目前為止 TailWind CSS 就成功加入到 CRA 囉~
只是如果你有發現「Unknown at rule @tailwind」這個錯誤訊息的話,可以參考我這一篇「VSCode 噴 Unknown at rule @tailwind 解決方式」文章的解決方式。
後面就讓我們繼續將原本放在 CodePen 的程式碼轉移到當前專案上吧。
接下來這邊我會建議將 App.js 改成 App.jsx,雖然副檔名不論是 .js 或是 .jsx 都沒有差異也不會發生任何錯誤,但是為了好辨別裡面是否有使用到 JSX 語法,因此這邊會建議將 App.js 改成 App.jsx 會比較好,未來當你看到這個副檔名時也就可以立刻知道裡面有使用到 JSX 語法。
接下來只需要將 App.js 裡面全部刪除,然後貼上 CodePen 中 const App = () => {} 的部分,但是這邊有一些小細節要注意,就是原本我們是這樣子撰寫 const [ todoList, setTodoList ] = React.useState(JSON.parse(localStorage.getItem('todoList')) || []); 相關 Hook,可是在 CRA 中因為改使用了另一種方式引入 Hook 因此語法要改成另一種寫法 const [ todoList, setTodoList ] = useState(JSON.parse(localStorage.getItem('todoList')) || []);,就僅僅只是將 React. 字樣刪除罷了
import { useState, useEffect } from 'react';

const App = () => {
  const [ todoList, setTodoList ] = useState(JSON.parse(localStorage.getItem('todoList')) || []);

  const addTodo = (event) => {
    setTodoList([
      ...todoList,
      {
        id: Date.now(),
        name: event.target.previousElementSibling.value,
        status: false
      }
    ]);
    event.target.previousElementSibling.value = '';
  };

  useEffect(() => {
    localStorage.setItem('todoList', JSON.stringify(todoList));
  }, [ todoList ]);

  const remoteAllTodo = () => {
    setTodoList([]);
  };

  return (
    <div>
      <div className="bg-indigo-500 p-5 h-screen">
        <div className="max-w-[768px] m-auto bg-white p-5">
          <h1 className="text-center text-2xl mb-4">React ToDoList</h1>
          <div className="flex">
            <input type="text" className="w-full rounded-l-lg border-l-2 border-y-2 border-indigo-300 pl-4 focus:outline-indigo-500 focus:outline-none focus:outline-offset-0" placeholder="請輸入你的代辦事項" />
            <button onClick={ addTodo } className="w-[50px] h-[50px] border-0 bg-sky-500 hover:bg-sky-600 rounded-r-lg text-white transition duration-700">+</button>
          </div>

          <List todoList={ todoList } setTodoList={ setTodoList }/>

          <div className="flex justify-between items-center  mt-5">
            <p>
              目前有 <span className="font-medium">{ todoList.length }</span> 個事項待完成
            </p>

            <button onClick={ remoteAllTodo } type="button" className="bg-red-300 p-2 rounded-md hover:bg-red-400 transition duration-700">Clear All Todo</button>
          </div>
        </div>
      </div>
    </div>
  )
}

export default App;
接下來在 src 底下建立一個 components 資料夾,然後也順便建立一個 List 資料夾與 index.jsx,並將 const List = ({ todoList, setTodoList }) => {...} 貼進去
const List = ({ todoList, setTodoList }) => {

  const updateTodo = (event) => {
    const { id } = event.target.dataset;
    const newTodoList = todoList.map((todo) => {
      if(todo.id === Number(id)) {
        todo.status = !todo.status;
      }
      return todo;
    });

    setTodoList([ ...newTodoList ]);
  }

  const template = (todo) => {
    return (
      <li className="py-4" key={ todo.id }>
        <label className={ todo.status ? 'line-through' : ''}>
          <input type="checkbox" className="mr-2" onChange={ updateTodo } data-id={ todo.id } checked={ todo.status }/>
          { todo.name }
        </label>
      </li>
    )
  }

  return ( <ul> { todoList.map((todo) => template(todo)) } </ul> )
}

export default List;
接下來只要將 List 元件的引入寫到 App.jsx 就好了
import List from './components/List';
到目前為止你只要輸入 npm start 就可以看到你前面章節練習的 TodoList 已經成功脫離 CodePen 環境轉移到真實的開發環境囉。
到目前為止我們已經將 ToDoList 的專案移轉到真實的開發環境,接下來我們要將專案部署到 GitHub Pages 上,讓大家可以透過網址來使用我們的 ToDoList。
而接下來我會盡可能一個一個步驟說明,讓你可以無痛的部署到 GitHub Pages。
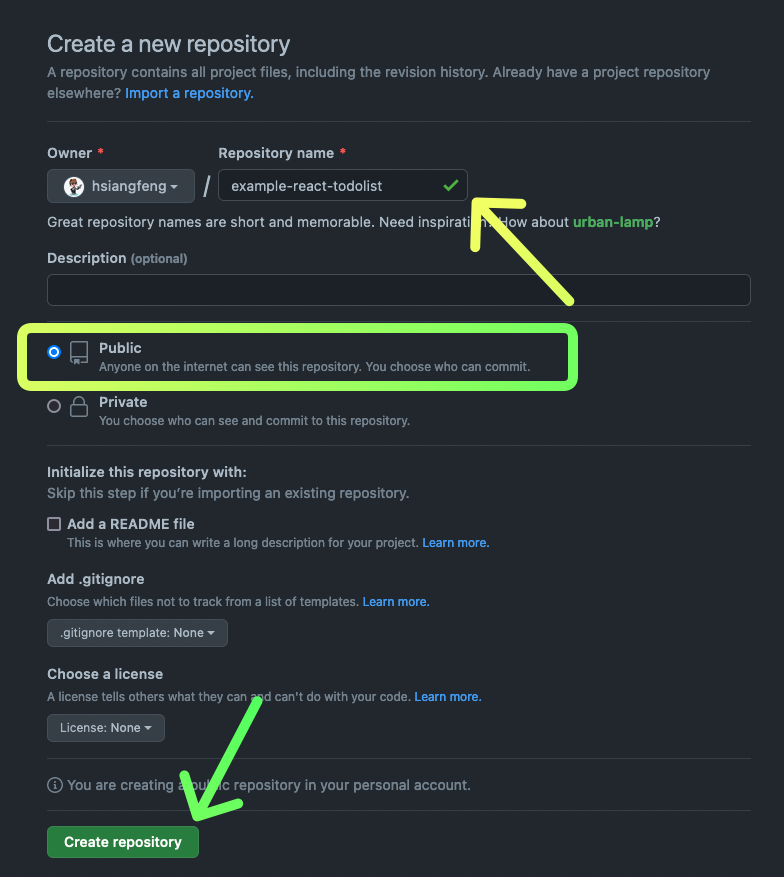
所以這邊請打開你的 GitHub 新建一個儲存庫,名稱為 example-react-todolist
新建成功後你會跳到另一個頁面,如下圖:
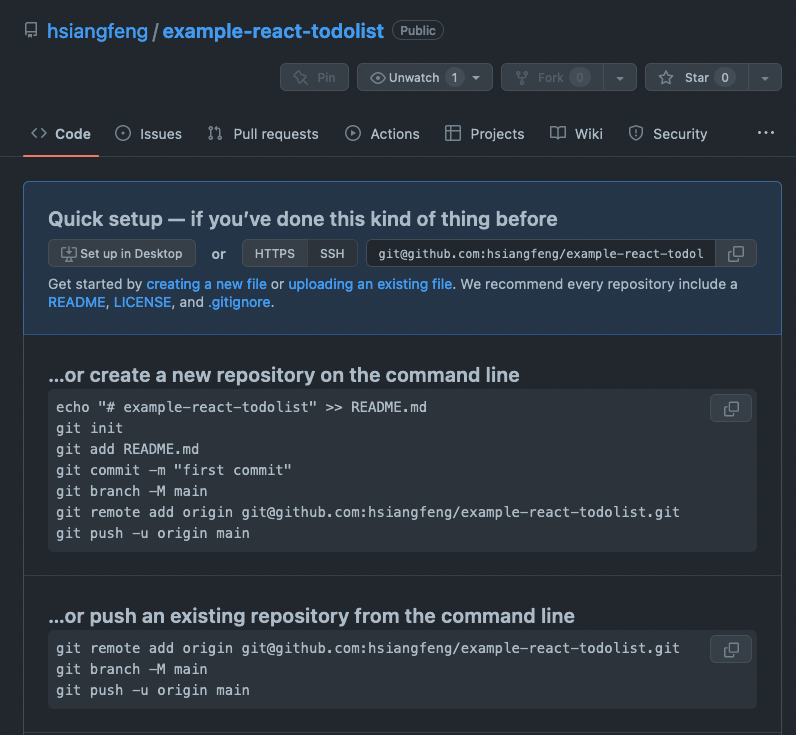
到這邊為止你就已經建立好儲存庫,然後請你複製畫面上下方「…or push an existing repository from the command line」的部分
git remote add origin 'url'
git branch -M main
git push -u origin main
稍後我們會用到這些指令,儲存庫的網址也請記得一下。
接下來我們要將我們的專案加入遠端儲存庫,所以請先打開你的終端機,並且切換到你的專案目錄,然後輸入剛剛複製的指令
git remote add origin 'url'
git branch -M main
git push -u origin main
以我的範例程式碼來講就是以下
git remote add origin git@github.com:hsiangfeng/example-react-todolist.git
git branch -M main
git push -u origin main
請注意,你的 url 跟我的不一樣,所以請你自行替換成你的 url。
除此之外你在貼上指令的時候,請逐行貼入,不要一次貼入全部,否則你可能會遇到一些問題,那麼由於我們剛剛搬移了專案,所以你的指令會是以下流程
git remote add origin git@github.com:hsiangfeng/example-react-todolist.git
git branch -M main
git add .
git commit -m 'first'
git push -u origin main

到目前為止你的專案原始碼應該已經上傳到 GitHub 儲存庫囉。
接下來的步驟非常重要,請不要漏掉任何一個步驟了,你只要漏掉一個步驟,你就無法部署到 GitHub Pages,因此請你仔細看完。
首先我們要編輯 package.json,請你打開你的專案目錄,然後找到 package.json,接著加入 homepage 屬性
{
  "name": "example-react-todolist",
  "version": "0.1.0",
  "private": true,
  "homepage": "https://hsiangfeng.github.io/example-react-todolist",
  "dependencies": {
    // ... 略過
  },
  "scripts": {
    // ... 略過
  },
  // ... 略過
}
React 的 CRA(Create React App) 將會讀取 homepage 屬性來決定你的專案的網址,請一定要加入這個屬性。
接著要安裝 gh-pages 套件幫助我們部署到 GitHub Pages,請在終端機輸入以下指令
npm install --save gh-pages
接著回來打開 package.json 找到 scripts 加入兩個指令,分別是 predeploy 與 deploy 指令
{
  "name": "example-react-todolist",
  "version": "0.1.0",
  "private": true,
  "homepage": "https://hsiangfeng.github.io/example-react-todolist",
  "dependencies": {
    // ... 略過
  },
  "scripts": {
    "predeploy": "npm run build",
    "deploy": "gh-pages -d build",
    // ... 略過
  },
  // ... 略過
}
predeploy 指令是當你輸入 npm run build 的時候,會優先執行 predeploy 指令,然後再執行 deploy 指令,所以你可以在 predeploy 指令中加入你要執行的指令,例如我們要執行 npm run build,所以我們就加入了 npm run build。
到目前為止你就可以部署到 GitHub Pages 了。
請在終端機輸入以下指令
npm run deploy
這樣子你就成功部署到你剛剛的儲存庫。
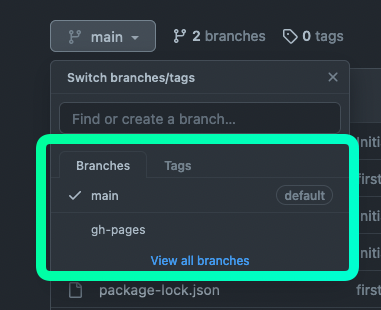
那麼接著要如何知道部署成功呢?第一個地方你可以點開 branch 的部分,如果有部署成功的話,你可以看到分支變成兩個,一個是 main,另一個是 gh-pages。
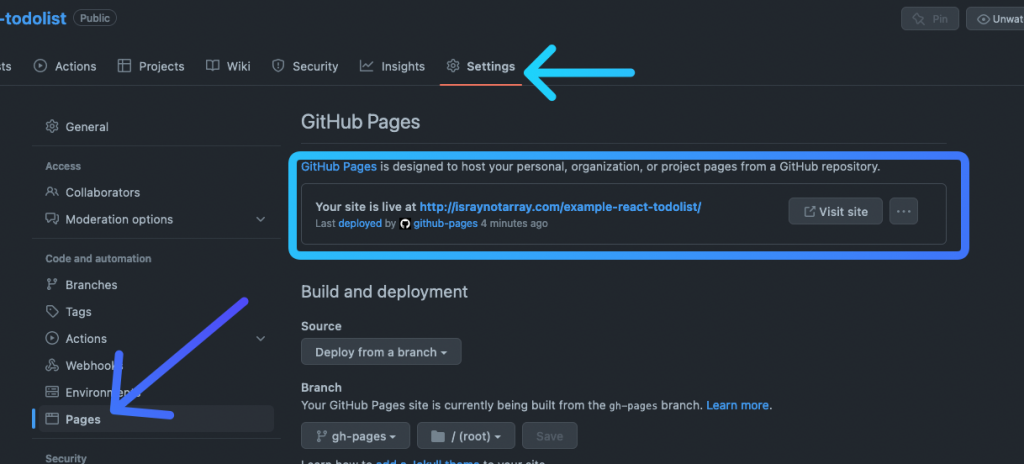
第二個地方你可以點開 Settings 的部分,然後往下拉,你可以看到 GitHub Pages 的部分,如果有部署成功的話,你可以看到 GitHub Pages 的網址。
那麼到目前網址你成功部署到 gh-page 上,而我這邊也附上我的 範例 給你觀看。
範例程式碼儲存庫:GitHub
範例 GitHub Pages:GitHub Pages
最後這邊也補一些資源,如果你對於 Git 指令沒有很熟悉的話,可以參考我這一篇基礎 Git 指令文章,我有列出常見的 Git 指令。
本文將會同步更新到我的部落格
