MotionLayout為ConstraintLayout的子類,可為布局添加動畫的效果,而這個布局需要ConstraintLayout2.0才能進行使用,首先在gradle內確認是否已加入ConstraintLayout2.0以上的依賴。
implementation 'androidx.constraintlayout:constraintlayout:2.1.4'
確認依賴後,接著先更改你的布局為MotionLayout(Convert to MotionLayout):
接著在res資料夾內,應該會產生一個xml/activity_main_scene的檔案如下: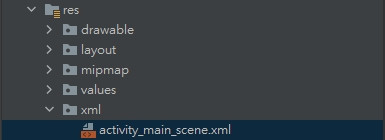
更換完的ui也幫你綁了activity_main_scene的動畫樣式:
<androidx.constraintlayout.motion.widget.MotionLayout xmlns:android="http://schemas.android.com/apk/res/android"
    xmlns:app="http://schemas.android.com/apk/res-auto"
    xmlns:tools="http://schemas.android.com/tools"
    android:layout_width="match_parent"
    android:layout_height="match_parent"
    app:layoutDescription="@xml/activity_main_scene"
    tools:context=".MainActivity">

    <TextView
        android:id="@+id/textView"
        android:layout_width="wrap_content"
        android:layout_height="wrap_content"
        android:text="Hello World!"
        app:layout_constraintBottom_toBottomOf="parent"
        app:layout_constraintLeft_toLeftOf="parent"
        app:layout_constraintRight_toRightOf="parent"
        app:layout_constraintTop_toTopOf="parent" />

</androidx.constraintlayout.motion.widget.MotionLayout>
那麼先貼上今日會用到的UI,寫了兩個view的框框,等等來介紹MotionLayout中會用到的屬性。
<androidx.constraintlayout.motion.widget.MotionLayout xmlns:android="http://schemas.android.com/apk/res/android"
    xmlns:app="http://schemas.android.com/apk/res-auto"
    xmlns:tools="http://schemas.android.com/tools"
    android:layout_width="match_parent"
    android:layout_height="match_parent"
    app:layoutDescription="@xml/activity_main_scene"
    tools:context=".MainActivity">

    <View
        android:id="@+id/button"
        android:layout_width="64dp"
        android:layout_height="64dp"
        android:background="@color/black"
        android:text="Button"
        tools:layout_editor_absoluteX="157dp"
        tools:layout_editor_absoluteY="333dp" />

    <View
        android:id="@+id/button2"
        android:layout_width="64dp"
        android:layout_height="64dp"
        android:background="@color/black"
        android:text="Button"
        tools:layout_editor_absoluteX="173dp"
        tools:layout_editor_absoluteY="507dp" />


</androidx.constraintlayout.motion.widget.MotionLayout>
MotionLayout最外層,在布局中app:layoutDescription會去引用MotionScene,包含了對應布局的任何動畫。
<MotionScene
    xmlns:android="http://schemas.android.com/apk/res/android"
    xmlns:motion="http://schemas.android.com/apk/res-auto">
    <!--執行的動畫-->
</MotionScene>
動畫的基本定義,基本上執行動畫都會在這底下設計,其中內部包含開始屬性(motion:constraintSetStart)、結束屬性(motion:constraintSetEnd)、動畫持續時間(motion:duration)、另外下層還有:
<OnSwipe
    motion:dragDirection="dragRight"
    motion:touchAnchorId="@+id/button"
    motion:touchAnchorSide="right"/>
<!--設定物件的動畫-->
<!--rotation=角度,scale=縮放大小,framePosition=進度位置,percentX=沿x軸的百分比距離,percentY=沿y軸的百分比距離-->
    <KeyFrameSet>
        <KeyAttribute
                android:rotation="0"
                android:scaleX="2"
                android:scaleY="2"
                motion:framePosition="0"
                motion:motionTarget="@id/button" />
        <KeyPosition
            motion:framePosition="50"
            motion:keyPositionType="pathRelative"
            motion:motionTarget="@id/button"
            motion:percentY="0.3"
            motion:percentX="0.5" />
            <KeyAttribute
                android:rotation="720"
                android:scaleX="2"
                android:scaleY="2"
                motion:framePosition="100"
                motion:motionTarget="@id/button" />
    </KeyFrameSet>
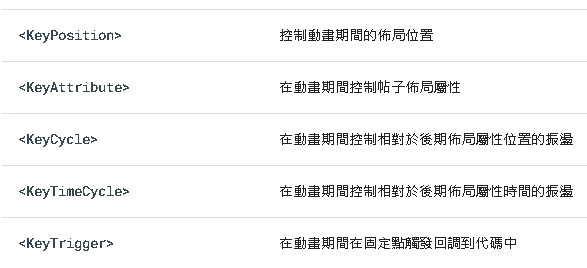
而每個都包含著很多不同的屬性控制動畫,今天主要會用KeyAttribute、KeyPosition這兩個來設計。
<OnClick
    motion:clickAction="toggle"
    motion:targetId="@id/button">
當點擊targetId設計的ID視圖,會執行clickAction,可分為toggle(假如在start則動畫至end,假如在end則動畫至start)、jumpToStart(跳至開始)、jumpToEnd(跳至結束)、transitionToStart(動畫至start)、transitionToEnd(動畫至End)。
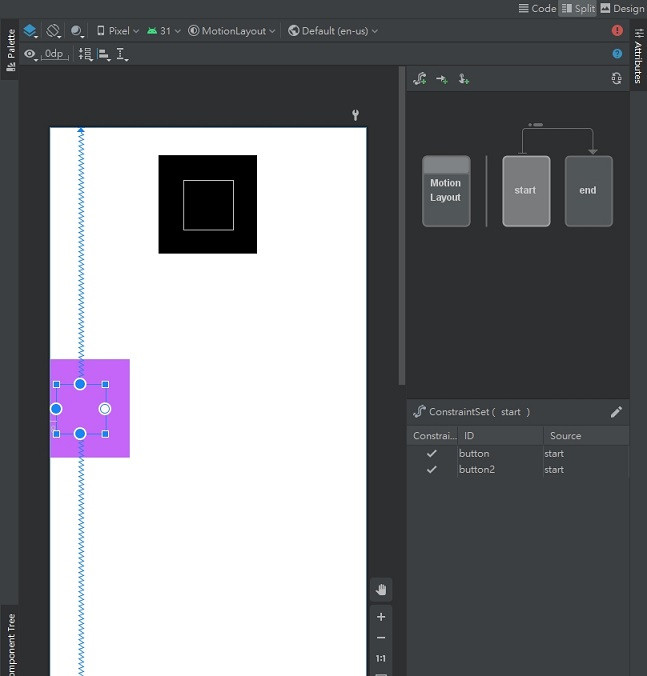
定義約束集,Transition中的motion:constraintSetStart、motion:constraintSetEnd屬性會來綁這邊的約束,這邊通常包含了你設定的位址以及顏色等,當然你也可以放入多個視圖進行動畫:
<!--動畫開始-->
<ConstraintSet android:id="@+id/start">
    <Constraint
        android:id="@+id/button"
        android:layout_width="64dp"
        android:layout_height="64dp"
        android:layout_marginStart="8dp"
        android:text="Button"
        motion:layout_constraintBottom_toBottomOf="parent"
        motion:layout_constraintStart_toStartOf="parent"
        motion:layout_constraintTop_toTopOf="parent">
        <CustomAttribute
            motion:attributeName="BackgroundColor"
            motion:customColorValue="#C566F8"/>
    </Constraint>
    <Constraint
        android:layout_height="64dp"
        android:layout_width="64dp"
        android:id="@+id/button2"
        motion:layout_constraintBottom_toBottomOf="parent"
        motion:layout_constraintEnd_toEndOf="parent"
        motion:layout_constraintTop_toTopOf="parent"
        motion:layout_constraintVertical_bias="0.103"
        motion:layout_constraintStart_toStartOf="parent" />
</ConstraintSet>
<!--動畫結束-->
<ConstraintSet android:id="@+id/end">
    <Constraint
        android:id="@id/button"
        android:layout_width="64dp"
        android:layout_height="64dp"
        android:layout_marginEnd="8dp"
        android:text="Button"
        motion:layout_constraintBottom_toBottomOf="parent"
        motion:layout_constraintEnd_toEndOf="parent"
        motion:layout_constraintTop_toTopOf="parent">
        <CustomAttribute
            motion:attributeName="BackgroundColor"
            motion:customColorValue="#34C0D8" />
    </Constraint>
    <Constraint
        android:layout_height="64dp"
        android:layout_width="64dp"
        android:id="@+id/button2"
        motion:layout_constraintBottom_toBottomOf="parent"
        motion:layout_constraintEnd_toEndOf="parent"
        motion:layout_constraintTop_toTopOf="parent"
        motion:layout_constraintVertical_bias="0.79"
        motion:layout_constraintStart_toStartOf="parent" />
</ConstraintSet>
接著附上今日的MotionScene程式:
<?xml version="1.0" encoding="utf-8"?>
<MotionScene xmlns:android="http://schemas.android.com/apk/res/android"
    xmlns:motion="http://schemas.android.com/apk/res-auto">
    <!--動畫開始&結束-->
    <Transition
        motion:constraintSetEnd="@+id/end"
        motion:constraintSetStart="@+id/start"
        motion:duration="1000">
        <OnSwipe
            motion:dragDirection="dragRight"
            motion:touchAnchorId="@+id/button"
            motion:touchAnchorSide="right"/>
        <!--設定物件的動畫-->
        <KeyFrameSet>
            <!--Button2-->
            <KeyAttribute
                android:rotation="0"
                android:scaleX="2"
                android:scaleY="2"
                motion:framePosition="0"
                motion:motionTarget="@id/button2" />
            <KeyAttribute
                android:rotation="720"
                android:scaleX="2"
                android:scaleY="2"
                motion:framePosition="100"
                motion:motionTarget="@id/button2" />
            <!--==================================-->
            <KeyAttribute
                android:rotation="0"
                android:scaleX="2"
                android:scaleY="2"
                motion:framePosition="0"
                motion:motionTarget="@id/button" />
            <KeyPosition
                motion:framePosition="50"
                motion:keyPositionType="pathRelative"
                motion:motionTarget="@id/button"
                motion:percentY="0.3"
                motion:percentX="0.5" />

            <KeyAttribute
                android:rotation="720"
                android:scaleX="2"
                android:scaleY="2"
                motion:framePosition="100"
                motion:motionTarget="@id/button" />
        </KeyFrameSet>
        <!--當點擊targetId按鈕,假如在start則動畫至end,假如在end則動畫至start-->
        <OnClick
            motion:clickAction=""
            motion:targetId="@id/button">
        </OnClick>
    </Transition>

    <ConstraintSet android:id="@+id/start">
        <Constraint
            android:id="@+id/button"
            android:layout_width="64dp"
            android:layout_height="64dp"
            android:layout_marginStart="8dp"
            android:text="Button"
            motion:layout_constraintBottom_toBottomOf="parent"
            motion:layout_constraintStart_toStartOf="parent"
            motion:layout_constraintTop_toTopOf="parent">
            <CustomAttribute
                motion:attributeName="BackgroundColor"
                motion:customColorValue="#C566F8"/>
        </Constraint>
        <Constraint
            android:layout_height="64dp"
            android:layout_width="64dp"
            android:id="@+id/button2"
            motion:layout_constraintBottom_toBottomOf="parent"
            motion:layout_constraintEnd_toEndOf="parent"
            motion:layout_constraintTop_toTopOf="parent"
            motion:layout_constraintVertical_bias="0.103"
            motion:layout_constraintStart_toStartOf="parent" />
    </ConstraintSet>

    <ConstraintSet android:id="@+id/end">
        <Constraint
            android:id="@id/button"
            android:layout_width="64dp"
            android:layout_height="64dp"
            android:layout_marginEnd="8dp"
            android:text="Button"
            motion:layout_constraintBottom_toBottomOf="parent"
            motion:layout_constraintEnd_toEndOf="parent"
            motion:layout_constraintTop_toTopOf="parent">
            <CustomAttribute
                motion:attributeName="BackgroundColor"
                motion:customColorValue="#34C0D8" />
            <Motion motion:drawPath="path"/>
        </Constraint>
        <Constraint
            android:layout_height="64dp"
            android:layout_width="64dp"
            android:id="@+id/button2"
            motion:layout_constraintBottom_toBottomOf="parent"
            motion:layout_constraintEnd_toEndOf="parent"
            motion:layout_constraintTop_toTopOf="parent"
            motion:layout_constraintVertical_bias="0.79"
            motion:layout_constraintStart_toStartOf="parent" />
    </ConstraintSet>
</MotionScene>
假如你要調Start的位子,你可以點start直接拉位子,End也是一樣,而如果要看動畫可以點右邊Start->End的箭頭: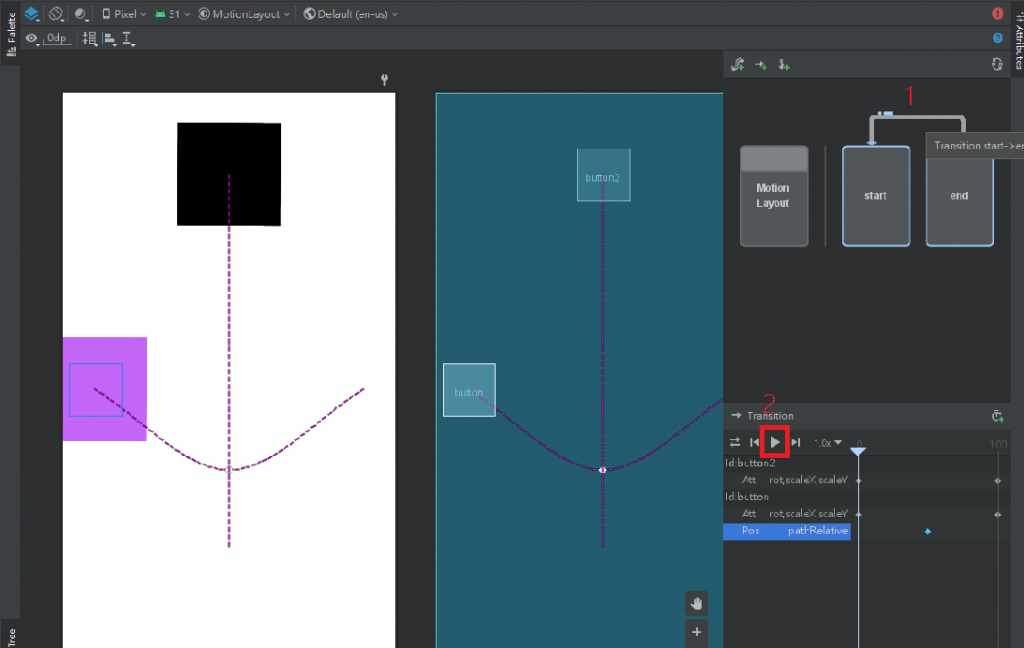
這邊就可以看到妳動畫的軌跡了,然後可以點選開始,其他功能依序是:
動畫Cycle、跳至Start、開始、跳至End,另外也能設定動畫跑的倍率。
另外這邊也有官方提供的一些範例:Android Developers/MotionLayout示例,有興趣可以試試看!

 iThome鐵人賽