
昨天我們在 Jnekins 上撰寫了我們的第一個 Pipeline,並成功地執行了起來,今天,讓我們一起串聯 Gitlab 以及 Harbor,來完成以下三個目的:
Pipeline Script from SCM 是將 Jenkinsfile 放置到 Gitlab Repository 內,在觸發構建時才將腳本拉取到 Jenkins 內參照執行
所以,我們在 Git Repository 創建一個檔案名為 Jenkinsfile,並將昨天的腳本內容放到裡面,隨後推送到 cct-devops 這個 Gitlab Repository 中,而之後,我們更新 Pipeline 腳本都以這一份為主,並且在修改後要推送上去。
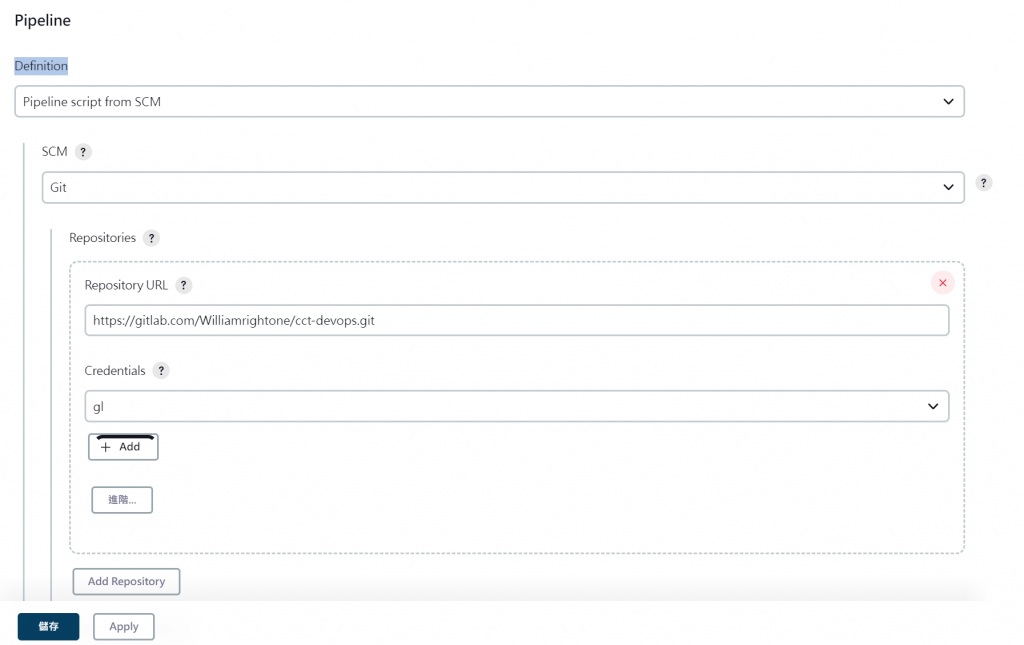
當我們在 Jenkins color-code-tag 項目的設置內,將 Pipeline Definition 設定成 Pipeline Script from SCM 後,會看到下面多出了 SCM 的選項,我們選擇 Git 後,會看到 Repositories URL 與 Credentials 的選項,此時我們便能將 Gti 專案的 URL 填入,同時在 Credentials 的選項下面 add 創建 Gitlab 的認證,並填入 Gitlab 的帳號與密碼。
完成後,我們再次地按下馬上建置,便會看到 Stage View 多了一個 Declarative: Checkout SCM,表示 Jenkins 到 Gitlab 內拿到了 Jenkinsfile 並且執行了裡面的腳本。
再來,我們來讓 Jenkins 也能夠拉取後端的原始碼。
首先到主頁面的管理 Jenkins 下,Security 內的 Manage Credentials,能夠看到我們剛才創建的 gitlab Credentials ID,我們將它複製後貼到 Jenkinsfile 內,並將參數以變數的方式抽離出來:
//被抽離的參數
def git_auth = "di8h0kfi-c312-4200-g45f-673329f9cd"
def git_address = "https://gitlab.com/Williamrightone/cct-java.git"

pipeline {

	agent any

	stages {
		stage('Check Java Code From Gitlab') {
			steps {
				checkout([$class: 'GitSCM', branches: [[name: "master"]], extensions: [], userRemoteConfigs: [[credentialsId: "${git_auth}", url: "${git_address}"]]])

			}
		}
	}
}
完成後按下建置,接著我們在最新的 Build 資訊側欄,點選 workspace,會看到他寫 /var/lib/jenkins/workspace/color-code-tag,點進去後,會發現我們的原始碼都被拉進 Jenkins 的 workspace 內部了。

而 Jenkins 服務既然是架設在 Linux 機上,此時我們若連線到 192.168.1.120 內,並前往 /var/lib/jenkins/workspace/color-code-tag 路徑,即可發現我們的 Git Repository 檔案。而當我們使用 Container 架設 Jenkins 時,就會需要將 Container 內部 Jenkins workspace 的路徑映射 (mount) 到 Linux 的某個路徑下。
下一步,我們來編譯與打包 cct-java,不過這裡我們就來插播一個 Java 後端的構建 plugin jib-maven-plugin
jib-maven-plugin 這個套件是用於簡化 java 打包成 Image 的過程,和 Spring boot 的初衷一樣,核心就是想要讓 java 相關的業務都能達到 "Just work" 的效果,讓團隊更著重於程式碼的開發。
我們先來說明一下,原先的計畫會怎麼走:
mvn clean package
docker build 192.168.1.120:9001/cct-back/cct-java:0.0.1 .
而 jib 的流程則僅需要再 pom 內設定要使用的 BaseImage,以及位置即可,jib 與 使用 Dockerfile 的差異可用一張圖解釋:
(取自 Docker image build vs. jib)
簡言之,使用 Dockerfile 會增加許多的步驟,但是也保有夠多的彈性,而 jib 則能夠快速地為我們完成工作。
要使用 jib-maven-plugin,需要先在 pom 裡面引入 dependancy,並且設置:
	<groupId>com.william</groupId>
	<artifactId>color-code-tag-back</artifactId>
	<version>0.0.2</version>
	<name>color-code-tag-back</name>
	<description>Demo project for Spring Boot</description>

	<properties>
		<project.build.sourceEncoding>UTF-8</project.build.sourceEncoding>
		<java.version>11</java.version>
		<docker.image.prefix>192.168.1.120:9001/cct-java/cct-back</docker.image.prefix>
		<jib-maven-plugin.version>2.2.0</jib-maven-plugin.version>
	</properties>

	<dependencies>
		<dependency>
			<groupId>org.springframework.boot</groupId>
			<artifactId>spring-boot-starter-web</artifactId>
		</dependency>

		<dependency>
			<groupId>org.springframework.boot</groupId>
			<artifactId>spring-boot-devtools</artifactId>
			<scope>runtime</scope>
			<optional>true</optional>
		</dependency>
		<dependency>
			<groupId>org.projectlombok</groupId>
			<artifactId>lombok</artifactId>
			<optional>true</optional>
		</dependency>
		<dependency>
			<groupId>org.springframework.boot</groupId>
			<artifactId>spring-boot-starter-test</artifactId>
			<scope>test</scope>
		</dependency>
	</dependencies>

	<build>
		<plugins>
			<plugin>
				<groupId>org.springframework.boot</groupId>
				<artifactId>spring-boot-maven-plugin</artifactId>
				<configuration>
					<excludes>
						<exclude>
							<groupId>org.projectlombok</groupId>
							<artifactId>lombok</artifactId>
						</exclude>
					</excludes>
				</configuration>
			</plugin>

			<plugin>
				<artifactId>jib-maven-plugin</artifactId>
				<groupId>com.google.cloud.tools</groupId>
				<version>${jib-maven-plugin.version}</version>
				<configuration>
					<from>
						<image>registry.access.redhat.com/ubi8/openjdk-11-runtime</image>
					</from>
					<to>
						<image>${docker.image.prefix}:${project.version}</image>
					</to>
					<allowInsecureRegistries>true</allowInsecureRegistries>
				</configuration>
			</plugin>
		</plugins>
	</build>
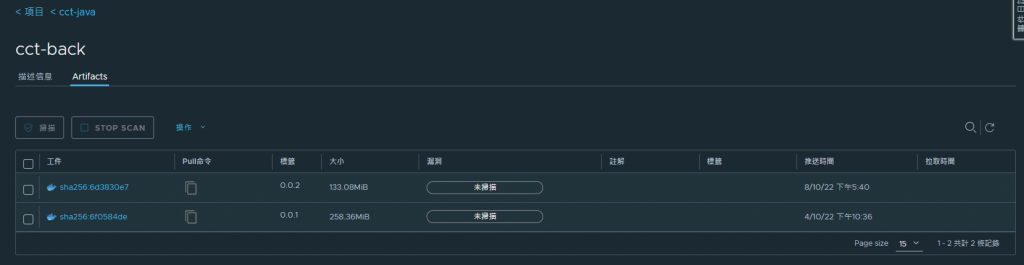
這樣,在匯出時,則會 >${docker.image.prefix}:${project.version} 創建出 192.168.1.120:9001/cct-java/cct-back:0.0.2了;另外,我們也將 BaseImage 更改為 redhat 的官方 Image。
接著我們要設定 Harbor 的 Credentials,此時我們可以使用原先創建的 william,也可以到 Harbor 項目內創立機器人帳戶,這裡選用機器人帳戶,我們先到 Harbor 的項目內選擇機器人帳戶。
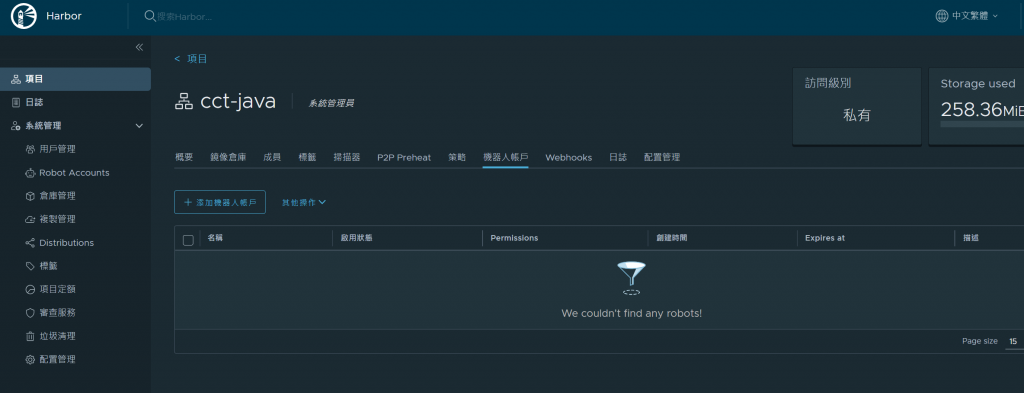
再點選 添加機器人帳戶 ,設定時可以將調整其權限。
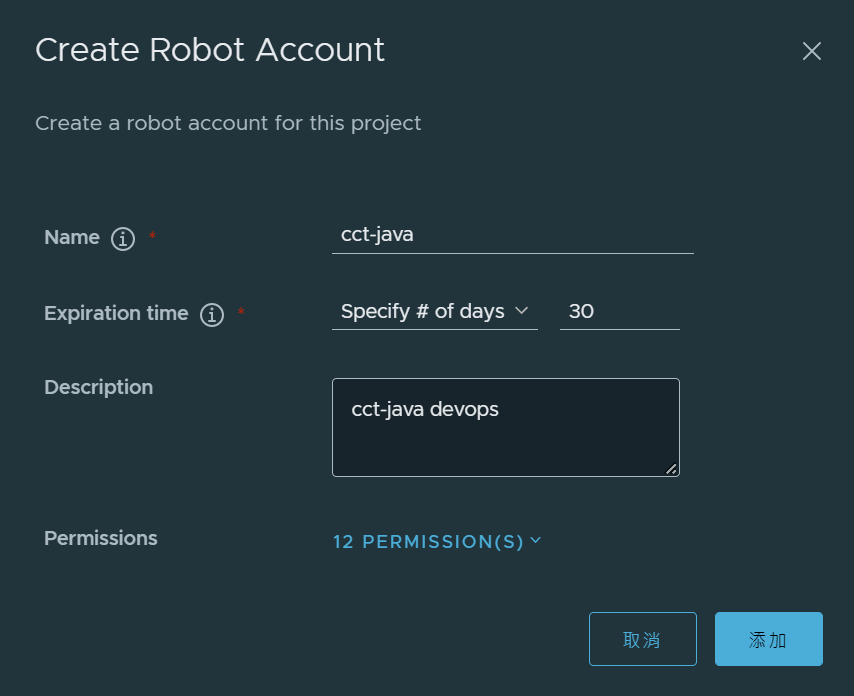
點選後,我們有一次能夠保存 token 的機會,他相當於是機器人帳號的密碼。拿到和我們可以到 Jenkins 內的管理選項,利用創建的機器人帳號與密碼,新增一個 Harbor 的 Credential。
再來我們更新 Jenkinsfile,在這裡我們可以使用 mvn package jib:dockerBuild 執行 Image 的建立。這裡我們將 jib Image 製作與推送 這個 Stage 加入,並用上剛才創建的 harbor Credential。
//被抽離的參數
def git_auth = "dbe4cf79-ca87-4200-a6d8-6883b895ce3c"
def git_address = "https://gitlab.com/Williamrightone/cct-java.git"
def harbor_auth = "a372743f-7400-492f-8893-0d50b1a79287"

pipeline {
	agent any
	stages {
		stage('Check Java Code From Gitlab') {
			steps {
				checkout([$class: 'GitSCM', branches: [[name: "master"]], extensions: [], userRemoteConfigs: [[credentialsId: "${git_auth}", url: "${git_address}"]]])
			}
		}

		stage('jib Image 製作與推送') {
             steps {
				script{
					withCredentials([usernamePassword(credentialsId: "${harbor_auth}", passwordVariable: 'harborPasswd', usernameVariable: 'haborUser')]) {
							sh '''
							mvn compile jib:build \
							-DsendCredentialsOverHttp=true \
							-Djib.to.auth.username=${haborUser} \
							-Djib.to.auth.password=${harborPasswd}
							'''
							}
						}
					}
				}
			}
}
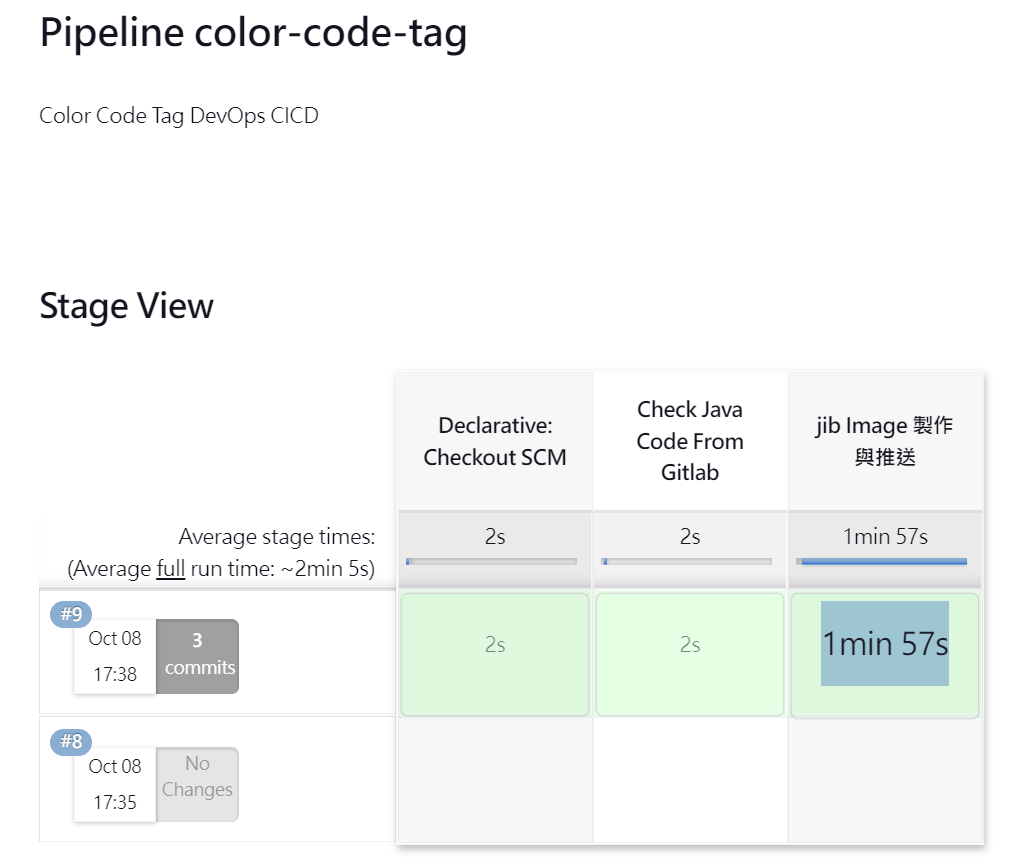
從 Stage View 可以看到建構與打包的時間是 1min 57s,而 Harbor 內也有了 0.0.2 版本的 Tags 了。
看看 Harbor
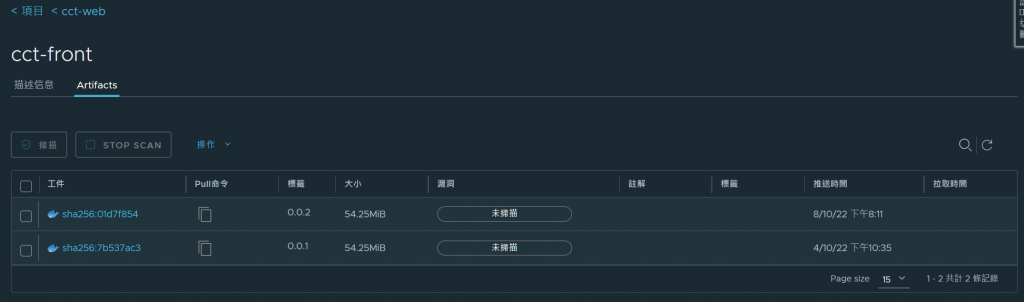
前端的打包就需要用原來的方法了,同時因為觸發構建的將會是另外的一個 Git Repository 的更新,因此我們要為 ctt 的前端也開一個 Pipeline 項目,並且也要為 Harbor cct-web 建立機器人帳號,並設定 credentials :
//被抽離的參數
def git_auth = "dbe4cf79-ca87-4200-a6d8-6883b895ce3c"
def git_address = "https://gitlab.com/Williamrightone/cct-web.git"
def harbor_auth = "d597f032-e903-4d05-8c07-df27b8ff86eb"

pipeline {

	agent any

	stages {
		stage('Check Web Code From Gitlab') {
			steps {
				checkout([$class: 'GitSCM', branches: [[name: "master"]], extensions: [], userRemoteConfigs: [[credentialsId: "${git_auth}", url: "${git_address}"]]])

			}
		}

		stage('Docker Image 製作與推送') {
         steps {
		  script{
		   withCredentials([usernamePassword(credentialsId: "${harbor_auth}", passwordVariable: 'harborPasswd', usernameVariable: 'haborUser')]) {

			sh 'docker build -t 192.168.1.120:9001/cct-web/cct-front:0.0.2 .'
			sh 'docker login -u ${haborUser} -p ${harborPasswd} http://192.168.1.120:9001'
			sh 'docker push 192.168.1.120:9001/cct-web/cct-front:0.0.2 '
			sh 'docker rmi 192.168.1.120:9001/cct-web/cct-front:0.0.2 '

				}
			   }
             }
			}
		}
}
完成後建置,可以 Jenkins 則會拉取 Angular 並且打包與推送了(其實我們的前端也能夠使用相同的方式打包與傳送)。
到這裡,我們已經利用 Jenkins 為我們完成了自動的整合與交付 (Integration & Delivery),明天,我們再讓 Jenkins 能夠遠端連線到 SIT 機 (192.168.1.188 那台),並且將 Image 拉進來部署;以及為 Jenkins 掛上 Webhooks,讓我們推送 code 到 Gitlab 時,會自動的觸發 Pipeline。
關於 Jenkinsfile 可以使用 devops 的分支進行管理,讓不同分之對應不同的 Jenkins job。
今天我們完成了前後端的原始碼拉取到 Image 的交付,總算是快要完成 CI/CD 的建置了。原本以為雙十節會有比較多時間寫,結果還是從下午寫到了傍晚...。


 iThome鐵人賽