前言
這個篇其實應該出現在一開始才對... 趁著在模式與模式的中間穿插介紹一下。雖然跟設計模式沒有直接關係,但因為想使用C++來做一些測試,選擇在擴充功能豐富的Visual Studio Code中來執行,以下紀錄從安裝到執行的步驟。
如同前面所說,本系列文章的所有程式碼都是以 C++ 改寫書中提供的 JAVA 程式碼,大家也可以直接執行看看文章中提到的程式碼。而要在自己的電腦上試著練習的話,建議可以使用 Visual Studio Code這個IDE,因為它的套件非常充足,而且可以隨時切換使用各種不同的語言!有非常多的功能都可以從網路上探索,今天就簡單紀錄一下安裝環境到使用的步驟,基本上從網路上都可以找得到,這裡彙整可供參考。
安裝g++, gdb
可全程按照官方步驟:Using GCC with MinGW。
- 安裝visual studio code:link。
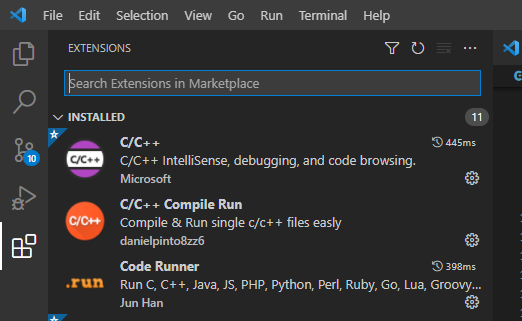
- 在VS Code中安裝C++相關套件:可在extension中搜尋C++來找到。
- Get the latest version of Mingw-w64 via MSYS2, which provides up-to-date native builds of GCC, Mingw-w64, and other helpful C++ tools and libraries. You can download the latest installer from the MSYS2 page or use this link to the installer.
- 以下就照著link中的連結一步一步去做就可以:Follow the Installation instructions on the MSYS2 website to install Mingw-w64. Take care to run each required Start menu and pacman command, especially Step 7, when you will install the actual Mingw-w64 toolset (pacman -S --needed base-devel mingw-w64-x86_64-toolchain).
- 注意,這邊按照MSYS2 installer之後只會有g++,需要再執行上面這行指令來取得gdb
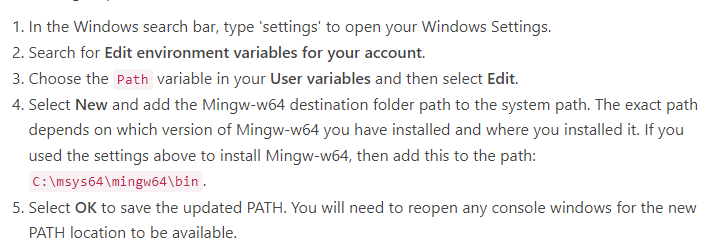
- Add the path to your Mingw-w64 bin folder to the Windows PATH environment variable by using the following steps:這邊就照著下面步驟做沒有問題:
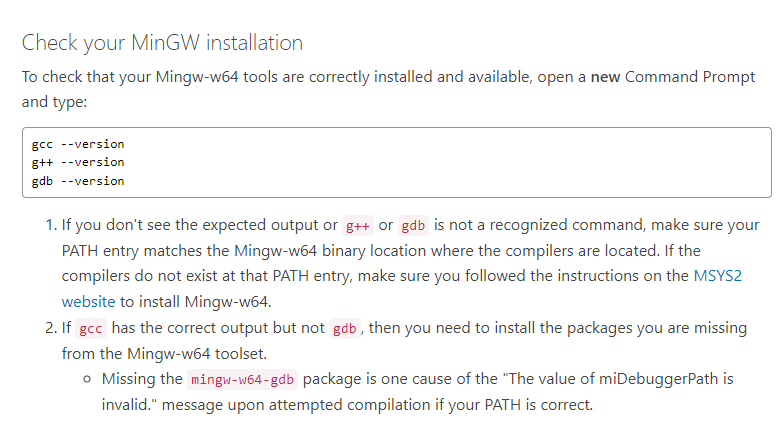
- Check your MinGW installation:遵照使用教學的這段來確認:
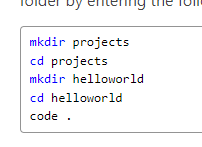
- 然後就可以創建專案與程式碼來用了,用以下步驟來開啟VS code專案
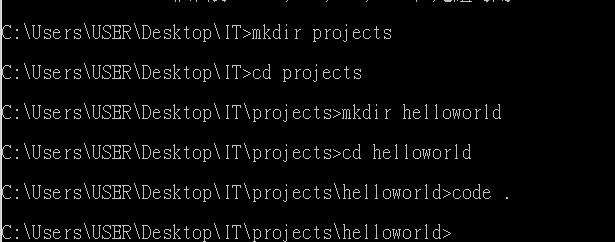
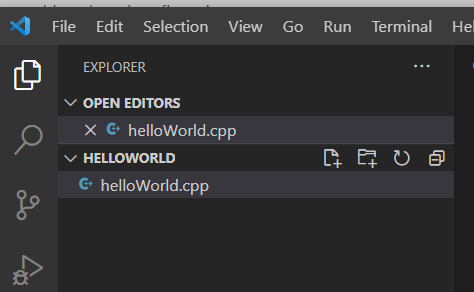
Run helloworld.cpp
- 接著就可以開始執行程式碼了:
把這段程式碼都貼上去:
#include <iostream>
#include <vector>
#include <string>

using namespace std;

int main()
{
    vector<string> msg {"Hello", "C++", "World", "from", "VS Code", "and the C++ extension!"};

    for (const string& word : msg)
    {
        cout << word << " ";
    }
    cout << endl;
}
- 存檔後執行:
Choose C/C++: g++.exe build and debug active file from the list of detected compilers on your system.=> 按f1後選擇C/C++: g++.exe build and debug active file這個選項。程式碼就會compile並執行了!
中間遇到坑,task.json沒有自動產生QQ 參照以下選g++.exe build and debug active file
就會產生task.json,也可以正常debug了~
https://stackoverflow.com/questions/34268034/where-is-the-tasks-json-file-in-vscode
- 其他VS code debugger的使用可以回去參考vs code官方教學或各式各樣的網路文章。
參考
結語
接下來預計可能多一些VS code使用git進行管理與coding style的補充,以及問答。


