在串接API之前首先需要先了解一下跨域資源共享Cross-Origin Resource Sharing (CORS) ,它是一種機制並運用HTTP Header來告知瀏覽器,目前運行的Web程序可以訪問來自不同來源的選定資源。
當 Web 應用程序請求的資源與其自己的來源(域、協議或端口)不同時,它會執行跨域 HTTP 請求。
因此出於安全原因,瀏覽器限制從腳本發起的跨域 HTTP 請求。
所以當我們React在與Laravel不同網域、端口運行時,我們就需要運用到CORS機制來進行。
接著藉由以下幾個步驟先行進行設定
1.首先將路由位置添加到routes/api.phpRoute::post(‘register’, ‘Auth\RegisterController@influencer_register’);
同時你可以在API使用api_token或Laravel Passport來實現身分驗證
2.建立整套完整的API從token確認到資料驗證確認
public function influencer_register(Request $request){
    $user = User::create({
        'accessName' => request()->acName,
        'email' => request()->email,
        'pwd' => request()->pwd
    });
    $user->generateToken();
    return respnse()->json(['data'=>$user], 201);
}
public function generateToken(){
    $this->api_token = Str::random(60);
    $this->save();
    return $this->api_token;
}
$table->string(‘api_token’,80)->unique()->nullable()->default(null);
curl -X POST http://localhost:8000/api/register \
-H “Accept: application/json” \
-H “Content-Type: application/json” \
-d ‘{“acName”: “test11”, “email”: “testasdf@yopmail.com”, “pwd”: “test12”, “pwd_confirmation”: “test12”}’
Output
{
    “data”: {
        “api_token”:”0syHnl0Y9jOIfszq11EC2CBQwCfObmvscrZYo5o2ilZPnohvndH797nDNyAT”,
        “created_at”: “2022–01–01 21:17:15”,
        “email”: “testasdf@yopmail.com”,
        “id”: 1,
        “acName”: “test11”,
        “updated_at”: “2022–01–01 21:17:15”
    }
}
protected $middleware = [
// …
\Fruitcake\Cors\HandleCors::class,

];
在$middlewareGroups添加相同內容,並發布php artisan vendor:publish — tag=”cors”
在依照需求修改config/cors.php,如下圖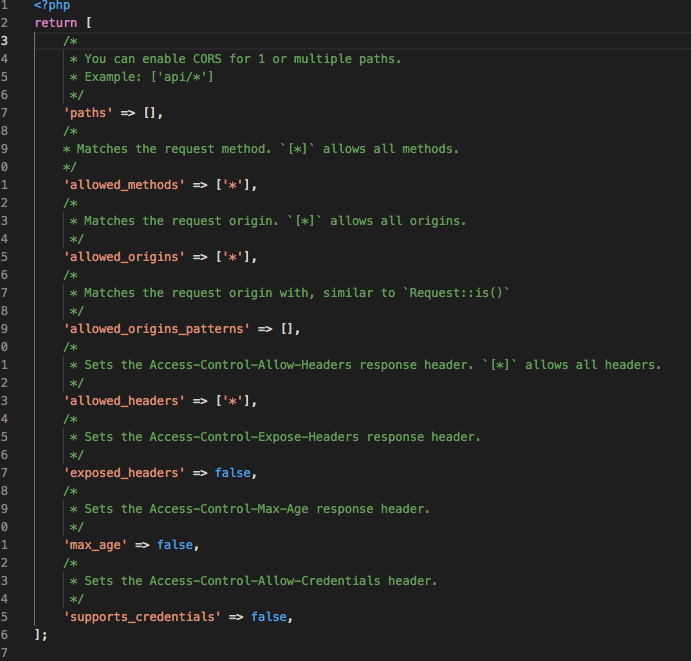
handleSubmit = async event => {
    event.preventDefault();
    this.setState({isLoading: true});
    try {
        let response = await fetch('http://localhost:8000/api/influencer_register',{
            method: 'POST',
            header: {
                'Accept': 'application/json',
                'Content-Type': 'application/json'
                },
            body: JSON.stringify({
                "acName": this.state.acName,
                "email": this.state.email,
                "pwd": this..state.pwd
            }),
        })
        let data = await response.json();
        const newUser = data.data
        this.setState({newUser});
        this.props.userHasAuthenticated(true)
        this.props.setUserName(newUser.acName)
        this.props.setApiToken(newUser.api_token)
        this.setState({ isLoading: false});
        this.porps.history.push("/");
    } catch (e) {
        alert(e.message)
    }
}
以上使用即可


 iThome鐵人賽