我們資訊相關科系的大學時期有很多的不管是選修的學分或是必修的,都會常常需要寫程式,那依照課程的需求,一部份可能需要分組進行,所以可以上傳到GitHub上面進行檔案的共用,當然相信市面上的大小公司也都廣泛使用。
(↑圖一)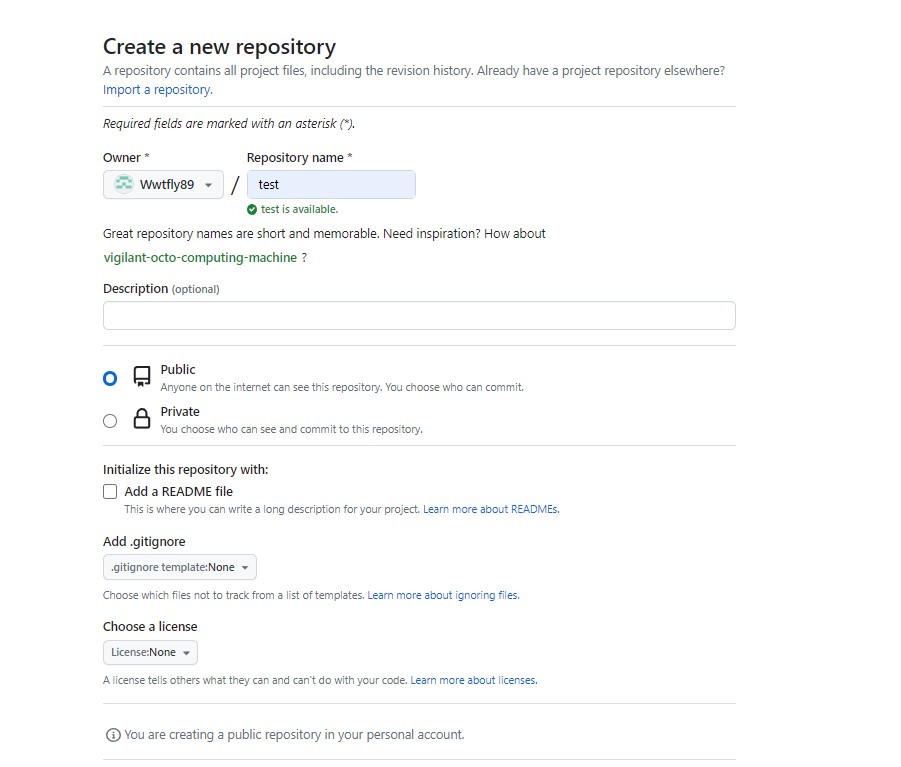
(↑圖二)
(圖一:必須先到自己的github上新增專案 → 圖二:取專案名)
(↑並且在想要的地方新增一個資料夾方便統整)
(↑開啟終端並進入所在資料夾的位址)
echo "# test" >> README.md
git init
git add README.md
git commit -m "test commit"
git branch -M main
git remote add origin https://github.com/Wwtfly89/test.git
git push -u origin main
echo "# test" >> README.md ------>新增#test為說明頁
git init ------>操作初始化
git add README.md ------>新增README.md檔到git
git commit -m "test commit"------>每個上傳的檔案後面都可以備註此檔案的簡單用處來清楚分辨
git branch -M main ------>命名分支為main
git remote add origin https://github.com/Wwtfly89/test.git
------>在本地端檔案庫增加一個叫做origin的遠端檔案庫
而origin是指https://github.com/Wwtfly89/test.git
git push -u origin main ------>設定預設值並上傳
(如無法上傳!)可以先將檔案丟入暫存區↓
git add .
並且說明後面的備註↓
git commit -m '簡單說明用處'
在push一次↓
git push
git pull
(↑則是將github檔案下載並更新本地的檔案)