上一次我們建立了上傳的外觀,但是還沒編寫出上傳後顯示圖片的細節,這次我們要完成這個部分的內容。
我們修改CreateModal.jsx,主要對div className="w-[50%]”底下的區塊做了一些修改,當我們已經上傳檔案了,就不能在上傳檔案,以及上傳後顯示我們的圖片。最後處理了一些bug。
import {
	Button,
	Modal,
	ModalBody,
	ModalContent,
	ModalOverlay,
} from "@chakra-ui/react";
import React, { useState } from "react";
import { FaPhotoVideo } from "react-icons/fa";
import './CreatePostModal.css';

const CreatePostModal = ({ onClose, isOpen }) => {
	const [isDragOver, setIsDragOver] = useState(false);
	const [file, setFile] = useState();

	const handleDrop = (e) => {
		e.preventDefault();
		const droppedFile = e.dataTransfer.files[0];
		//檢查檔案類型是圖片或影片才能上傳
		if (
			droppedFile.type.startsWith("image/") ||
			droppedFile.type.startsWith("video/")
		) {
			setFile(droppedFile);
		}
	};

	const handleDragOver = (e) => {
		e.preventDefault();
		e.dataTransfer.dropEffect = "copy";
		setIsDragOver(true);
	};

	const handleDragLeave = () => {
		setIsDragOver(false);
	};

	//上傳檔案時,確認是不是圖片或影片
	const handleOnChange = (e) => {
		const file = e.target.files[0];
		if (
			file &&
			(file.type.startsWith("image/") || file.type.startsWith("video/"))
		) {
			setFile(file);
		} else {
			setFile(null);
			alert("Please upload an image or video");
		}
	};

	return (
		<div>
			<Modal size={"4xl"} onClose={onClose} isOpen={true} isCentered>
				<ModalOverlay />
				<ModalContent>
					<div className="flex justify-between py-1 px-10 items-center">
						<p>Create New Post</p>
						<Button variant={"ghost"} size="sm" colorScheme={"blue"}>
							Share
						</Button>
					</div>
					<hr />
					<ModalBody>
						<div>
							<div className="w-[50%]">
								{	!file &&
									<div
									onDrop={handleDrop}
									onDragOver={handleDragOver}
									onDragLeave={handleDragLeave}
									className="drag-drop h-full"
								>
									<div>
										<FaPhotoVideo className="text-3xl" />
										<p>Drag photos and videos here</p>
									</div>
									<label htmlFor="file-upload" className="custom-file-upload">
										Select From Computer
									</label>

									<input
										className="file-input"
										type="file"
										id="file-upload"
										accept="image/*, video/*"
										onChange={handleOnChange}
									/>
								</div>
								}

								{file && <img src={URL.createObjectURL(file)} alt="" />}
							</div>
						</div>
					</ModalBody>
				</ModalContent>
			</Modal>
		</div>
	);
};

export default CreatePostModal;
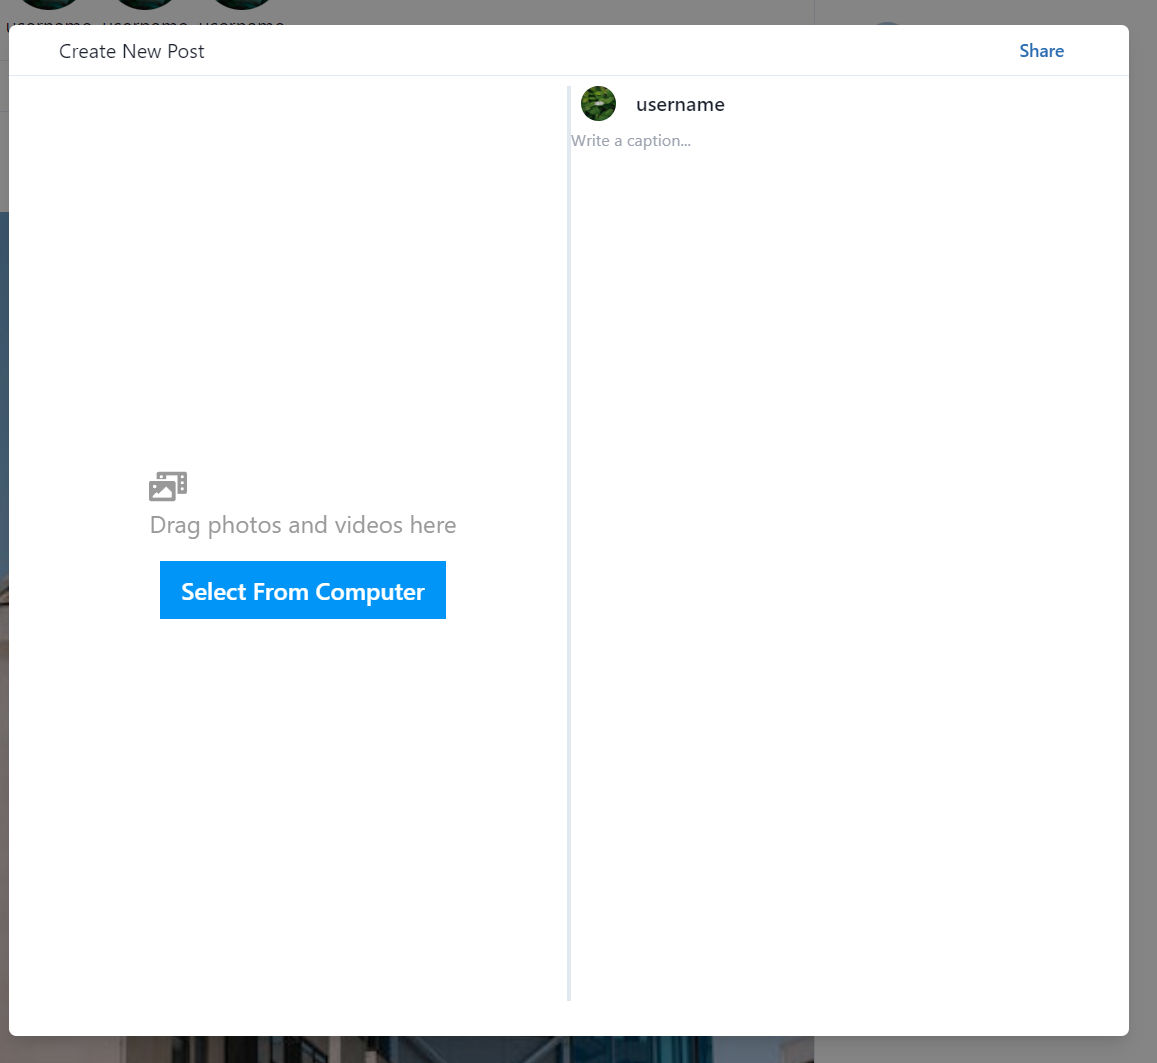
我們有兩種上傳圖片的方式。
第一種:把圖片拖曳到【Drag photos and videos here】的區塊上。
第二種:點擊【Select From Computer】的藍色按鈕選擇上傳的圖片,並按下開啟。
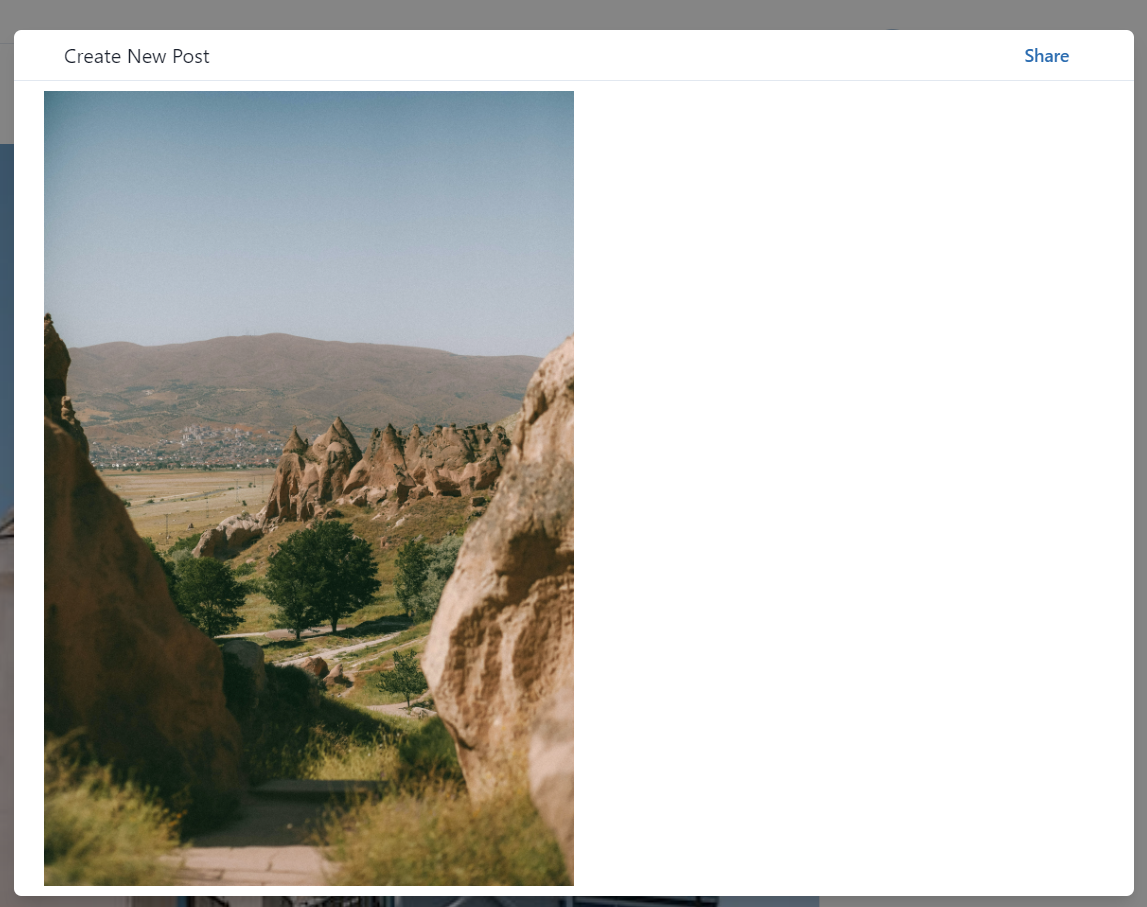
不論選擇的是哪種,最後顯示的結果都是一樣的,上傳的圖片會像這樣顯示在網頁上。
上傳的區塊這樣就完成了,接下來開發填寫評論和地點的區塊。
我們對CommentModal.jsx做一些修改,讓它顯示username的頭像和名稱,還有一個輸入文章的區域。
import {
	Button,
	Modal,
	ModalBody,
	ModalContent,
	ModalOverlay,
} from "@chakra-ui/react";
import React, { useState } from "react";
import { FaPhotoVideo } from "react-icons/fa";
import "./CreatePostModal.css";

const CreatePostModal = ({ onClose, isOpen }) => {
	const [isDragOver, setIsDragOver] = useState(false);
	const [file, setFile] = useState();

	const handleDrop = (e) => {
		e.preventDefault();
		const droppedFile = e.dataTransfer.files[0];
		//檢查檔案類型是圖片或影片才能上傳
		if (
			droppedFile.type.startsWith("image/") ||
			droppedFile.type.startsWith("video/")
		) {
			setFile(droppedFile);
		}
	};

	const handleDragOver = (e) => {
		e.preventDefault();
		e.dataTransfer.dropEffect = "copy";
		setIsDragOver(true);
	};

	const handleDragLeave = () => {
		setIsDragOver(false);
	};

	//上傳檔案時,確認是不是圖片或影片
	const handleOnChange = (e) => {
		const file = e.target.files[0];
		if (
			file &&
			(file.type.startsWith("image/") || file.type.startsWith("video/"))
		) {
			setFile(file);
		} else {
			setFile(null);
			alert("Please upload an image or video");
		}
	};

	return (
		<div>
			<Modal size={"4xl"} onClose={onClose} isOpen={true} isCentered>
				<ModalOverlay />
				<ModalContent>
					<div className="flex justify-between py-1 px-10 items-center">
						<p>Create New Post</p>
						<Button variant={"ghost"} size="sm" colorScheme={"blue"}>
							Share
						</Button>
					</div>
					<hr />
					<ModalBody>
						<div className="flex h-[70vh] justify-between pb-5">
							<div className="w-[50%]">
								{!file && (
									<div
										onDrop={handleDrop}
										onDragOver={handleDragOver}
										onDragLeave={handleDragLeave}
										className="drag-drop h-full"
									>
										<div>
											<FaPhotoVideo className="text-3xl" />
											<p>Drag photos and videos here</p>
										</div>
										<label htmlFor="file-upload" className="custom-file-upload">
											Select From Computer
										</label>

										<input
											className="file-input"
											type="file"
											id="file-upload"
											accept="image/*, video/*"
											onChange={handleOnChange}
										/>
									</div>
								)}

								{file && (
									<img
										className="max-h-full"
										src={URL.createObjectURL(file)}
										alt=""
									/>
								)}
							</div>
							<div className="w-[1px] border-2 h-full"></div>

							<div className="w-[50%]">
								<div className="flex items-center px-2">
									<img className="w-7 h-7 rounded-full" src="https://images.pexels.com/photos/17963821/pexels-photo-17963821.jpeg?auto=compress&cs=tinysrgb&w=1260&h=750&dpr=1" alt="" />
									<p className="font-semibold ml-4">username</p>
								</div>
								<div>
									<textarea className="captionInput" name="caption" rows="8" placeholder="Write a caption..."></textarea>
								</div>
							</div>
						</div>
					</ModalBody>
				</ModalContent>
			</Modal>
		</div>
	);
};

export default CreatePostModal;
在CommentModal.css,新增captionInput的CSS設定。
.captionInput{
    width: 100%;
    margin-top: 5px;
    outline: none;
    resize: none;
    font-size: small;
}
完成剩餘部分的外觀後的CommentModal.jsx。
import {
	Button,
	Modal,
	ModalBody,
	ModalContent,
	ModalOverlay,
} from "@chakra-ui/react";
import React, { useState } from "react";
import { FaPhotoVideo } from "react-icons/fa";
import "./CreatePostModal.css";
import { BsEmojiSmile } from "react-icons/bs";
import { MdOutlineLocationOn } from "react-icons/md";

const CreatePostModal = ({ onClose, isOpen }) => {
	const [isDragOver, setIsDragOver] = useState(false);
	const [file, setFile] = useState();
	const [caption, setCaption] = useState("");

	const handleDrop = (e) => {
		e.preventDefault();
		const droppedFile = e.dataTransfer.files[0];
		//檢查檔案類型是圖片或影片才能上傳
		if (
			droppedFile.type.startsWith("image/") ||
			droppedFile.type.startsWith("video/")
		) {
			setFile(droppedFile);
		}
	};

	const handleDragOver = (e) => {
		e.preventDefault();
		e.dataTransfer.dropEffect = "copy";
		setIsDragOver(true);
	};

	const handleDragLeave = () => {
		setIsDragOver(false);
	};

	//上傳檔案時,確認是不是圖片或影片
	const handleOnChange = (e) => {
		const file = e.target.files[0];
		if (
			file &&
			(file.type.startsWith("image/") || file.type.startsWith("video/"))
		) {
			setFile(file);
		} else {
			setFile(null);
			alert("Please upload an image or video");
		}
	};

	const handleCaptionChange = (e) => {
		setCaption(e.target.value);
	}

	return (
		<div>
			<Modal size={"4xl"} onClose={onClose} isOpen={true} isCentered>
				<ModalOverlay />
				<ModalContent>
					<div className="flex justify-between py-1 px-10 items-center">
						<p>Create New Post</p>
						<Button variant={"ghost"} size="sm" colorScheme={"blue"}>
							Share
						</Button>
					</div>
					<hr />
					<ModalBody>
						<div className="flex h-[70vh] justify-between pb-5">
							<div className="w-[50%]">
								{!file && (
									<div
										onDrop={handleDrop}
										onDragOver={handleDragOver}
										onDragLeave={handleDragLeave}
										className="drag-drop h-full"
									>
										<div>
											<FaPhotoVideo className="text-3xl" />
											<p>Drag photos and videos here</p>
										</div>
										<label htmlFor="file-upload" className="custom-file-upload">
											Select From Computer
										</label>

										<input
											className="file-input"
											type="file"
											id="file-upload"
											accept="image/*, video/*"
											onChange={handleOnChange}
										/>
									</div>
								)}

								{file && (
									<img
										className="max-h-full"
										src={URL.createObjectURL(file)}
										alt=""
									/>
								)}
							</div>
							<div className="w-[1px] border h-full"></div>

							<div className="w-[50%]">
								<div className="flex items-center px-2">
									<img
										className="w-7 h-7 rounded-full"
										src="https://images.pexels.com/photos/17963821/pexels-photo-17963821.jpeg?auto=compress&cs=tinysrgb&w=1260&h=750&dpr=1"
										alt=""
									/>
									<p className="font-semibold ml-4">username</p>
								</div>
								<div className="px-2">
									<textarea
										className="captionInput"
										name="caption"
										rows="8"
										placeholder="Write a caption..."
										onChange={handleCaptionChange}
									></textarea>
								</div>

								<div className="flex justify-between px-2">
									<BsEmojiSmile />
									<p className="opacity-70">{caption?.length} / 2,200</p>
								</div>
								<hr />

								<div className="flex p-2 justify-between items-center">
									<input className="locationInput" type="text" placeholder="Add location" name="location" />
									<MdOutlineLocationOn />
								</div>
								<hr />
							</div>
						</div>
					</ModalBody>
				</ModalContent>
			</Modal>
		</div>
	);
};

export default CreatePostModal;
在CommentModal.css,新增locationInput的CSS設定。
.locationInput{
    border: none;
    outline: none;
    width: 90%;
}

.locationInput:focus{
    outline: none;
}
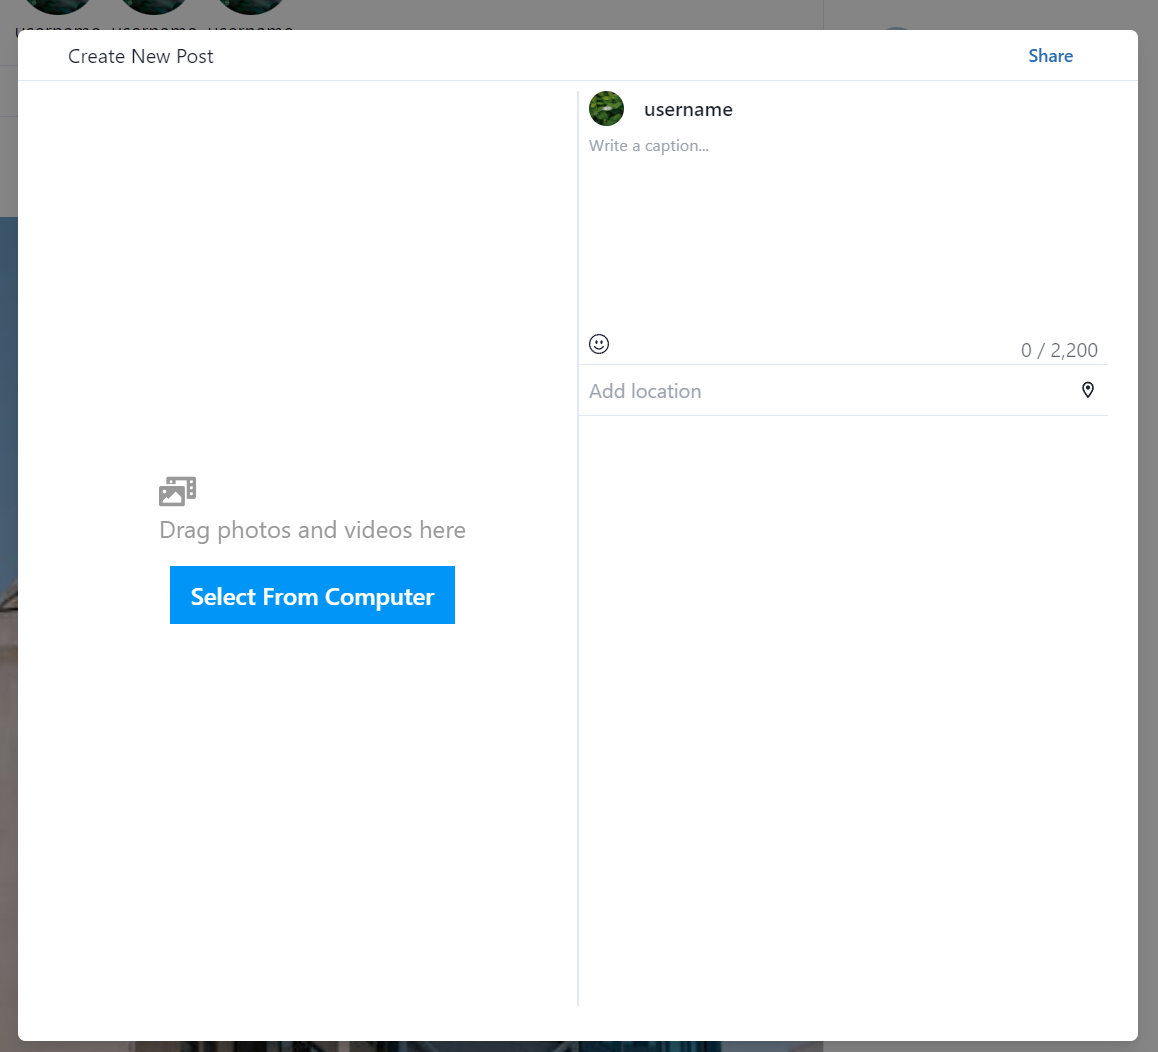
外觀完成後就讓它在點擊Create後才會出現。
先移除HomePage.jsx中的。
import React from "react";
import StoryCircle from "../../Components/Story/StoryCircle";
import HomeRight from "../../Components/HomeRight/HomeRight";
import PostCard from "../../Components/Post/PostCard";

const HomePage = () => {
	return (
		<div>
			<div className="mt-10 flex w-[100%] justify-center">
				<div className="w-[44%] px-10">
					<div className="flex space-x-2 border p-4 rounded-md justify-start w-full">
						{[1, 1, 1].map((item) => (
							<StoryCircle />
						))}
					</div>

					<div className="space-y-10 w-full mt-10">
						{[1, 1].map((item) => (
							<PostCard />
						))}
					</div>
				</div>
				<div className="w-[35%]">
					<HomeRight />
				</div>
			</div>
		</div>
	);
};

export default HomePage;
再到Sidebar.jsx,設定按下Create時彈出CreateModal視窗。
import React, { useState } from "react";
import { IoReorderThreeOutline } from "react-icons/io5";
import { menu } from "./SidebarMenu";
import { useNavigate } from "react-router-dom";
import { useDisclosure } from "@chakra-ui/react";
import CreatePostModal from "../Post/CreatePostModal";

const Sidebar = () => {
	const [activeTab, setActiveTab] = useState([]);
	const navigate = useNavigate();
	const { isOpen, onOpen, onClose } = useDisclosure();

	const handleTabClick = (title) => {
		setActiveTab(title);
		//點擊Profile按鈕時,跳到/username
		if (title === "Profile") {
			navigate("/username");
		}
		//點擊Home按鈕時,跳到/
		else if (title === "Home") {
			navigate("/");
		}
		//點擊Create按鈕時,跳出CreateModal視窗
		else if (title === "Create") {
			onOpen();
		}
	};

	return (
		<div className="sticky top-0 h-[100vh]">
			<div className="flex flex-col justify-between h-full px-10">
				<div>
					<div className="pt-10">
						<img className="w-40" src="Instagram_logo.svg.png" alt="" />
					</div>
					<div className="mt-10">
						{menu.map((item) => (
							<div
								onClick={() => handleTabClick(item.title)}
								className="flex items-center cursor-pointer mb-5 text-lg"
							>
								{activeTab === item.title ? item.activeIcon : item.icon}
								<p
									className={`${
										activeTab === item.title ? "font-bold" : "font-semibold"
									}`}
								>
									{item.title}
								</p>
							</div>
						))}
					</div>
				</div>
				<div className="flex items-center cursor-pointer pb-10">
					<IoReorderThreeOutline />
					<p className="ml-5">More</p>
				</div>
			</div>
			<CreatePostModal onClose={onClose} isOpen={isOpen} />
		</div>
	);
};

export default Sidebar;
啟動專案,確認點選Create後能夠跳出CreateModal視窗就成功了。