依據官方手冊說明,Zabbix agent 2是新一代的Zabbix agent,可以代替Zabbix agent使用。
Zabbix Agent 2 的開發目的是:
將使用Zabbix agent2,搭配對應的Templates來監控Linux主機。
Zabbix-agent2需要根據主機Linux OS來安裝,可以參考原廠網頁去下載安裝。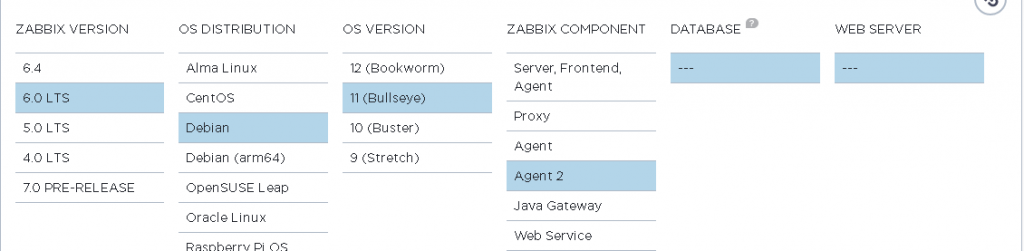
預計安裝Ubuntu 22.04 /Debian11 /RedHat Enterprise Linux 9/Oracle Linux 9
# wget https://repo.zabbix.com/zabbix/6.0/ubuntu/pool/main/z/zabbix-release/zabbix-release_6.0-4+ubuntu22.04_all.deb
# dpkg -i zabbix-release_6.0-4+ubuntu22.04_all.deb
# apt update
# apt install zabbix-agent2 zabbix-agent2-plugin-*
# wget https://repo.zabbix.com/zabbix/6.0/debian/pool/main/z/zabbix-release/zabbix-release_6.0-4+debian11_all.deb
# dpkg -i zabbix-release_6.0-4+debian11_all.deb
# apt update
# apt install zabbix-agent2 zabbix-agent2-plugin-*
RedHat Enterprise Linux 9/Oracle Linux 9 要安裝Zabbix-agent2,請確認是否有安裝EPEL repository.
如果有請先在/etc/yum.repos.d/epel.repo 增加 "excludepkgs=zabbix*" ,避免安裝EPEL 內建的Zabbix agent2,造成系統問題。
vi /etc/yum.repos.d/epel.repo
---
[epel]
excludepkgs=zabbix*
---
# rpm -Uvh https://repo.zabbix.com/zabbix/6.0/rhel/9/x86_64/zabbix-release-6.0-4.el9.noarch.rpm
# dnf clean all
# dnf install zabbix-agent2 zabbix-agent2-plugin-*
修改Zabbix agent2設定檔,指定Zabbix Server的ip,設定主機名稱。
# sudo vi /etc/zabbix/zabbix_agent2.conf
---
Server=192.168.1.101
ServerActive=192.168.1.101
Hostname=主機名稱
---
Server及ServerActive請指定為Zabbix Server的ip,2種設定後面會說明。主機名稱請確認設定為hostname 指令的主機名稱,在Zabbix Server設定主機時也要設定相同主機名稱,減少主機名稱無法對應的問題產生。
啟動Zabbix agent2 服務,並設定為開機啟動
# systemctl restart zabbix-agent2
# systemctl enable zabbix-agent2
Zabbix agent2的有2種運作方式,分別為Passive 及Active 模式 ,設定檔Server及ServerActive 設定分別對應2種模式。
設定 Server=192.168.1.101 ,此模式下Zabbix Server 會定期跟 Agent 端溝通獲取資料。在Linux 主機可以使用Linux by Zabbix agent Templates。
設定 ServerActive=192.168.1.101 ,此模式下Agent 會主動提供資料給Zabbix Server資料。在Linux 主機可以使用Linux by Zabbix agent active Templates。
在Zabbix agent 的安裝過程都有加裝zabbix-agent2-plugin-\,都可以運用不同的plugin,搭配Zabbix提供的多種Template,方便監控不同的服務。
後續登入Zabbix WEB進行設定
內容為學習過程如有問題,請多多指教,謝謝。
文章也同步於個人網站


 iThome鐵人賽