先來看個流程:
在初始化之前,先做以下事情:
--pod-network-cidr
--apiserver-advertise-address。查看 master 的 IP:
ip addr
看 enp0s8 介面:
1: lo: <LOOPBACK,UP,LOWER_UP> mtu 65536 qdisc noqueue state UNKNOWN group default qlen 1000
    link/loopback 00:00:00:00:00:00 brd 00:00:00:00:00:00
    inet 127.0.0.1/8 scope host lo
       valid_lft forever preferred_lft forever
    inet6 ::1/128 scope host
       valid_lft forever preferred_lft forever
2: enp0s3: <BROADCAST,MULTICAST,UP,LOWER_UP> mtu 1500 qdisc fq_codel state UP group default qlen 1000
    link/ether 02:3b:7b:b7:3b:2d brd ff:ff:ff:ff:ff:ff
    inet 10.0.2.15/24 brd 10.0.2.255 scope global dynamic enp0s3
       valid_lft 84870sec preferred_lft 84870sec
    inet6 fe80::3b:7bff:feb7:3b2d/64 scope link
       valid_lft forever preferred_lft forever
3: enp0s8: <BROADCAST,MULTICAST,UP,LOWER_UP> mtu 1500 qdisc fq_codel state UP group default qlen 1000
    link/ether 08:00:27:ec:c8:a0 brd ff:ff:ff:ff:ff:ff
    inet 192.168.10.100/24 brd 192.168.10.255 scope global enp0s8
       valid_lft forever preferred_lft forever
    inet6 fe80::a00:27ff:feec:c8a0/64 scope link
       valid_lft forever preferred_lft forever
執行:
sudo kubeadm init --pod-network-cidr=10.244.0.0/16 --apiserver-advertise-address=192.168.10.100
vagrant@master:~$ sudo kubeadm init --pod-network-cidr=10.244.0.0/16 --apiserver-advertise-address=192.168.10.100
[init] Using Kubernetes version: v1.28.2
[preflight] Running pre-flight checks
[preflight] Pulling images required for setting up a Kubernetes cluster
[preflight] This might take a minute or two, depending on the speed of your internet connection
[preflight] You can also perform this action in beforehand using 'kubeadm config images pull'
W0920 03:21:19.528796    5564 checks.go:835] detected that the sandbox image "registry.k8s.io/pause:3.6" of the container runtime is inconsistent with that used by kubeadm. It is recommended that using "registry.k8s.io/pause:3.9" as the CRI sandbox image.
[certs] Using certificateDir folder "/etc/kubernetes/pki"
[certs] Generating "ca" certificate and key
[certs] Generating "apiserver" certificate and key
[certs] apiserver serving cert is signed for DNS names [kubernetes kubernetes.default kubernetes.default.svc kubernetes.default.svc.cluster.local master] and IPs [10.96.0.1 192.168.10.100]
[certs] Generating "apiserver-kubelet-client" certificate and key
[certs] Generating "front-proxy-ca" certificate and key
[certs] Generating "front-proxy-client" certificate and key
[certs] Generating "etcd/ca" certificate and key
[certs] Generating "etcd/server" certificate and key
[certs] etcd/server serving cert is signed for DNS names [localhost master] and IPs [192.168.10.100 127.0.0.1 ::1]
[certs] Generating "etcd/peer" certificate and key
[certs] etcd/peer serving cert is signed for DNS names [localhost master] and IPs [192.168.10.100 127.0.0.1 ::1]
[certs] Generating "etcd/healthcheck-client" certificate and key
[certs] Generating "apiserver-etcd-client" certificate and key
[certs] Generating "sa" key and public key
[kubeconfig] Using kubeconfig folder "/etc/kubernetes"
[kubeconfig] Writing "admin.conf" kubeconfig file
[kubeconfig] Writing "kubelet.conf" kubeconfig file
[kubeconfig] Writing "controller-manager.conf" kubeconfig file
[kubeconfig] Writing "scheduler.conf" kubeconfig file
[etcd] Creating static Pod manifest for local etcd in "/etc/kubernetes/manifests"
[control-plane] Using manifest folder "/etc/kubernetes/manifests"
[control-plane] Creating static Pod manifest for "kube-apiserver"
[control-plane] Creating static Pod manifest for "kube-controller-manager"
[control-plane] Creating static Pod manifest for "kube-scheduler"
[kubelet-start] Writing kubelet environment file with flags to file "/var/lib/kubelet/kubeadm-flags.env"
[kubelet-start] Writing kubelet configuration to file "/var/lib/kubelet/config.yaml"
[kubelet-start] Starting the kubelet
[wait-control-plane] Waiting for the kubelet to boot up the control plane as static Pods from directory "/etc/kubernetes/manifests". This can take up to 4m0s
[apiclient] All control plane components are healthy after 17.009039 seconds
[upload-config] Storing the configuration used in ConfigMap "kubeadm-config" in the "kube-system" Namespace
[kubelet] Creating a ConfigMap "kubelet-config" in namespace kube-system with the configuration for the kubelets in the cluster
[upload-certs] Skipping phase. Please see --upload-certs
[mark-control-plane] Marking the node master as control-plane by adding the labels: [node-role.kubernetes.io/control-plane node.kubernetes.io/exclude-from-external-load-balancers]
[mark-control-plane] Marking the node master as control-plane by adding the taints [node-role.kubernetes.io/control-plane:NoSchedule]
[bootstrap-token] Using token: h5jiom.prcgsk4emtxpkrlo
[bootstrap-token] Configuring bootstrap tokens, cluster-info ConfigMap, RBAC Roles
[bootstrap-token] Configured RBAC rules to allow Node Bootstrap tokens to get nodes
[bootstrap-token] Configured RBAC rules to allow Node Bootstrap tokens to post CSRs in order for nodes to get long term certificate credentials
[bootstrap-token] Configured RBAC rules to allow the csrapprover controller automatically approve CSRs from a Node Bootstrap Token
[bootstrap-token] Configured RBAC rules to allow certificate rotation for all node client certificates in the cluster
[bootstrap-token] Creating the "cluster-info" ConfigMap in the "kube-public" namespace
[kubelet-finalize] Updating "/etc/kubernetes/kubelet.conf" to point to a rotatable kubelet client certificate and key
[addons] Applied essential addon: CoreDNS
[addons] Applied essential addon: kube-proxy

Your Kubernetes control-plane has initialized successfully!

To start using your cluster, you need to run the following as a regular user:

  mkdir -p $HOME/.kube
  sudo cp -i /etc/kubernetes/admin.conf $HOME/.kube/config
  sudo chown $(id -u):$(id -g) $HOME/.kube/config

Alternatively, if you are the root user, you can run:

  export KUBECONFIG=/etc/kubernetes/admin.conf

You should now deploy a pod network to the cluster.
Run "kubectl apply -f [podnetwork].yaml" with one of the options listed at:
  https://kubernetes.io/docs/concepts/cluster-administration/addons/

Then you can join any number of worker nodes by running the following on each as root:

kubeadm join 192.168.10.100:6443 --token h5jiom.prcgsk4emtxpkrlo \
        --discovery-token-ca-cert-hash sha256:5781b5682a60e510ac58ea0f7e06af554b675ea0b61147a6ef3a78c57e2b5ffb
開始叢集前要先執行:
mkdir -p $HOME/.kube
sudo cp -i /etc/kubernetes/admin.conf $HOME/.kube/config
sudo chown $(id -u):$(id -g) $HOME/.kube/config
剛才初始化的訊息中提到,需要在叢集上部署 pod 網路,我這邊會使用的是 Weave Net:
You should now deploy a pod network to the cluster.
Run "kubectl apply -f [podnetwork].yaml" with one of the options listed at:
  https://kubernetes.io/docs/concepts/cluster-administration/addons/
Container Network Interface (CNI)
CNI 提供一套標準來分配容器 IP 地址與網路設定。例如:CNI plugin 會為每個 Pod 建立一個獨立的 IP 位址,讓不同 Pods 之間可以透過 IP 進行溝通。
剛才官方網站上有列出不同的 CNI plugin,當前是使用 Weave Net 這套 plugin。
在 master 上安裝 Weave Net:
kubectl apply -f https://github.com/weaveworks/weave/releases/download/v2.8.1/weave-daemonset-k8s.yaml
在這要將剛才在初始化 master 中設定的 pod network 的範圍( --pod-network-cidr)與 Weave Net 做一個對應,所以要修改一下 Weave Net 的設定。
輸入查看當前的 deployment
kubectl get ds -A
NAMESPACE     NAME         DESIRED   CURRENT   READY   UP-TO-DATE   AVAILABLE   NODE SELECTOR            AGE
kube-system   kube-proxy   1         1         1       1            1           kubernetes.io/os=linux   18m
kube-system   weave-net    1         1         1       1            0           <none>                   2m34s
修改 deployment (-n 是指 namespace)
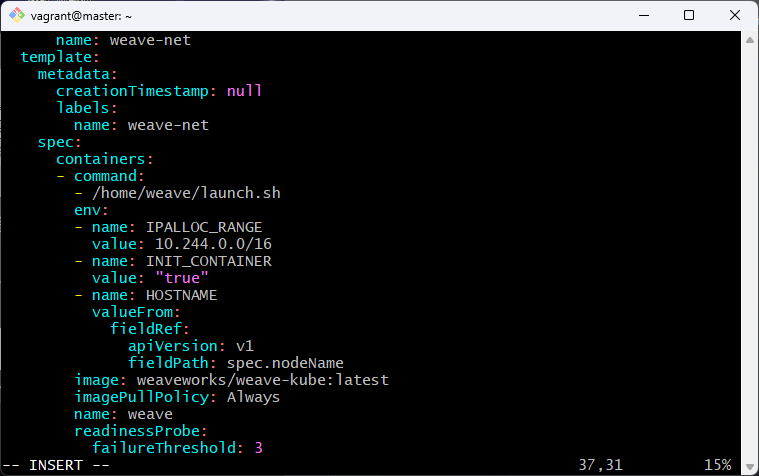
kubectl edit ds weave-net -n kube-system
在 env 底下加入環境變數 IPALLOC_RANGE 並儲存
env:
  - name: IPALLOC_RANGE
    value: 10.244.0.0/16
修改後叢集會刪掉再重新建立一個 pod:weave-net-bngzr
kubectl get po -A
NAMESPACE     NAME                             READY   STATUS    RESTARTS        AGE
kube-system   coredns-5dd5756b68-8dm8d         1/1     Running   0               22m
kube-system   coredns-5dd5756b68-gx6rj         1/1     Running   0               22m
kube-system   etcd-master                      1/1     Running   0               22m
kube-system   kube-apiserver-master            1/1     Running   0               22m
kube-system   kube-controller-manager-master   1/1     Running   1 (4m11s ago)   22m
kube-system   kube-proxy-llkjs                 1/1     Running   0               22m
kube-system   kube-scheduler-master            1/1     Running   1 (4m11s ago)   22m
kube-system   weave-net-bngzr                  2/2     Running   0               24s
worker1 輸入,!!請不要複製以下,這邊請輸入自己產生的指令!!:
sudo kubeadm join 192.168.10.100:6443 --token h5jiom.prcgsk4emtxpkrlo \
        --discovery-token-ca-cert-hash sha256:5781b5682a60e510ac58ea0f7e06af554b675ea0b61147a6ef3a78c57e2b5ffb
若忘了指令可以在 master 輸入:
kubeadm token create --print-join-command
sudo kubeadm join 192.168.10.100:6443 --token h5jiom.prcgsk4emtxpkrlo \
>         --discovery-token-ca-cert-hash sha256:5781b5682a60e510ac58ea0f7e06af554b675ea0b61147a6ef3a78c57e2b5ffb
[preflight] Running pre-flight checks
[preflight] Reading configuration from the cluster...
[preflight] FYI: You can look at this config file with 'kubectl -n kube-system get cm kubeadm-config -o yaml'
[kubelet-start] Writing kubelet configuration to file "/var/lib/kubelet/config.yaml"
[kubelet-start] Writing kubelet environment file with flags to file "/var/lib/kubelet/kubeadm-flags.env"
[kubelet-start] Starting the kubelet
[kubelet-start] Waiting for the kubelet to perform the TLS Bootstrap...

This node has joined the cluster:
* Certificate signing request was sent to apiserver and a response was received.
* The Kubelet was informed of the new secure connection details.

Run 'kubectl get nodes' on the control-plane to see this node join the cluster.
再到 master 查看目前叢集有哪些 node:
kubectl get no
NAME      STATUS   ROLES           AGE    VERSION
master    Ready    control-plane   15m    v1.28.2
worker1   Ready    <none>          102s   v1.28.2
worker1 可能要稍微等一下才會 Ready,到這邊就算完成建立叢集了,終於。
若建立完叢集可以用以下指令停止 VM
vagrant halt
刪除 VM
vagrant destroy