好的,這是我們第一次製作一個專案!這個專案叫做選號機,以下是功能介紹:
以下是我的一些很雜亂的操作,如果大家懶得看,我提供程式碼給各位
<TextView
        android:id="@+id/textView"
        android:layout_width="wrap_content"
        android:layout_height="wrap_content"
        android:layout_marginTop="319dp"
        android:text="0"
        android:textSize="20sp"
        app:layout_constraintEnd_toEndOf="parent"
        app:layout_constraintStart_toStartOf="parent"
        app:layout_constraintTop_toTopOf="parent" />

    <Button
        android:id="@+id/button"
        android:layout_width="wrap_content"
        android:layout_height="wrap_content"
        android:layout_marginTop="8dp"
        android:text="Button"
        app:layout_constraintEnd_toEndOf="parent"
        app:layout_constraintStart_toStartOf="parent"
        app:layout_constraintTop_toBottomOf="@+id/textView" />
打開我們的專案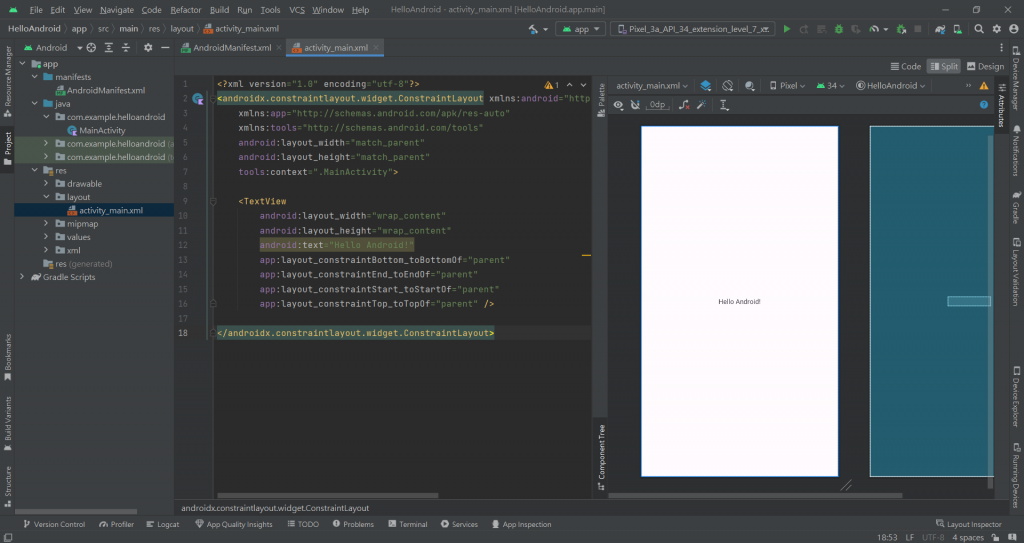
此步驟可做可不做:看到 Design 的部分,點擊小眼睛 > Show System UI,可以發現畫面變成手機的感覺了(這樣好看多了)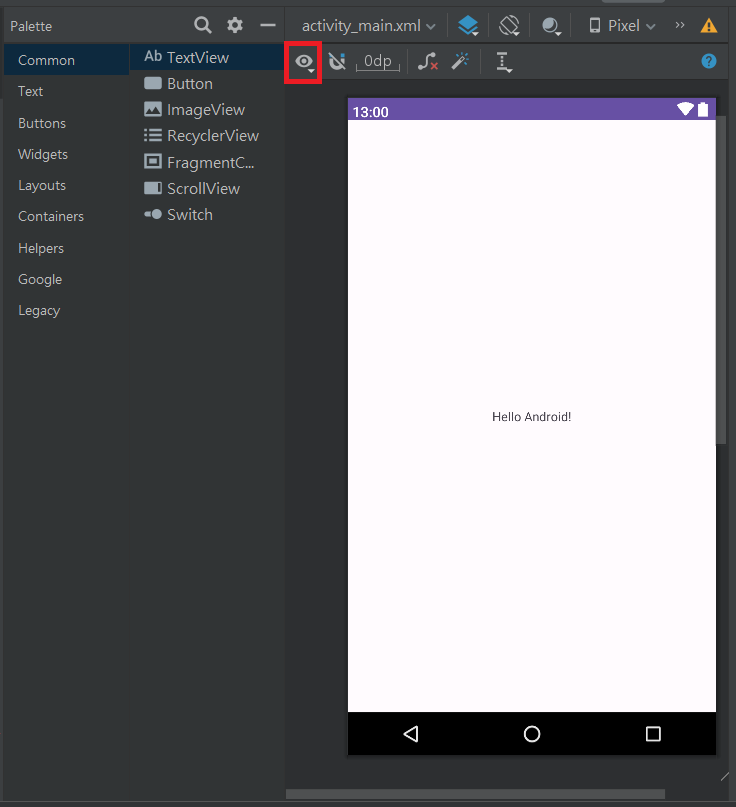
3.看到 Design 的 Palette,將 Common 分配的 Button 拉進畫面中,這個時候如果執行程式會發現Button 的位置跟我們放的位置不一樣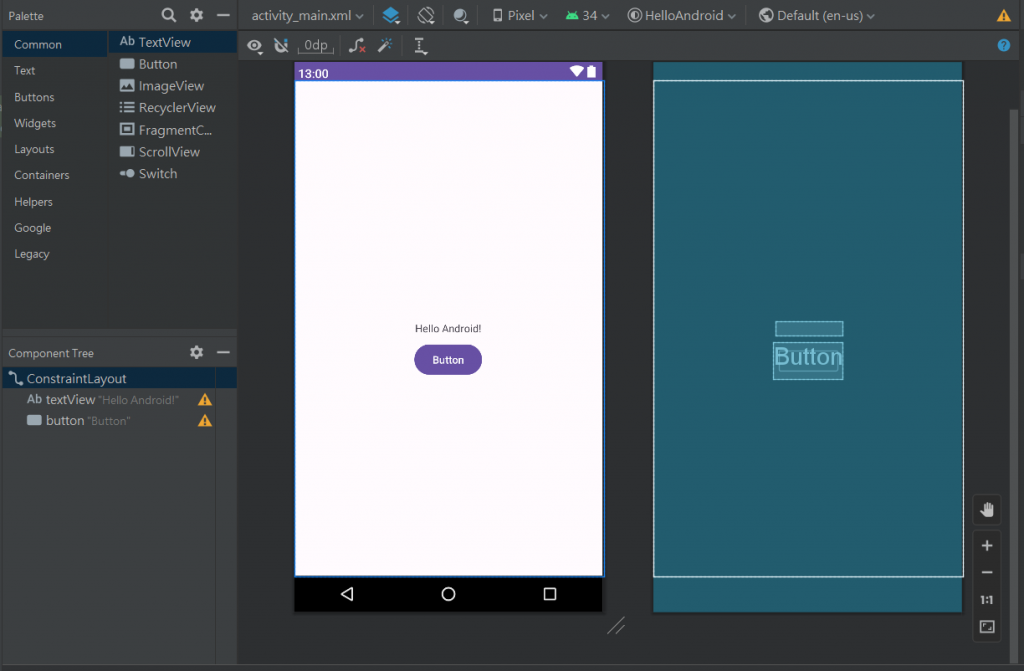
點擊畫面中的 Button,看到 Attributes 會顯示按鈕的資訊,我們看向 Layout 的 Constraint Widget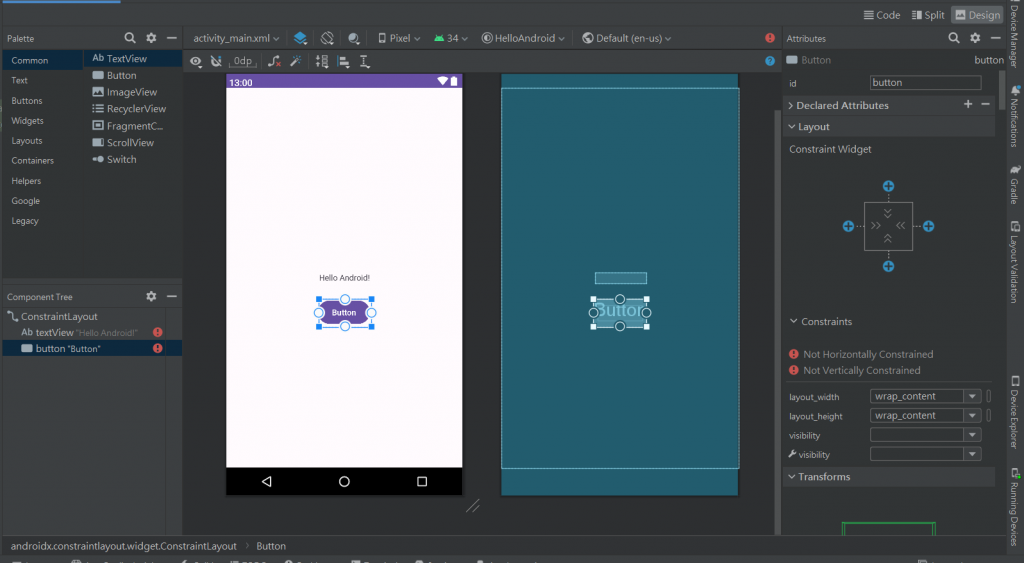
可以看到這裡有四個藍色的加號,我們點擊左右和上面的加號,這邊我先不詳細說明原因,簡單來說是利用相對位置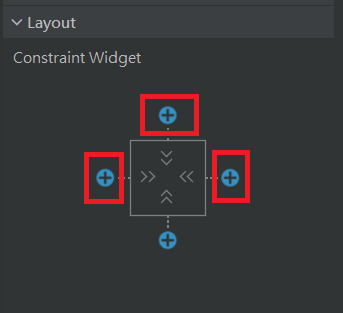
將上面的數值改成這樣,執行後就會看到一個位置正確的按鈕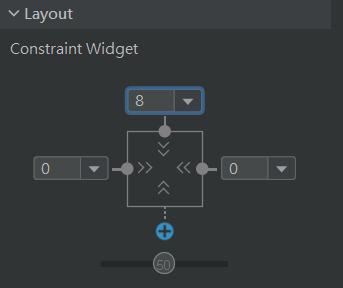
接下來回到 Design,點擊 Hello World,將他的 Text 改成 0
重複跟按鈕一樣的動作,看向 Layout 的 Constraint Widget,新增相對位置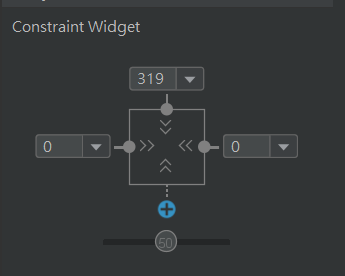
最後我發現文字好像太小了,所以點擊文字,看到 Attributes 並滑到底下,會看到 textSize,把這個參數改大一點,文字就看起來舒服多了~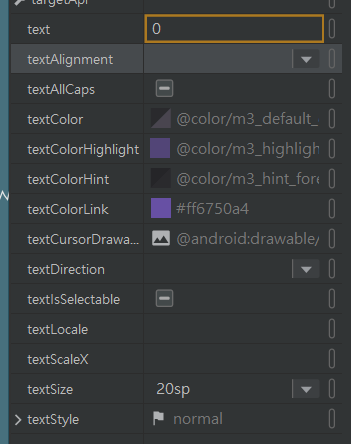
最後就會看到完整的外觀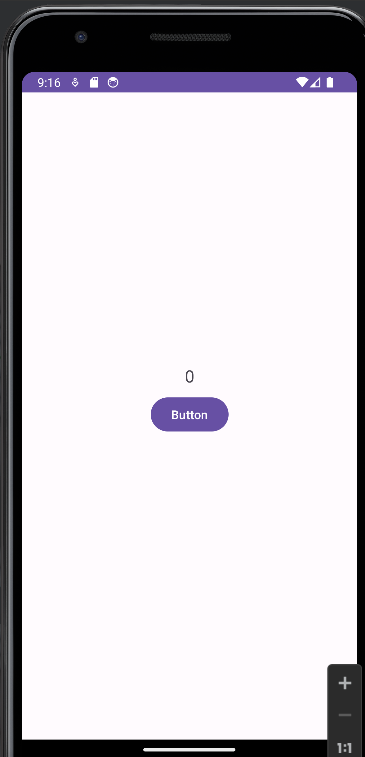
這邊先跟各位說明,程式碼的部分僅供參考,每個人都有每個人的寫法,如果你有更好的寫法就不用參考我的了
進入 MainActivity.kt
首先我們需要先偵測點擊按鈕這個動作,因此我們要在 MainActivity 這個 class 裡面宣告一個變數作為按鈕,型態是 Button,利用 findViewById 找到我們畫面中的按鈕
class MainActivity : AppCompatActivity() {
    override fun onCreate(savedInstanceState: Bundle?) {
        super.onCreate(savedInstanceState)
        setContentView(R.layout.activity_main)

        val button: Button = findViewById(R.id.button)

    }
}
接著利用 Button 這個物件的 setOnClickListener 用來偵測按鈕被點擊的事件,當按鈕按下時我們要做兩件事情,首先用 getNumber 這個 function 得到隨機數,再使用 showNumber 顯示
button.setOnClickListener{
    val number = getNumber()
    showNumber(number)
}
getNumber 和 showNumber 都是 MainActivity 的其中一個 Methon,所以要寫在 class 裡面,以下是目前程式碼的架構,到這邊大家可以先暫停,自己想想看怎麼寫
class MainActivity : AppCompatActivity() {
		override fun onCreate(savedInstanceState: Bundle?) {
				// 第二步和第三步寫的程式碼在這裡
		}
		private fun getNumber(): Int{ // 這邊的 Int 代表這個 Methon 會回傳整數
				// 這邊要注意 getNumber 需要回傳數值,記得寫 return
	  }
		private fun showNumber(number:Int){
				// 這邊只需要顯示,不需要回傳
	  }
}
getNumber 的程式碼如下:
private fun getNumber(): Int{
    val number_upper_limit = 10 // 宣告一個變數作為數字的上面
    return (1 .. number_upper_limit).random() // 從 1 到 number_upper_limit 隨機選一個數
}
showNumber 的程式碼如下:
private fun showNumber(number:Int){
    val numberText: TextView = findViewById(R.id.textView) // 跟剛剛 Button 是一樣的
    numberText.text = number.toString() // 修改它的 text,這邊要記得把 number 轉成字串
}
程式都寫好後,點擊右上角的綠色箭頭 RUN app,如果在前面操作時虛擬裝置是關的,按下執行後會自動幫你打開虛擬手機,但如果發現打開後手機是黑的代表手機還沒開機,只要按下左上角的開機鍵就好了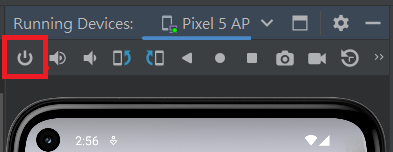
最後是成果展示!我這邊丟到 youtube,想看的人在自己點進去看~
第一次寫專案總是讓人特別的興奮!由於我自己在寫的時候也還沒搞懂很多事情,所以在說明上可能比較不清楚,特別是 XML 的部分。
大家不用擔心,下一篇開始就會詳細介紹 XML 了!
Android Studio_骰子案例-1(kotlin版本)
https://www.youtube.com/watch?v=B0hYgONuh4g&list=PLsEC4qT8YxBLvNJBs1a_hHd2iwSrHieKu&index=4&t=419s


 iThome鐵人賽