回憶需求可以參考 Day 16. 來做個 TypeScript 專案吧
昨天我們完成了 Company.ts, User.ts, Map.ts 三個 class 的內容,並且把它們引入 index.ts 中使用,今天我們來實作標記地點的功能吧!
在開始之前先說一下,接下來的內容都會先寫一種比較直覺的方法,之後再做優化並瞭解原因,用這個方式來熟悉 TypeScript
要加入 google map 的標記功能,我們會需要 google map Library 的 Marker 方法
這是目前的 Map.ts
// Map.ts
export class Map {
  public googleMap: google.maps.Map;
  constructor() {
    this.googleMap = new google.maps.Map(document.getElementById("map") as HTMLElement, {
      zoom: 10,
      center: {
        lat: 22.61,
        lng: 120.30,
      },
    });
  }
}
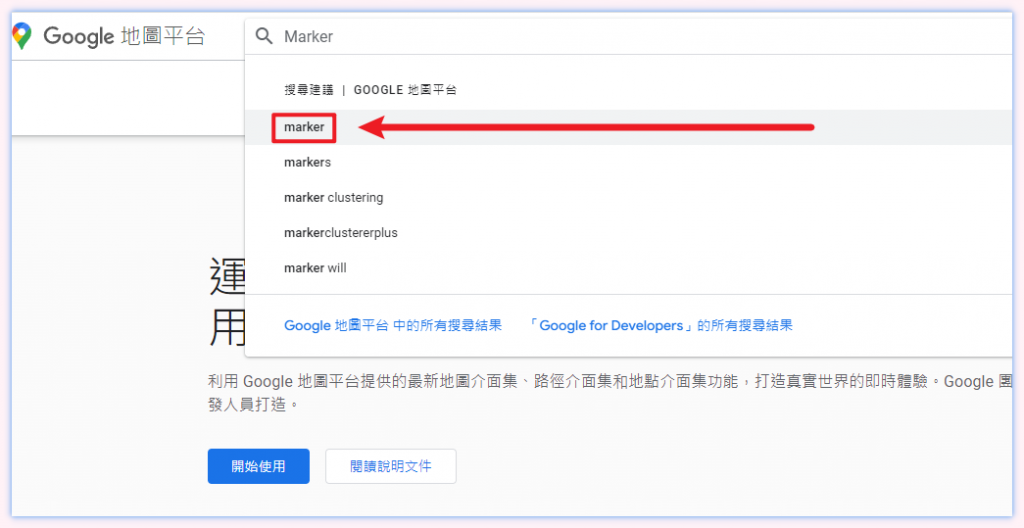
我們可以在 Google 地圖平台 搜尋 Marker 找到使用說明

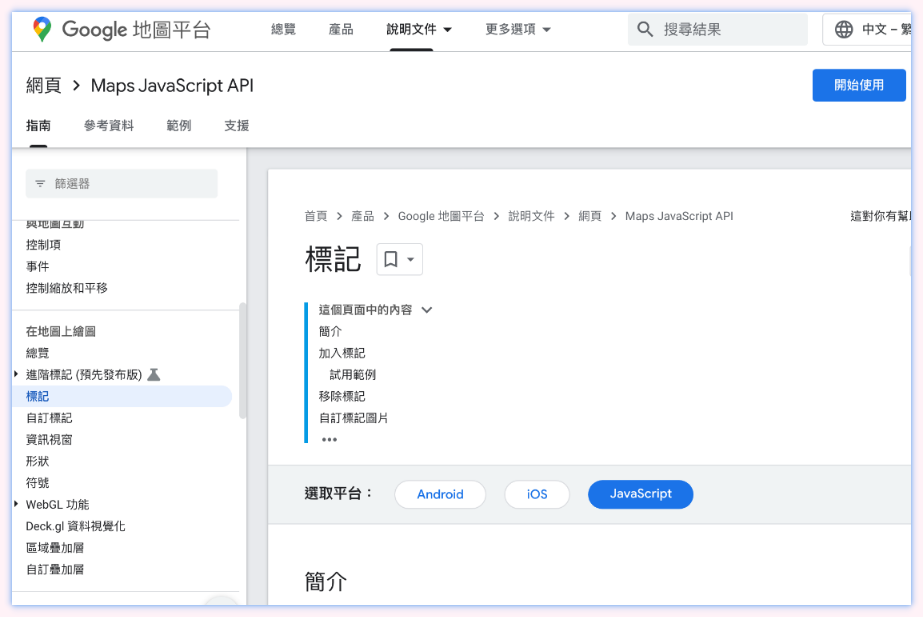
結果如下

可以看到文件中說的 Marker class 的使用方法,沒錯,文件中說明 Marker 是一個類別 class,代表要使用他的話我們必須建立他的實體出來
文件也有提到建立時可以傳入的參數為 type MarkerOptions

我們再繼續深入看 MarkerOptions 的定義

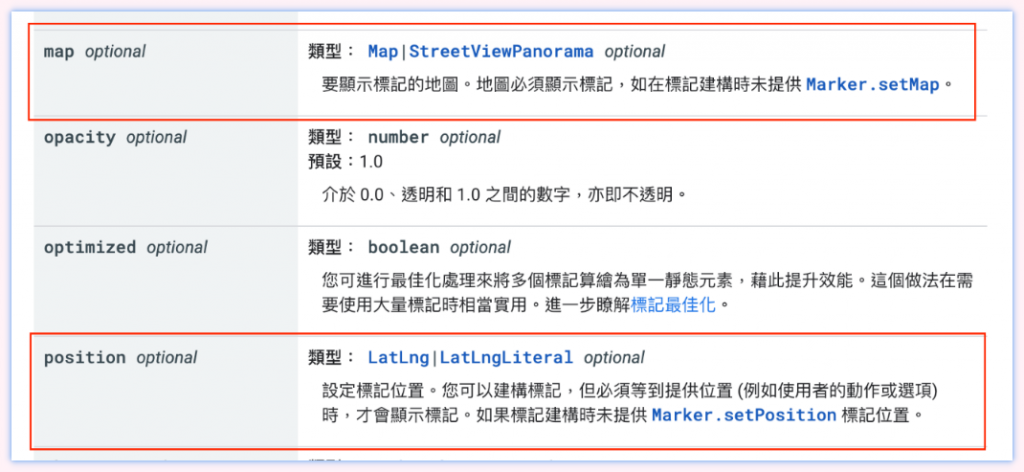
這邊直接提供我們會使用到的屬性為 position 以及 map ,詳細可參考 Marker 類別
position 是我們的目標 標記 要顯示的位置,可接受類型 LatLng|LatLngLiteral 類型的參數,就是經緯度
map 為 標記 要出現的地圖,可接受類型 Map|StreetViewPanorama 類型的參數

下面在我們專案的 class Map 中使用,為它加上一個加入標記的方法 addMarker,想像中可以接受經緯度,並且加入本身屬性 googleMap
// Map.ts
export class Map {
  public googleMap: google.maps.Map;
  constructor() {
    this.googleMap = new google.maps.Map(document.getElementById("map") as HTMLElement, {
      zoom: 10,
      center: {
        lat: 22.61,
        lng: 120.30,
      },
    });
  }

  // this way
  addMaker(lat, lng) {
    new google.maps.Marker({        // class Marker 需要建立實體,所以要 new
        map: this.googleMap,        // 參數 map 接收一個 Map 屬性的值
        position: {                 // position 接收經緯度的參數
            lat: lat,
            lng: lng,
        }
    })
  }
}
但是我們的經緯度會從 User 或是 Company 傳入,所以可以再改寫成這樣,專門給 User 使用
addUserMaker(user): void {
    new google.maps.Marker({
        map: this.googleMap,
        position: {
            lat: user.location.lat,
            lng: user.location.lng,
        }
    })
}
目前這樣功能就完成囉,我們可以先試試看,在 index.ts 中引入試試
// index.ts
import { User } from './User';
import { Company } from './Company';
import { Map } from './Map';

const user = new User();
const map = new Map();
map.addUserMaker(user)
執行 parcel index.html
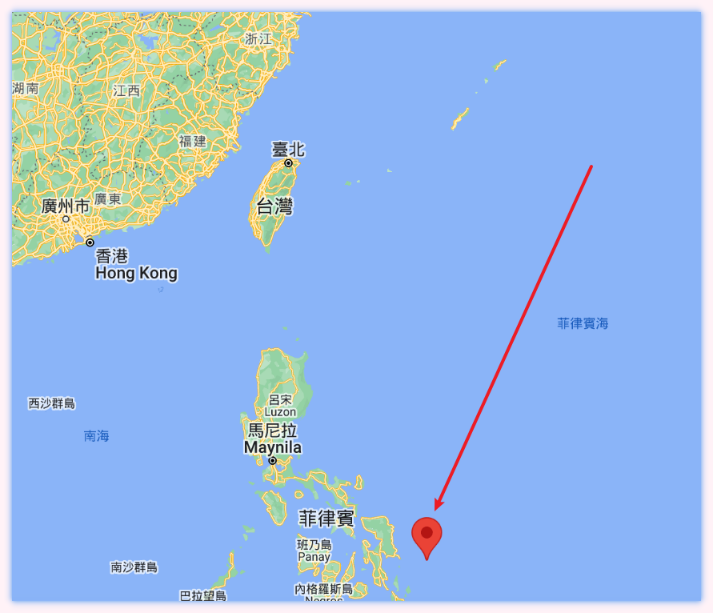
可以看到我們隨機 random 出來的 user 經緯度成功被標記在地圖上囉

欸欸,company 也需要加入地圖中顯示標記,但我們這個方法 addUserMaker(user) 目前只能傳入 User 屬性,或許可以再寫一個給 company 用的方法 addCompanyMaker(company) 的方法,並且在 Map.ts 引入 class User, Company 作為傳入參數得 type 如下
// Map.ts
import { User } from './User';
import { User } from './User';

export class Map {
    public googleMap: google.maps.Map;
    constructor() {
        this.googleMap = new google.maps.Map(document.getElementById('maps') as HTMLElement, {
            zoom: 5,
            center: {
                lat: 23,
                lng: 120.6,
            },
            backgroundColor: 'pink',
        });
    }
    addUserMaker(user: User): void {
        new google.maps.Marker({
            map: this.googleMap,
            position: {
                lat: user.location.lat,
                lng: user.location.lng,
            }
        })
    }
    addCompanyMaker(company: Company): void {
        new google.maps.Marker({
            map: this.googleMap,
            position: {
                lat: company.location.lat,
                lng: company.location.lng,
            }
        })
    }
}
index.ts 也使用 addCompanyMaker 的方法
import { User } from './User';
import { Company } from './Company';
import { Map } from './CustomMap';

const user = new User();
const map = new Map();
const company = new Company();
map.addUserMaker(user)
map.addCompanyMaker(company)
可以發現,好耶,兩個標記都出現了

下面開始優化
可以發現 addUserMaker 和 addCompanyMaker 兩個方法太像了,只是一個接受 User、一個接受 Company,但他們做的事情都一樣,只是把傳入參數的經緯度抓出來,作為 Marker 用的參數
    addUserMaker(user: User): void {
        new google.maps.Marker({
            map: this.googleMap,
            position: {
                lat: user.location.lat,
                lng: user.location.lng,
            }
        })
    }
    addCompanyMaker(company: Company): void {
        new google.maps.Marker({
            map: this.googleMap,
            position: {
                lat: company.location.lat,
                lng: company.location.lng,
            }
        })
    }
你可能會說,那那那我們就讓他可以接受這兩個類別不就好了嗎
addMaker(item: User | Company): void {    // <== this way
    new google.maps.Marker({
        map: this.googleMap,
        position: {
            lat: item.location.lat,
            lng: item.location.lng,
        }
    })
}
沒錯,這樣是可以 work,但是如果之後有其他類型也要使用 Map 的 addMarker 方法,那我們就只能一直一直往後加要新傳入的 type
addMaker(item: User | Company | island | country | Raye | airplane ......): void { // <= 太長喇
    new google.maps.Marker({
        map: this.googleMap,
        position: {
            lat: item.location.lat,
            lng: item.location.lng,
        }
    })
}
後面的 type 就會無限往後加上,這時候就是 interface 出馬的時候
可能也會覺得,啊啊啊那我就不加 Type 檢查啦,但是這樣 TypeScript 就不會幫你檢查
所以我們還是需要使用正確的方法
我們可以把 addMaker() 方法的參數用一個介面接起來,設定好這個介面 interface 的結構,之後要傳入的參數只要符合這個結構,我們就會允許它使用 addMaker() 方法,而目前 addMaker() 只會使用到傳入參數的經緯度屬性,所以初步的 interface 可以這樣寫
interface Mappable {    // 只要有 經緯度屬性即可
    location: {
        lat: number;
        lng: number;
    };
}
    addMaker(mappable: Mappable): void {
        new google.maps.Marker({
            map: this.googleMap,
            position: {
                lat: mappable.location.lat,
                lng: mappable.location.lng,
            }
        })
    }
最後的程式碼會長這樣
import { User } from './User';
import { Company } from './Company';
import { Map } from './CustomMap';

const user = new User();
const map = new Map();
const company = new Company();
map.addMaker(user)
map.addMaker(company)
// index.ts
// import { User } from './User';        // 不需要引入了
// import { Company } from './Company';  // 不需要引入了

interface Mappable {
    location: {
        lat: number;
        lng: number;
    };
}

export class Map {
    public googleMap: google.maps.Map;
    constructor() {
        this.googleMap = new google.maps.Map(document.getElementById('maps') as HTMLElement, {
            zoom: 5,
            center: {
                lat: 23,
                lng: 120.6,
            },
        });
    }
    addMaker(mappable: Mappable): void {
        new google.maps.Marker({
            map: this.googleMap,
            position: {
                lat: mappable.location.lat,
                lng: mappable.location.lng,
            }
        })
    }
}
現在 addMaker 會自動檢查傳入的參數有沒有符合 interface Mappable,符合的話才會允許傳入,現在我們不管是不是 class User 或是 class Company,只要結構有符合 interface Mappable 便會被允許使用 class Map 的 addMaker 方法
