
好了昨天講完要做什麼今天要開始實作了
首先打開Day 9 Debug完的Code,然後開始實作吧
一開始可以先在main.go加上notion的相關路徑
func main() {
	r := gin.Default()

	c := controller.NewController()

	v1 := r.Group("/api/v1")
	{
		notion := v1.Group("/notion")
		{
			notion.POST("/createDatabase", c.CreateNotionDatabase)
		}
		...
	}
	...
	r.Run(":8080")
}
將route設定好了,gin取得這個連結的時候就會知道要到哪一個controller來找function
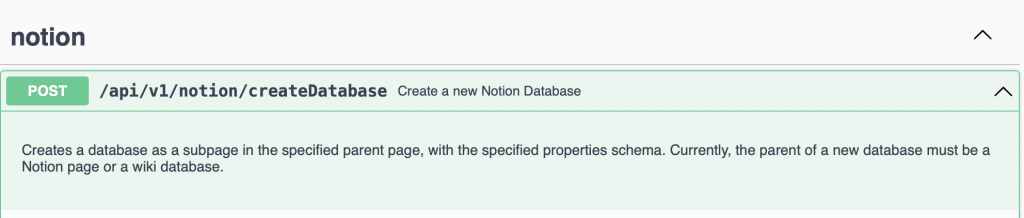
接著來寫CreateNotionDatabase這段
這邊我先上Code,再來稍微解釋一下
controller/notion.go
package controller
import (
"log"
"github.com/gin-gonic/gin"
"github.com/spf13/viper"
"github.com/swaggo/swag/example/celler/handler"
)
// CreateNotionDatabase godoc
//
// @Summary Create a new Notion Database
// @Description Creates a database as a subpage in the specified parent page, with the specified properties schema. Currently, the parent of a new database must be a Notion page or a wiki database.
// @Tags notion
// @Accept json
// @Produce json
// @Success 200 {string} string "success"
// @Failure 400 {string} string "fail"
// @Router /api/v1/notion/createDatabase [post]
func (c *Controller) CreateNotionDatabase(ctx *gin.Context) {
client := handler.NewClient()
header := map[string]string{
"Authorization": "[Your Secret]",
"Notion-Version": "2022-06-28",
"Content-Type": "application/json",
}
body := []byte(`{
"is_inline": true,
"parent": {
"type": "page_id",
"page_id": "[Your Page Id]"
},
"icon": {
"type": "emoji",
"emoji": "📝"
},
"cover": {
"type": "external",
"external": {
"url": "https://website.domain/images/image.png"
}
},
"title": [
{
"type": "text",
"text": {
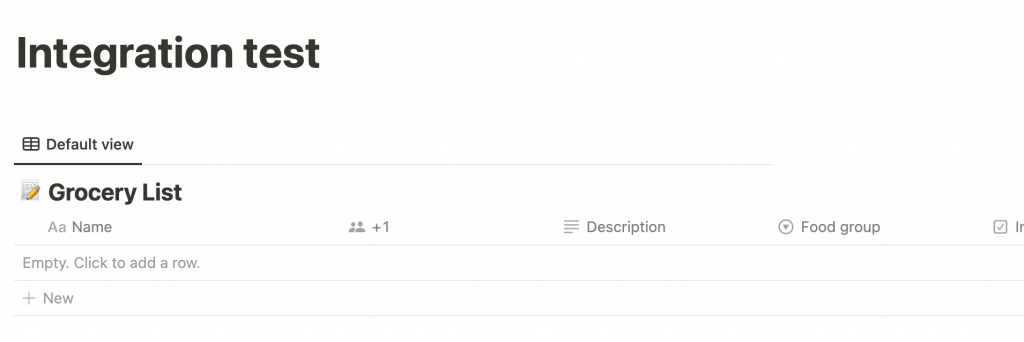
"content": "Grocery List",
"link": null
}
}
],
"properties": {
"Name": {
"title": {}
},
"Description": {
"rich_text": {}
},
"In stock": {
"checkbox": {}
},
"Food group": {
"select": {
"options": [
{
"name": "🥦Vegetable",
"color": "green"
},
{
"name": "🍎Fruit",
"color": "red"
},
{
"name": "💪Protein",
"color": "yellow"
}
]
}
},
"Price": {
"number": {
"format": "dollar"
}
},
"Last ordered": {
"date": {}
},
"Store availability": {
"type": "multi_select",
"multi_select": {
"options": [
{
"name": "Duc Loi Market",
"color": "blue"
},
{
"name": "Rainbow Grocery",
"color": "gray"
},
{
"name": "Nijiya Market",
"color": "purple"
},
{
"name": "Gus's Community Market",
"color": "yellow"
}
]
}
},
"+1": {
"people": {}
},
"Photo": {
"files": {}
}
}
}`)
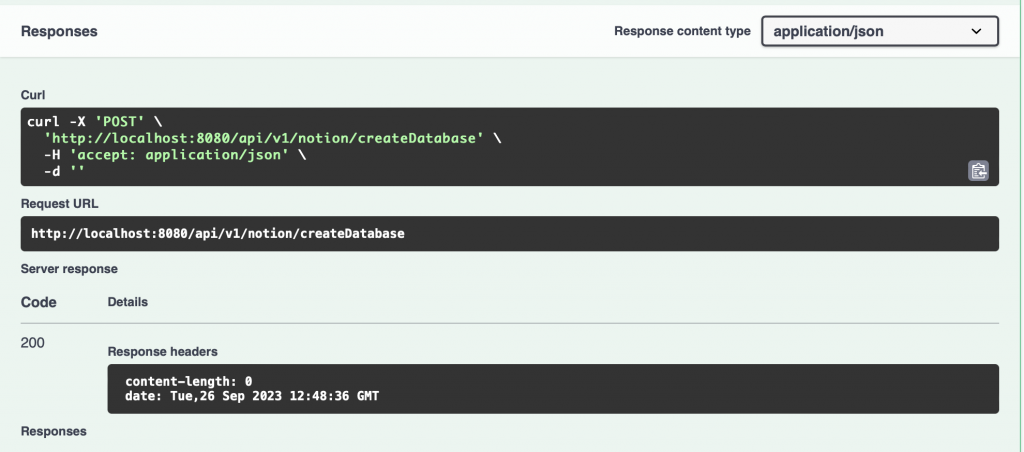
client.Post("https://api.notion.com/v1/databases", header, body)
}
由於swaggo是抓code中的註解,需要在controller上面打上一些註解
這邊先稍微講有用到的部分,有時間再詳細介紹
至於在下面的CreateNotionDatabase function中,根據Day 7的Header跟Body還有url填進去
最後再用golang post的function就可以在Notion中順利產生Database
明天會講一下要怎麼喂Secret跟Post的內容,先show一下完成圖。

 iThome鐵人賽