大家好,我是一名菜鳥工程師,Chris,今天來到第 14 天,JS 的事件處理
但在此之前,我們先將以下程式碼,放到 HTML 的 head 標籤裡
<script src="./app.js" defer></script>
這段程式碼表示 : 具有 defer 屬性,會阻止觸發 DOMContentLoaded 事件,直到 load 完成
1 使用 addEventListener()
能夠觸發事件的物件為addEventListener()方法,這就是新增事件處理器的機制
有許多不同類型的事件可以發生,以下是一些常見的事件和使用方式,將會逐一介紹
2 點擊事件 click:
button標籤<button class="btn">請按我</button>
button標籤加上click事件處理器let button = document.querySelector(".btn");
button.addEventListener("click", (e) => {
console.log("按鈕被點擊");
});
在網頁上,每當使用者點擊一次button時,就會印出一次我們所設定的資料,如 “按鈕被點擊”
2 滑鼠事件mouse: 如 mousemove(滑鼠移動) - 當使用者在移動滑鼠時觸發
let button = document.querySelector(".btn");

button.addEventListener("mousemove", (e) => {
  console.log("滑鼠移動");
});");
});
3 鍵盤事件keyboard: 如 keydown(鍵盤按下) - 當使用者按下我設定的鍵時觸發
document.addEventListener('keydown', function(event) {
  if (event.key === 'Enter') {
      alert("按下 Enter 了!");
  }
});
4 提交表單事件submit: 與表單相關的事件
form表單<h1>表單</h1>
<form id="myForm">
<label for="name">姓名:</label>
<input type="text" id="name" name="name">
<br>
<label for="email">電子郵件:</label>
<input type="email" id="email" name="email">
<br>
<input type="submit" value="送出">
</form>
submit事件const form = document.getElementById("myForm");
form.addEventListener("submit", function (event) {
event.preventDefault();
const name = document.getElementById("name").value;
const email = document.getElementById("email").value;
// 在console輸出 表單欄位的值
console.log("姓名:", name);
console.log("電子郵件:", email);
});
在表單 myForm 上,使用 addEventListener 方法來監聽表單的 submit 事件
在事件處理中,使用 e.preventDefault() 阻止表單預設的提交
可以在 console 上印出 "使用者輸入表單的內容"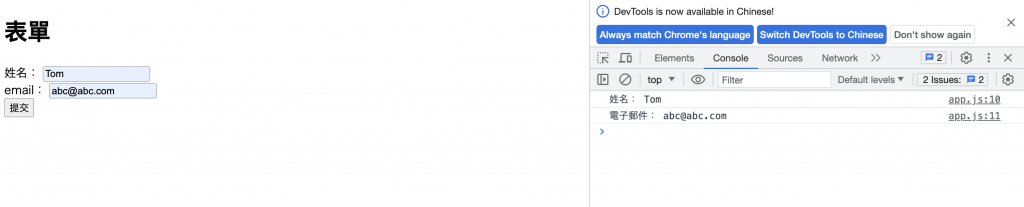
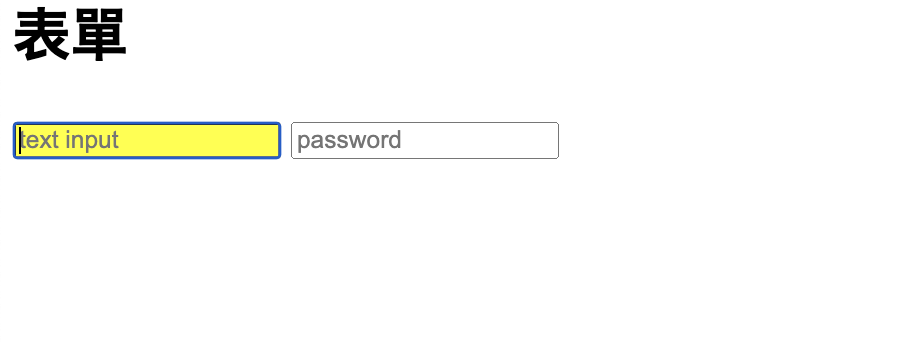
5 焦點事件focus : 焦點獲取時觸發
form表單<form id="form">
<input type="text" placeholder="text input" />
<input type="password" placeholder="password" />
</form>
focus事件const form = document.getElementById("form");
form.addEventListener(
"focus",
(event) => {
event.target.style.background = "yellow";
},
true,
);
form.addEventListener(
"blur",
(event) => {
event.target.style.background = "";
},
true,
);
6 視窗大小事件resize: 當使用者調整視窗大小時觸發
<p>視窗的高度: <span id="height"></span></p>
<p>視窗的寬度: <span id="width"></span></p>
const height = document.querySelector("#height");
const width = document.querySelector("#width");

function reportWindowSize() {
  height.textContent = window.innerHeight;
  width.textContent = window.innerWidth;
}

window.onresize = reportWindowSize;
7 滾輪事件scroll: 當使用者滑動滾輪時觸發
<div id="scroll-content">
  <p>滾動位置:0</p>
</div>
<div style="height: 2000px"></div>
let scrollContent = document.getElementById('scroll-content');

window.addEventListener('scroll', function() {
  let scrollPosition = window.scrollY || document.documentElement.scrollTop;

  scrollContent.querySelector('p').textContent = '滾動位置:' + scrollPosition;
});
建立顯示滾動位置的元素,然後使用addEventListener監聽視窗的滾動事件
每次滾動事件觸發時,會取得目前的滾動位置,並更新頁面上所顯示目前的滾動位置
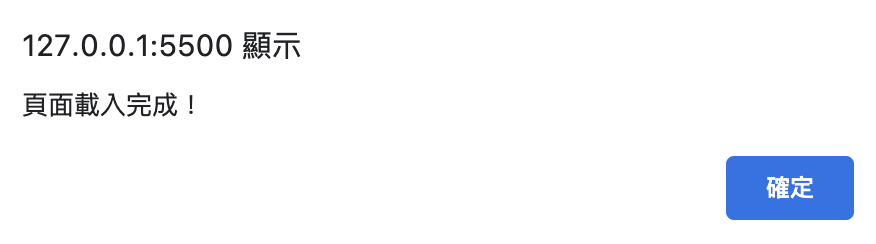
8 頁面事件load: 當頁面載入完成後觸發
window.addEventListener('load', function() {
    alert('頁面載入完成!');
});
9 文件載入完成事件DOMContentLoaded: 文件的 DOM 結構已經完全載入後觸發
<p id="myElement"></p>

<button id="myButton">submit</button>
DOMContentLoaded 事件document.addEventListener('DOMContentLoaded', function() {
let myElement = document.getElementById('myElement');
myElement.textContent = '文檔已載入完成!';
let myButton = document.getElementById('myButton');
myButton.addEventListener('click', function() {
console.log("測試按鈕");
});
});
10 自定義事件custom: 使用者可以建立自訂的事件
- JS 語法
new CustomEvent(type)
new CustomEvent(type, options)
- 參數type (類型)
事件名稱的字串。 事件名稱要區分大小寫
options (選項) 選擇性使用
一個對象,除了 Event() 中定義的屬性之外,還可以具有以下屬性:
detail (詳情) 選擇性使用
與事件關聯的事件相關值。 可以使用 CustomEvent.detail 屬性使用該值。 它預設為 null
在 JS 中,自訂事件並觸發
// 建立一個新的自訂事件
var helloEvent = new Event('helloEvent');

// 建立一個目標元素,可以是任何 DOM 元素
var targetElement = document.querySelector('.hello');

// 新增一個事件監聽器來處理自訂事件
targetElement.addEventListener('helloEvent', function(e) {
    console.log('自定義事件已發生!');
    console.log('事件對象:', e);
});

// 觸發自訂事件
targetElement.dispatchEvent(helloEvent);
今天就介紹到這邊,那我們明天見囉~~
明天預計內容:JS 事件內容!!!