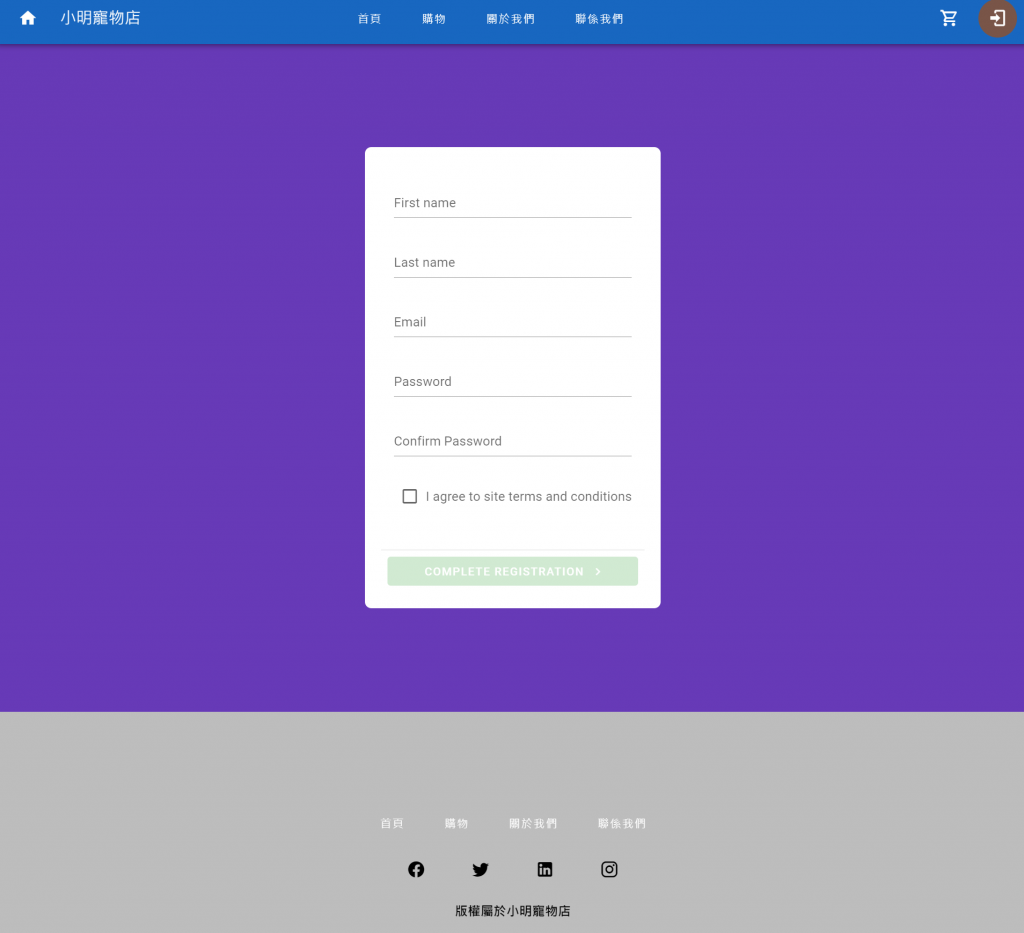
今天繼續完成昨天的登入界面,我們今天簡單來做個注冊頁面。
我們可以先來看成果:

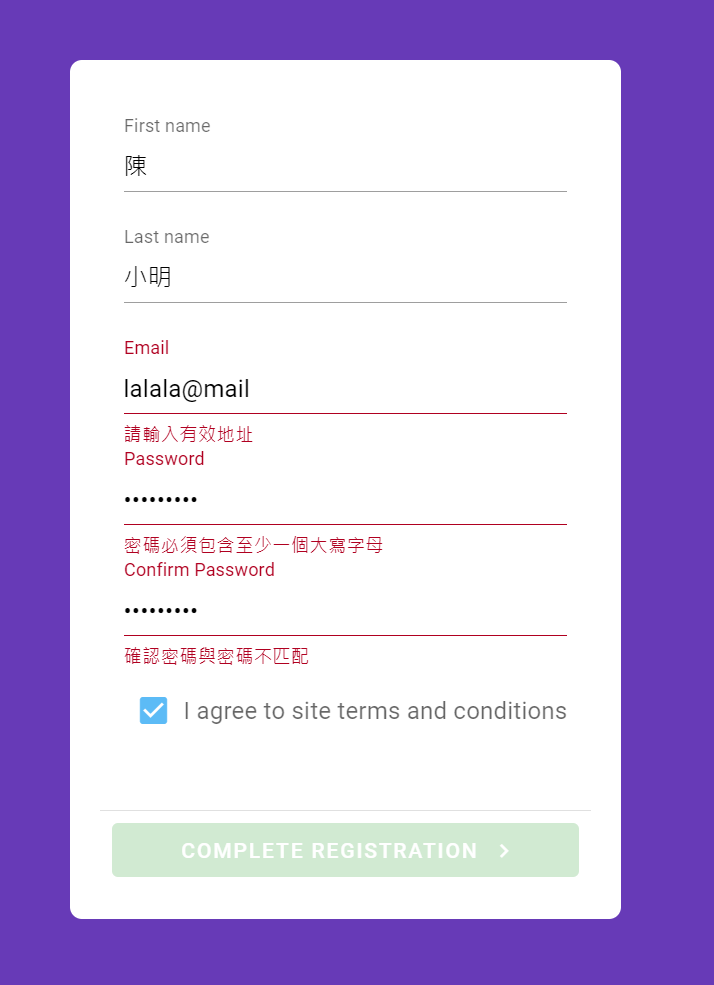
前端驗證的部分,我們所有欄位必須填入,并且符合驗證才能按下按鈕,我們可以用兩種辦法來做到這個事情,就是使用v-text-field的:rules規則,這裏可以用兩種方式來做,一種是method,一種是computed,看你喜歡用哪種都可以。
computed: {
    passwordRules() {
        return [
            (v) => !!v || '密碼必須填寫',
            (v) => (v && v.length >= 8) || '密碼必須至少包含8個字符',
            (v) => /[A-Z]/.test(v) || '密碼必須包含至少一個大寫字母',
            (v) => /[a-z]/.test(v) || '密碼必須包含至少一個小寫字母',
            (v) => /\d/.test(v) || '密碼必須包含至少一個數字',
            (v) => /[@#$%^&+=]/.test(v) || '密碼必須包含至少一個特殊字符 (@#$%^&+=)',
        ];
    },
    confirmPasswordRules() {
        return [
            (v) => !!v || "確認密碼必須填寫",
            (v) => v === this.password || "確認密碼與密碼不匹配",
        ];
    },
    emailRules() {
        return [
            (v) => !!v || "Email必須填寫",
            (v) => /.+@.+\..+/.test(v) || "請輸入有效地址",
        ];
    },
},
methods: {
    required(v) {
        return !!v || 'Field is required'
    },

}
這裏可以看到只要驗證不通過就不能按下按鈕:
然後只要簡單為按鈕加上'to'屬性:
<v-btn block class="bg-success" :disabled="!form" :to="{ name: dashboard }">
    Complete Registration
    <v-icon icon="mdi-chevron-right" end></v-icon>
</v-btn>
這樣就完成了一整個的導航了。
完整的代碼:
// Register.vue

<template>
    <v-container class="fill-height bg-deep-purple" fluid>
        <v-form v-model="form" class="mx-auto bg-white rounded-lg pa-5" max-width="344" title="User Registration">
            <v-container>
                <v-text-field v-model="first" color="primary" label="First name" variant="underlined"
                    :rules="[required]"></v-text-field>

                <v-text-field v-model="last" color="primary" label="Last name" variant="underlined"
                    :rules="[required]"></v-text-field>

                <v-text-field v-model="email" color="primary" label="Email" variant="underlined"
                    :rules="emailRules"></v-text-field>

                <v-text-field v-model="password" type="password" color="primary" label="Password" :rules="passwordRules"
                    placeholder="Enter your password" variant="underlined"></v-text-field>

                <v-text-field v-model="confirmPassword" type="password" color="primary" label="Confirm Password"
                    :rules="confirmPasswordRules" placeholder="Re-enter your password" variant="underlined"></v-text-field>
                <v-checkbox v-model="terms" color="secondary" label="I agree to site terms and conditions"></v-checkbox>
            </v-container>

            <v-divider></v-divider>

            <v-card-actions>
                <v-spacer></v-spacer>

                <v-btn block class="bg-success" :disabled="!form" :to="{ name: dashboard }">
                    Complete Registration

                    <v-icon icon="mdi-chevron-right" end></v-icon>
                </v-btn>
            </v-card-actions>
        </v-form>
    </v-container>
</template>

<script>
export default {
    data: () => ({
        form: false,
        first: null,
        last: null,
        email: null,
        password: null,
        confirmPassword: null,
        terms: false,
    }),
    computed: {
        passwordRules() {
            return [
                (v) => !!v || '密碼必須填寫',
                (v) => (v && v.length >= 8) || '密碼必須至少包含8個字符',
                (v) => /[A-Z]/.test(v) || '密碼必須包含至少一個大寫字母',
                (v) => /[a-z]/.test(v) || '密碼必須包含至少一個小寫字母',
                (v) => /\d/.test(v) || '密碼必須包含至少一個數字',
                (v) => /[@#$%^&+=]/.test(v) || '密碼必須包含至少一個特殊字符 (@#$%^&+=)',
            ];
        },
        confirmPasswordRules() {
            return [
                (v) => !!v || "確認密碼必須填寫",
                (v) => v === this.password || "確認密碼與密碼不匹配",
            ];
        },
        emailRules() {
            return [
                (v) => !!v || "Email必須填寫",
                (v) => /.+@.+\..+/.test(v) || "請輸入有效地址",
            ];
        },
    },
    methods: {
        required(v) {
            return !!v || 'Field is required'
        },

    }
}
</script>
至於Router的部分則是加多一個router給它:
{
    path: "/dashboard",
    component: () => import("@/layouts/default/Default.vue"),
    children: [
      {
        path: "",
        name: "Dashboard",
        component: () =>
          import(/* webpackChunkName: "dashboard" */ "@/views/Dashboard.vue"),
      },
    ],
},
今天就簡單這樣~祝大家中秋節快樂呀!
本篇終。
