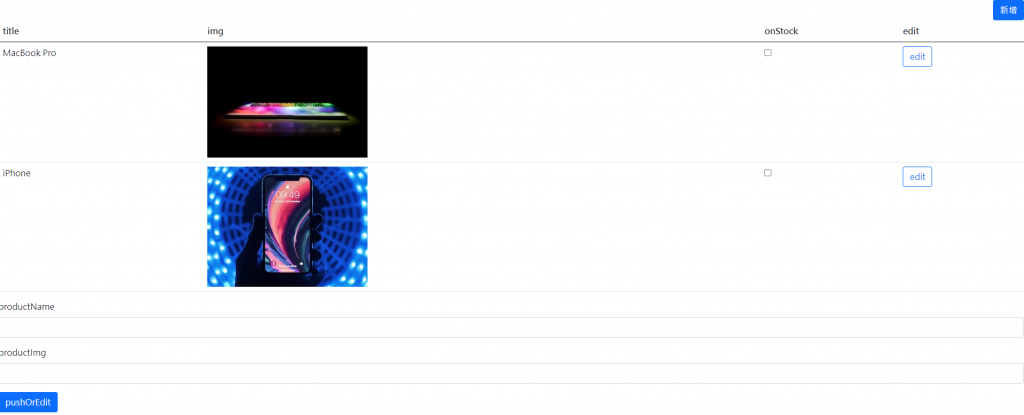
先將以下(載入bs)貼到head標籤其他css前(一般多使用npm)
<link href="https://cdn.jsdelivr.net/npm/bootstrap@5.1.1/dist/css/bootstrap.min.css" rel="stylesheet" integrity="sha384-F3w7mX95PdgyTmZZMECAngseQB83DfGTowi0iMjiWaeVhAn4FJkqJByhZMI3AhiU" crossorigin="anonymous">
並將以下加入body
   <script src="https://unpkg.com/vue@3/dist/vue.global.js"></script>
    <div id="app">{{ message }}</div>
    <script>
      const { createApp } = Vue;

      createApp({
        data() {
          return {
            message: "Hi Vue",
          };
        },
        created() {},
        methods: {},
      }).mount("#app");
    </script>
之後可用vite快速建置環境以上環境

大原則:input 都用v-model雙向綁定 v-for要配:key
製作需操作的按鈕等 可直接先命名@click並寫入methods
有外部資料記得在created週期中先加入
寫邏輯的時候 想像點下去 應該要看到或發生的事
可外包div class="text-end"將inline-block靠右
動態屬性(會跟著資料變動)記得加上v-bind 如 :src
製作table時 格式參考
          <table class="table">
        <thead>
          <tr>
            th*4
          </tr>
        </thead>
        <tbody>
          <tr>
            td*4
          </tr>
        </tbody>
      </table>
練習用參考資料 一般放在script內最前
const products = [
        {
          id: "1",
          imgUrl:
            "https://images.unsplash.com/photo-1516906571665-49af58989c4e?ixlib=rb-1.2.1&ixid=MXwxMjA3fDB8MHxwaG90by1wYWdlfHx8fGVufDB8fHw%3D&auto=format&fit=crop&w=300&q=80",
          name: "MacBook Pro",
          onStock: false,
        },
        {
          id: "2",
          imgUrl:
            "https://images.unsplash.com/photo-1512499617640-c74ae3a79d37?ixid=MXwxMjA3fDB8MHxwaG90by1wYWdlfHx8fGVufDB8fHw%3D&ixlib=rb-1.2.1&auto=format&fit=crop&w=300&q=80",
          name: "iPhone",
          onStock: false,
        },
      ];
