架構圖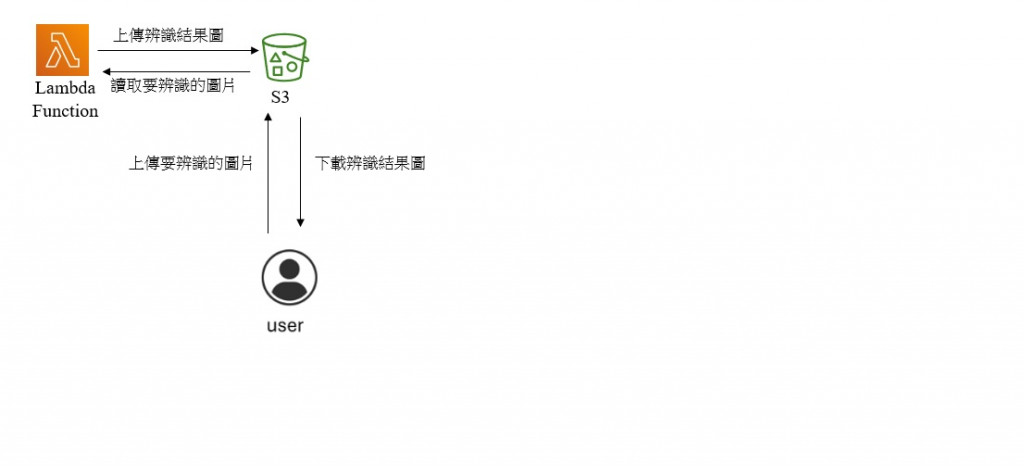
功能說明


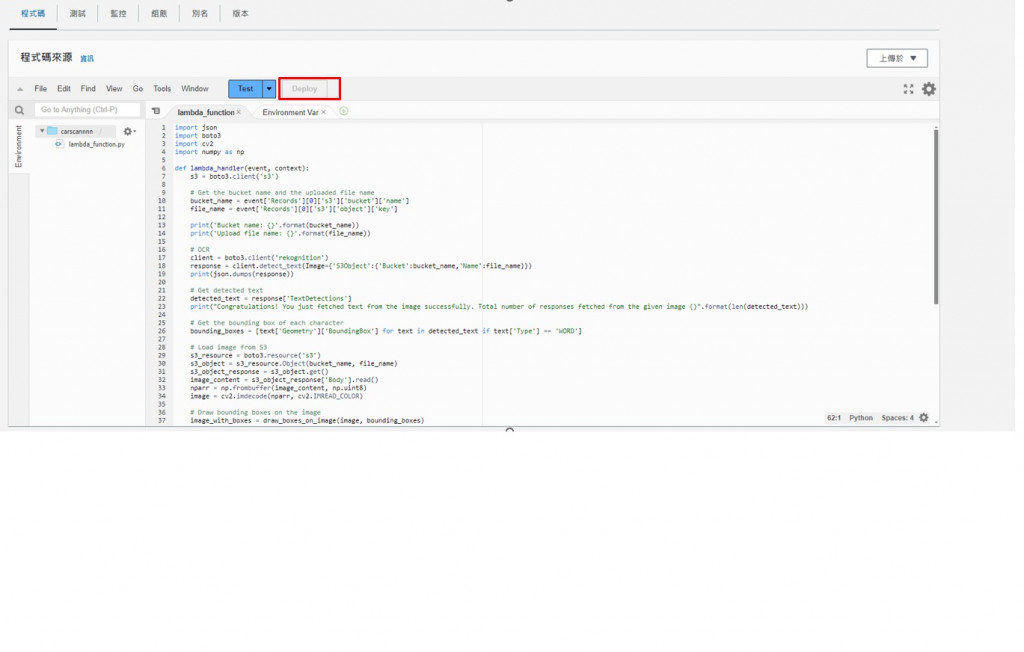
import json
import boto3
import cv2
import numpy as np

def lambda_handler(event, context):
   s3 = boto3.client('s3')

   # Get the bucket name and the uploaded file name
   bucket_name = event['Records'][0]['s3']['bucket']['name']
   file_name = event['Records'][0]['s3']['object']['key']

   print('Bucket name: {}'.format(bucket_name))
   print('Upload file name: {}'.format(file_name))

   # OCR
   client = boto3.client('rekognition')
   response = client.detect_text(Image={'S3Object':{'Bucket':bucket_name,'Name':file_name}})
   print(json.dumps(response))

   # Get detected text
   detected_text = response['TextDetections']
   print("Congratulations! You just fetched text from the image successfully. Total number of responses fetched from the given image {}".format(len(detected_text)))

   # Get the bounding box of each character
   bounding_boxes = [text['Geometry']['BoundingBox'] for text in detected_text if text['Type'] == 'WORD']

   # Load image from S3
   s3_resource = boto3.resource('s3')
   s3_object = s3_resource.Object(bucket_name, file_name)
   s3_object_response = s3_object.get()
   image_content = s3_object_response['Body'].read()
   nparr = np.frombuffer(image_content, np.uint8)
   image = cv2.imdecode(nparr, cv2.IMREAD_COLOR)

   # Draw bounding boxes on the image
   image_with_boxes = draw_boxes_on_image(image, bounding_boxes)

   # Encode the modified image back to bytes
   _, encoded_image = cv2.imencode('.jpg', image_with_boxes)
   modified_image_content = encoded_image.tobytes()

   # Upload the modified image back to S3
   modified_file_name = f"c110112109_{file_name}"  //輸出檔案名稱
   s3.put_object(Bucket=bucket_name, Key=modified_file_name, Body=modified_image_content)

   return {
       'statusCode': 200,
       'body': json.dumps('Hello from Lambda!')
   }

def draw_boxes_on_image(image, bounding_boxes):
   # Draw bounding boxes on the image
   for box in bounding_boxes:
       left = int(box['Left'] * image.shape[1])
       top = int(box['Top'] * image.shape[0])
       width = int(box['Width'] * image.shape[1])
       height = int(box['Height'] * image.shape[0])
       cv2.rectangle(image, (left, top), (left+width, top+height), (0, 255, 0), 2)
   return image

{
"Records": [
{
"eventVersion": "2.1",
"eventSource": "aws:s3",
"awsRegion": "us-east-1", //地區
"eventTime": "1970-01-01T00:00:00.000Z",
"eventName": "ObjectCreated:Put",
"userIdentity": {
"principalId": "EXAMPLE"
},
"requestParameters": {
"sourceIPAddress": "127.0.0.1"
},
"responseElements": {
"x-amz-request-id": "EXAMPLE123456789",
"x-amz-id-2": "EXAMPLE123/5678abcdefghijklambdaisawesome/mnopqrstuvwxyzABCDEFGH"
},
"s3": {
"s3SchemaVersion": "1.0",
"configurationId": "testConfigRule",
"bucket": {
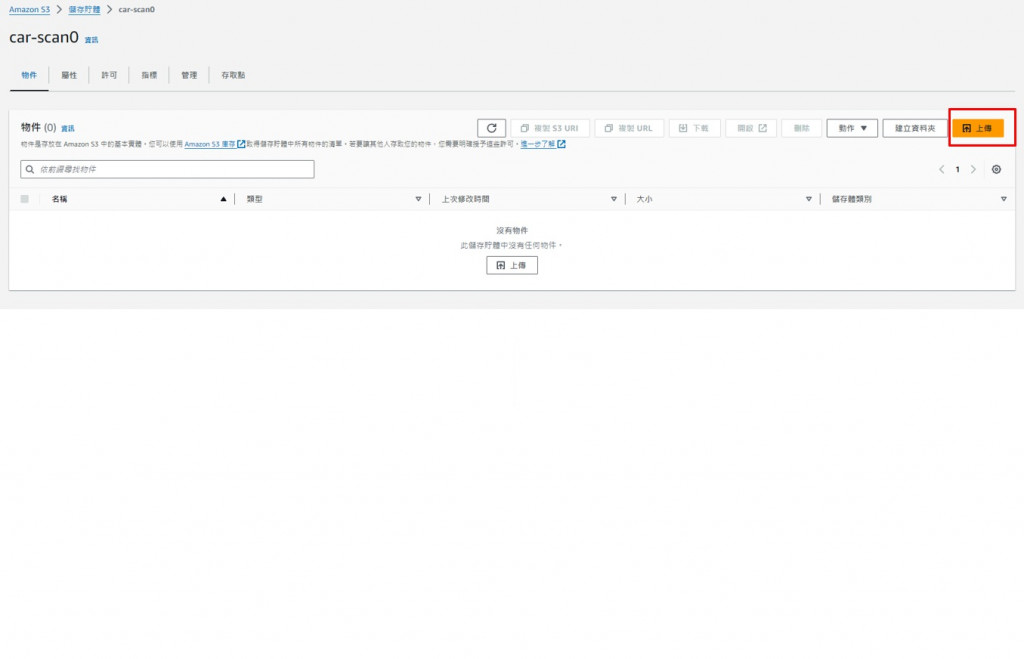
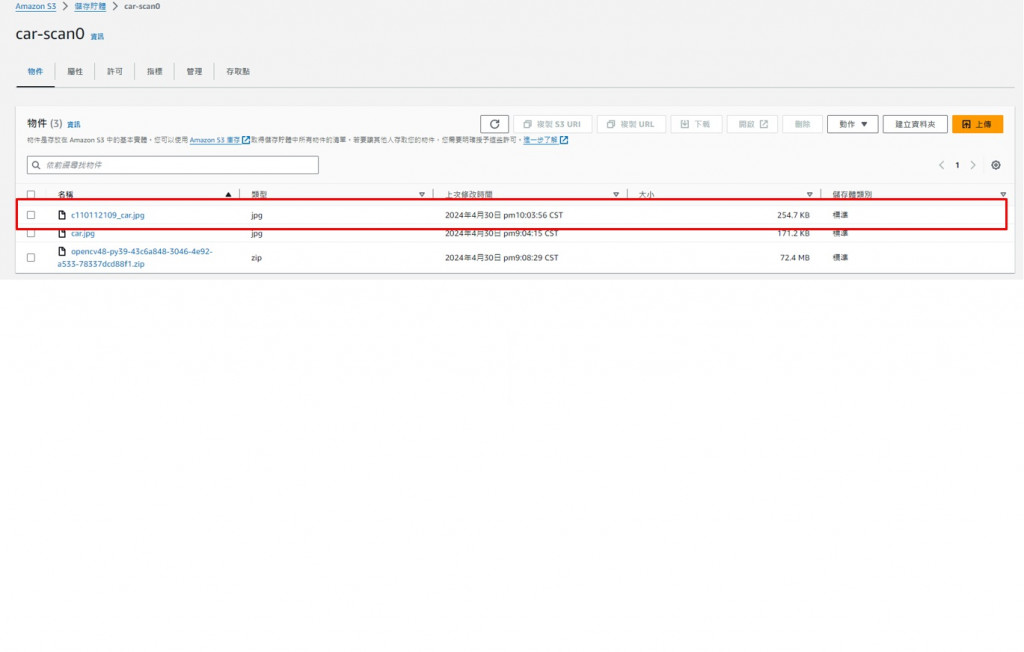
"name": "car-scan0", //寫s3名子
"ownerIdentity": {
"principalId": "EXAMPLE"
},
"arn": "arn:aws:s3:::car-scan0" //寫s3名子
},
"object": {
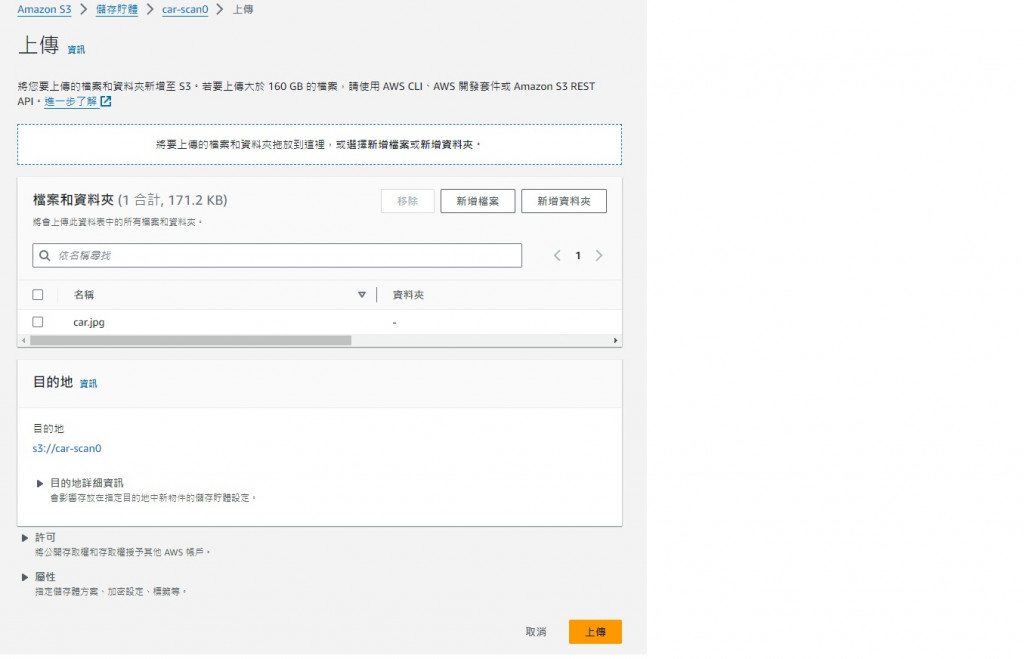
"key": "car.jpg", //要辨識的照片
"size": 1024,
"eTag": "0123456789abcdef0123456789abcdef",
"sequencer": "0A1B2C3D4E5F678901"
}
}
}
]
}

參考資料
https://ithelp.ithome.com.tw/articles/10282533?sc=iThomeR
 ccc
ccc
