
在專案上線後,持續監控專案的程式碼有沒有出錯是很重要的一件事情,這篇文章我們嘗試導入 Sentry 到 kintone 上,並且簡單測試一下。
Sentry 是一個錯誤監控和性能監控的平台,幫助開發者追踪、記錄和修復應用程序中的錯誤和性能問題。Sentry 可以與多種程式語言、框架和工具整合,例如 JavaScript、Python、Node.js、Vue.js 等。主要功能包括:
使用這類工具幫我們監控是非常必要的,例如我們在 kintone 上有設定流程管理,這個流程在某個階段發生錯誤了,但我們沒辦法回溯到上一個階段,因為這個流程已經跑完,再加上每個使用者的權限都不同,要再模擬出一次相同的情況會非常困難。
即使有寫單元測試保護程式碼,依然沒辦法避免掉這類問題,因為 kintone 的後台可以直接設定權限、欄位 ID、流程及狀態等,一旦被更動,程式碼就會炸裂。這時候如果有使用監控工具,就可以到工具上看錯誤的時間點、錯誤訊息等等,協助我們排除狀況。
首先到 官網 註冊帳號,之後會進入儀表板,點選左邊的 Projects 後,會看到 Create Project 的按鈕,點進去選擇 platform 以及 alert frequency 還有 Team。
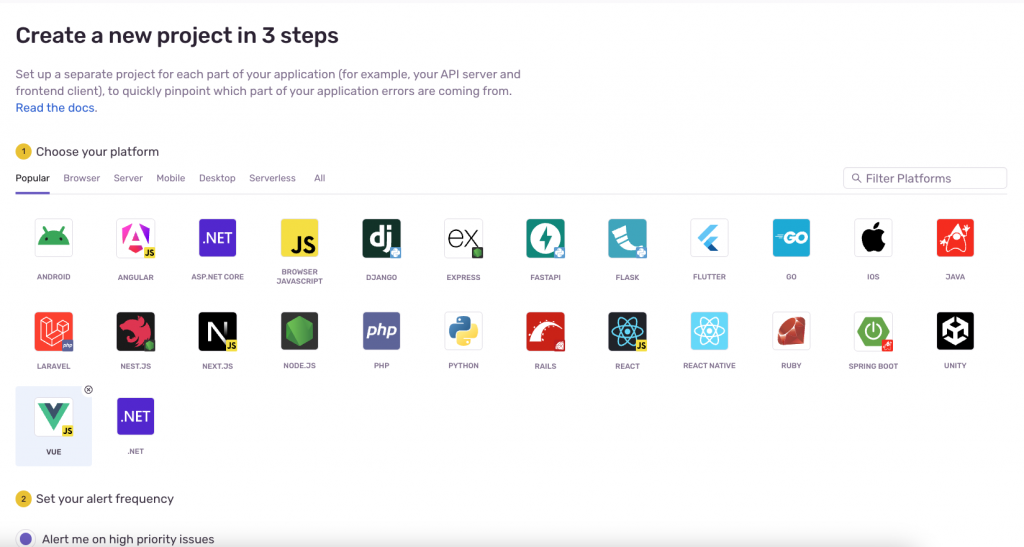
我選 Vue,建立後會看到一連串的官方教學 Combo。
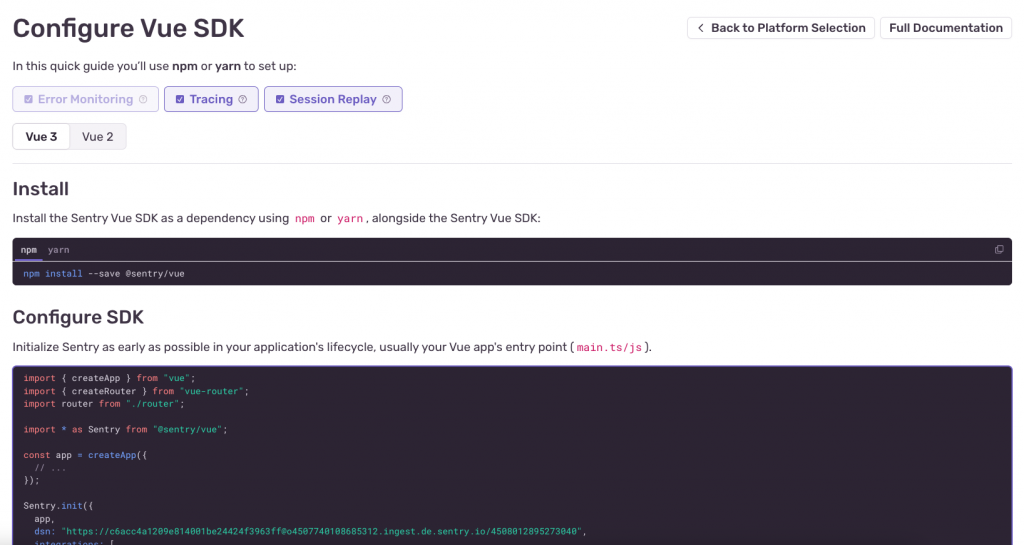
直接複製起來貼到自己的專案上即可,以我自己的 kintone 專案會是:
import { createApp } from 'vue'
import App from './App.vue'
import * as Sentry from '@sentry/vue'

kintone.events.on('app.record.index.show', () => {
  const app = createApp(App)

  if (process.env.NODE_ENV === 'production') {
    Sentry.init({
      app,
      dsn: '******',
      integrations: [
        Sentry.browserTracingIntegration(),
        Sentry.replayIntegration(),
      ],
      tracesSampleRate: 1.0,
      tracePropagationTargets: ['localhost', /^https:\/\/yourserver\.io\/api/],
      replaysSessionSampleRate: 0.1,
      replaysOnErrorSampleRate: 1.0,
    });
  }

  const el = kintone.app.getHeaderSpaceElement()
  if (el) app.mount(el)
})
process.env.NODE_ENV === 'production' 是因為只在正式環境才監控。
之後可以嘗試呼叫一個未定義的函式:
  // 略 ...
  // 可以先將 production 判斷移除,方便測試
  const el = kintone.app.getHeaderSpaceElement()
  if (el) app.mount(el)
  myUndefinedFunction();
})
回到 Sentry 網頁,會看到錯誤出現在上面。

然後點進去看錯誤發現根本看不懂:
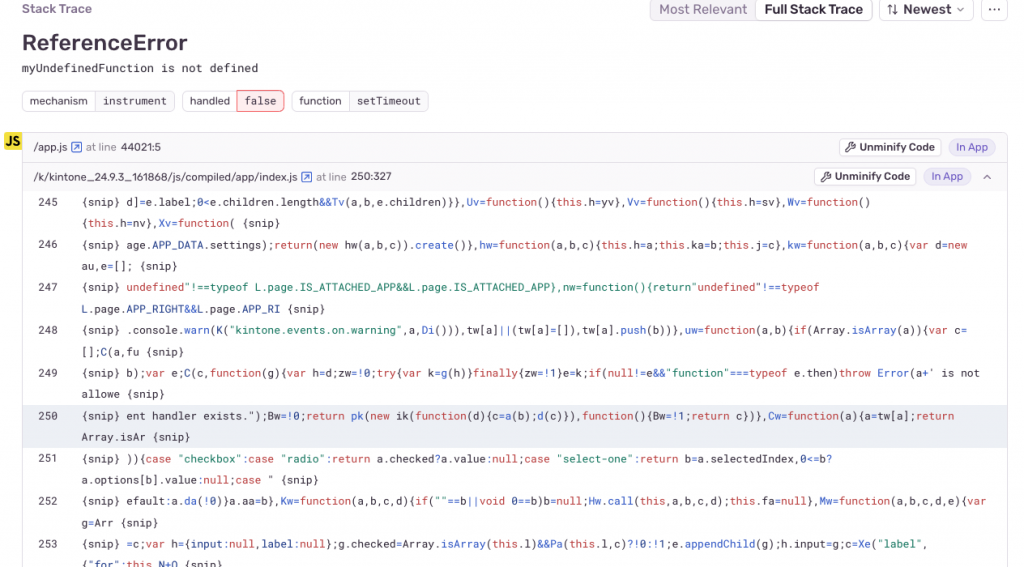
所以我們來處理一下 Source Map,讓他能顯示 Vue 程式碼出錯的是哪一行。
在我們的 Rsbuild 專案底下安裝:
npm i -D @sentry/webpack-plugin
在 config 檔案中設定,順便產生 sourceMap:
import { sentryWebpackPlugin } from '@sentry/webpack-plugin'

export default defineConfig({
  plugins: [pluginVue()],
  tools: {
    rspack: {
      plugins: [
        sentryWebpackPlugin({
          org: 'your_org',
          project: 'your_project',
          authToken: process.env.SENTRY_AUTH_TOKEN,
        }),
      ],
    },
  },
  output: {
    sourceMap: {
      js: 'source-map',
    },
  // 略 ...
然後在 .env 中放上 SENTRY_AUTH_TOKEN
KINTONE_BASE_URL=
KINTONE_USERNAME=
KINTONE_PASSWORD=
APP_ID=
SENTRY_AUTH_TOKEN=
SENTRY_AUTH_TOKEN 可以在網頁中產生,如下:
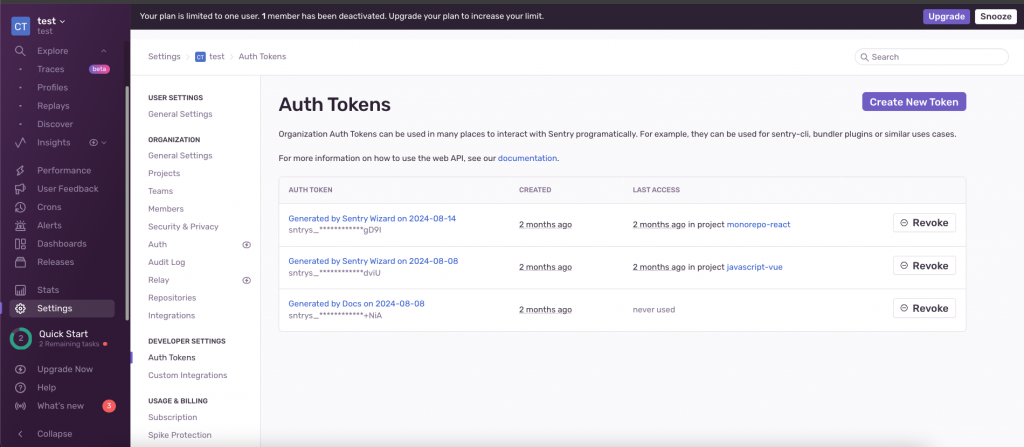
接著如果打上 npm run build 的話,可以看到我們的檔案會被傳送到 Sentry 中:
● web ━━━━━━━━━━━━━━━━━━━━━━━━━ (100%) emitting after emit
> Found 2 files
> Analyzing 2 sources
> Analyzing completed in 0.02s
> Adding source map references
> Bundling completed in 0.114s
> Bundled 2 files for upload
> Bundle ID: 882eccfa-4ecb.......
> Optimizing completed in 0.009s
> Nothing to upload, all files are on the server
> Processing completed in 0.463s
> File processing complete
> Organization: test
> Project: test
> Release: undefined
> Dist: None
> Upload type: artifact bundle
把我們的客製化程式碼上傳到 kintnoe 後,再重新整理執行剛剛未定義的函式,發生錯誤後回到 Sentry 網頁上查看:
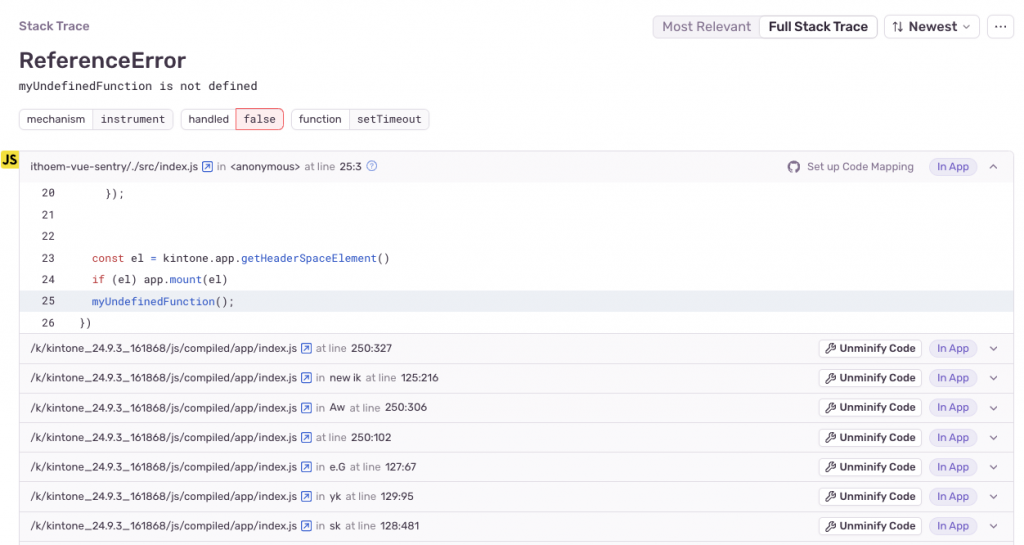
發現終於是我們看得懂的東西了!已感動,以上就設關於設定的教學。
實際調用的時候可以用 Sentry.captureException 來發送訊息到 Sentry 監控。
const test = async () => {
  try {
    const res = await fetch('https://test.com.tw')
  } catch(e) {
    Sentry.captureException(e, {
      tags: {
        section: 'API Fetch',
        feature: 'Example API',
      },
    })
  }
}
