我們可以使用官方的 BSP 來開發自己的板子,需要改的部分最主要的就是設備樹了,原因是因為官方 BSP 對應的是官方的評估版,而我們自己做的板子or像是野火、百問等等的板子,通常原理圖上的設計會不太相同。
先記得安裝 git 與 repo
sudo apt-get install git
git config --global user.emael "xxxxxx@xxxx"
git config --global user.emael "name"
mkdir ~/bin
PATH=~/bin:$PATH
curl https://storage.googleapis.com/git-repo-downloads/repo > ~/bin/repo
chmod a+x ~/bin/repo
cd <working directory path>/Distribution-Package
repo init -u https://github.com/STMicroelectronics/oe-manifest.git -b refs/tags/openstlinux-6.1-yocto-mickledore-mpu-v24.06.26
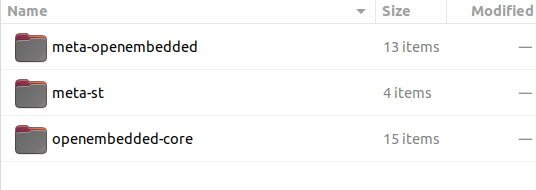
同步完成後可以看到下方圖片的這幾個資料夾,這就是 yocto 當中的 layers , 其中 openembedded 的資料夾則是比較通用的一些檔案,meta-st 則是由 ST 所提供的。
# 安裝 ST 需要的依賴
sudo apt install gcc-multilib
sudo apt install libegl1-mesa libgmp-dev libmpc-dev libsdl1.2-dev pylint python3-git python3-jinja2 python3-pip socat xterm zstd
同步後的檔案說明如下:
Distribution-Package                      OpenSTLinux distribution
├── layers
│    ├── meta-openembedded                關於 open embedded標準 的 layer
│    ├── meta-st
│    │   ├── meta-st-openstlinux          包含了openstlinux 發行版的框架與鏡像檔設定
│    │   ├── meta-st-stm32mp              包含了 stm32mp 的 BSP 與設備描述
│    │   │   ├── recipes-bsp
│    │   │   │   ├── alsa                 ALSA(Advanced Linux Sound Architecture) 與聲卡 音效有關的 recipe
│    │   │   │   ├── ddr-firmware         DDR 與 PHY 的韌體
│    │   │   │   ├── drivers              Vivante GCNANO GPU 核心驅動程式的製作方法 (種嵌入式圖形處理單元(GPU))
│    │   │   │   ├── fip-stm32mp          fip 生成 (包括引導程式、驅動程式和其他必要的韌體文件 , 引導程式、DDR 初始化碼、BL31、BL32、BL33 )
│    │   │   │   ├── trusted-firmware-a   TF-A 的 recipe
│    │   │   │   ├── trusted-firmware-m   TF-M 的 recipe
│    │   │   │   └── u-boot               U-Boot 的 recipe
│    │   │   ├── recipes-connectivity
│    │   │   │   ├── bluetooth            藍芽的driver (掛起 and 恢復)
│    │   │   │   ├── openssl              bbappend recipe 用來將openssl 加入 SDK 用
│    │   │   ├── recipes-extended
│    │   │   │   ├── external-dt          為 BSP 元件以外的 STM32 MPU 設備提供設備樹檔案的方法
│    │   │   │   ├── linux-examples       STM32 MPU devices的liunx example 的 recipe
│    │   │   │   ├── libb64               For STM32MP15x lines  only - Library for base64 encoding/decoding data
│    │   │   │   ├── m33projects          For STM32MP15x lines  only - Recipes for firmware examples for Cortex M33
│    │   │   │   ~~├── m4coredump           For STM32MP15x lines  only - Recipes for script to manage coredump of cortexM4~~
│    │   │   │   ~~├── m4projects           For STM32MP15x lines  only - Recipes for firmware examples for Cortex M4~~
│    │   │   │   └── ~~stm32mp-g0           For STM32MP13x lines  only - Recipes for G0 USB firmware~~
│    │   │   ├── recipes-graphics
│    │   │   │   ├── gcnano-userland      Recipes for Vivante libraries OpenGL ES, OpenVG and EGL (multi backend)
│    │   │   │   └── [...]
│    │   │   ├── recipes-kernel
│    │   │   │   ├── linux                Linux kernel
│    │   │   │   └── linux-firmware       Linux firmwares (example, Bluetooth firmware)
│    │   │   │   └── [...]
│    │   │   ├── recipes-security
│    │   │   │   ├── optee                Recipes for OPTEE
│    │   │   ├── recipes-st
│    │   │   │   └── images               Recipes for the bootfs and userfs partitions binaries
│    │   │   │   └── [...]
│    │   │   └── [...]
│    │   ├── meta-st-stm32mp-addons       STMicroelectronics layer that helps managing the STM32CubeMX integration
│    │   └── scripts
│    │       ├── envsetup.sh              Environment setup script for Distribution Package
│    │       └── [...]
│    └── openembedded-core                Core metadata for current versions of OpenEmbedded (standard)
DISTRO=openstlinux-weston MACHINE=stm32mp1 source layers/meta-st/scripts/envsetup.sh
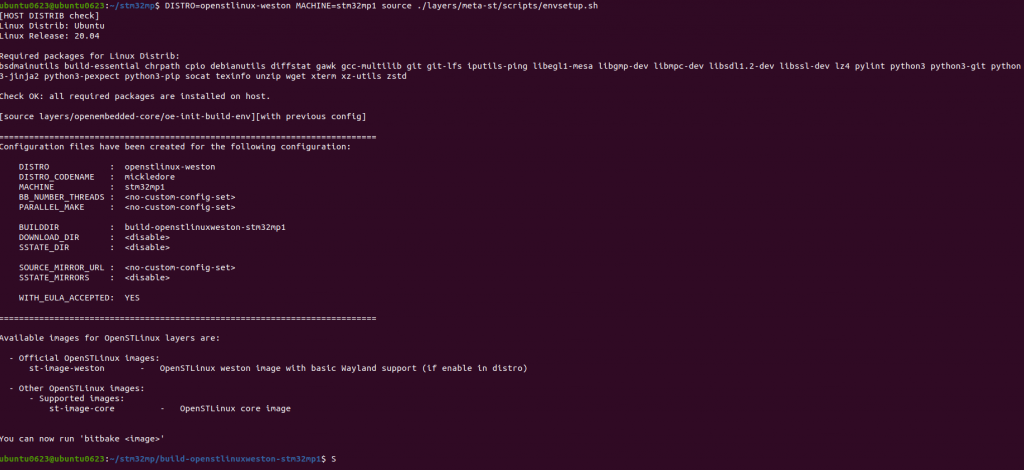
stm32mp/layers/meta-st/meta-st-openstlinux/conf/distro

stm32mp/layers/meta-st/meta-st-stm32mp/conf/machine

當輸入完了 DISTRO=openstlinux-weston MACHINE=stm32mp15 source layers/meta-st/scripts/envsetup.sh 後將會在外層產生 buid 的資料夾,當中會有個 conf 的資料夾裡面會存放兩個檔案如下


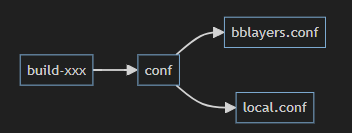
.bb layers 我們不太會去手動修改他,未來如果有新的 layer 要加入或者是要創建新的layer都可以使用下方指令
bitbake-layers create-layer meta-xxxxx
bitbake-layers add-layer meta-xxxxx
當 bitbake-layers add-layer meta-xxxxx 輸入完這個指令後,就會自動的將我們的 layer 給新增到 bblayers.conf 當中。
接著來說明一下該如何編譯,編譯的方式可以編譯官方所提供的image file , 或者是編譯由 openembedded 所預設的 image。
下方則是編譯的方式 ,這個過程會持續得非常久,取決你的網路跟你的電腦效能。(我自己大約是需要 6 hr)
在整個構建目錄的最上層資料夾調用下方指令
bitbake <build-target>

#####範例
bitbake core-image-minimal
這個構建方式很依賴網路速度跟電腦規格,我們也可以先下載但是不構建
bitbake -c fetchall core-image-minimal
下載完成後可以斷開網路離線構建。
當構建到一半遇到錯誤的時候,通常會直接停止,但我們可以透過下方的命令,先讓剩餘的任務繼續構建。
bitbake -k core-image-minimal
-k 這個選項是告訴 BitBake 繼續構建直到不依賴這個錯誤的任務被處理
假如遇到了不知道該如何解決的構建問題時,可以透過下方指令清空目前的構建
bitbake -c cleansstate core-image-minimal
然後再重新構就一次
bitbake core-image-minimal
編譯中的畫面如下: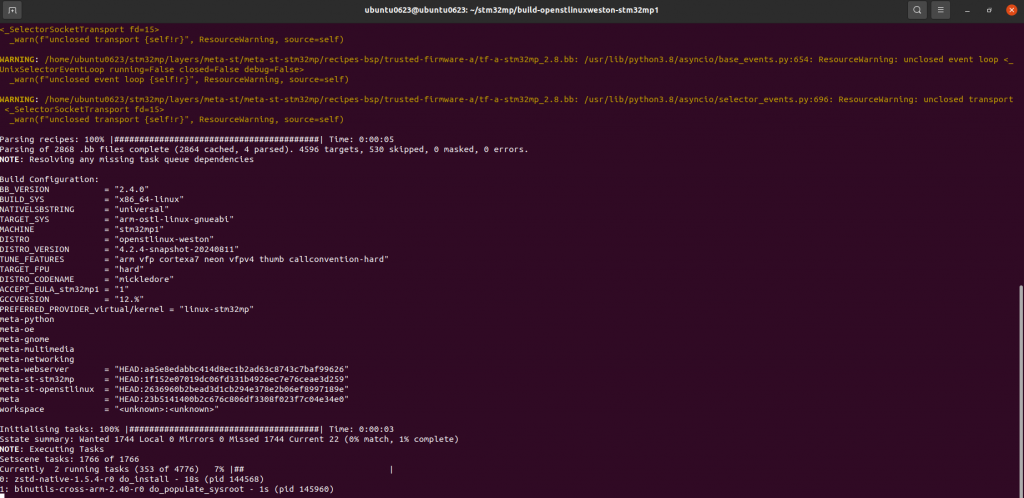
下圖是我們編譯完後的檔案,會在你的 build 資料夾底下,我們所需要注意的幾個資料夾是
其他的資料夾有興趣可以google一下,像是 sstate 這個資料夾當我們編譯過第一次後,會存放著暫存檔案。下次編譯的時候可以讀取這邊,去比對修改過的檔案,避免全部重頭編譯。
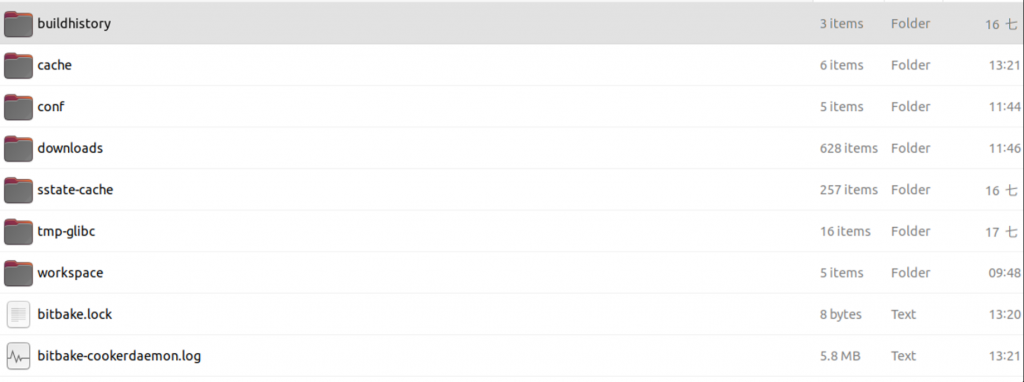
前面說明過conf 資料夾,所以這邊就不說明了。 tmp-glibc 資料夾裡面我們可以看到有非常多的東西。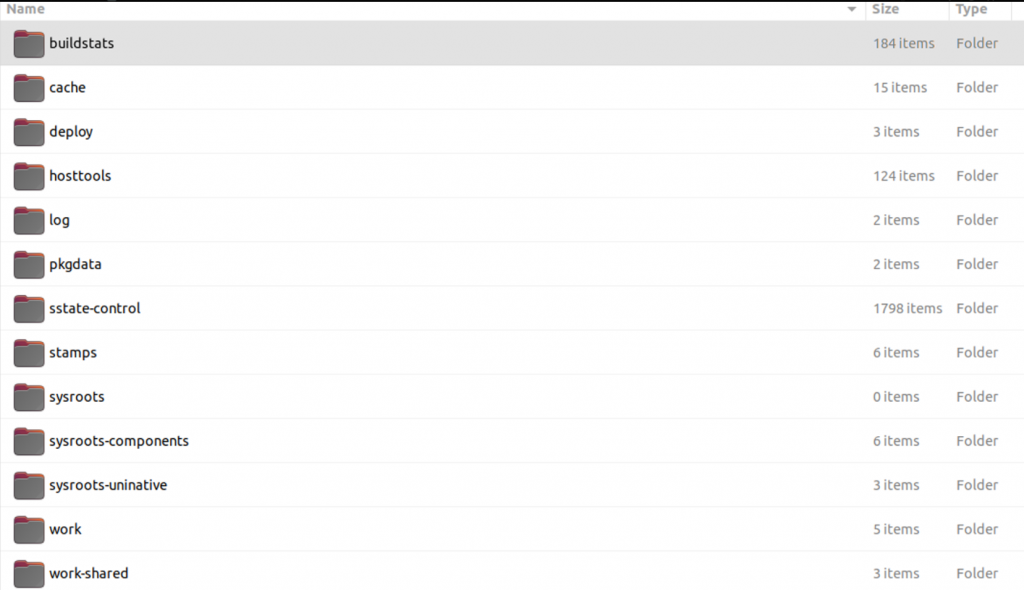
我們最需要注意以及會用到的就是 deploy,因為我們編譯過後的image , fliesystem 都會存放到這。進到 deloy/image 當中可以看到目標機器為名的資料夾,所有我們需要燒錄的檔案都會在這。
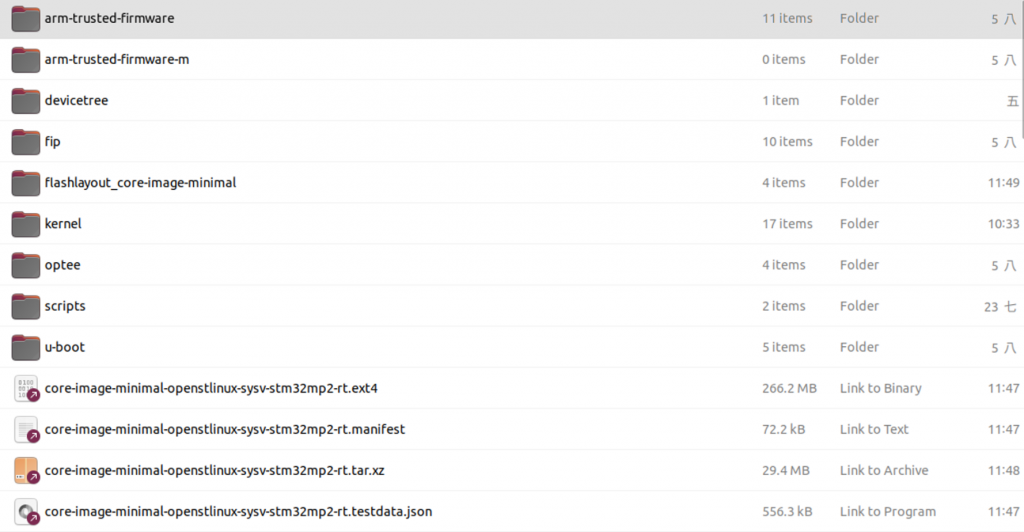
可以看到下方有 ext4 , tar.xz 格式的檔案,這是我們最終要燒錄的 image 檔案。其他會有些命名是 bootfs rootfs 之類的,則是我們常說的根文件系統。

