在上一個單元討論了如何自動生成3D物件,但是這個物件沒有顏色與表面,這個單元就來討論如何針對自動生成的3D物件上色。
首先,使用ModelEntity來生成一個3D物件:
let box = ModelEntity(mesh: .generateBox(width: 0.5, height: 0.5, depth: 0.5))
ModelEntity可以加入材料屬性:
let box = ModelEntity(
    mesh: .generateBox(size: 0.5, cornerRadius: 0),
    materials: [SimpleMaterial(color: .red, isMetallic: false)]
)
在這裡使用SimpleMaterial生成一個紅色的材料,另外isMetallic可以設定使否為金屬材質。
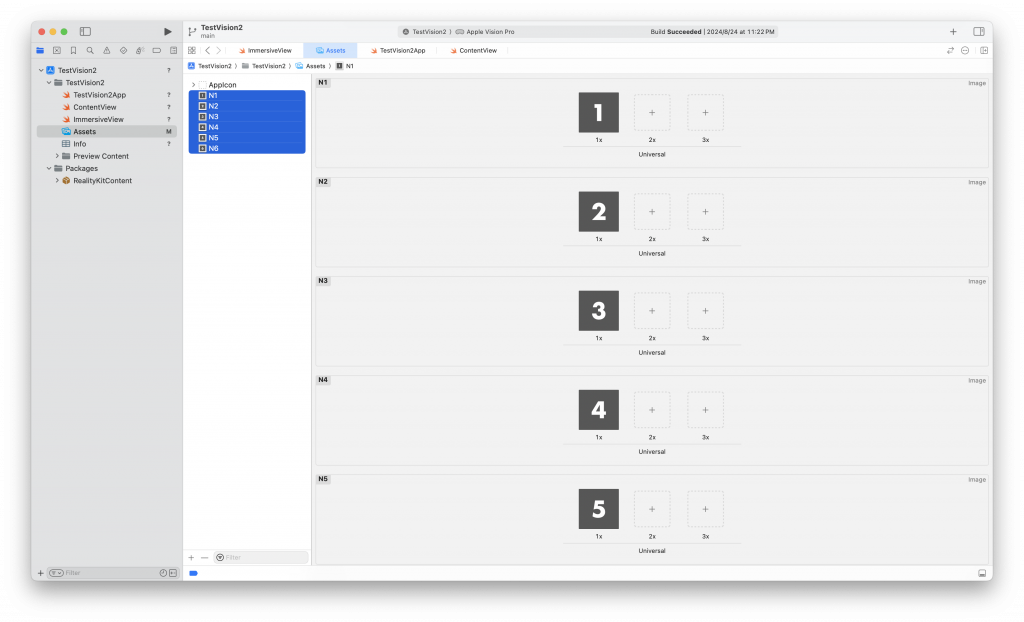
而除了設定顏色的材質之外,也可以使用貼圖方式,例如這裡準備了六張圖片,如圖:

讀取這六張圖片:
guard
    let texture1 = try? TextureResource.load(named: "N1"),
    let texture2 = try? TextureResource.load(named: "N2"),
    let texture3 = try? TextureResource.load(named: "N3"),
    let texture4 = try? TextureResource.load(named: "N4"),
    let texture5 = try? TextureResource.load(named: "N5"),
    let texture6 = try? TextureResource.load(named: "N6")
else {
    fatalError("Unable to load texture.")
}
TextureResource是3D材質的圖片讀取方式。
然後將這六個TextureResource帶入給SimpleMaterial:
var material1 = SimpleMaterial()
var material2 = SimpleMaterial()
var material3 = SimpleMaterial()
var material4 = SimpleMaterial()
var material5 = SimpleMaterial()
var material6 = SimpleMaterial()

material1.color = .init(texture: .init(texture1))
material2.color = .init(texture: .init(texture2))
material3.color = .init(texture: .init(texture3))
material4.color = .init(texture: .init(texture4))
material5.color = .init(texture: .init(texture5))
material6.color = .init(texture: .init(texture6))

let box = Entity()
box.components.set(ModelComponent(
    mesh: .generateBox(width: 0.5, height: 0.5, depth: 0.5, splitFaces: true),
    materials: [material1, material2, material3, material4, material5, material6])
)
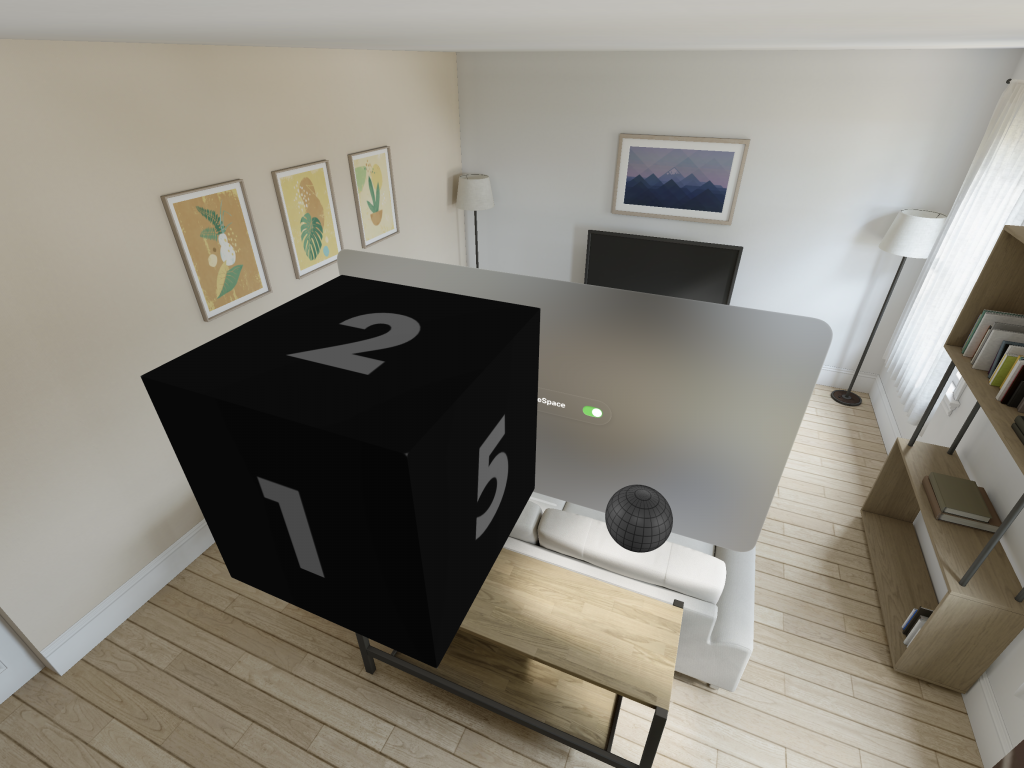
如此,這個立方體就會有六個面的貼圖,顯示如圖:

完整程式碼:
@MainActor class Day27ViewModel: ObservableObject {

    private var contentEntity = Entity()

    func setupContentEntity() -> Entity {
        guard
            let texture1 = try? TextureResource.load(named: "N1"),
            let texture2 = try? TextureResource.load(named: "N2"),
            let texture3 = try? TextureResource.load(named: "N3"),
            let texture4 = try? TextureResource.load(named: "N4"),
            let texture5 = try? TextureResource.load(named: "N5"),
            let texture6 = try? TextureResource.load(named: "N6")
        else {
            fatalError("Unable to load texture.")
        }

        var material1 = SimpleMaterial()
        var material2 = SimpleMaterial()
        var material3 = SimpleMaterial()
        var material4 = SimpleMaterial()
        var material5 = SimpleMaterial()
        var material6 = SimpleMaterial()

        material1.color = .init(texture: .init(texture1))
        material2.color = .init(texture: .init(texture2))
        material3.color = .init(texture: .init(texture3))
        material4.color = .init(texture: .init(texture4))
        material5.color = .init(texture: .init(texture5))
        material6.color = .init(texture: .init(texture6))

        let box = Entity()
        box.components.set(ModelComponent(
            mesh: .generateBox(width: 0.5, height: 0.5, depth: 0.5, splitFaces: true),
            materials: [material1, material2, material3, material4, material5, material6])
        )

        box.position = SIMD3(x: 0, y: 2, z: -1)

        contentEntity.addChild(box)

        return contentEntity
    }
}
從 SwiftUI 到 Apple Vision Pro - SwiftUI 從零開始 Day27 [完]
