我們來學Nextjs的middleware
在你的src/middleware.ts建立檔案
import { NextResponse } from "next/server";
import type { NextRequest } from "next/server";
import { auth } from "@/auth";

export async function middleware(request: NextRequest) {
  const session = await auth();
  console.log({ session });

  if (!session) {
    return NextResponse.redirect(new URL("/api/auth/signin", request.url));
  }

  const testGroup = Math.random() < 0.5 ? "A" : "B";
  const response = NextResponse.next();
  response.cookies.set("test_group", testGroup);

  // 繼續處理請求
  return response;
}

export const config = {
  matcher: "/:path*/about",
};
然後修改你的src/app/[lang]/about/page.tsx
import { getDictionary } from "./getDictionary";
import { notFound } from "next/navigation";
import { Card, CardHeader, CardTitle, CardContent } from "@/components/ui/card";
import LanguageSwitcher from "@/components/commons/LanguageSwitcher";
import { cookies } from "next/headers";

export default async function Home({ params }: { params: { lang: string } }) {
  const testGroup = cookies().get("test_group");

  if (params.lang !== "en" && params.lang !== "zh") {
    notFound();
  }
  const dictionary = await getDictionary(params.lang);
  return (
    <div className="container mx-auto mt-10">
      <div className="flex justify-end mb-4">
        <LanguageSwitcher lang={params.lang} />
      </div>
      <Card className="w-full max-w-md mx-auto">
        <CardHeader>
          <CardTitle className="text-2xl font-bold text-center">
            {dictionary.hello}!
          </CardTitle>
        </CardHeader>
        <CardContent>
          <p className="text-center text-lg">{dictionary.welcome}</p>
          <p className="text-center text-lg text-red-400">
            Test Group: {testGroup?.value}
          </p>
        </CardContent>
      </Card>
    </div>
  );
}
你應該可以在http://localhost:3000/en/about看到你的Test Group
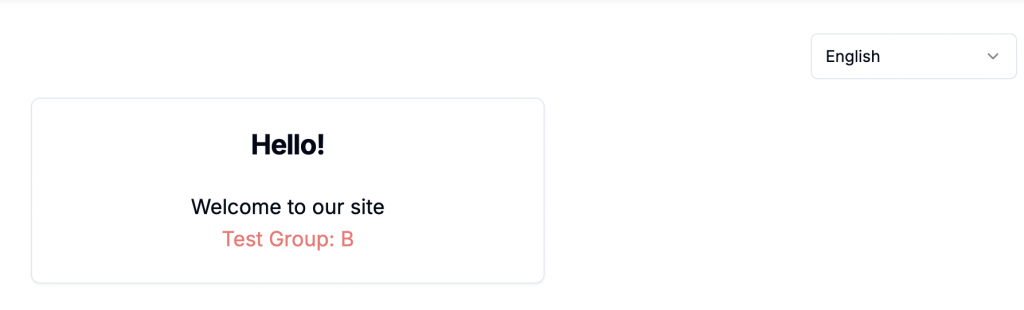
並且如果你重新整理幾次的話 應該可以看到Test Group一直在變
以及如果你用無痕視窗開啟這個網址的話 應該會被轉到登入畫面
middleware 是全局的,且每個應用只能有一個 middleware
通常位於src下面
middleware通常用於以下用途
例如這裡我們驗證了使用者是否有登入
沒有的話就將他轉到登入畫面
  if (!session) {
    return NextResponse.redirect(new URL("/api/auth/signin", request.url));
  }
以及我們做了一個A/B測試
並設定在cookie中
response.cookies.set("test_group", testGroup);
並在畫面中 取得現在應該的test group
const testGroup = cookies().get("test_group");
這裡我們有
export const config = {
  matcher: "/:path*/about",
};
目的是只有符合這個網址的時候 才執行middleware
你可以嘗試進入其他網址 應該不會看到session被印出來
如果你需要更進階的邏輯你可以用以下的方式
 if (request.nextUrl.pathname.startsWith('/api')) {
    // API 路由的邏輯
  } else if (request.nextUrl.pathname.startsWith('/admin')) {
    // 管理員路由的邏輯
  } else {
    // 其他路由的邏輯
  }
今天我們實作了middleware
並學會了一些middleware常見的作法
你可以在這裡統一管理你的頁面轉導向
包含身份驗證等
如果你需要 甚至可以在這裡留下錯誤跟log的紀錄


 iThome鐵人賽