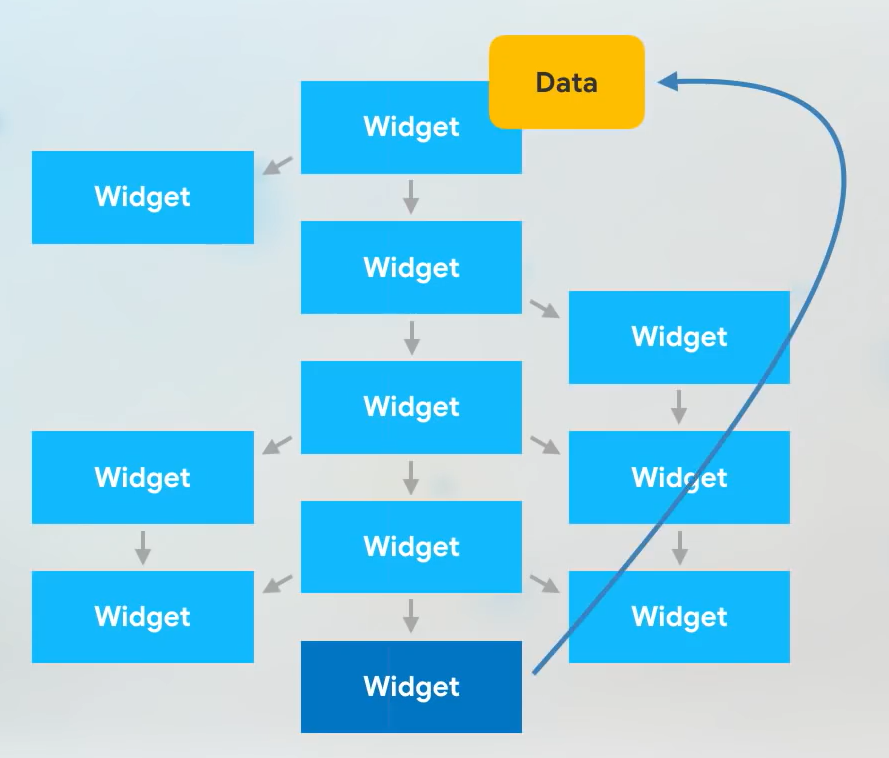
昨天提到的 StatefulWidget 會使用 createState 建立一個狀態,而設計師們可以再設計一個 build 函式建立 Widget。當使用者觸發 setState 時,會使得 該 Widget 被重新 build()。試想,假設今天在 Widget A 觸發了一個按鈕,我們希望 Widget B 可以被更新。然而 Widget B 可能被包在更多的 Widget 之中,這時我們只能,一個傳一個,把資料傳遞給 Widget B。在 Flutter 中,我們可以用 InheritedWidget 來處理這個煩人的問題!
圖片來源:https://www.youtube.com/watch?v=Zbm3hjPjQMk&t=50s
本章節範例程式碼:https://github.com/ksw2000/ironman-2024/tree/master/flutter-practice/inherited_widget
InheritedWidget 有以下幾個使用場景:
InheritedWidget 可以解決這個問題,讓子 widget 可以直接訪問上層的數據。InheritedWidget 只會通知那些真正依賴於其數據變化的子 widget 重繪,而不會影響其他不依賴的 widget,這有助於提高應用性能。以下是 InheritedWidget 的大致用方式,我們可以把 widgetA 和 widgetB 都用 InheritedWidget 包裝,當然 widgetB 可能被包進更深處,比如 widgetC。
class InheritedCounter extends InheritedWidget {
  // ...
}

class ... {
  return InheritedCounter(
    child: ...
      widgetC
      widgetA
  );
}

class widgetC ... {
  build () {
    return
      widgetB
  }
}
InheritedWidget 負責管理「資料」,當 widgetA 利用 setState 更動資料時,InheritedWidget 會將改動的部分通知 widgetB。以下是 InheritedWidget 的寫法。
class InheritedCounter extends InheritedWidget {
  const InheritedCounter({super.key, required this.counter, required super.child});
  final int counter;

  static InheritedCounter? of(BuildContext context) {
    return context.dependOnInheritedWidgetOfExactType<InheritedCounter>();
  }

  @override
  bool updateShouldNotify(InheritedCounter oldWidget) {
    return oldWidget.counter != counter;
  }
}
首先 updateShouldNotify 代表何時需要通知重建,當舊 widget 中的 count 值不等於當前 widget 的 count 值時,就要進行畫面重新。而另一個靜態函式 of 這個用法是讓需被更新的 widget (比如 widgetB),直接取得資料,而不需要透過中間的 widget (比如 widgetC)。
我們可以更改昨天的範例程式,移除 FloatingActionButton,並另外建構一個 MyText 和 MyButton
class _MyHomePageState extends State<MyHomePage> {
  int _counter = 0;

  @override
  Widget build(BuildContext context) {
    return Scaffold(
      appBar: AppBar(
        backgroundColor: Theme.of(context).colorScheme.inversePrimary,
        title: Text(widget.title),
      ),
      body: Center(
        child: InheritedCounter(
            count: _counter,
            child: Column(
              mainAxisAlignment: MainAxisAlignment.center,
              children: <Widget>[
                const Text(
                  'You have pushed the button this many times:',
                ),
                const MyText(),
                const SizedBox(
                  height: 10,
                ),
                MyButton(
                  // TODO
                ),
              ],
            )),
      ),
    );
  }
}
首先,我們先處理 MyText 的部分,MyText 可以利用 InheritedCounter 中的 of 方法取得 counter 值
class MyText extends StatefulWidget {
  const MyText({super.key});

  @override
  State<MyText> createState() => _MyTextState();
}

class _MyTextState extends State<MyText> {
  @override
  Widget build(BuildContext context) {
    return Text(
      // 呼叫 InheritedCounter 中 of 靜態方法,取得其「實例」
      // 並將 counter 欄位讀出轉出字串
      InheritedCounter.of(context)!.counter.toString(),
      style: Theme.of(context).textTheme.headlineMedium,
    );
  }
}
接著我們處理 MyButon 的部分。由於在 MyButton 的 scope 呼叫 setState() 並無意義,且 MyButton 根本不是 StatefulWidget,因此我們可以將 onPressed 由更上層的 Widget 實作,再往下傳遞,這樣子當按下按鈕時,觸發的 onPressed 就會觸發 _MyHomePageState 中的 setState()
class MyButton extends StatelessWidget {
  const MyButton({super.key, this.onPressed});
  final void Function()? onPressed;

  @override
  Widget build(BuildContext context) {
    return TextButton(onPressed: onPressed, child: const Text('Inceasement'));
  }
}
剛剛的範例在 _MyHomePageState 中省略了 MyButton 的 onPressed 參數,現在我們將其補齊。
class _MyHomePageState extends State<MyHomePage> {
  int _counter = 0;

  @override
  Widget build(BuildContext context) {
    return Scaffold(
      // ...
                MyButton(
                  onPressed: () {
                    setState(() {
                      _counter++;
                    });
                  },
                ),
      // ...
    );
  }
}
我們可以發現在 InheritedCounter 中 of 回傳的是一個可為 null 的物件,導致我們在調用時必需加入 ! 。在新版 flutter 中建議將這種寫法取名叫 maybeOf() 而 of() 則是直接回傳一個不可為 null 的物件。其實就是直接在原本的函式中先做斷言。
參考官方文件:Migrate of to non-nullable return values, and add maybeOf | Flutter
因此我們可以再次更改程式碼:
class InheritedCounter extends InheritedWidget {
  const InheritedCounter(
      {super.key, required this.counter, required super.child});
  final int counter;

  static InheritedCounter? maybeOf(BuildContext context) {
    return context.dependOnInheritedWidgetOfExactType<InheritedCounter>();
  }

  static InheritedCounter of(BuildContext context) {
    final result =
        context.dependOnInheritedWidgetOfExactType<InheritedCounter>();
    assert(result != null, 'No InheritedCounter found in context');
    return result!;
  }

  @override
  bool updateShouldNotify(InheritedCounter oldWidget) {
    return oldWidget.counter != counter;
  }
}
有時候,我們會將 InheritedWidget 的實作設為 private,但此時又希望 of 方法可以被調用,此時我們可以將 of 的實作改移到更上層的 widget 中。比如 Theme.of() 的實作是在 Theme 中,而 Theme 是一個 StatelessWidget。
class Theme extends StatelessWidget {
  // of 方法在 Theme 實作
  static ThemeData of(BuildContext context) {
    // _InheritedTheme 是一個繼承 InheritedWidget 的 class
    // 也就是說 of 這個方法是由另一個 class 來實作而不是直接在 _InheritedTheme 裡實作
    // 這樣子可以不讓其他套件引用 _InheritedTheme 但也保留了 of 的功能取得資料
    final _InheritedTheme? inheritedTheme = context.dependOnInheritedWidgetOfExactType<_InheritedTheme>();
    // ...
    return ThemeData.localize(theme, theme.typography.geometryThemeFor(category));
  }

  @override
  Widget build(BuildContext context) {
    return _InheritedTheme(
      // ...
    );
  }
}
在 _InheritedTheme 中並沒有實作 of 這個靜態方法
class _InheritedTheme extends InheritedTheme {
  const _InheritedTheme({
    required this.theme,
    required super.child,
  });

  final Theme theme;

  @override
  Widget wrap(BuildContext context, Widget child) {
    return Theme(data: theme.data, child: child);
  }

  @override
  bool updateShouldNotify(_InheritedTheme old) => theme.data != old.theme.data;
}
後記:
AI 沒辦法理解我要他畫 widget tree,他只會畫 tree
當我們的 widget 樹越來越複雜時,資料的傳遞和畫面的更新也會變得很複雜,雖然物件導向的設計可以讓整個程式更有條理,但在 Flutter 中狀態的管理還是很不容易,明天會提到除了用 InheritedWidget 管理狀態,我們也可以使用 Riverpod 進行管理。
喜歡我的朋友別忘了去追蹤我的 Github: @ksw2000 追蹤系列文及按讚這篇文章!