這章不會教大家怎麼安裝 Flutter,而是會以一個比較宏觀的角度告訴大家一個 Flutter App 的架構。
本次教學使用 Flutter 3.24 進行。本章節的範例程式碼:https://github.com/ksw2000/ironman-2024/tree/master/flutter-practice/hello
但建議讀者可以自行在本地以指令建立。
首先我們可以在 Flutter 官網中安裝 Flutter https://flutter.dev.org.tw/get-started/install
因為每個人電腦環境狀況不一樣,因此這裡不提供這方面的教學。另外,我們也可以使用 Google Project IDX 來新增一個 Flutter 專案
在使用 flutter 指令前,我們可以先使用 flutter doctor 來測試 flutter 是否安裝成功
> flutter doctor
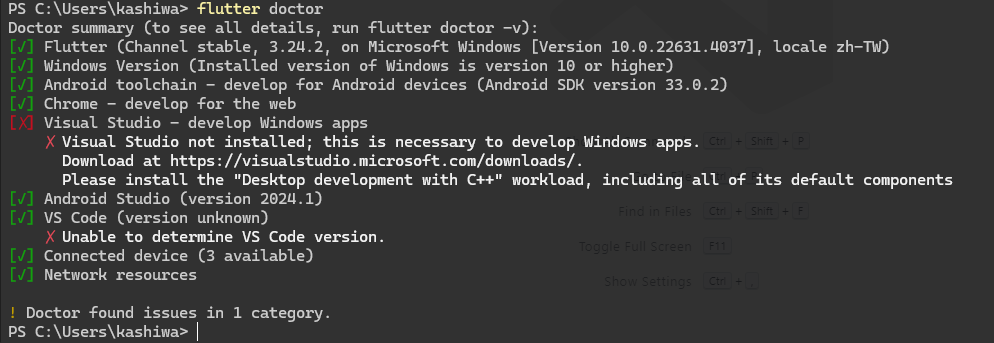
像我目前的裝置,因為沒有要開發 windows app 所以可以不安裝 Visual Studio
我們可以直接利用命令列新增一個簡單的 flutter 專案,直接命名成 hello
> flutter create hello
以下是整個專案的結構,我們主要的程式在 lib 資料夾中
.
└── hello/
    ├── .dart_tool/  # Dart 編譯器和工具所使用的內部資料夾,存放暫存資料和依賴管理
    ├── .idea/       # IDE 設定檔(通常為 JetBrains 系列,如 IntelliJ 或 Android Studio)
    ├── android/     # Android 平台專用的原生程式碼與配置,當部署到 Android 時會用到
    ├── ios/         # iOS 平台專用的原生程式碼與配置,當部署到 iOS 時會用到
    ├── lib/         # 放置主要的 Dart 程式碼,包括主應用程式邏輯
    ├── linux/       # Linux 平台專用的原生程式碼與配置,當部署到 Linux 時會用到
    ├── macos/       # macOS 平台專用的原生程式碼與配置,當部署到 macOS 時會用到
    ├── test/        # 測試程式碼放置處,用來進行單元測試或其他自動化測試
    ├── web/         # Web 平台專用的原生程式碼與配置,當部署到 Web 時會用到
    ├── windows/     # Windows 平台專用的原生程式碼與配置,當部署到 Windows 時會用到
    ├── .gitignore   # 定義哪些檔案或資料夾不會被 Git 版本控制系統追蹤
    ├── .metadata    # Flutter 專案的元數據檔案,包含一些版本與配置資訊
    ├── analysis_options.yaml
                     # Dart 分析器的配置檔案,用來控制靜態分析的行為
    ├── hello.iml     # IntelliJ IDEA 專案檔,儲存 IDE 專案設定
    ├── pubspec.lock # 鎖定依賴版本的檔案,確保每次構建使用的依賴版本一致
    ├── pubspec.yaml # Flutter 專案的配置檔案,定義專案的依賴、版本等資訊
    └── README.md    # 專案的說明文件,通常包含簡單介紹、如何使用、安裝等資訊
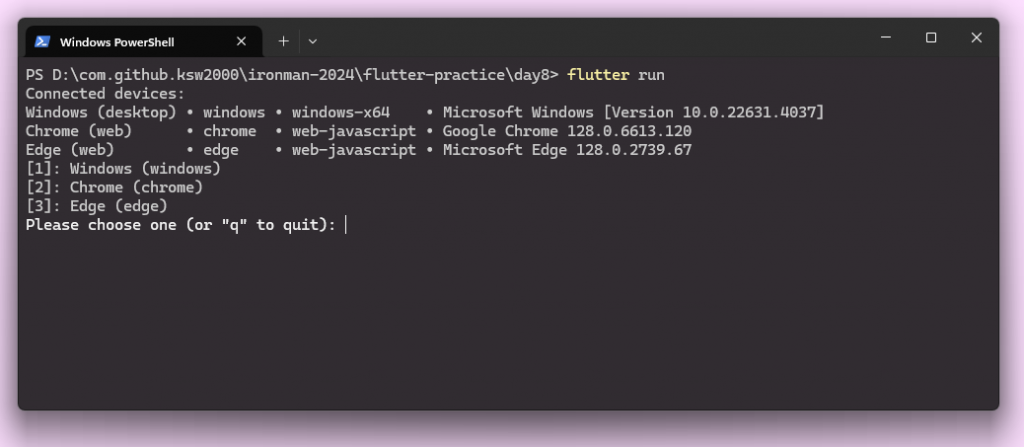
初始化後,我們可以馬上執行專案
> flutter run
此時會跳出幾個選項,我們可以直接使用 Chrome 或 Edge 來查看專案
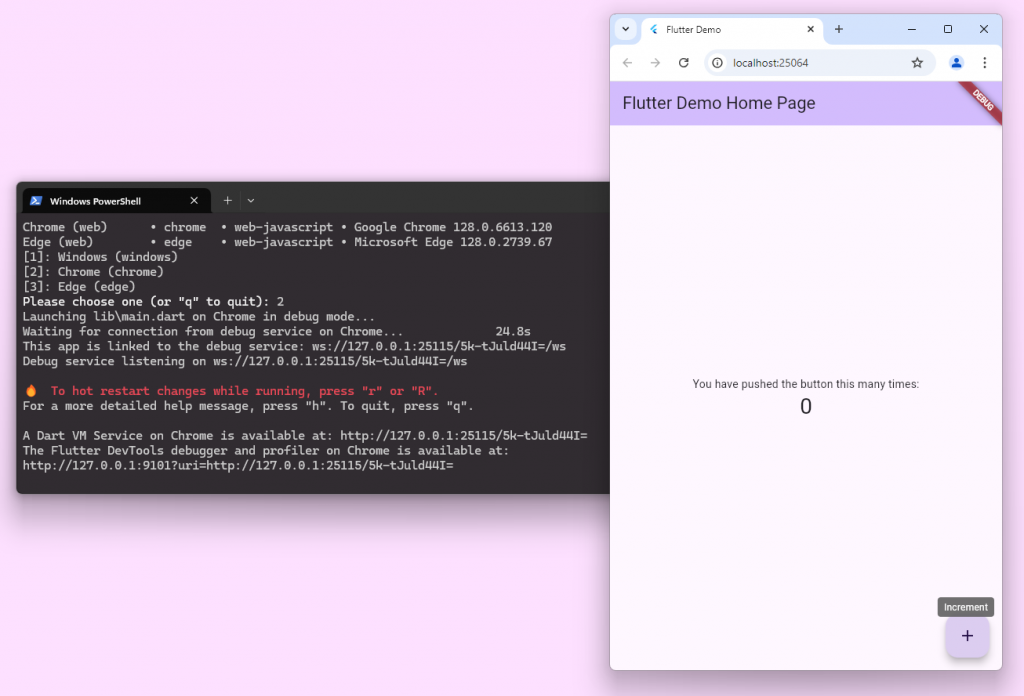
選擇 2 後,Flutter 會自動開啟一個新的 Chrome 瀏覽器運行 Flutter 專案
為了更改 APP 的內容,我們可以更改專案中的 lib/main.dart 檔
import 'package:flutter/material.dart';

void main() {
  runApp(const MyApp());
}

class MyApp extends StatelessWidget {
  const MyApp({super.key});

  // This widget is the root of your application.
  @override
  Widget build(BuildContext context) {
    // ...
  }
}

class MyHomePage extends StatefulWidget {
  const MyHomePage({super.key, required this.title});
  final String title;

  @override
  State<MyHomePage> createState() => _MyHomePageState();
}

class _MyHomePageState extends State<MyHomePage> {
  // ...
  @override
  Widget build(BuildContext context) {
    // ...
  }
}
首先,Flutter 專案中一樣有個 main 函式,main 函式裡會調用 runApp(),runApp() 必需要傳入一個 Widget 物件
void runApp(Widget app)
在 Flutter 中有兩大 Widget:StatelessWidget 以及 StatefulWidget
StatelessWidget 是無狀態的 widget,代表一個不會改變的 UI 元素。當 widget 被 build 之後,它的狀態不會發生變化。因此,如果 UI 的外觀或行為只需根據輸入的參數進行渲染,且不需要動態更新,StatelessWidget 是一個好的選擇。
使用場景:
StatefulWidget 是有狀態的 widget,它的 UI 可以在 widget 的生命週期中發生變化。它由兩部分組成:
StatefulWidget:定義 widget 是什麼,但不保存狀態。State:保存與 widget 相關的狀態,並在**「狀態變更」**時重新渲染 UI。當 widget 的狀態需要隨時間改變,例如按鈕被點擊後會有不同的反應,或是從網路載入數據時使用進度條,StatefulWidget 就派上用場。
使用場景:
我們可以將 Widget 想像成一棵樹 (資料結構的樹),runApp 會所放的就是 MyApp 這個根節點
runApp → MyApp → MyHomePage
在使用 StatelessWidget 時,我們必需先建立建構函式,因為建構函式建構 MyApp 後不會再更動所以我們會加上 const,並且當 flutter 在建構這些 Widget 時,都會給予 key 值,也因此我們可以把得到的 key 值傳遞給父母類 StatelessWidget。
接著我們需要 @override 一個函式 build(), build 函式會在該 widget 被加入樹時,或者一些相依性更動時被呼叫。現在,我們其實只需要關注 build 函式內的 return 就好,return 需要回傳一個 Widget,在 flutter 中,我們最外層的 Widget 會使用 MaterialApp。Material 是 Android 的設計風格。除了以 MaterialApp 作為起點,我們其實也可以使用 ios 風格的 CupertinoApp。
class MyApp extends StatelessWidget {
  // 建構函式,
  const MyApp({super.key});

  // This widget is the root of your application.
  @override
  Widget build(BuildContext context) {
    return MaterialApp(
      title: 'Flutter Demo',
      theme: ThemeData(
        // This is the theme of your application.
        //
        // Notice that the counter didn't reset back to zero; the application
        // state is not lost during the reload. To reset the state, use hot
        // restart instead.
        //
        // This works for code too, not just values: Most code changes can be
        // tested with just a hot reload.
        colorScheme: ColorScheme.fromSeed(seedColor: Colors.deepPurple),
        useMaterial3: true,
      ),
      home: const MyHomePage(title: 'Flutter Demo Home Page'),
    );
  }
}
MateralApp 建構時有很多地方可供調整,如果要繼續往下搭建我們的畫面,就必需把我們的主畫面 Widget 放入 home 之中。MyHomePage 是一個 StatefulWidget。使用 StatefulWidget 時,也要先建立建構函式,除了提供 key 值之外,我們也可以另外設定自己需要的參數,比如 title (StatelessWidget 也可以只是這裡示範的是 StatefulWidget)。接著我們要 @override createState() 這個方法,createState 的功能是建構並返回一個 State 物件,這個 State 物件會保存 widget 的狀態並控制其重建。而這個 State 物件就是我們的關鍵。
class MyHomePage extends StatefulWidget {
  const MyHomePage({super.key, required this.title});

  // This widget is the home page of your application. It is stateful, meaning
  // that it has a State object (defined below) that contains fields that affect
  // how it looks.

  // This class is the configuration for the state. It holds the values (in this
  // case the title) provided by the parent (in this case the App widget) and
  // used by the build method of the State. Fields in a Widget subclass are
  // always marked "final".

  final String title;

  @override
  State<MyHomePage> createState() => _MyHomePageState();
}
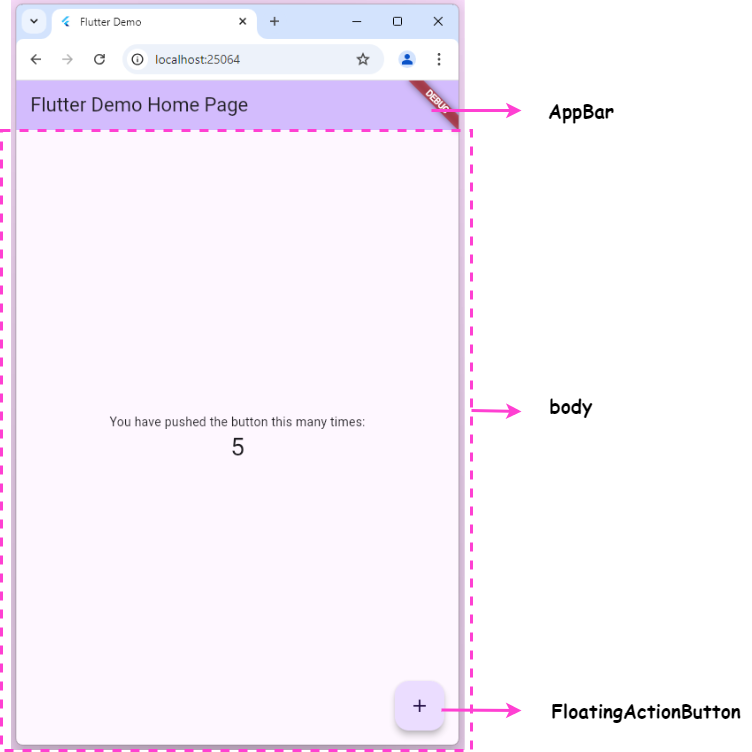
我們可以看到我們自定的 State 物件相當複雜,其中最重要的就是 build() 函式,負責建構畫面。我們這裡會使用 Scaffold Widget 來建構畫面,主要包含三個部分:appBar, body 以及 floatingActionButton
class _MyHomePageState extends State<MyHomePage> {
  int _counter = 0;

  void _incrementCounter() {
    setState(() {
      // This call to setState tells the Flutter framework that something has
      // changed in this State, which causes it to rerun the build method below
      // so that the display can reflect the updated values. If we changed
      // _counter without calling setState(), then the build method would not be
      // called again, and so nothing would appear to happen.
      _counter++;
    });
  }

  @override
  Widget build(BuildContext context) {
    // This method is rerun every time setState is called, for instance as done
    // by the _incrementCounter method above.
    //
    // The Flutter framework has been optimized to make rerunning build methods
    // fast, so that you can just rebuild anything that needs updating rather
    // than having to individually change instances of widgets.
    return Scaffold(
      appBar: AppBar(
        backgroundColor: Theme.of(context).colorScheme.inversePrimary,
        title: Text(widget.title),
      ),
      body: Center(
        // Center is a layout widget. It takes a single child and positions it
        // in the middle of the parent.
        child: Column(
          mainAxisAlignment: MainAxisAlignment.center,
          children: <Widget>[
            const Text(
              'You have pushed the button this many times:',
            ),
            Text(
              '$_counter',
              style: Theme.of(context).textTheme.headlineMedium,
            ),
          ],
        ),
      ),
      floatingActionButton: FloatingActionButton(
        onPressed: _incrementCounter,
        tooltip: 'Increment',
        child: const Icon(Icons.add),
      ), // This trailing comma makes auto-formatting nicer for build methods.
    );
  }
}
當我們點擊 floatingActionButton 時會呼叫 _incrementCounter 進而影響 body 畫面中的數字,我們可以看到 _incrementCounter 會呼叫 setState 函式,其實 setState 的作用就是告訴 flutter 目前我們的 StatefulWidget 中的狀態已經被改變了,需要對 StatefulWidget 重新渲染。
void _incrementCounter() {
  setState(() {
    _counter++;
  });
}
setState() 中的 callback function 會先被執行,執行完畢後會將 StatefulWidget 標記為需要進行畫面更新。因此 setState() 中的 callback function 不可以是 async function
void setState(VoidCallback fn){
  assert(...);  // 檢查一些生命週期
  final Object? result = fn() as dynamic;  // 呼叫 fn
  assert(...);	// 檢查 fn 是否為 async function
  _element!.markNeedsBuild();  // 呼叫 markNeedsBuild()
  // markNeedsBuild() 會將元件設為 dirty 並將其加入全局 list 中
  // 告訴下一個 frame 需要將此元件重新建構
}
setState()的作用範圍是 statefulWidget 下的 widget (subtree),也因此如果我們需要變更在我們之上的 widget 必需要用其他的方法!
我們可以更改 _incrementCounter 使其每次都加 2
void _incrementCounter() {
  setState(() {
    _counter += 2;
  });
}
當更改後可以在 terminal 上按下 r ,這個會使 Flutter 熱重啟整個程式!按 q 則會關掉程式
後記:明天應該會講 Inheritedwidget